How to Use HX711 Load Cell (5kg): Examples, Pinouts, and Specs
Introduction
The HX711 Load Cell (5kg) by SparkFun is a precision weight measurement device designed to handle loads up to 5 kilograms. It works in conjunction with the HX711 amplifier to provide highly accurate and stable weight readings. This load cell is ideal for applications such as digital scales, force measurement systems, and other weight-sensitive projects. Its compact design and ease of integration make it a popular choice for hobbyists and professionals alike.
Explore Projects Built with HX711 Load Cell (5kg)

Explore Projects Built with HX711 Load Cell (5kg)
Common Applications
- Digital weighing scales
- Force measurement systems
- IoT-based weight monitoring
- Robotics and automation requiring weight sensing
- Food portioning systems
Technical Specifications
Below are the key technical details for the HX711 Load Cell (5kg):
Load Cell Specifications
| Parameter | Value |
|---|---|
| Rated Load Capacity | 5 kg |
| Output Sensitivity | 1.0 ± 0.1 mV/V |
| Excitation Voltage | 5V (recommended), 10V max |
| Input Resistance | 1,000 ± 10 Ω |
| Output Resistance | 1,000 ± 10 Ω |
| Operating Temperature | -10°C to +40°C |
| Material | Aluminum Alloy |
| Dimensions | 80mm x 12.7mm x 12.7mm |
HX711 Amplifier Specifications
| Parameter | Value |
|---|---|
| Operating Voltage | 2.6V to 5.5V |
| Operating Current | < 1.5mA |
| ADC Resolution | 24-bit |
| Gain | 128 (default) or 64 |
| Interface | Serial (Clock and Data) |
Pin Configuration
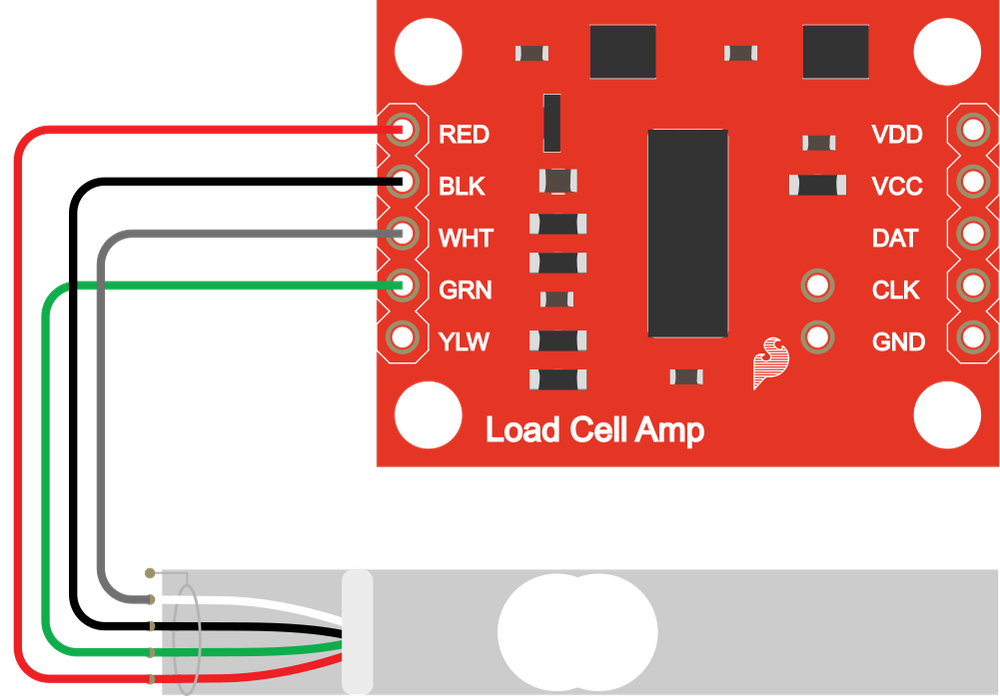
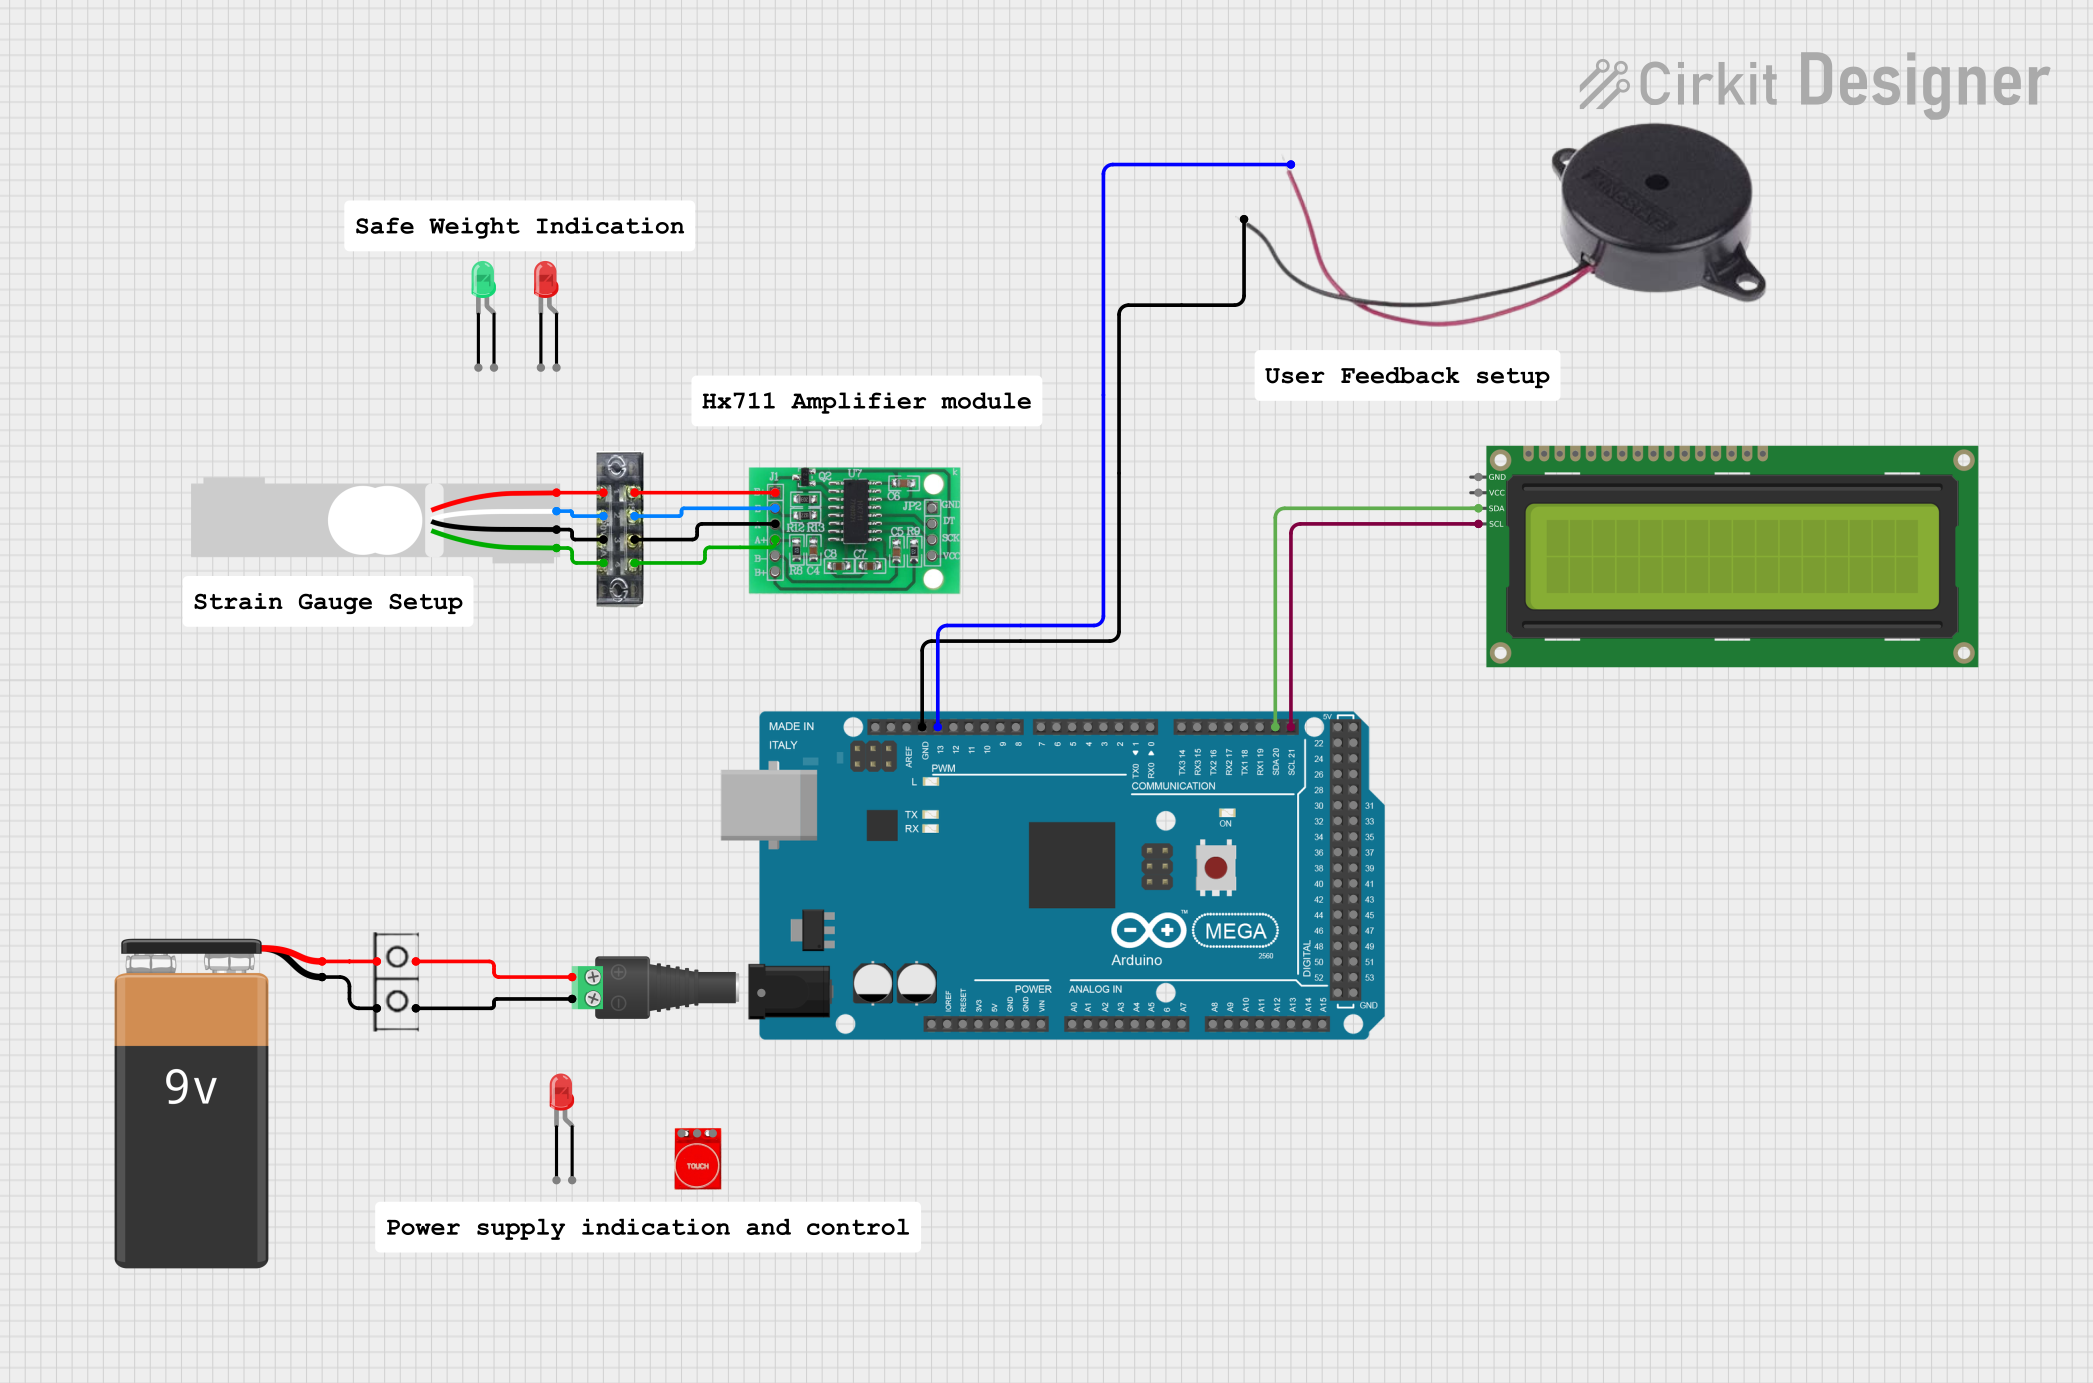
Load Cell Wires
| Wire Color | Description |
|---|---|
| Red | Excitation+ (E+) |
| Black | Excitation- (E-) |
| White | Signal+ (S+) |
| Green | Signal- (S-) |
HX711 Amplifier Pins
| Pin Name | Description |
|---|---|
| VCC | Power supply (2.6V to 5.5V) |
| GND | Ground |
| DT | Data output |
| SCK | Serial clock input |
Usage Instructions
Connecting the Load Cell to the HX711 Amplifier
Wire the Load Cell to the HX711 Amplifier:
- Connect the red wire of the load cell to the E+ pin on the HX711.
- Connect the black wire of the load cell to the E- pin on the HX711.
- Connect the white wire of the load cell to the S+ pin on the HX711.
- Connect the green wire of the load cell to the S- pin on the HX711.
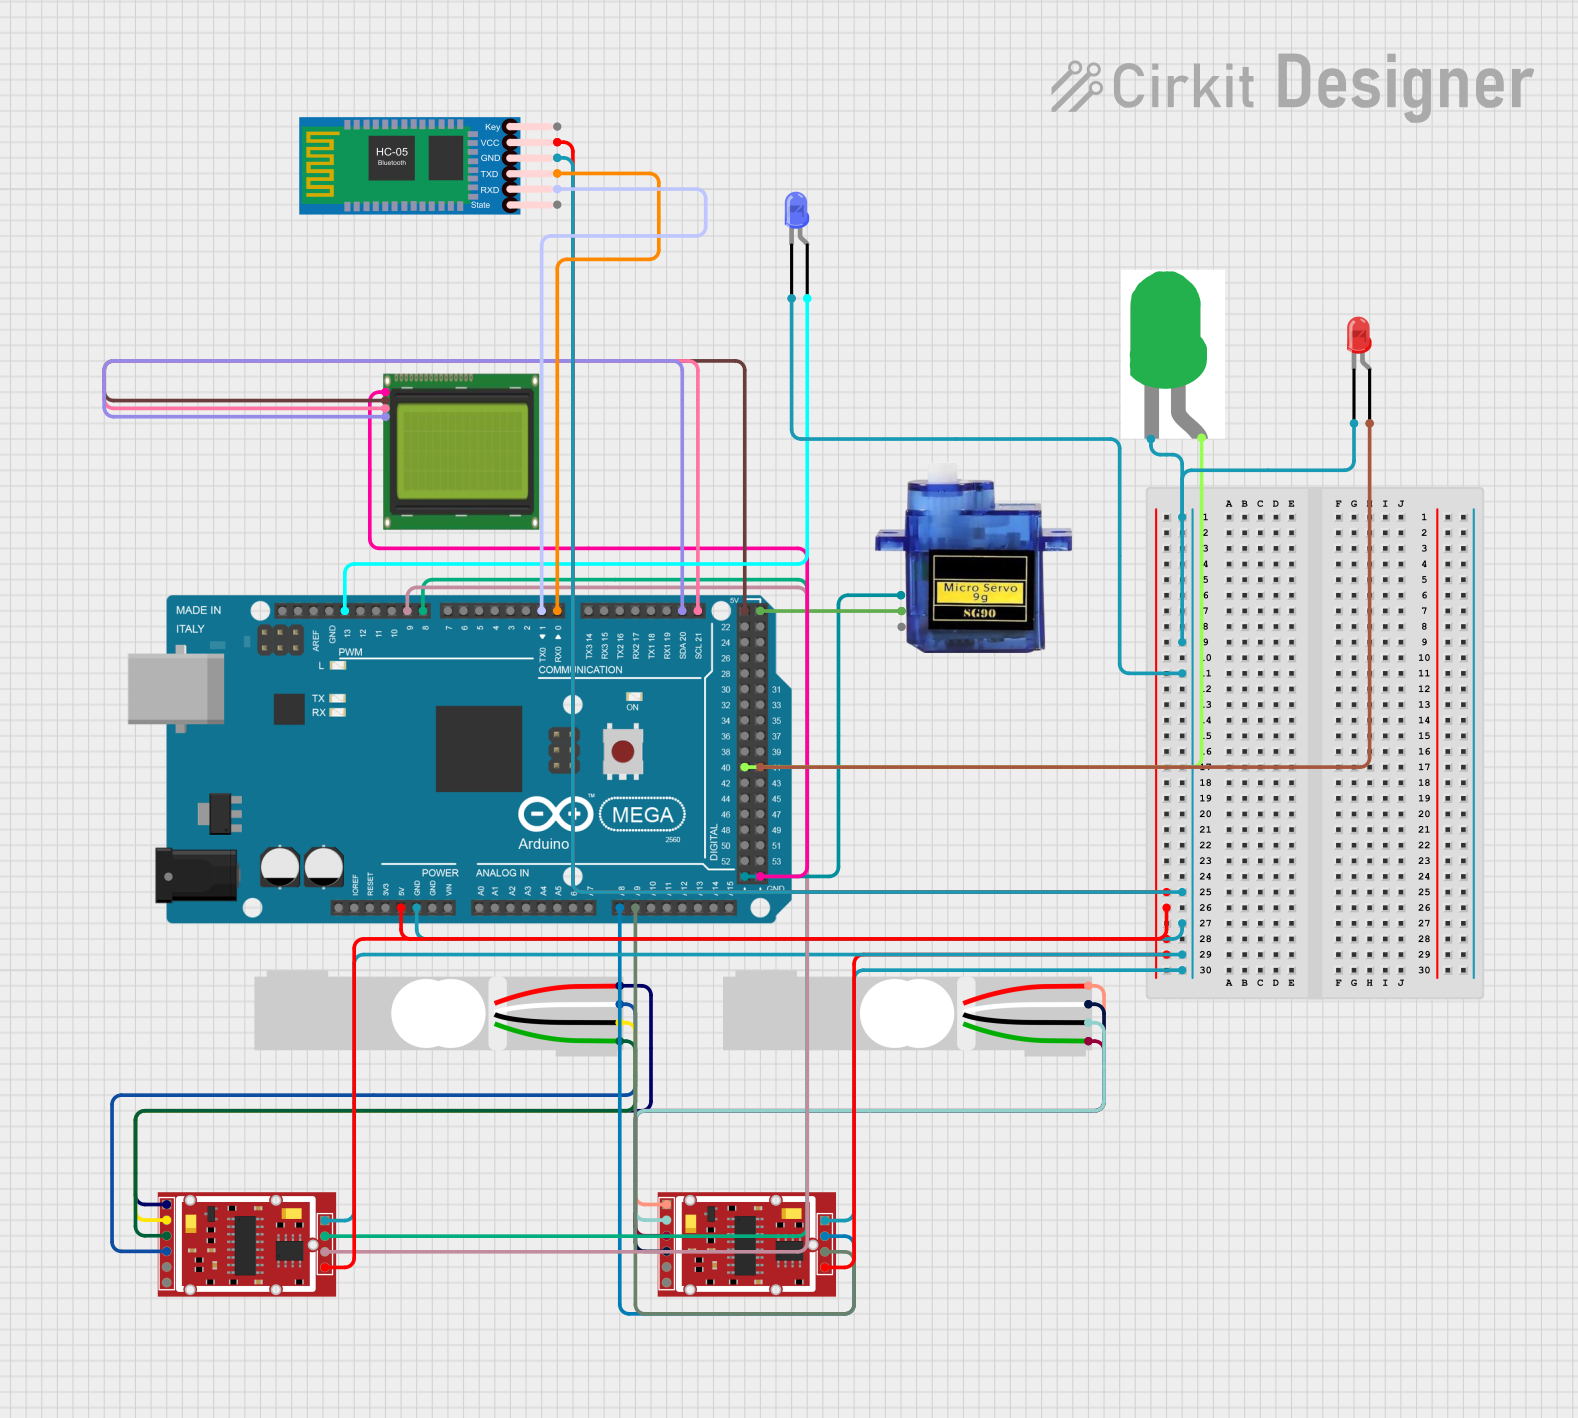
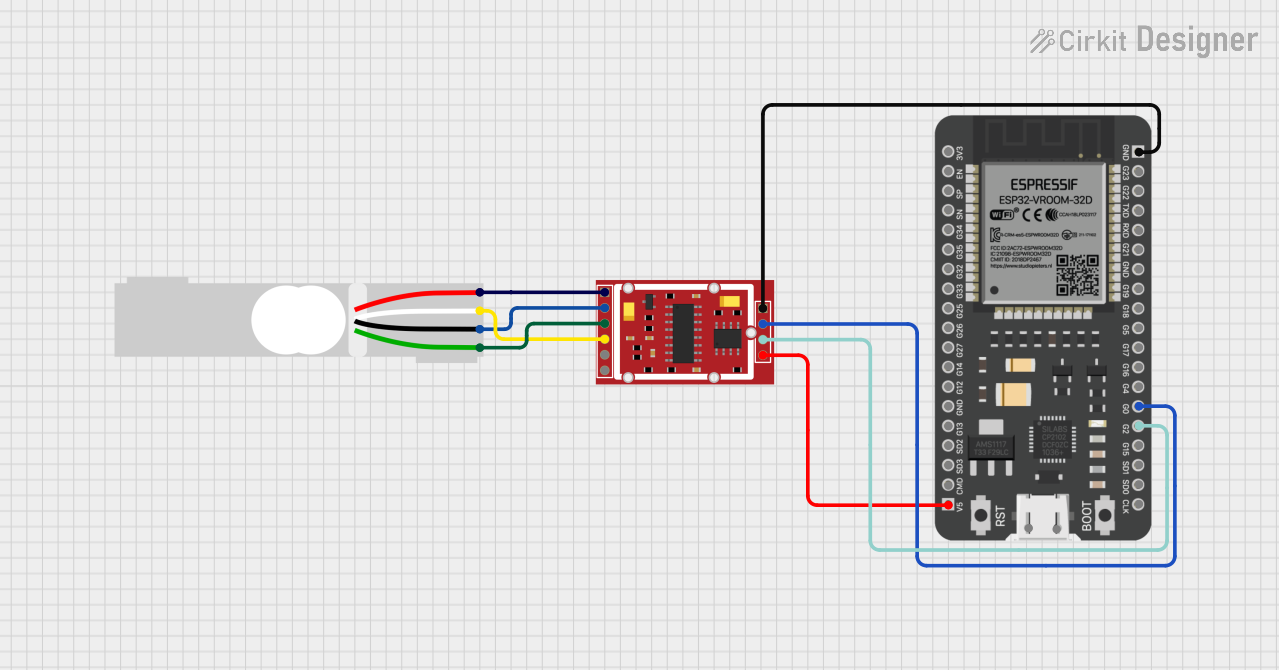
Connect the HX711 to a Microcontroller (e.g., Arduino UNO):
- Connect the VCC pin of the HX711 to the 5V pin on the Arduino.
- Connect the GND pin of the HX711 to the GND pin on the Arduino.
- Connect the DT pin of the HX711 to a digital pin on the Arduino (e.g., D3).
- Connect the SCK pin of the HX711 to another digital pin on the Arduino (e.g., D2).
Arduino Code Example
Below is an example code to interface the HX711 Load Cell with an Arduino UNO:
#include "HX711.h" // Include the HX711 library

// Define pins for HX711
#define DT 3  // Data pin connected to D3
#define SCK 2 // Clock pin connected to D2

HX711 scale; // Create an instance of the HX711 class

void setup() {
  Serial.begin(9600); // Initialize serial communication
  scale.begin(DT, SCK); // Initialize the HX711 with the defined pins
  Serial.println("HX711 Load Cell Example");

  // Calibrate the scale (adjust the factor based on your setup)
  scale.set_scale(2280.f); // Set the scale factor (calibration value)
  scale.tare(); // Reset the scale to zero
}

void loop() {
  // Read the weight from the load cell
  if (scale.is_ready()) {
    float weight = scale.get_units(); // Get the weight in units
    Serial.print("Weight: ");
    Serial.print(weight);
    Serial.println(" kg");
  } else {
    Serial.println("HX711 not ready. Check wiring.");
  }
  delay(500); // Wait for 500ms before the next reading
}
Important Considerations
- Calibration: The
set_scale()function in the code must be calibrated for your specific load cell and setup. Use a known weight to determine the correct scale factor. - Taring: Always use the
tare()function to reset the scale to zero before taking measurements. - Power Supply: Ensure a stable 5V power supply to avoid fluctuations in readings.
- Mounting: Securely mount the load cell to prevent mechanical vibrations or misalignment, which can affect accuracy.
Troubleshooting and FAQs
Common Issues
Inconsistent or Fluctuating Readings:
- Ensure the load cell is securely mounted and not subject to vibrations.
- Verify that the power supply is stable and within the recommended range.
- Check for loose or incorrect wiring connections.
No Output or "HX711 not ready" Message:
- Confirm that the HX711 is properly connected to the microcontroller.
- Ensure the load cell wires are connected to the correct pins on the HX711.
- Verify that the HX711 library is correctly installed in your Arduino IDE.
Incorrect Weight Readings:
- Perform a proper calibration using a known weight.
- Ensure the load cell is not overloaded beyond its 5kg capacity.
FAQs
Q: Can I use this load cell for weights above 5kg?
A: No, the load cell is rated for a maximum load of 5kg. Exceeding this limit may damage the load cell or result in inaccurate readings.
Q: How do I calibrate the load cell?
A: Use a known weight and adjust the scale factor in the set_scale() function until the readings match the actual weight.
Q: Can I use multiple load cells with one HX711?
A: Yes, you can connect multiple load cells in a Wheatstone bridge configuration, but this requires additional wiring and careful calibration.
Q: Is the HX711 compatible with 3.3V microcontrollers?
A: Yes, the HX711 can operate at 3.3V, but ensure the load cell is also compatible with the reduced excitation voltage.