How to Use water pump: Examples, Pinouts, and Specs
Introduction
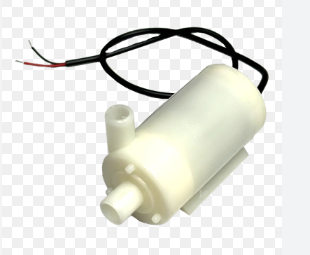
A water pump is a mechanical device designed to move water from one location to another. It is commonly used in a variety of applications, including irrigation systems, drainage systems, water supply systems, and cooling systems. Water pumps are essential in both residential and industrial settings, providing efficient water transfer for various purposes.
This documentation focuses on the general-purpose water pump manufactured by me, with the part ID none. It is suitable for small-scale projects, including DIY electronics, Arduino-based automation, and low-power water circulation systems.
Explore Projects Built with water pump
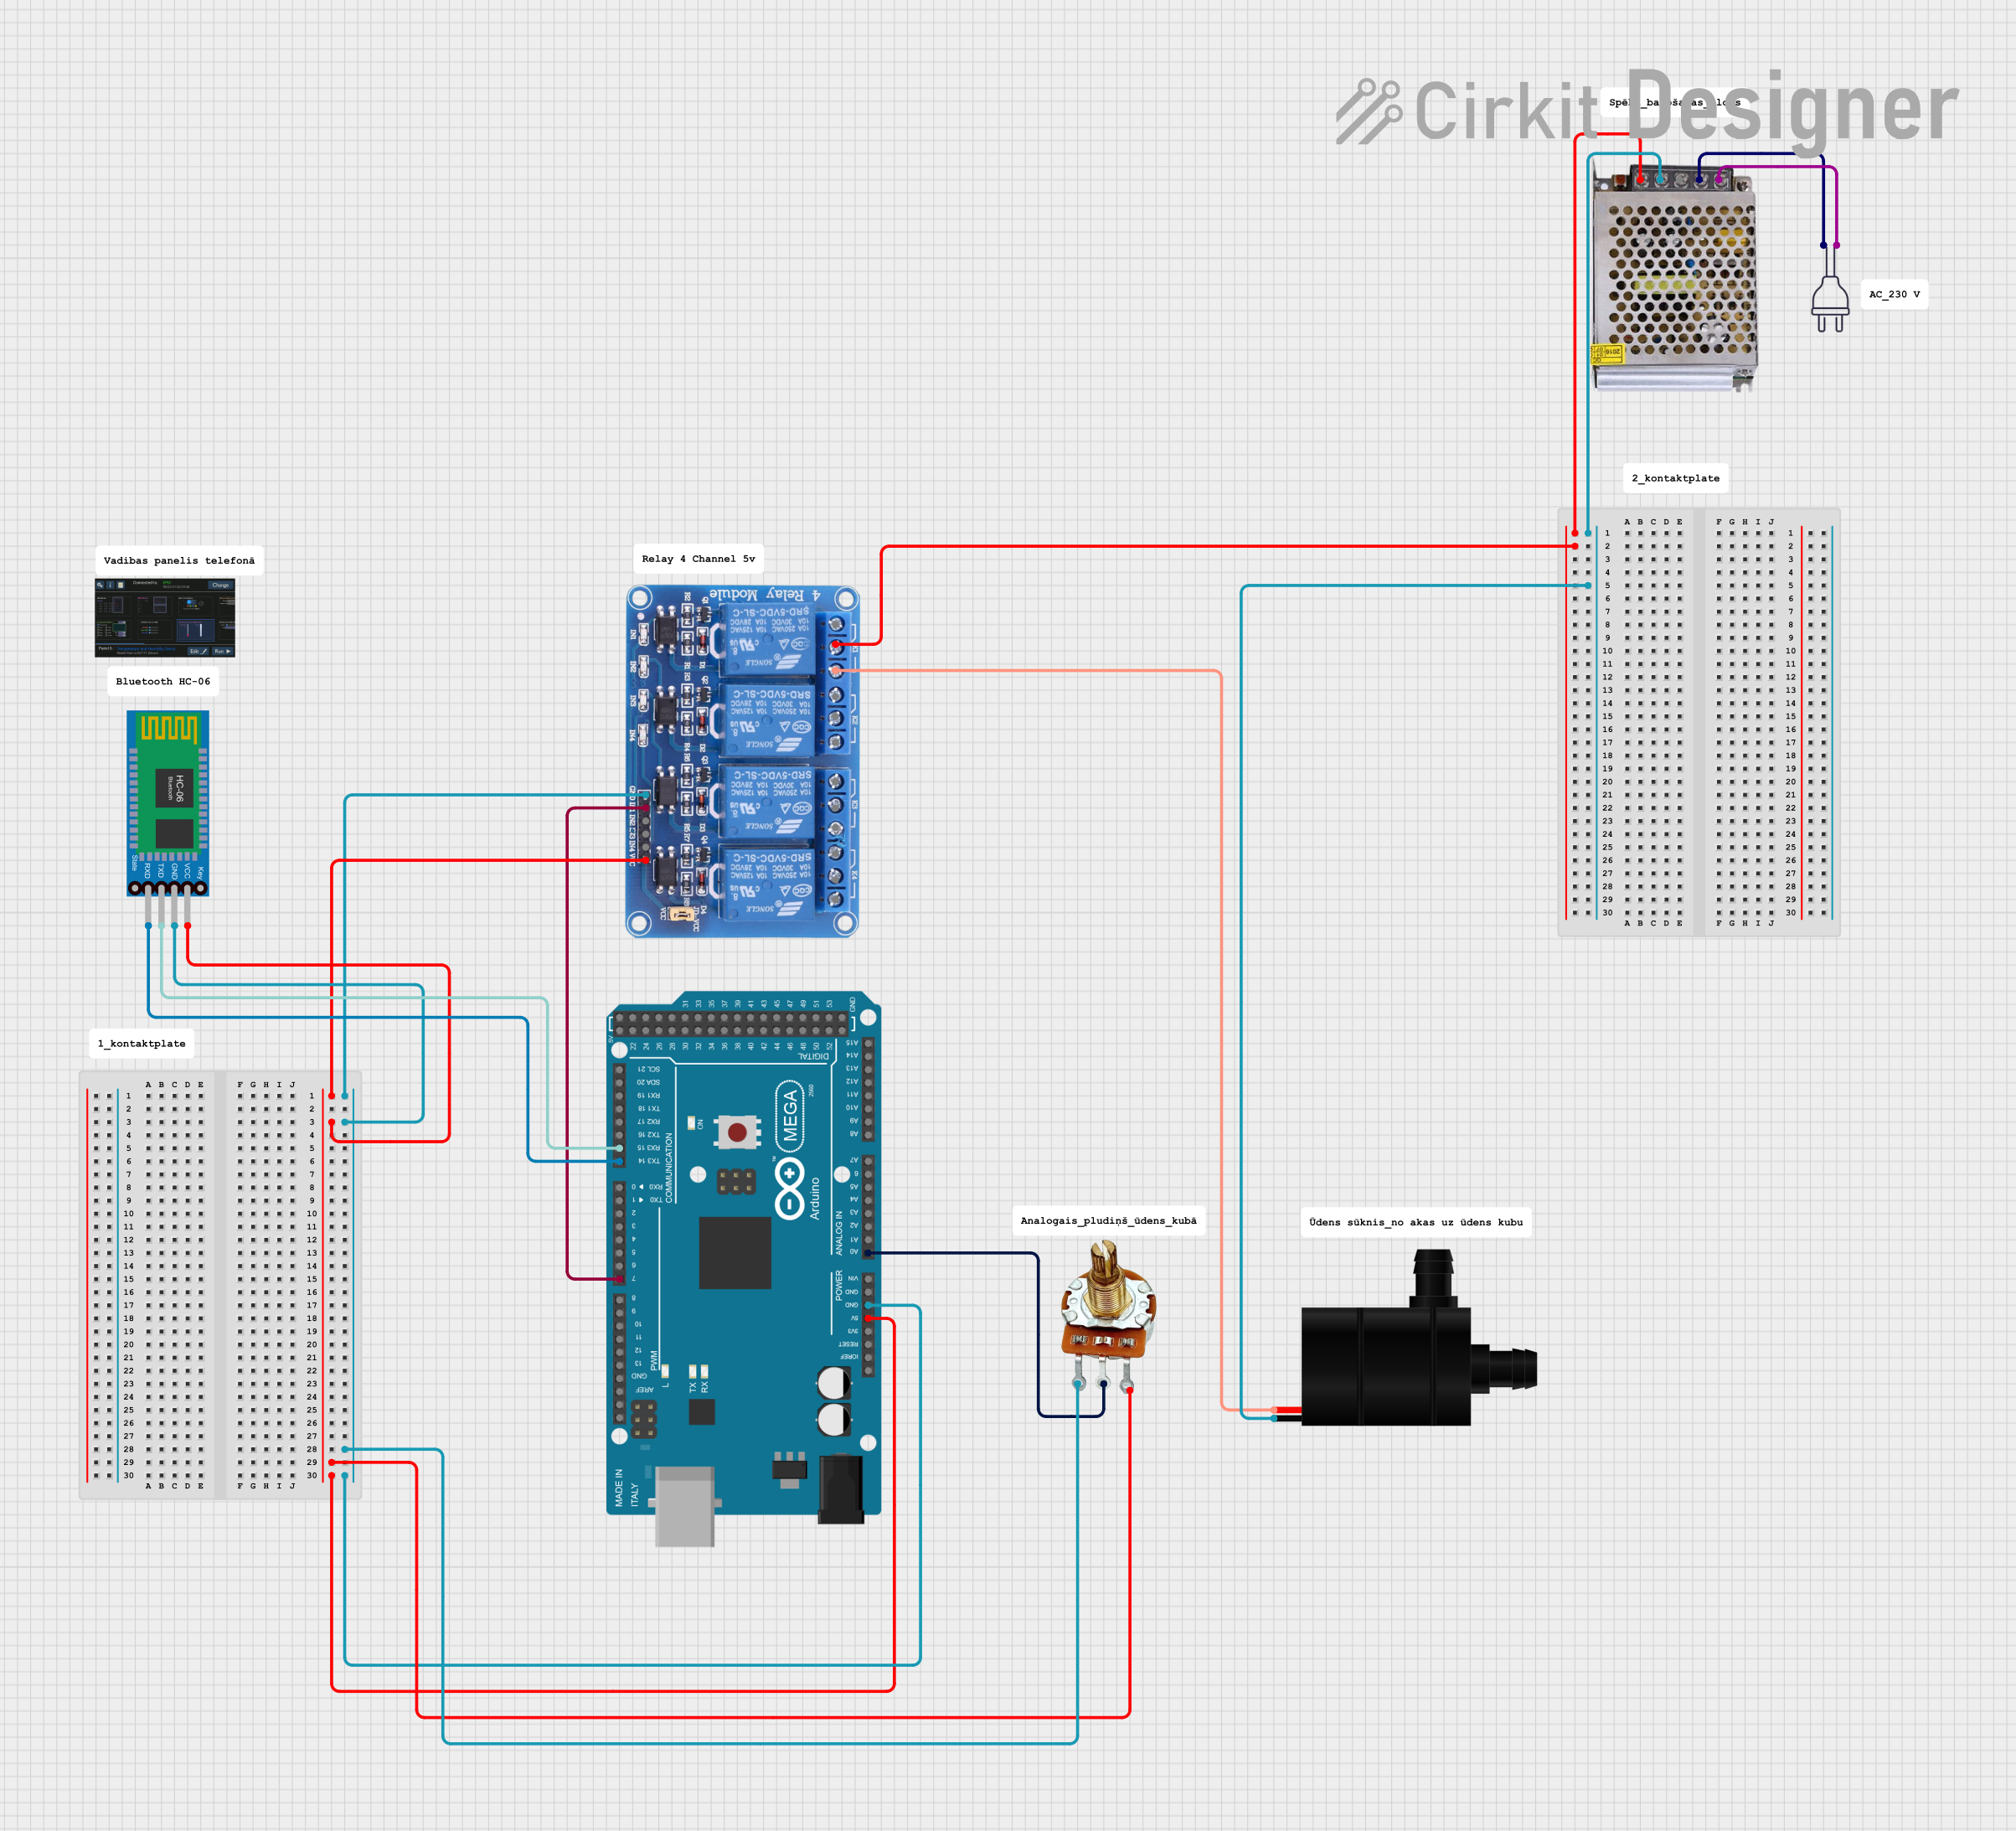
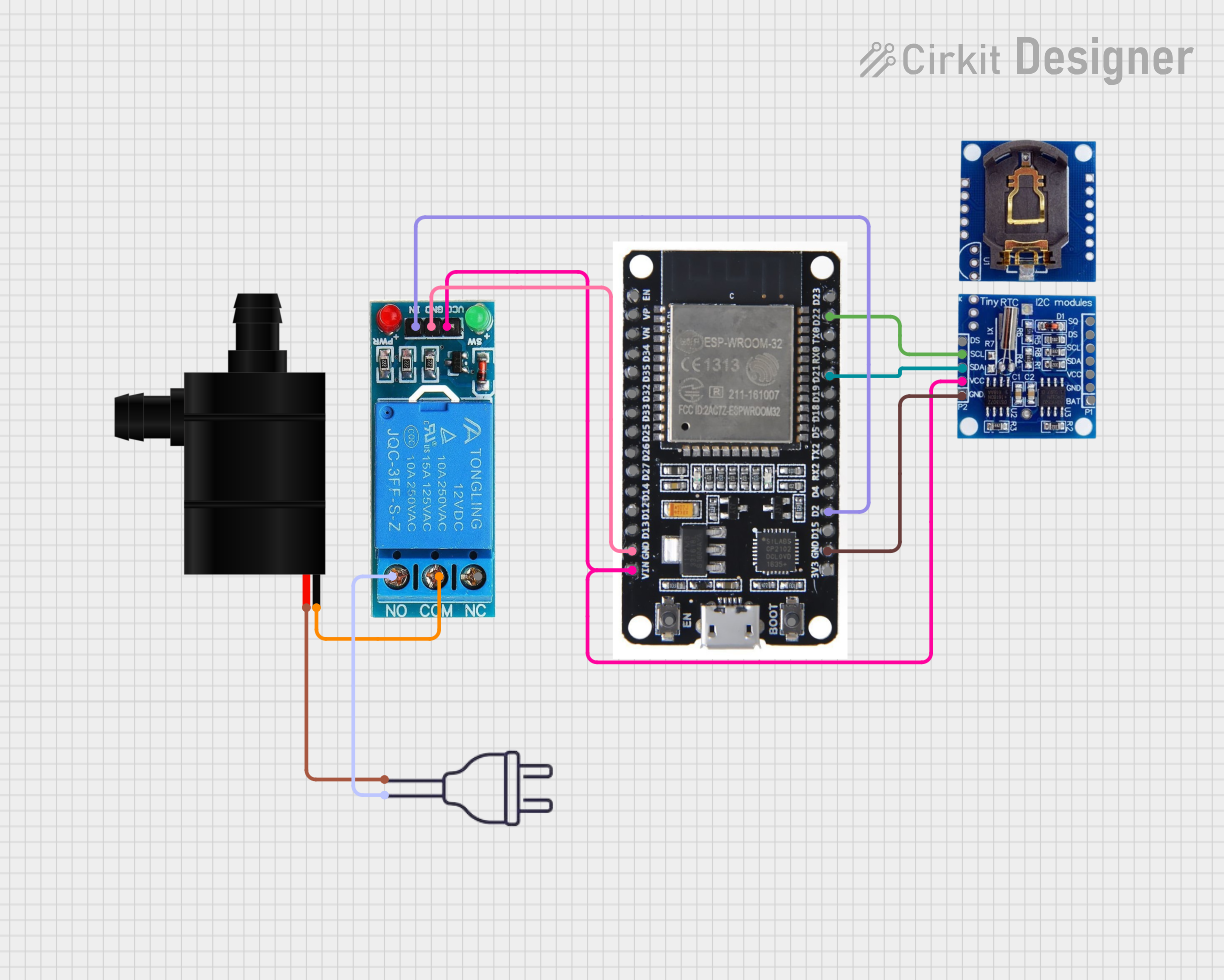
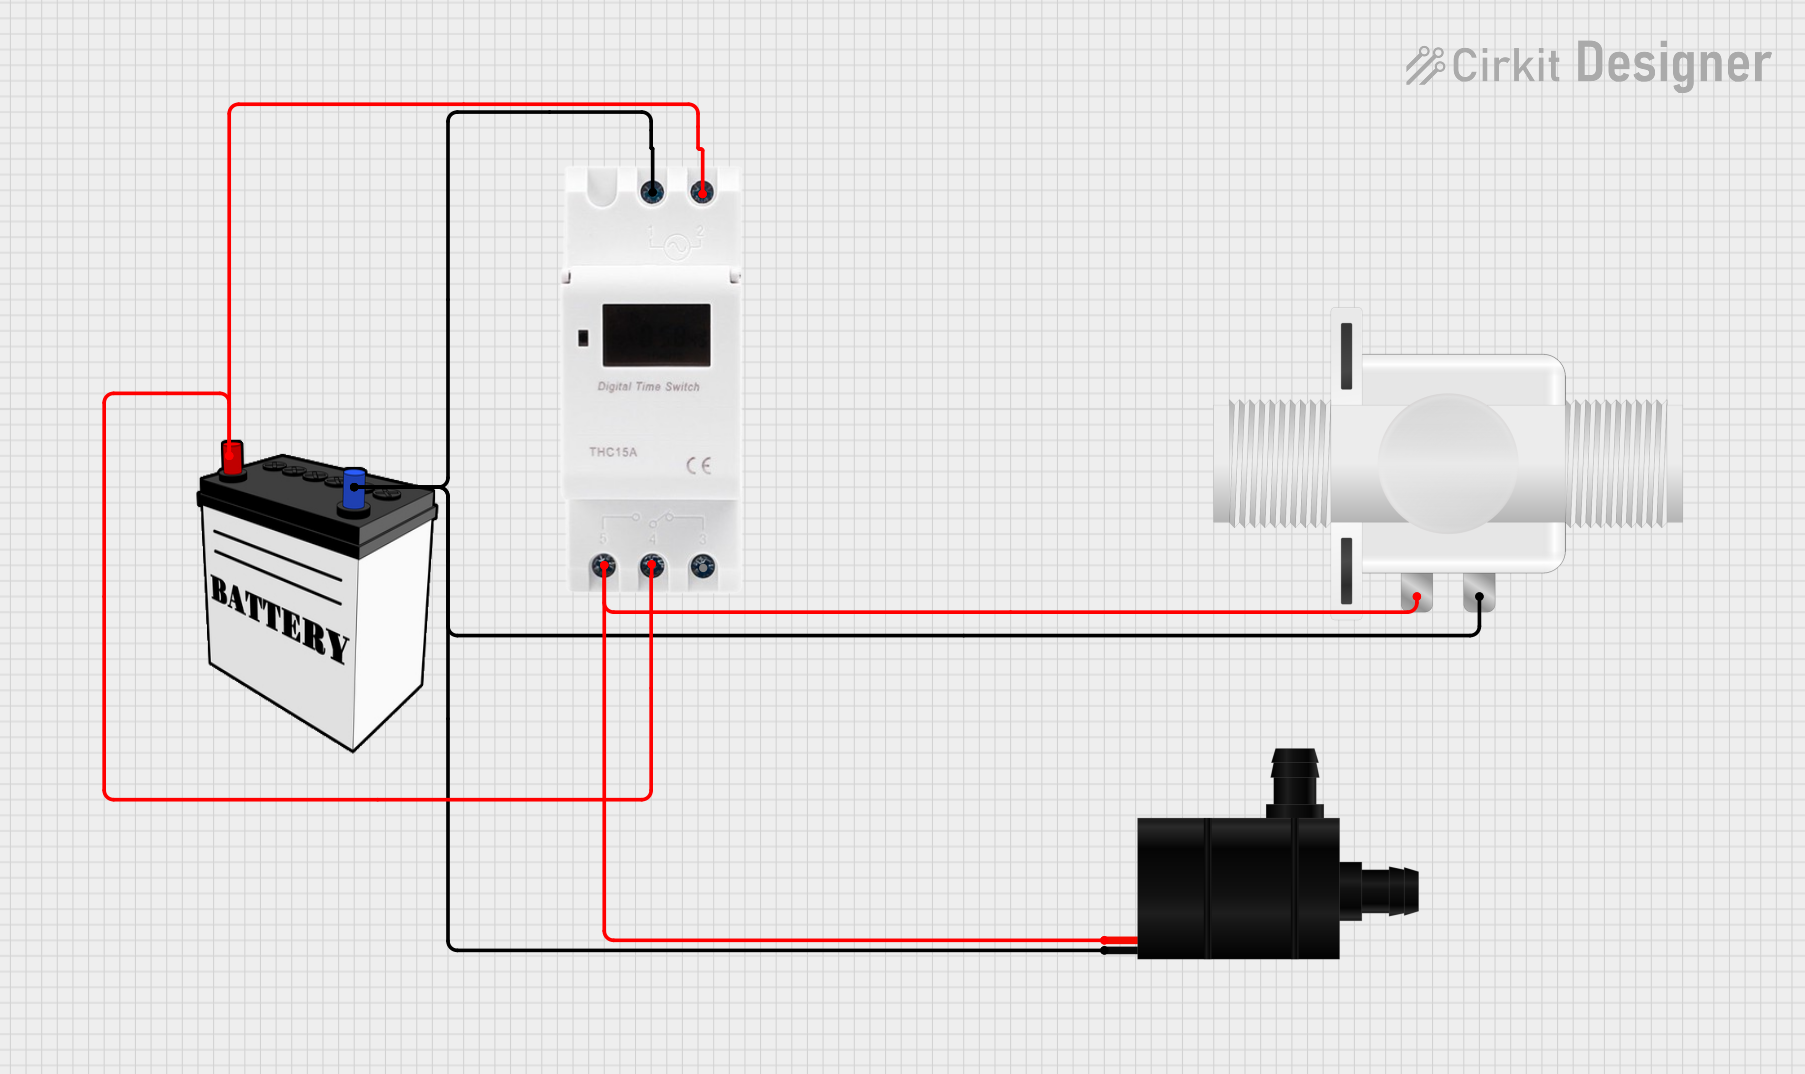
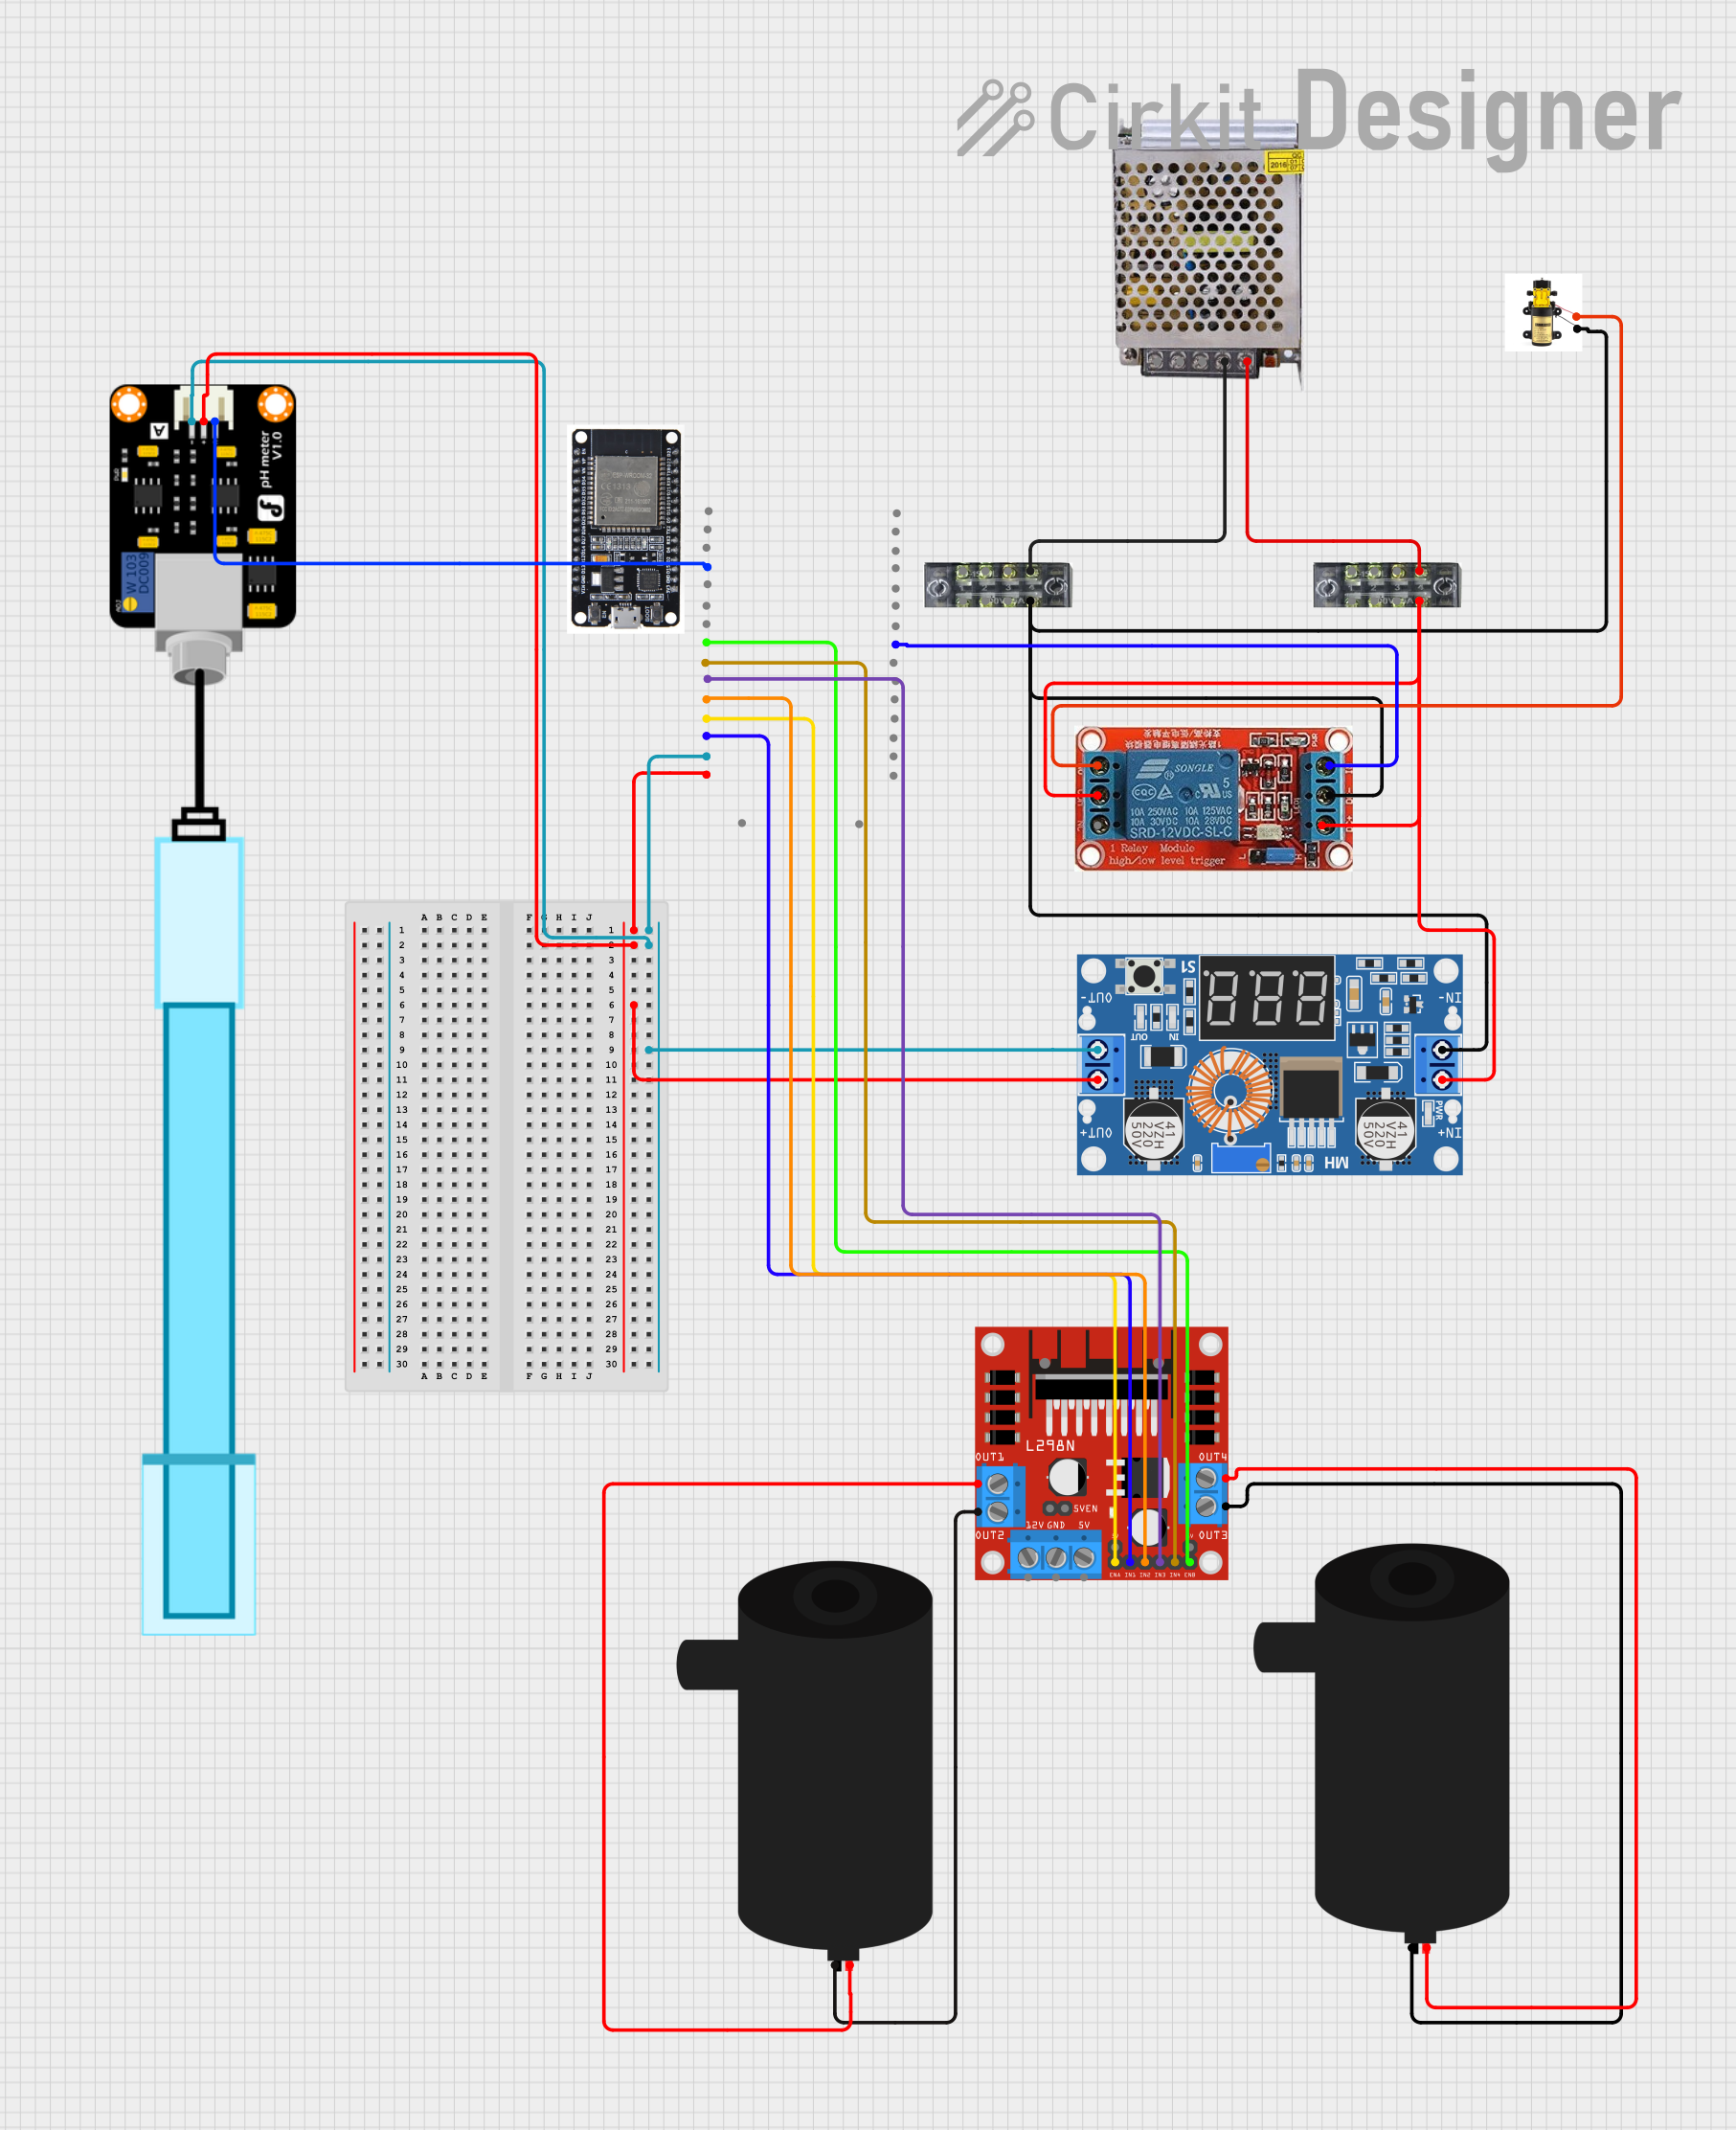
Explore Projects Built with water pump
Technical Specifications
Below are the key technical details for the water pump:
| Parameter | Value |
|---|---|
| Operating Voltage | 5V - 12V DC |
| Operating Current | 0.1A - 0.5A |
| Maximum Flow Rate | 120 liters per hour (L/h) |
| Maximum Lift Height | 1.2 meters |
| Power Consumption | 1W - 6W |
| Inlet/Outlet Diameter | 6mm |
| Material | Plastic (ABS) |
| Weight | 80 grams |
Pin Configuration and Descriptions
The water pump typically has two wires for electrical connection:
| Wire Color | Function | Description |
|---|---|---|
| Red | Positive (+) | Connect to the positive terminal of the power supply. |
| Black | Negative (-) | Connect to the ground (GND) of the power supply. |
Usage Instructions
How to Use the Water Pump in a Circuit
- Power Supply: Ensure the power supply matches the operating voltage range (5V - 12V DC). Exceeding the voltage range may damage the pump.
- Connections:
- Connect the red wire to the positive terminal of the power supply.
- Connect the black wire to the ground terminal of the power supply.
- Water Source: Submerge the pump in water or connect it to a water reservoir. Ensure the inlet is fully submerged for optimal performance.
- Control: Optionally, use a relay module or MOSFET to control the pump via a microcontroller like an Arduino.
Important Considerations and Best Practices
- Priming: Ensure the pump is primed (filled with water) before operation to prevent dry running, which can damage the pump.
- Filtration: Use a filter to prevent debris from entering the pump and causing blockages.
- Orientation: Install the pump in the correct orientation, with the inlet and outlet properly aligned.
- Cooling: Avoid running the pump for extended periods without water, as this may cause overheating.
Example: Controlling the Water Pump with an Arduino UNO
Below is an example of how to control the water pump using an Arduino UNO and a relay module:
// Example: Controlling a water pump with Arduino UNO and a relay module
// Ensure the relay module is connected to the Arduino and the pump is powered
// by an external power supply within the specified voltage range.

const int relayPin = 7; // Pin connected to the relay module

void setup() {
  pinMode(relayPin, OUTPUT); // Set the relay pin as an output
  digitalWrite(relayPin, LOW); // Ensure the pump is off initially
}

void loop() {
  // Turn the pump ON
  digitalWrite(relayPin, HIGH);
  delay(5000); // Keep the pump on for 5 seconds

  // Turn the pump OFF
  digitalWrite(relayPin, LOW);
  delay(5000); // Keep the pump off for 5 seconds
}
Notes:
- Use an external power supply to power the pump, as the Arduino cannot provide sufficient current.
- Ensure the relay module is rated for the pump's voltage and current.
Troubleshooting and FAQs
Common Issues and Solutions
Pump Does Not Start:
- Cause: Insufficient power supply or loose connections.
- Solution: Verify the power supply voltage and current. Check all connections.
Low Water Flow:
- Cause: Blocked inlet or outlet, or insufficient water level.
- Solution: Clean the inlet and outlet. Ensure the pump is fully submerged.
Pump Overheats:
- Cause: Running the pump dry or for extended periods.
- Solution: Always ensure the pump is primed and avoid prolonged operation.
Noise During Operation:
- Cause: Air trapped in the pump or debris in the impeller.
- Solution: Remove the pump, clean it, and ensure it is fully submerged.
FAQs
Q: Can the pump be used with saltwater?
A: This pump is designed for freshwater use. Using it with saltwater may cause corrosion.Q: Can the pump run continuously?
A: Yes, but ensure proper cooling and water flow to prevent overheating.Q: How do I control the pump speed?
A: Use a PWM (Pulse Width Modulation) controller or a variable power supply to adjust the voltage.Q: Is the pump waterproof?
A: Yes, the pump is waterproof and can be fully submerged in water.
This concludes the documentation for the water pump. For further assistance, contact the manufacturer.