
How to Use Adafruit Feather M0 Express: Examples, Pinouts, and Specs
 Design with Adafruit Feather M0 Express in Cirkit Designer
Introduction
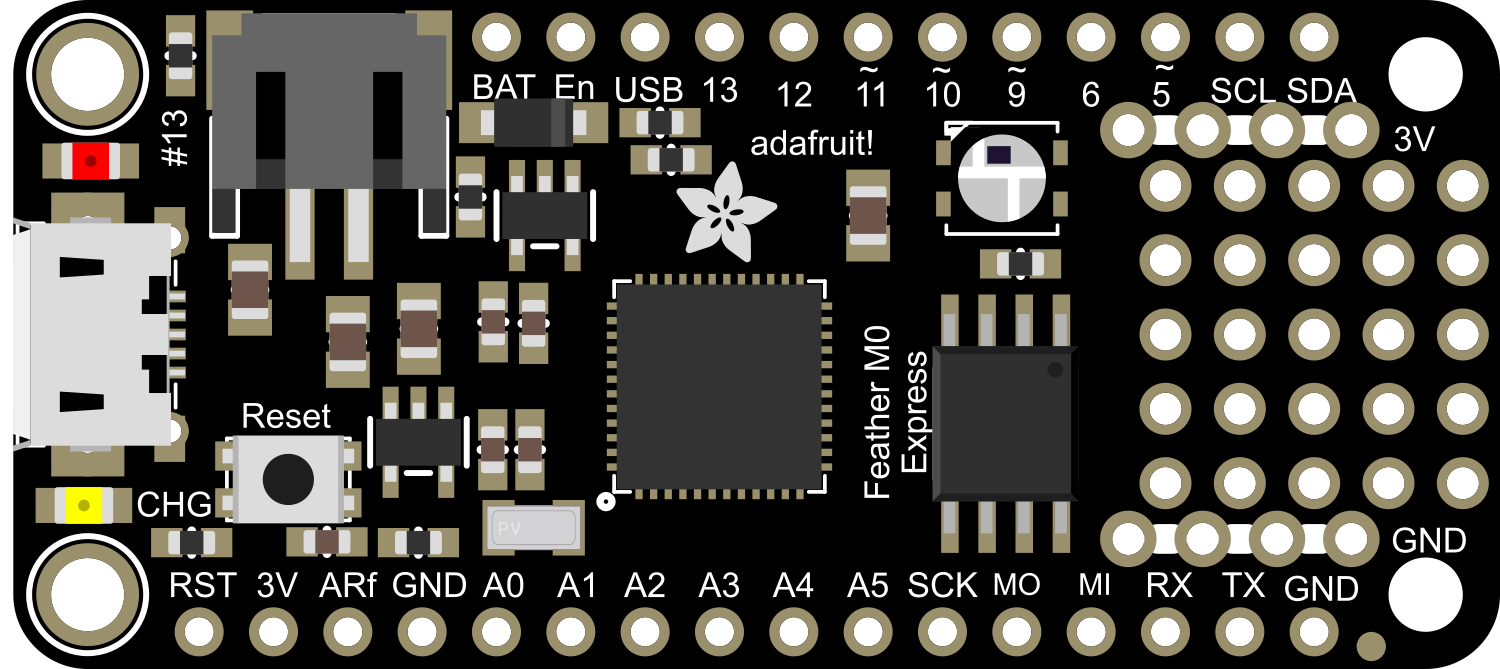
The Adafruit Feather M0 Express is a compact and versatile microcontroller board based on the Atmel SAMD21 ARM Cortex-M0+ processor. It features built-in USB support, a variety of I/O pins, and compatibility with the Arduino IDE and CircuitPython. Designed for portability and ease of use, the Feather M0 Express is ideal for Internet of Things (IoT) projects, data logging, and other embedded applications. Its small form factor and lightweight design make it perfect for wearable and portable devices.
Explore Projects Built with Adafruit Feather M0 Express
 Open Project in Cirkit Designer
 Open Project in Cirkit Designer
 Open Project in Cirkit Designer
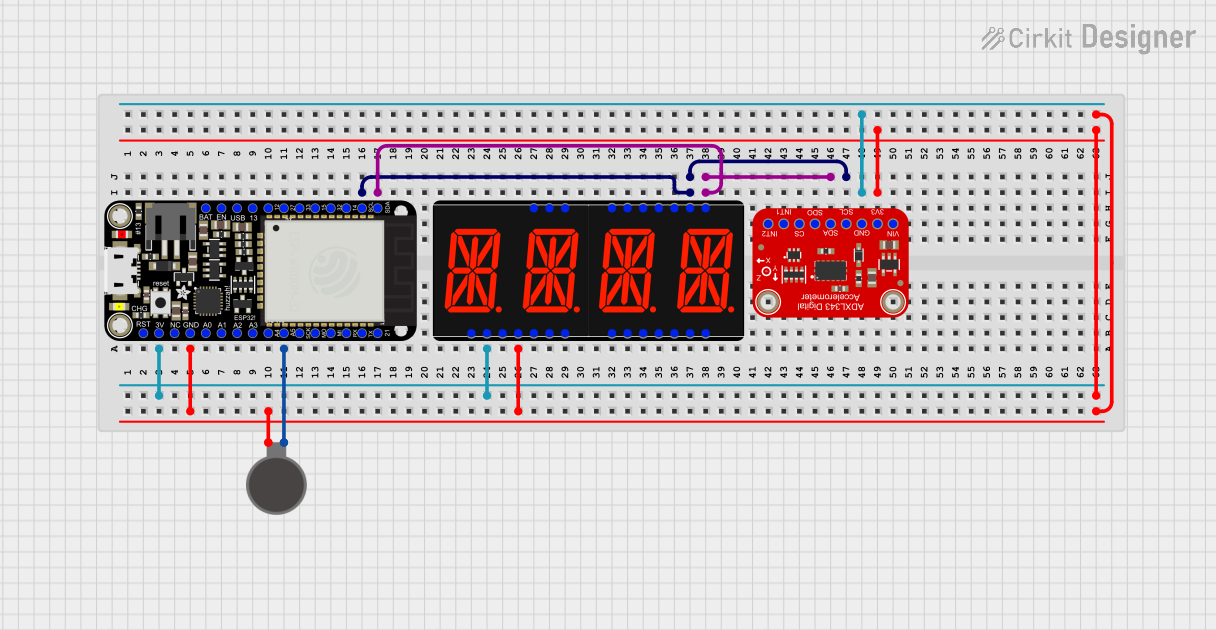 Open Project in Cirkit Designer
Explore Projects Built with Adafruit Feather M0 Express
Open Project in Cirkit DesignerOpen Project in Cirkit DesignerOpen Project in Cirkit DesignerOpen Project in Cirkit DesignerCommon Applications
- IoT devices and smart home automation
- Data logging and sensor interfacing
- Wearable electronics
- Robotics and motor control
- Educational projects and prototyping
Technical Specifications
The Adafruit Feather M0 Express offers a range of features and capabilities to suit various applications. Below are its key technical details:
Key Features
- Microcontroller: Atmel SAMD21G18 ARM Cortex-M0+ (32-bit, 48 MHz)
- Flash Memory: 256 KB
- SRAM: 32 KB
- Built-in Storage: 2 MB SPI Flash for data logging or CircuitPython
- Operating Voltage: 3.3V logic
- Input Voltage: 3.7V LiPo battery or 5V via USB
- Connectivity: Native USB support
- I/O Pins: 20 GPIO pins (8 analog inputs, 1 true analog output)
- PWM Outputs: 8 pins
- Communication Protocols: UART, I2C, SPI
- Power Options: USB or LiPo battery
- Dimensions: 51mm x 23mm x 8mm
- Weight: 4.8g
Pin Configuration and Descriptions
The Feather M0 Express has a total of 20 GPIO pins, each with specific functions. Below is a detailed pinout:
| Pin | Label | Function |
|---|---|---|
| 0 | RX | UART Receive (Serial Communication) |
| 1 | TX | UART Transmit (Serial Communication) |
| 2 | D2 | Digital I/O, PWM capable |
| 3 | D3 | Digital I/O, PWM capable |
| 4 | D4 | Digital I/O, PWM capable |
| 5 | D5 | Digital I/O, PWM capable |
| 6 | D6 | Digital I/O, PWM capable |
| 9 | D9 | Digital I/O, PWM capable |
| 10 | D10 | Digital I/O, PWM capable |
| 11 | D11 | Digital I/O, SPI MOSI |
| 12 | D12 | Digital I/O, SPI MISO |
| 13 | D13 | Digital I/O, SPI SCK, onboard LED |
| A0 | A0 | Analog Input (ADC) |
| A1 | A1 | Analog Input (ADC) |
| A2 | A2 | Analog Input (ADC) |
| A3 | A3 | Analog Input (ADC) |
| A4 | SDA | Analog Input, I2C Data Line |
| A5 | SCL | Analog Input, I2C Clock Line |
| EN | Enable | Enable pin for power management |
| BAT | Battery Voltage | Voltage from the connected LiPo battery |
Usage Instructions
The Adafruit Feather M0 Express is designed to be user-friendly and compatible with multiple programming environments, including the Arduino IDE and CircuitPython. Below are the steps to get started and important considerations for using the board.
Getting Started
Powering the Board:
- Connect the Feather M0 Express to your computer via a micro-USB cable.
- Alternatively, connect a 3.7V LiPo battery to the JST connector for portable use.
Installing the Arduino IDE:
- Download and install the Arduino IDE from the official Arduino website.
- Install the Adafruit SAMD Boards package via the Arduino Board Manager.
Programming the Board:
- Select "Adafruit Feather M0" as the board in the Arduino IDE.
- Choose the correct COM port for the connected Feather M0 Express.
- Write or upload your Arduino sketch to the board.
Example Code: Blinking the Onboard LED
The following example demonstrates how to blink the onboard LED connected to pin 13.
// Blink example for Adafruit Feather M0 Express
// This code blinks the onboard LED at 1-second intervals.

void setup() {
  pinMode(13, OUTPUT); // Set pin 13 as an output for the onboard LED
}

void loop() {
  digitalWrite(13, HIGH); // Turn the LED on
  delay(1000);            // Wait for 1 second
  digitalWrite(13, LOW);  // Turn the LED off
  delay(1000);            // Wait for 1 second
}
Important Considerations
- Voltage Levels: The Feather M0 Express operates at 3.3V logic. Ensure that any connected peripherals are compatible with 3.3V signals.
- Battery Charging: The board includes a built-in LiPo battery charger. When connected via USB, it will automatically charge the connected battery.
- CircuitPython: If using CircuitPython, ensure the board is loaded with the appropriate firmware. The onboard SPI Flash can be used to store Python scripts and libraries.
Troubleshooting and FAQs
Common Issues
Board Not Recognized by Computer:
- Ensure the USB cable is data-capable (not charge-only).
- Check that the correct COM port is selected in the Arduino IDE.
Sketch Fails to Upload:
- Double-tap the reset button to enter bootloader mode. The board's LED will pulse to indicate bootloader mode.
- Re-select the board and port in the Arduino IDE and try uploading again.
CircuitPython Drive Not Visible:
- Verify that the CircuitPython firmware is installed on the board.
- If the drive is corrupted, reformat it as FAT32 and reload the firmware.
FAQs
Q: Can I power the Feather M0 Express with both USB and a battery simultaneously?
A: Yes, the board automatically switches between USB and battery power, prioritizing USB when available.
Q: How do I reset the board to factory settings?
A: Double-tap the reset button to enter bootloader mode, then upload a new sketch or reinstall CircuitPython firmware.
Q: What is the maximum current output for the GPIO pins?
A: Each GPIO pin can source or sink up to 7mA. For higher current requirements, use external drivers or transistors.
Q: Can I use the Feather M0 Express with other FeatherWing add-ons?
A: Yes, the Feather M0 Express is compatible with the FeatherWing ecosystem, allowing easy expansion with additional modules.
By following this documentation, users can effectively utilize the Adafruit Feather M0 Express for a wide range of projects and applications.