How to Use Balboa Spa Heater Assembly: Examples, Pinouts, and Specs
Introduction
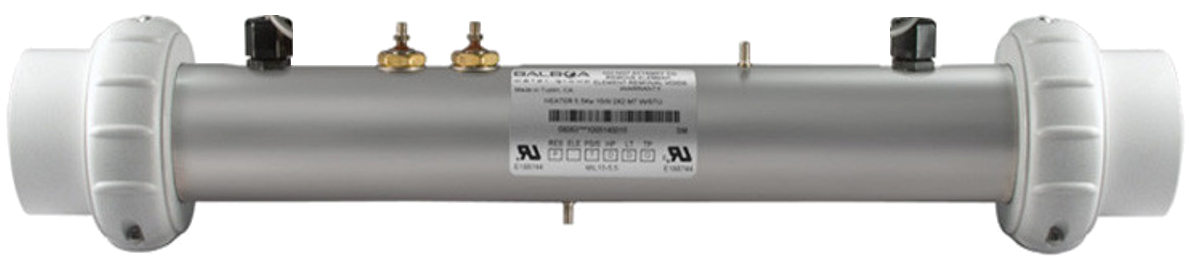
The Balboa Spa Heater Assembly (EL2000/VS) is a high-performance heating unit designed specifically for spa and hot tub systems. Manufactured by Balboa, this heater assembly ensures efficient temperature control, maintaining water warmth for optimal user comfort. It is a reliable and durable component, engineered to withstand the demanding conditions of spa environments.
Explore Projects Built with Balboa Spa Heater Assembly
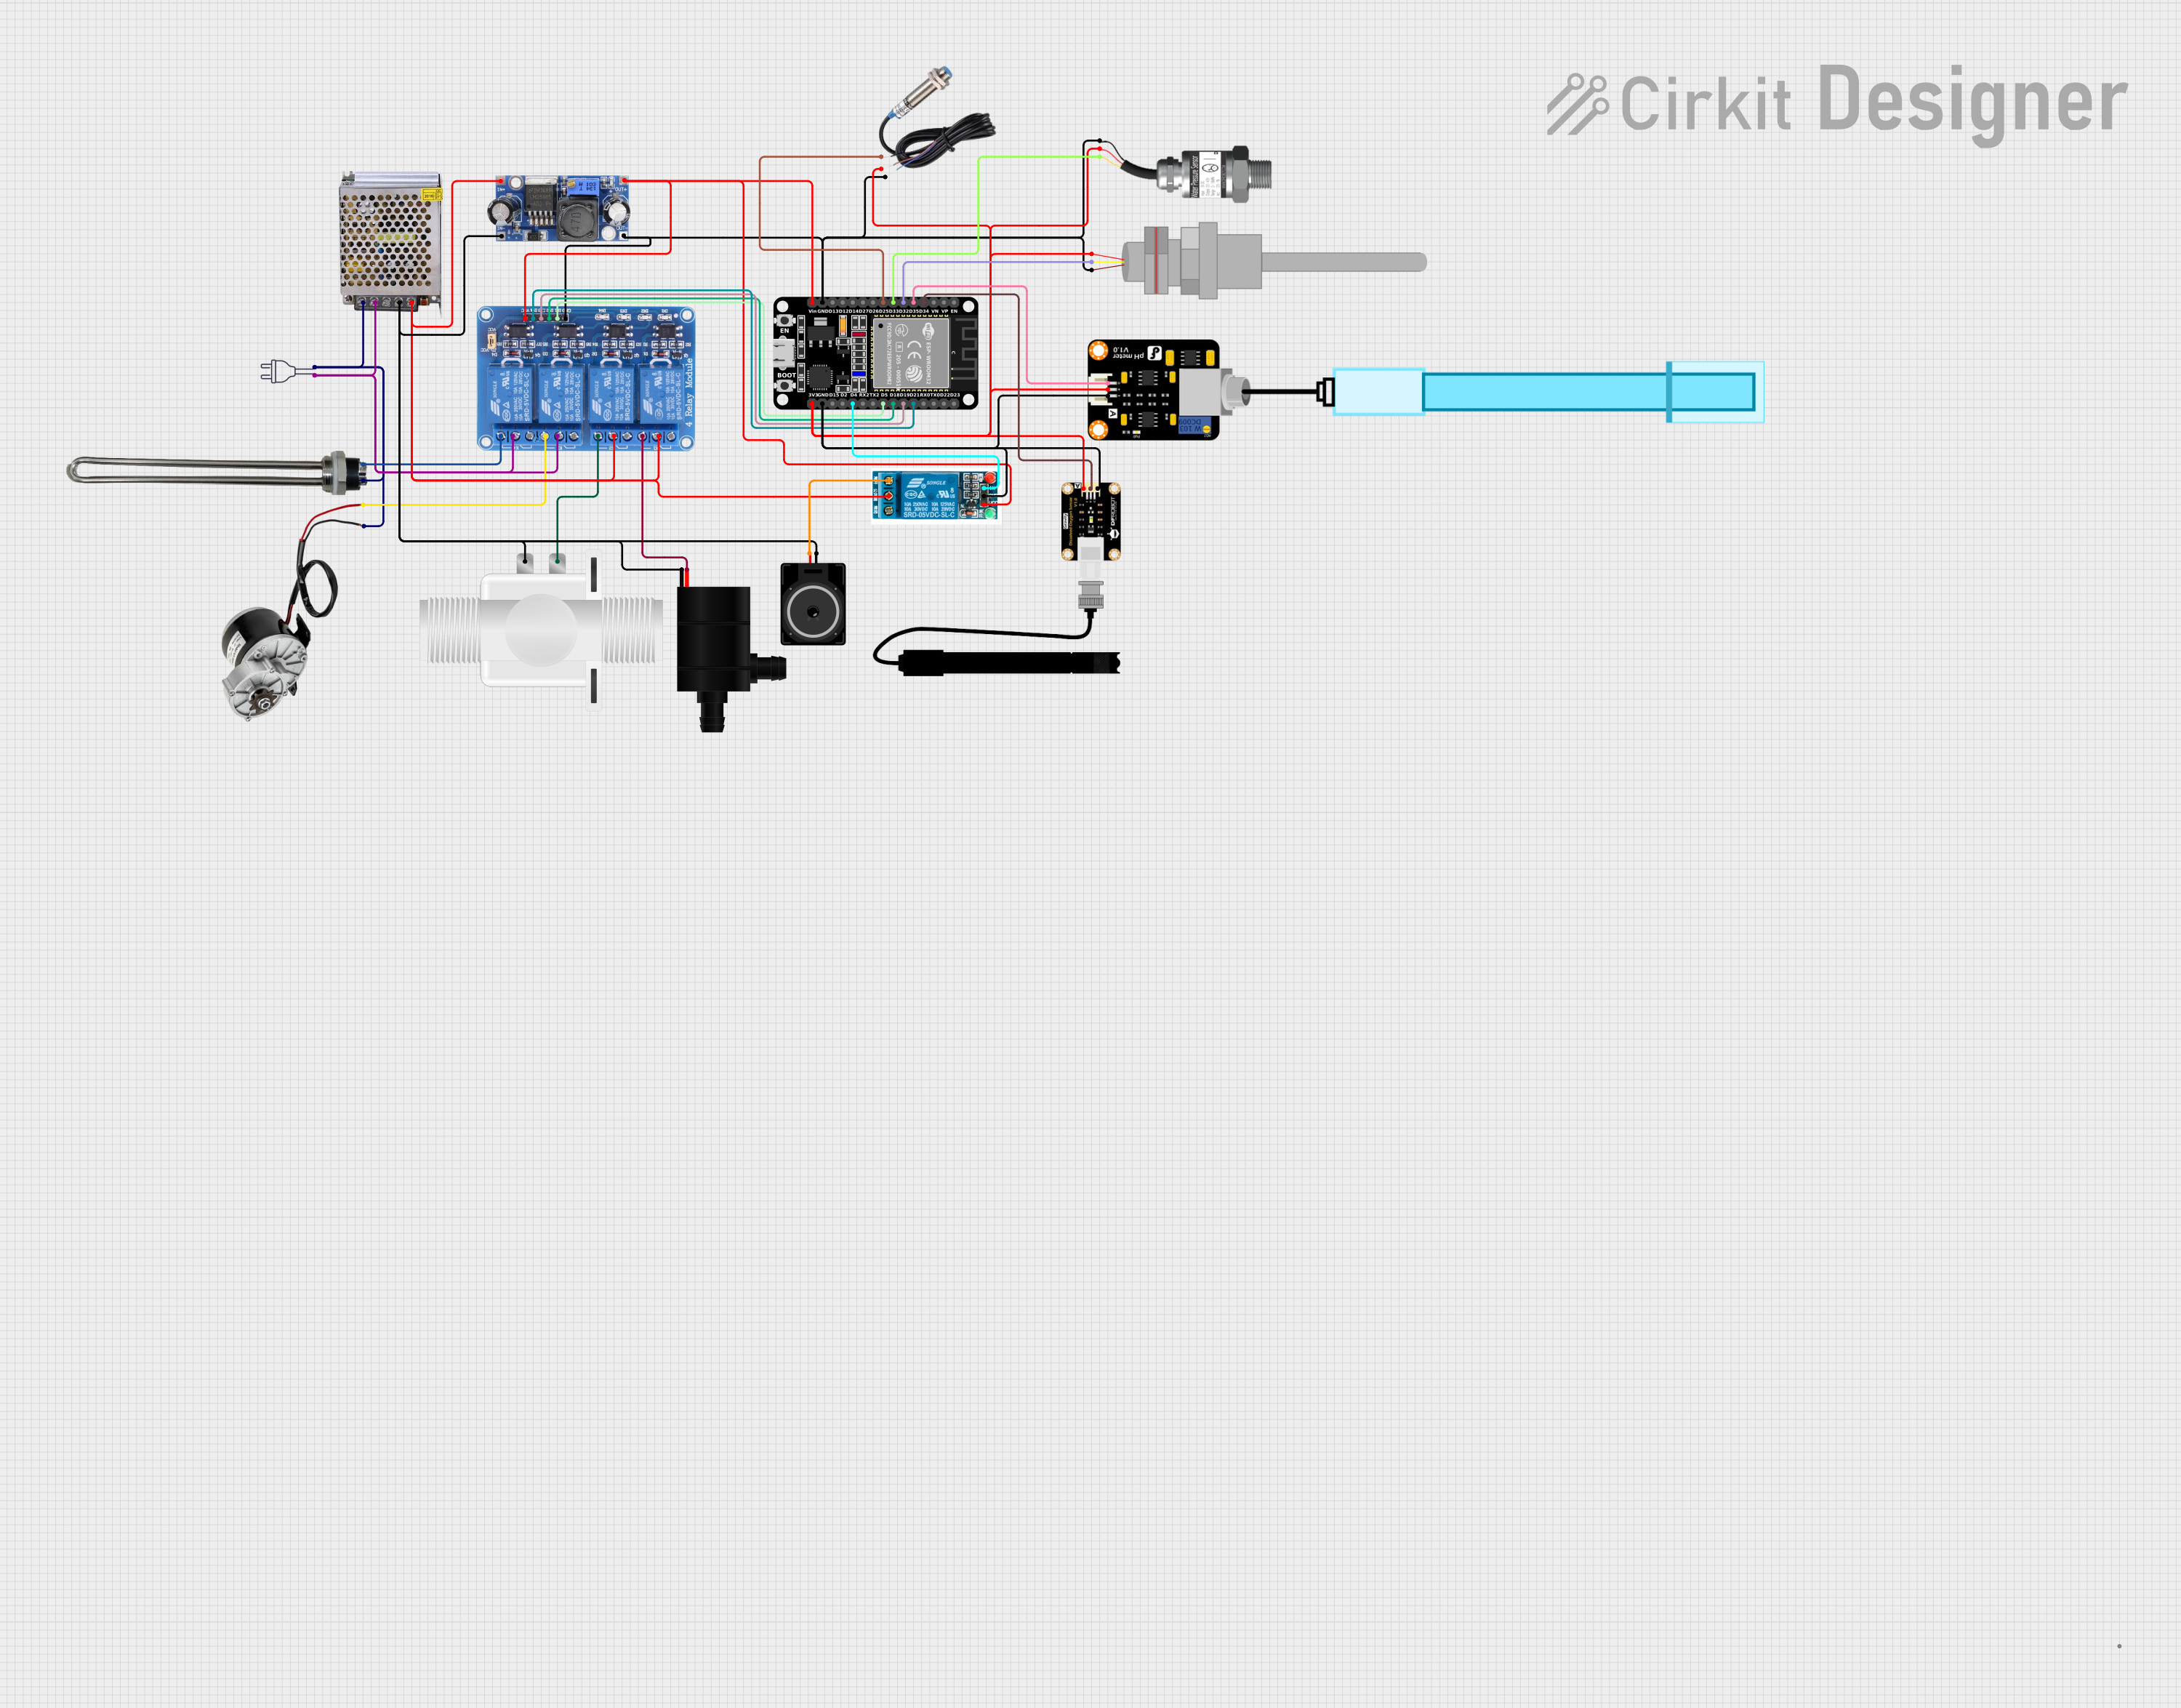
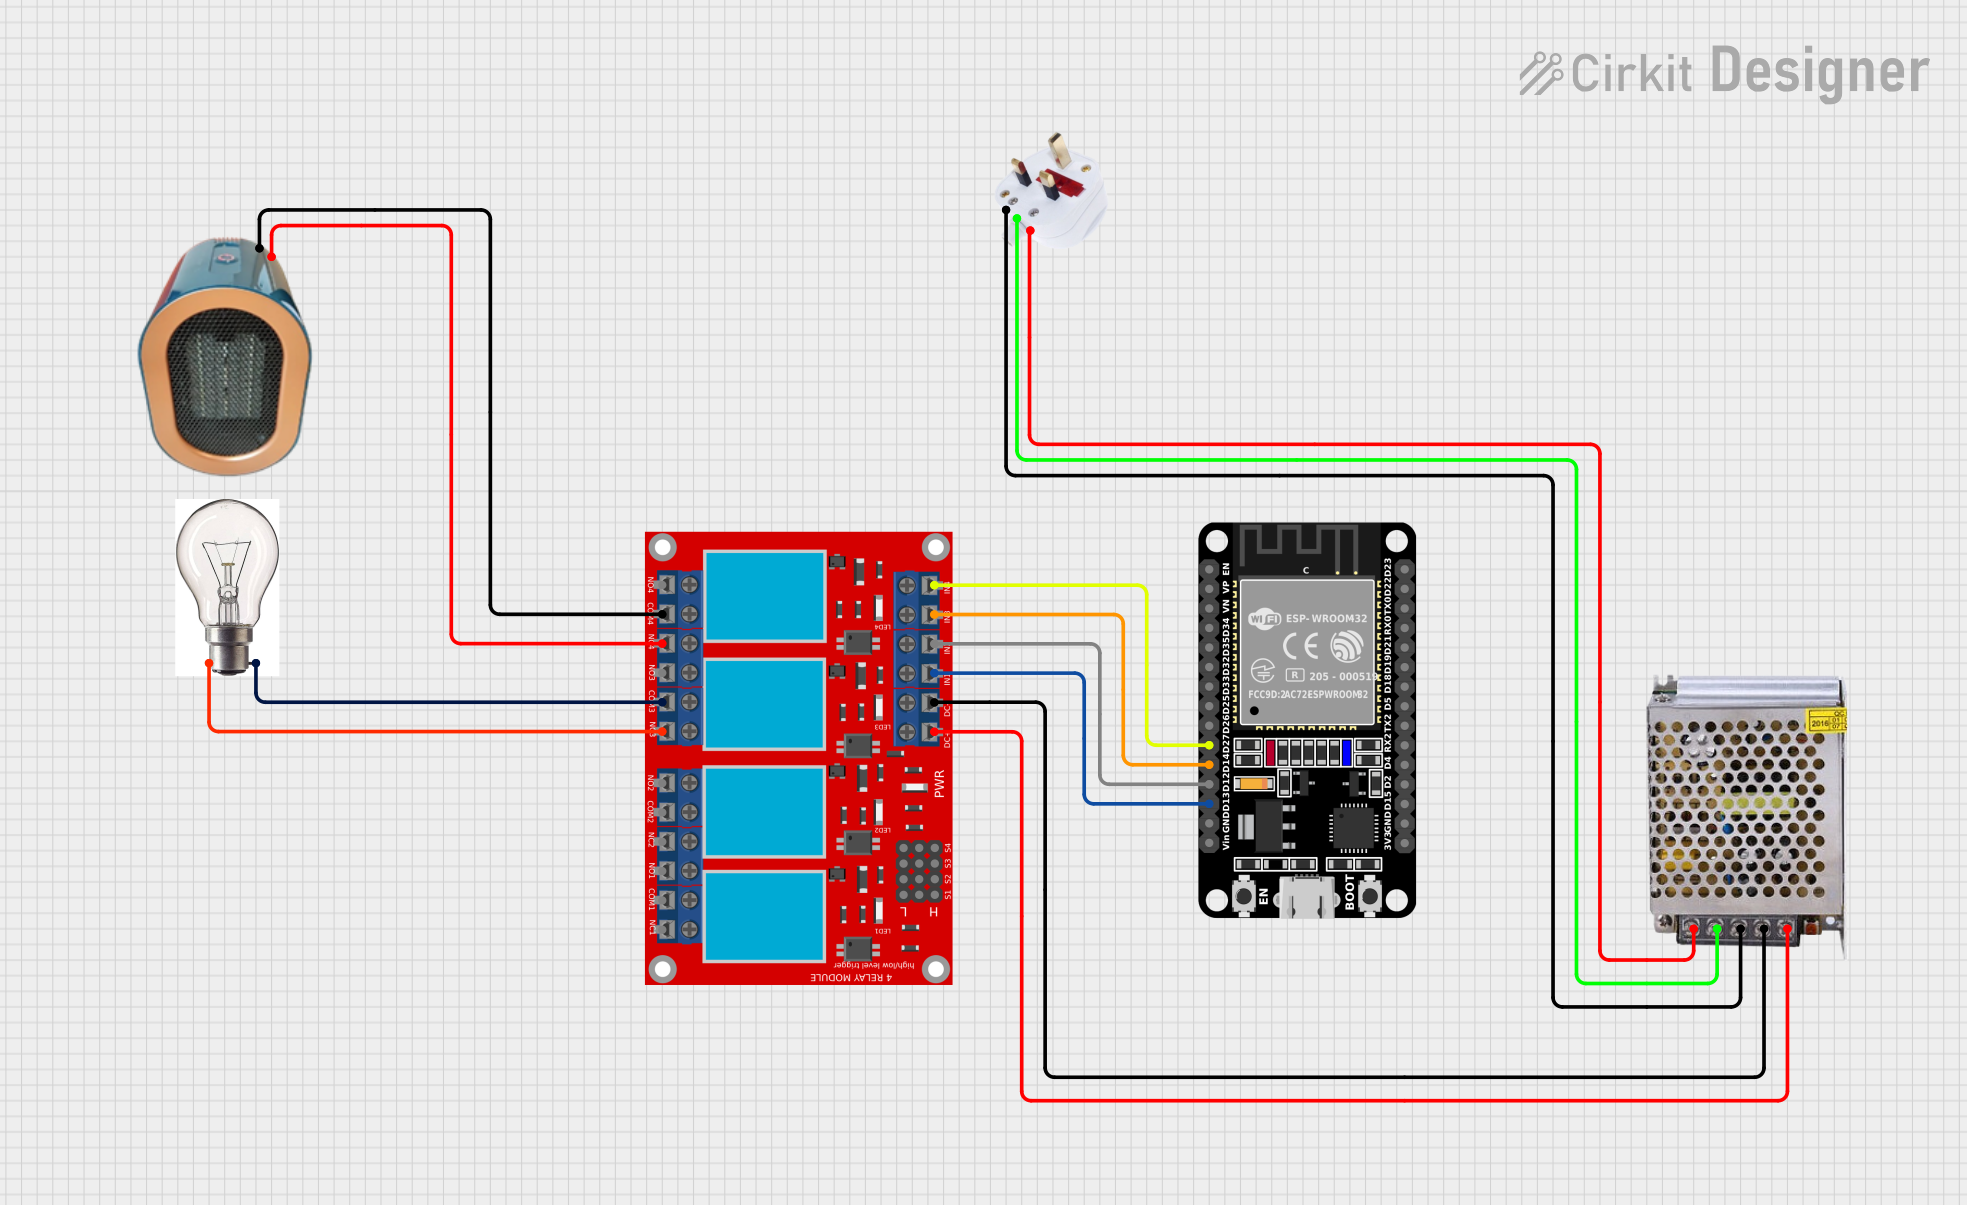


Explore Projects Built with Balboa Spa Heater Assembly
Common Applications and Use Cases
- Heating water in residential and commercial spas or hot tubs.
- Maintaining consistent water temperature for user comfort.
- Integration into spa control systems for automated temperature regulation.
- Replacement or upgrade for existing spa heater assemblies.
Technical Specifications
The following table outlines the key technical details of the Balboa Spa Heater Assembly (EL2000/VS):
| Specification | Details |
|---|---|
| Manufacturer | Balboa |
| Part ID | EL2000/VS |
| Voltage Rating | 230V AC |
| Power Rating | 4.0 kW |
| Current Rating | 16-20 Amps |
| Heating Element Material | Stainless Steel |
| Temperature Range | 80°F to 104°F (27°C to 40°C) |
| Dimensions | 15" x 2.5" x 2.5" (approx.) |
| Weight | 3.5 lbs (approx.) |
| Safety Features | High-limit sensor, pressure switch |
| Certifications | UL Listed, CE Certified |
Pin Configuration and Descriptions
The Balboa Spa Heater Assembly does not have traditional pins like an IC or microcontroller. Instead, it features terminal connections for power input and control signals. The table below describes these connections:
| Terminal | Description |
|---|---|
| L1 (Line 1) | Connects to the first live wire of the 230V AC power supply. |
| L2 (Line 2) | Connects to the second live wire of the 230V AC power supply. |
| Ground | Connects to the ground wire for safety. |
| Pressure Switch | Monitors water flow and ensures the heater operates only when water is present. |
| High-Limit Sensor | Prevents overheating by shutting off the heater if the temperature exceeds safe limits. |
Usage Instructions
How to Use the Component in a Circuit
Power Connection:
- Connect the L1 and L2 terminals to a 230V AC power source. Ensure the connections are secure and insulated.
- Attach the ground wire to the designated ground terminal for safety.
Control Integration:
- Connect the pressure switch and high-limit sensor to the spa control system. These sensors ensure safe operation by monitoring water flow and temperature.
Water Flow:
- Ensure proper water flow through the heater assembly. The pressure switch will prevent the heater from operating if water flow is insufficient.
Temperature Settings:
- Use the spa control system to set the desired water temperature. The heater will automatically maintain the set temperature.
Important Considerations and Best Practices
- Safety First: Always disconnect power before installing or servicing the heater assembly.
- Proper Grounding: Ensure the ground connection is secure to prevent electrical hazards.
- Water Flow: Verify that the spa pump is functioning correctly to maintain adequate water flow through the heater.
- Temperature Limits: Do not exceed the recommended temperature range (104°F/40°C) to avoid damage to the heater or spa system.
- Regular Maintenance: Periodically inspect the heater assembly for signs of wear, corrosion, or debris buildup.
Arduino Integration
While the Balboa Spa Heater Assembly is not typically controlled by an Arduino, it is possible to monitor and control its operation using an Arduino-based system. Below is an example of how to monitor the high-limit sensor and pressure switch using an Arduino UNO:
// Example code to monitor the high-limit sensor and pressure switch
// for the Balboa Spa Heater Assembly using an Arduino UNO.

// Define pin connections
const int pressureSwitchPin = 2;  // Digital pin connected to the pressure switch
const int highLimitSensorPin = 3; // Digital pin connected to the high-limit sensor
const int heaterRelayPin = 4;     // Digital pin to control a relay for the heater

void setup() {
  pinMode(pressureSwitchPin, INPUT);  // Set pressure switch pin as input
  pinMode(highLimitSensorPin, INPUT); // Set high-limit sensor pin as input
  pinMode(heaterRelayPin, OUTPUT);    // Set relay control pin as output

  Serial.begin(9600); // Initialize serial communication for debugging
}

void loop() {
  // Read the state of the pressure switch and high-limit sensor
  bool pressureSwitchState = digitalRead(pressureSwitchPin);
  bool highLimitSensorState = digitalRead(highLimitSensorPin);

  // Debugging: Print sensor states to the serial monitor
  Serial.print("Pressure Switch: ");
  Serial.println(pressureSwitchState ? "ON" : "OFF");
  Serial.print("High-Limit Sensor: ");
  Serial.println(highLimitSensorState ? "OK" : "TRIPPED");

  // Control the heater relay based on sensor states
  if (pressureSwitchState && highLimitSensorState) {
    digitalWrite(heaterRelayPin, HIGH); // Turn on the heater
  } else {
    digitalWrite(heaterRelayPin, LOW);  // Turn off the heater
  }

  delay(1000); // Wait for 1 second before the next loop iteration
}
Troubleshooting and FAQs
Common Issues Users Might Face
Heater Not Turning On:
- Cause: Insufficient water flow or faulty pressure switch.
- Solution: Check the spa pump and ensure proper water flow. Inspect the pressure switch for damage or debris.
Water Not Heating:
- Cause: Faulty heating element or incorrect wiring.
- Solution: Test the heating element for continuity. Verify all electrical connections.
Overheating:
- Cause: Malfunctioning high-limit sensor or blocked water flow.
- Solution: Inspect the high-limit sensor and replace if necessary. Clear any obstructions in the water flow.
Tripped Circuit Breaker:
- Cause: Short circuit or excessive current draw.
- Solution: Inspect the wiring for damage. Ensure the heater is not drawing more current than the circuit can handle.
Solutions and Tips for Troubleshooting
- Use a multimeter to test electrical connections and components.
- Regularly clean the heater assembly to prevent debris buildup.
- Consult the Balboa user manual for detailed troubleshooting steps and diagrams.
- If issues persist, contact a qualified technician or Balboa customer support for assistance.