How to Use DFRobot Gravity Analoge Troebelheidssensor: Examples, Pinouts, and Specs
Introduction
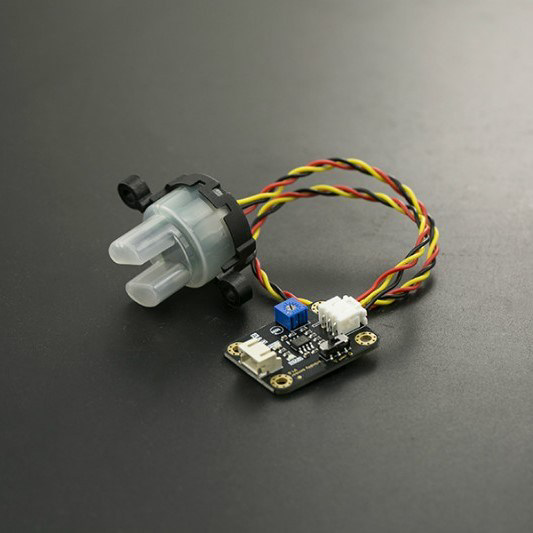
The DFRobot Gravity Analog Turbidity Sensor is an electronic device designed to measure the turbidity of a liquid. Turbidity is the cloudiness or haziness of a fluid caused by large numbers of individual particles that are generally invisible to the naked eye, similar to smoke in the air. The sensor works by emitting light into the liquid and measuring the intensity of light that is scattered by the particles in the water. This sensor is commonly used in applications such as water quality testing, environmental monitoring, and in control systems for industrial water filtration.
Explore Projects Built with DFRobot Gravity Analoge Troebelheidssensor
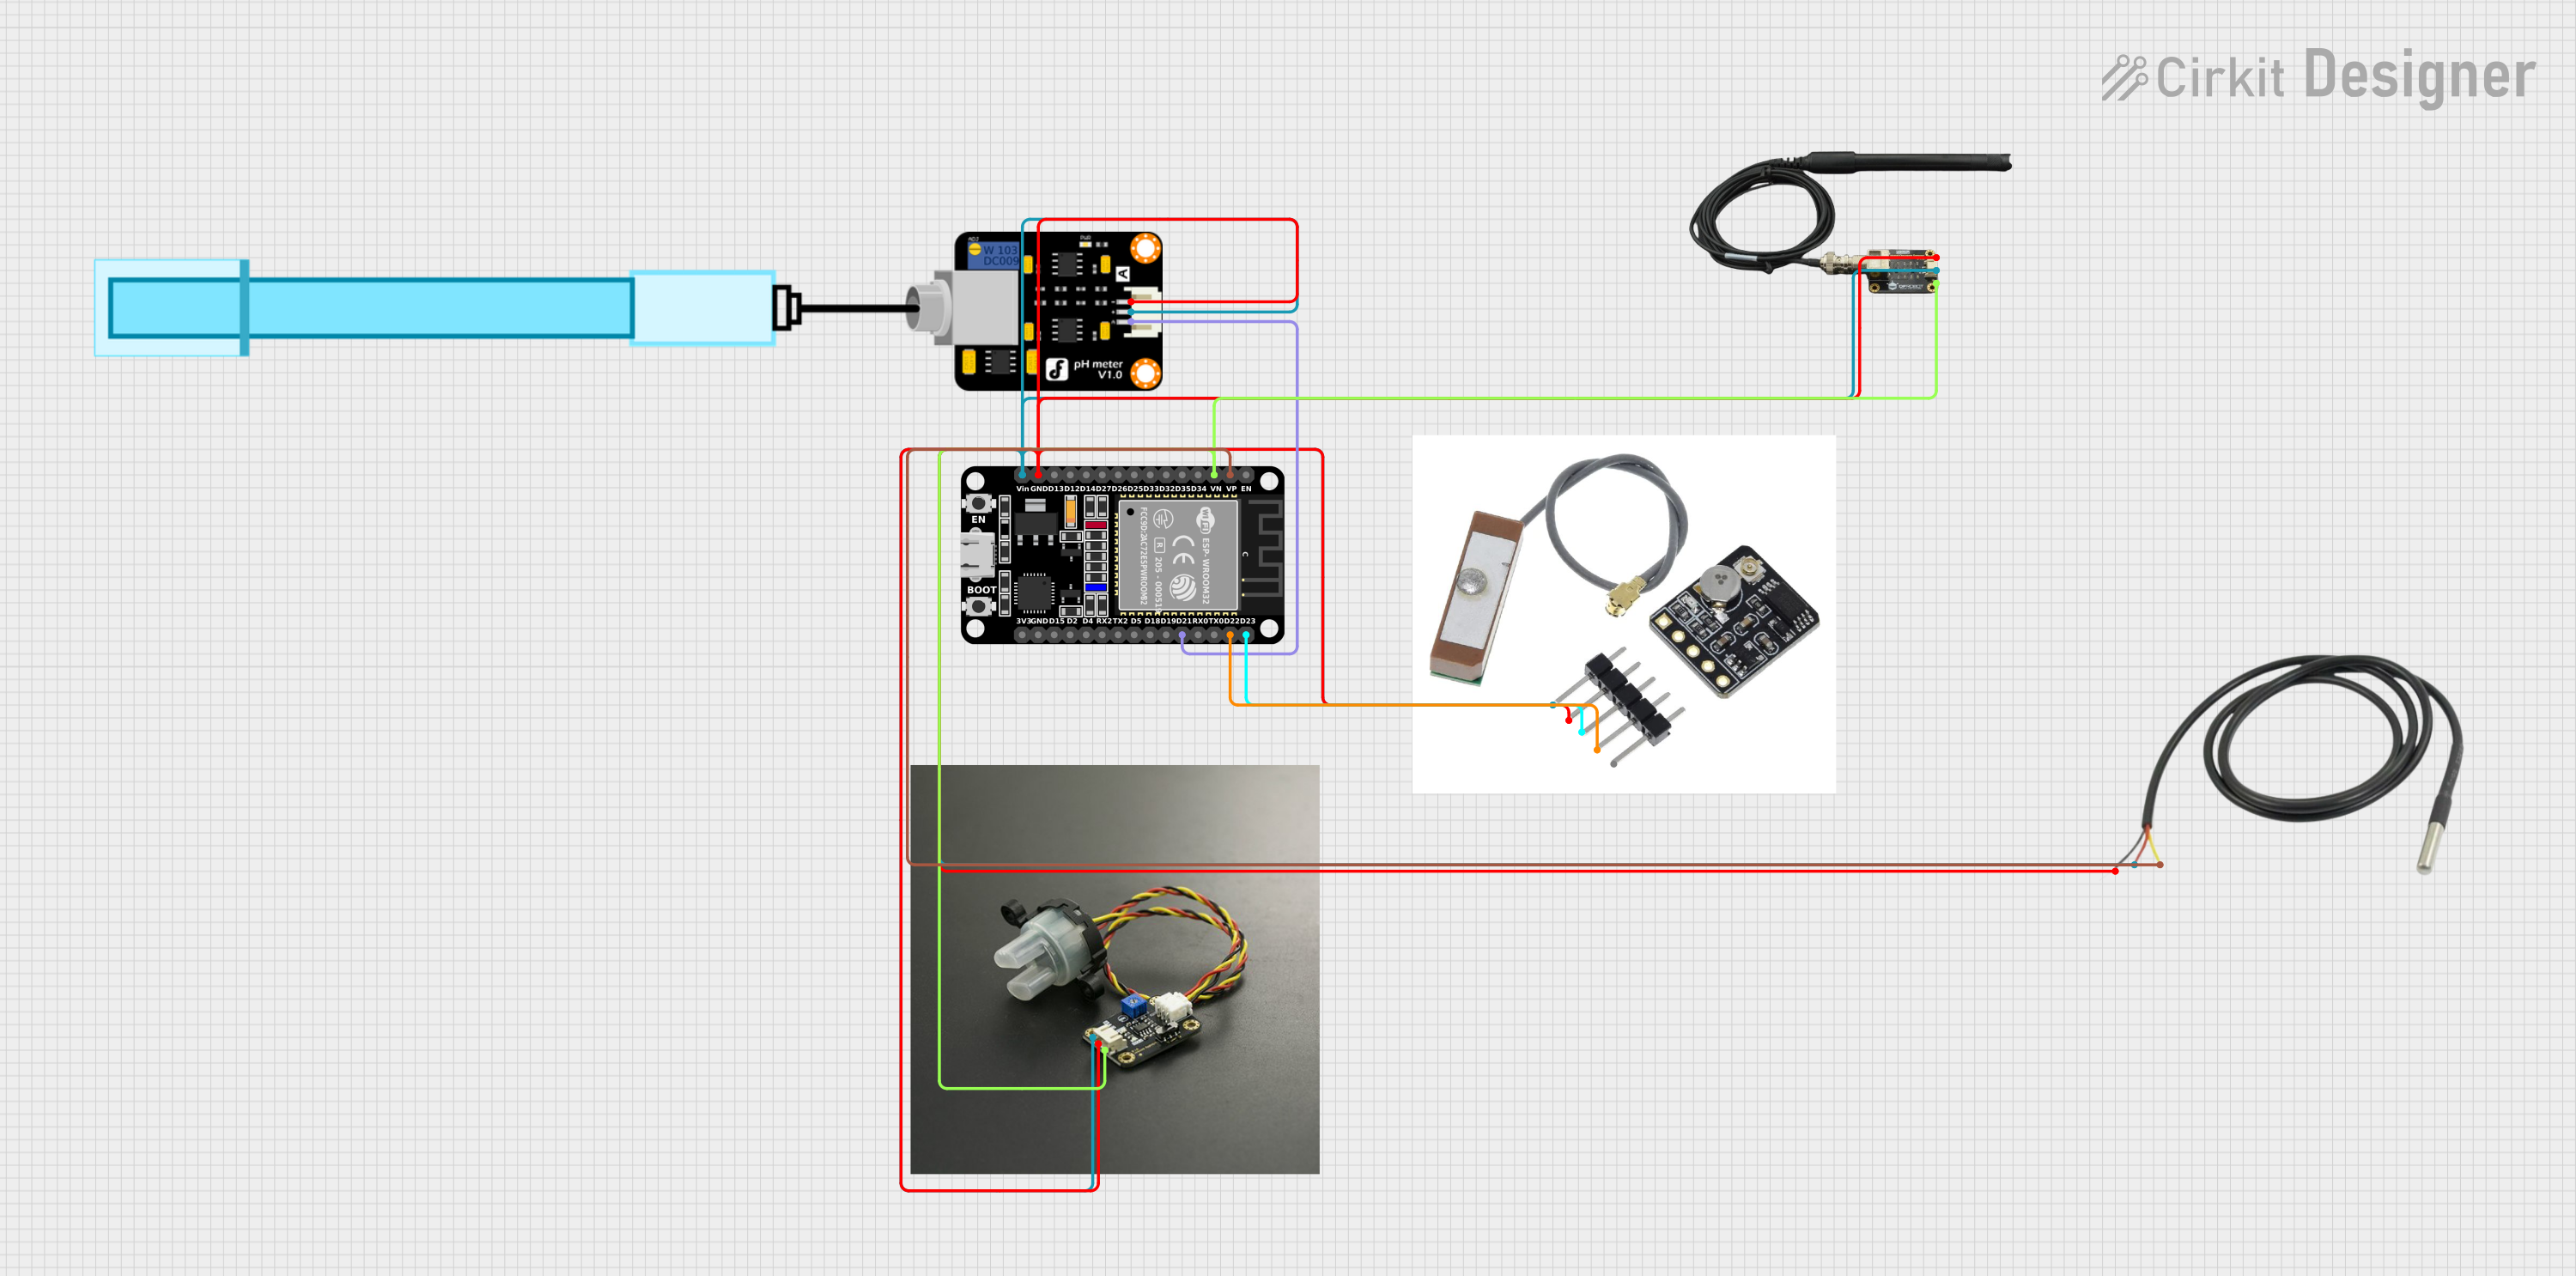
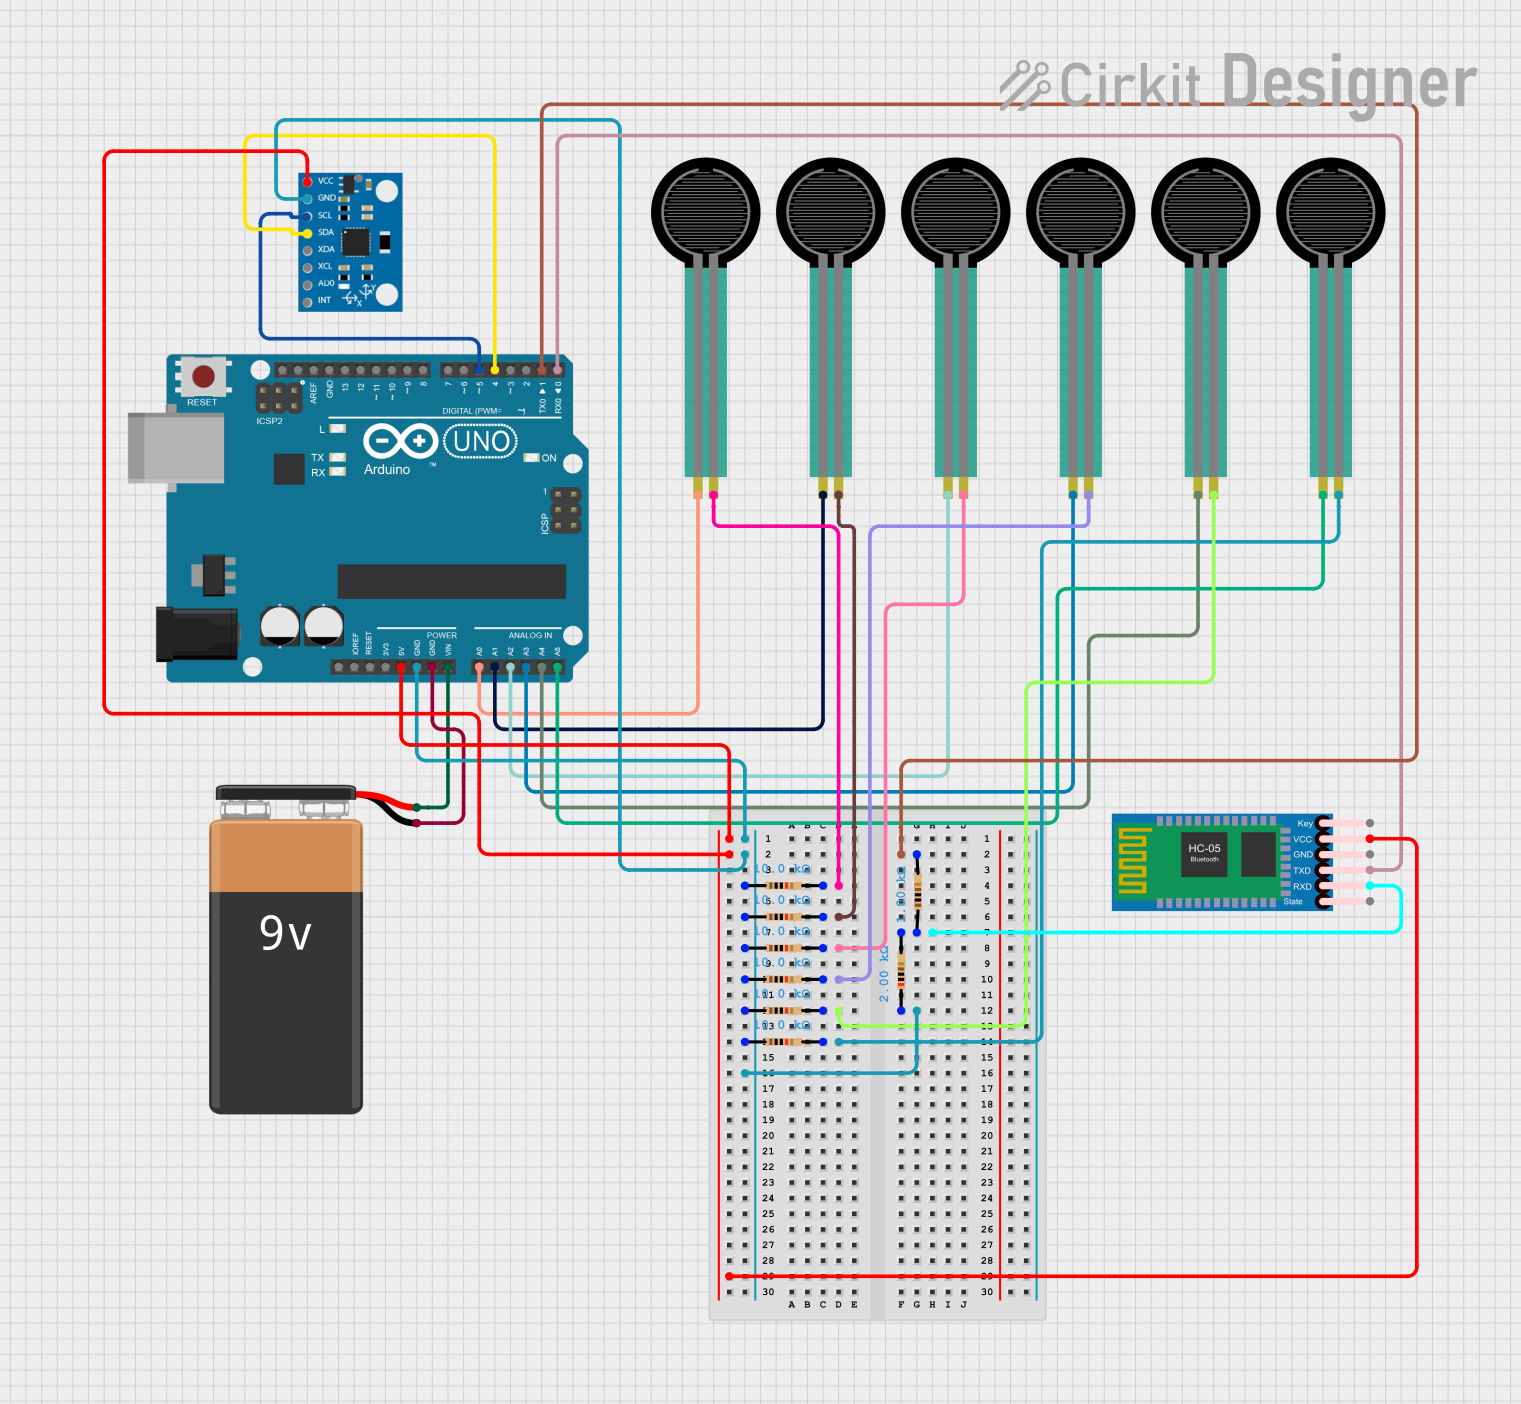
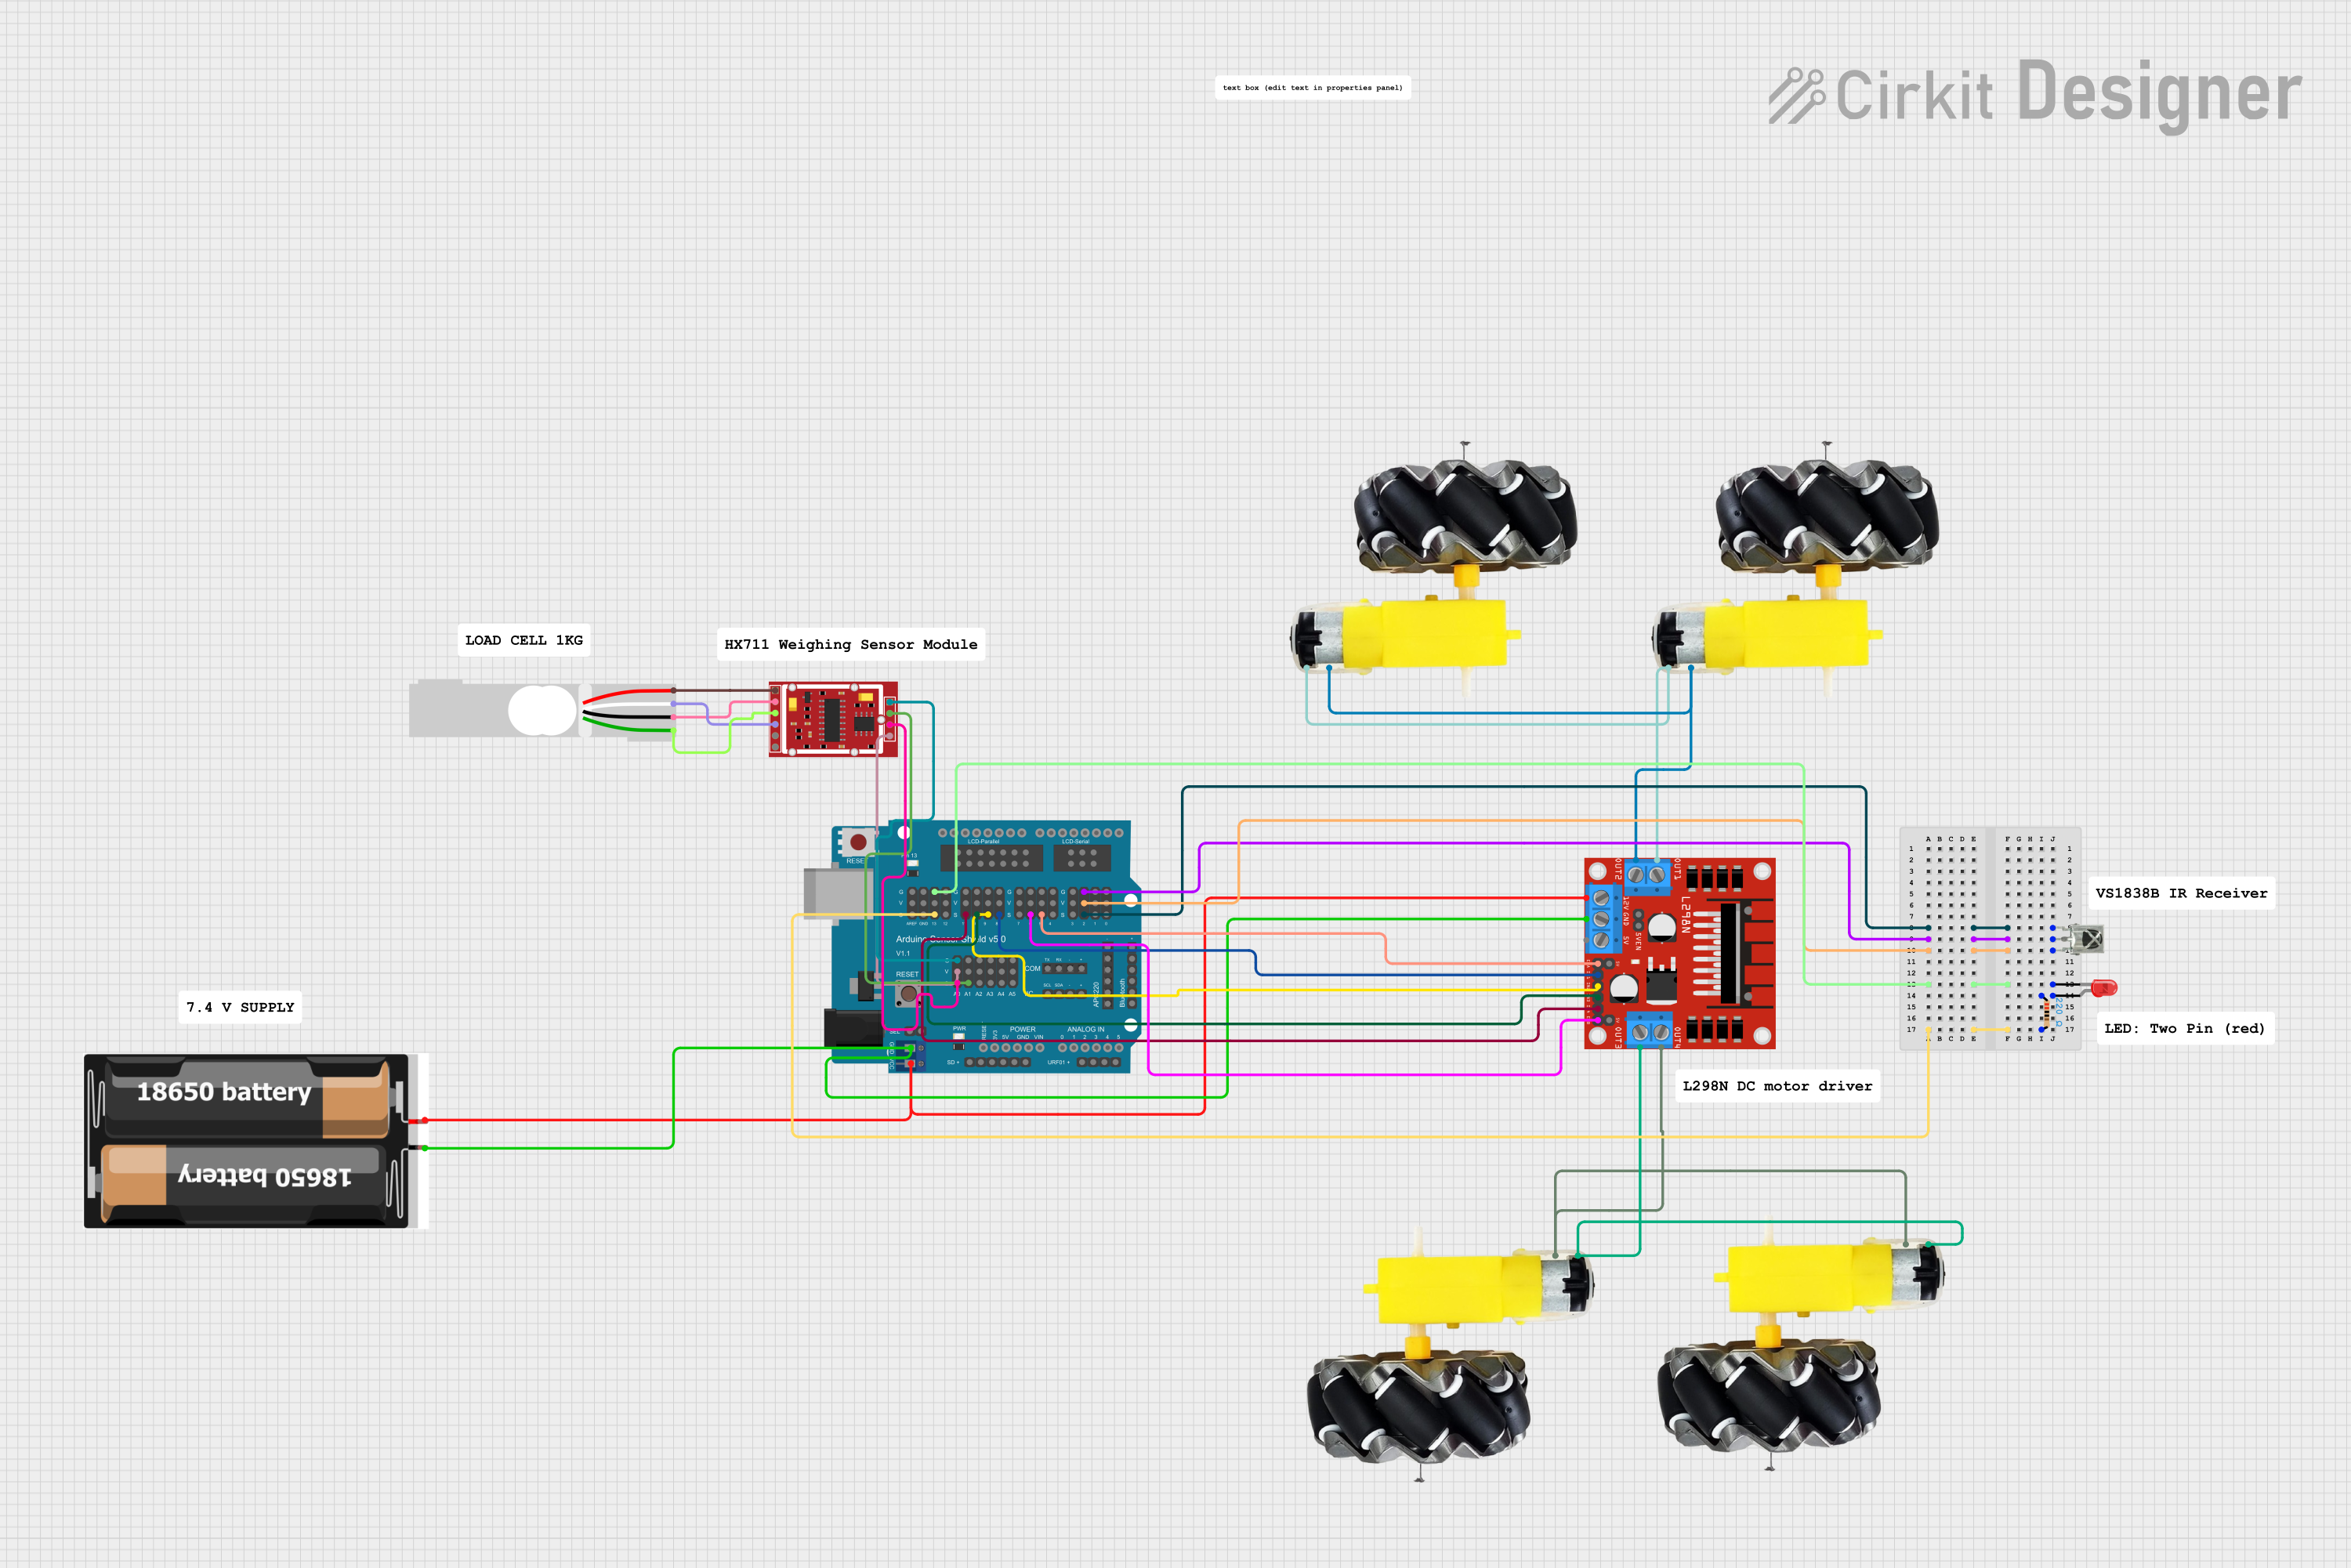

Explore Projects Built with DFRobot Gravity Analoge Troebelheidssensor
Technical Specifications
Key Technical Details
- Operating Voltage: 5V DC
- Output Signal: Analog (0-4.5V)
- Measurement Range: 0-3000 NTU (Nephelometric Turbidity Units)
- Accuracy: ±5% F.S. (Full Scale)
- Response Time: <500ms
- Operating Temperature: 5°C to 90°C
- Storage Temperature: -30°C to 90°C
- Cable Length: 30 cm
Pin Configuration and Descriptions
| Pin Number | Description |
|---|---|
| 1 | GND (Ground) |
| 2 | VCC (5V Input) |
| 3 | Analog Output Signal |
Usage Instructions
Integration with a Circuit
To use the DFRobot Gravity Analog Turbidity Sensor in a circuit:
- Connect the GND pin to the ground of the power supply.
- Connect the VCC pin to a 5V supply from the power source.
- Connect the Analog Output Signal to an analog input on your microcontroller (e.g., Arduino).
Important Considerations and Best Practices
- Ensure that the sensor is properly calibrated before use to obtain accurate measurements.
- Avoid exposing the sensor to direct sunlight as this can affect the readings.
- Keep the sensor clean and free from debris to maintain its accuracy.
- Do not immerse the sensor beyond the indicated depth limit to prevent damage.
- Use a stable power supply to prevent fluctuations in the sensor readings.
Example Code for Arduino UNO
// Define the analog input pin where the sensor is connected
const int turbidityPin = A0;

void setup() {
  // Initialize serial communication at 9600 bits per second:
  Serial.begin(9600);
}

void loop() {
  // Read the value from the sensor:
  int sensorValue = analogRead(turbidityPin);
  float voltage = sensorValue * (5.0 / 1023.0); // Convert to voltage

  // Print out the value in volts to the serial monitor
  Serial.print("Turbidity Voltage: ");
  Serial.print(voltage);
  Serial.println(" V");

  // Delay for a bit to get stable readings
  delay(1000);
}
Troubleshooting and FAQs
Common Issues
- Inaccurate Readings: Ensure the sensor is calibrated correctly. Avoid any external light interference.
- No Readings: Check the wiring and connections. Ensure the sensor is receiving 5V power supply.
- Erratic Readings: Stabilize the power supply and avoid touching the sensor or the water during measurement.
Solutions and Tips for Troubleshooting
- Calibration: Perform calibration with a solution of known turbidity. Adjust the readings accordingly.
- Cleaning: Regularly clean the sensor's optical components with a soft, damp cloth.
- Shielding: Use a shield to block external light sources if necessary.
FAQs
Q: Can the sensor be used in saltwater? A: Yes, but ensure that the sensor is thoroughly rinsed with fresh water after use to prevent corrosion.
Q: What is the sensor's lifespan? A: With proper maintenance and use within the recommended conditions, the sensor can last for several years.
Q: How often should the sensor be calibrated? A: Calibration frequency depends on usage, but it is recommended to calibrate the sensor before any critical measurements or after any significant handling or cleaning.