How to Use Laser diode: Examples, Pinouts, and Specs
Introduction
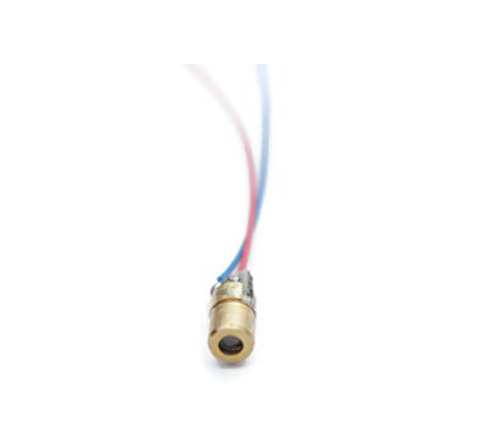
A laser diode, manufactured by Electronic Spices, is a semiconductor device known for its ability to emit coherent light through a process called stimulated emission. Laser diodes are widely used in various applications such as fiber-optic communications, barcode readers, laser pointers, CD/DVD/Blu-ray reading and writing, laser printing, and in medical equipment.
Explore Projects Built with Laser diode

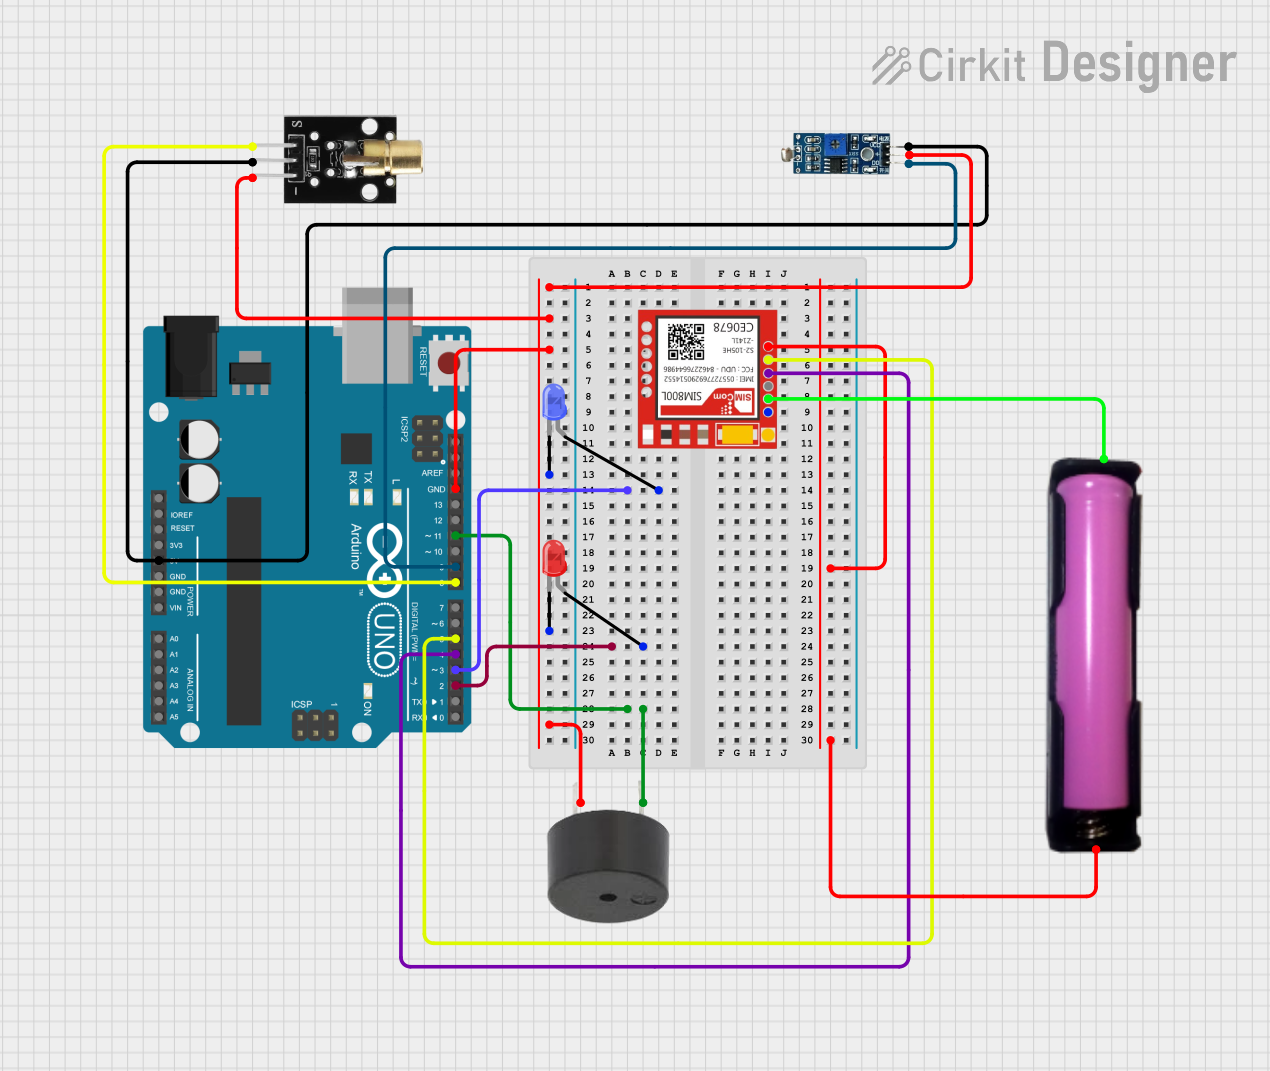
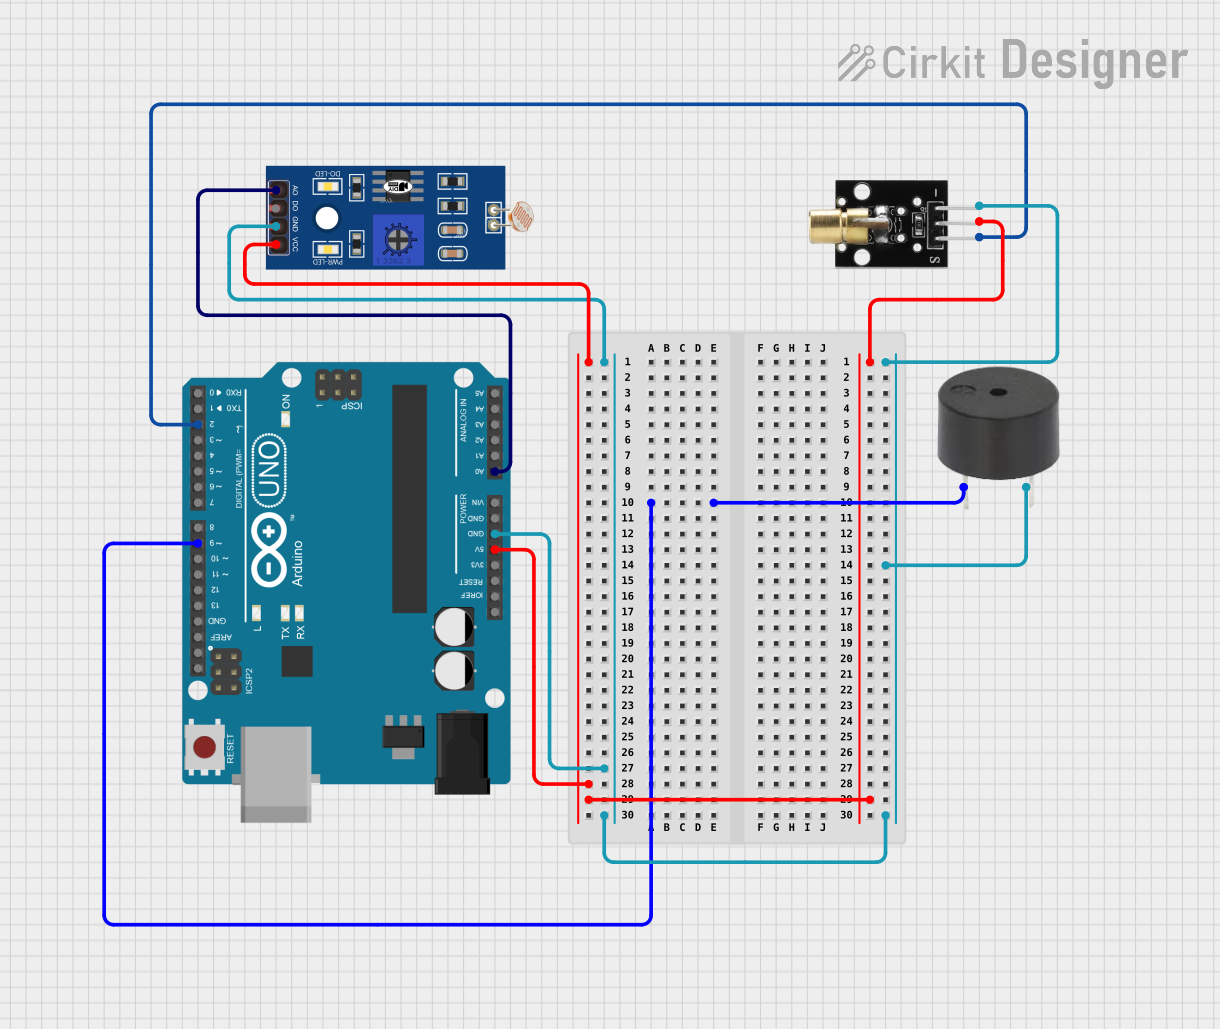
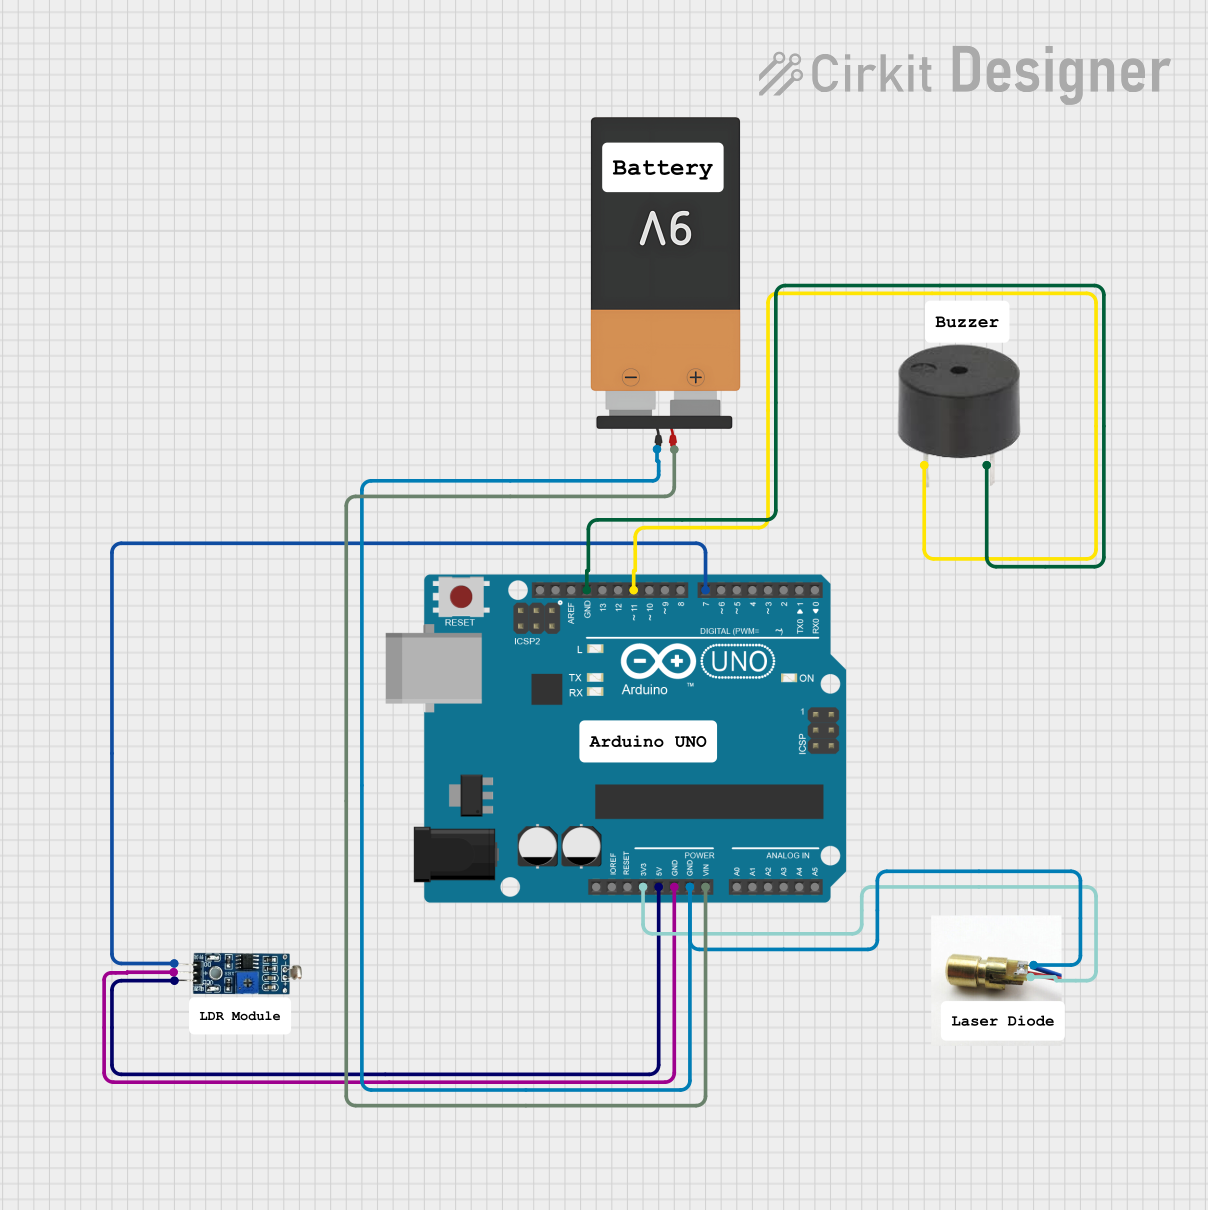
Explore Projects Built with Laser diode
Common Applications and Use Cases
- Optical communication
- Scanning and imaging devices
- Laser printing
- Medical diagnostics and treatments
- Material processing
- Consumer electronics
Technical Specifications
Key Technical Details
- Manufacturer: Electronic Spices
- Part ID: dblldhrlpo5
- Wavelength: Typically ranges from 400 nm to 1600 nm (varies by model)
- Output Power: Varies by model (e.g., 5 mW, 10 mW, etc.)
- Operating Voltage: Typically around 2.2V to 3.6V
- Operating Current: Depends on the model, often around 20 mA to 150 mA
- Threshold Current: The minimum current at which the diode starts to emit laser light
- Operating Temperature: -10°C to +60°C (varies by model)
Pin Configuration and Descriptions
| Pin Number | Description |
|---|---|
| 1 | Anode (+) |
| 2 | Cathode (-) |
Usage Instructions
How to Use the Component in a Circuit
- Power Supply: Ensure that the power supply matches the operating voltage and current requirements of the laser diode.
- Current Limiting: Always use a current limiting resistor or a constant current source to prevent overdriving the diode.
- Heat Sinking: Laser diodes generate heat during operation. Use appropriate heat sinking to maintain operational temperature.
- Avoid Direct Eye Exposure: Never look directly into the laser beam or point it at others. Use appropriate safety goggles that block the specific laser wavelength.
Important Considerations and Best Practices
- ESD Sensitivity: Laser diodes are sensitive to electrostatic discharge. Handle with proper ESD precautions.
- Reverse Voltage: Avoid applying reverse voltage as it can damage the diode.
- Modulation: If modulation is required, ensure it is within the diode's bandwidth capabilities.
- Lifetime: Operating the diode within specified limits ensures maximum lifetime.
Troubleshooting and FAQs
Common Issues
- Dim or No Laser Emission: Check if the diode is properly powered and the current is within specified limits. Ensure the diode is not damaged.
- Overheating: Verify that the heat sinking is adequate. Reduce the operating current if necessary.
- Intermittent Operation: Check for loose connections and ensure that the power supply is stable.
Solutions and Tips for Troubleshooting
- Use a Multimeter: To check for proper voltage and current.
- Check Connections: Ensure all connections are secure and correct.
- Replace the Diode: If the diode is damaged, it may need to be replaced.
FAQs
Q: Can I drive the laser diode directly from an Arduino pin? A: No, an Arduino pin cannot supply sufficient current and may not provide the necessary voltage. Use a driver circuit.
Q: What is the lifetime of a laser diode? A: The lifetime can vary widely based on usage, but typically tens of thousands of hours if operated within specifications.
Q: Is it safe to use a laser diode without goggles? A: No, always use safety goggles rated for the specific wavelength of the laser diode to prevent eye damage.
Example Arduino Code
Below is an example of how to control a laser diode using an Arduino UNO. This example assumes the use of a laser diode driver circuit.
const int laserPin = 3; // Laser diode connected to digital pin 3

void setup() {
  pinMode(laserPin, OUTPUT); // Set the laser pin as output
}

void loop() {
  digitalWrite(laserPin, HIGH); // Turn on the laser diode
  delay(1000);                  // Keep the laser on for 1 second
  digitalWrite(laserPin, LOW);  // Turn off the laser diode
  delay(1000);                  // Keep the laser off for 1 second
}
Note: The above code is a simple on-off example. Always ensure that the laser diode is driven through a proper driver circuit to regulate current and voltage as per the diode's specifications.