Cirkit Designer
Your all-in-one circuit design IDE
Home /
Component Documentation
How to Use AK80-9: Examples, Pinouts, and Specs
Introduction
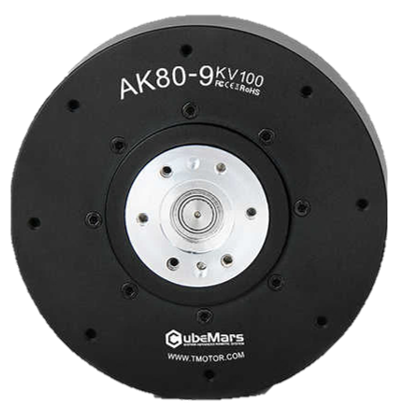
The AK80-9, manufactured by T-Motor, is a high-performance brushless DC motor specifically designed for robotics and automation applications. Known for its compact size, high torque, and efficiency, the AK80-9 is an ideal choice for projects requiring precise motor control and high power density.
Explore Projects Built with AK80-9
ESP32-Based Wi-Fi Controlled Robotic Car with OLED Display and Laser Shooting
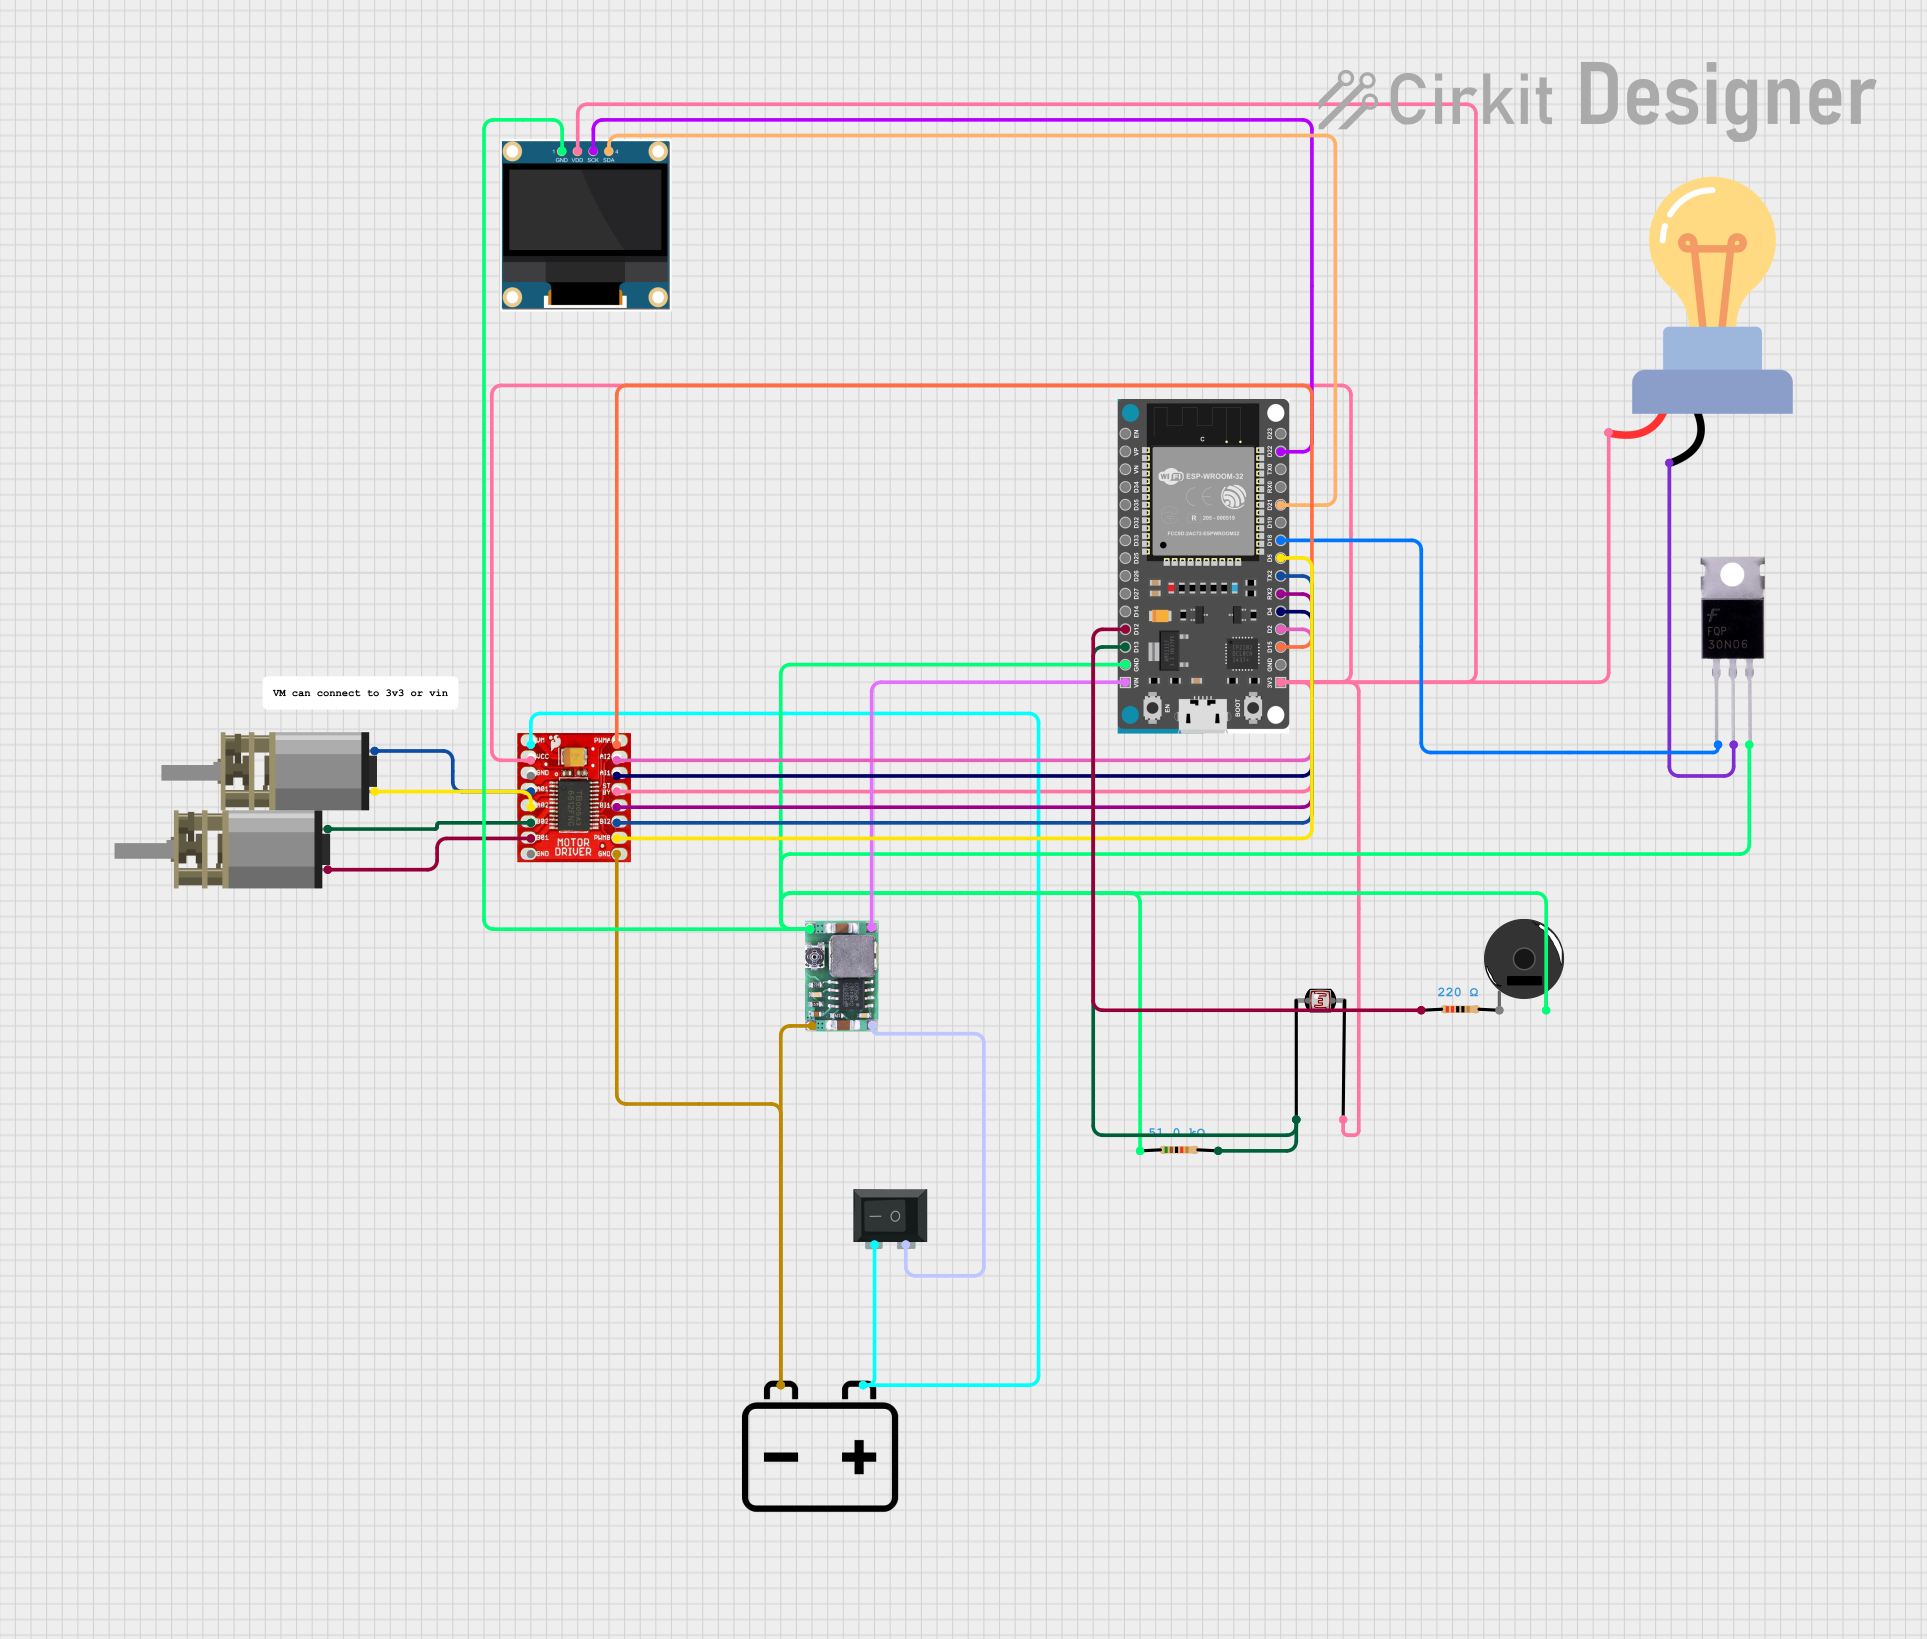
This circuit is a remote-controlled shooting game system using an ESP32 microcontroller, which interfaces with a PS3 controller to control two DC motors via a TB6612FNG motor driver, and a laser for shooting. The system includes an OLED display for game status, a photocell for detecting laser hits, and a piezo buzzer for sound feedback.
ESP32-Based Security System with RFID and Laser Tripwire

This circuit is designed for a comprehensive security and access control system with motion detection, access via RFID, and a break-beam sensor. It includes a solenoid lock controlled by a relay, visual and audible alerts, and a robust power management system with solar and battery backup to ensure uninterrupted operation.
ESP32-Based Security System with RFID, PIR Sensor, and Laser Modules

This circuit is designed for a security and access control system with motion detection, beam-break detection, RFID-based access, and user input via a keypad. It is managed by an ESP32 microcontroller, which also controls an OLED display and an electric lock through a relay. The system is powered by a solar panel with a charge controller and UPS battery, with buck converters for voltage regulation.
Arduino Pro Mini-Based Battery-Powered Laser Emitter with Temperature Sensing and OLED Display
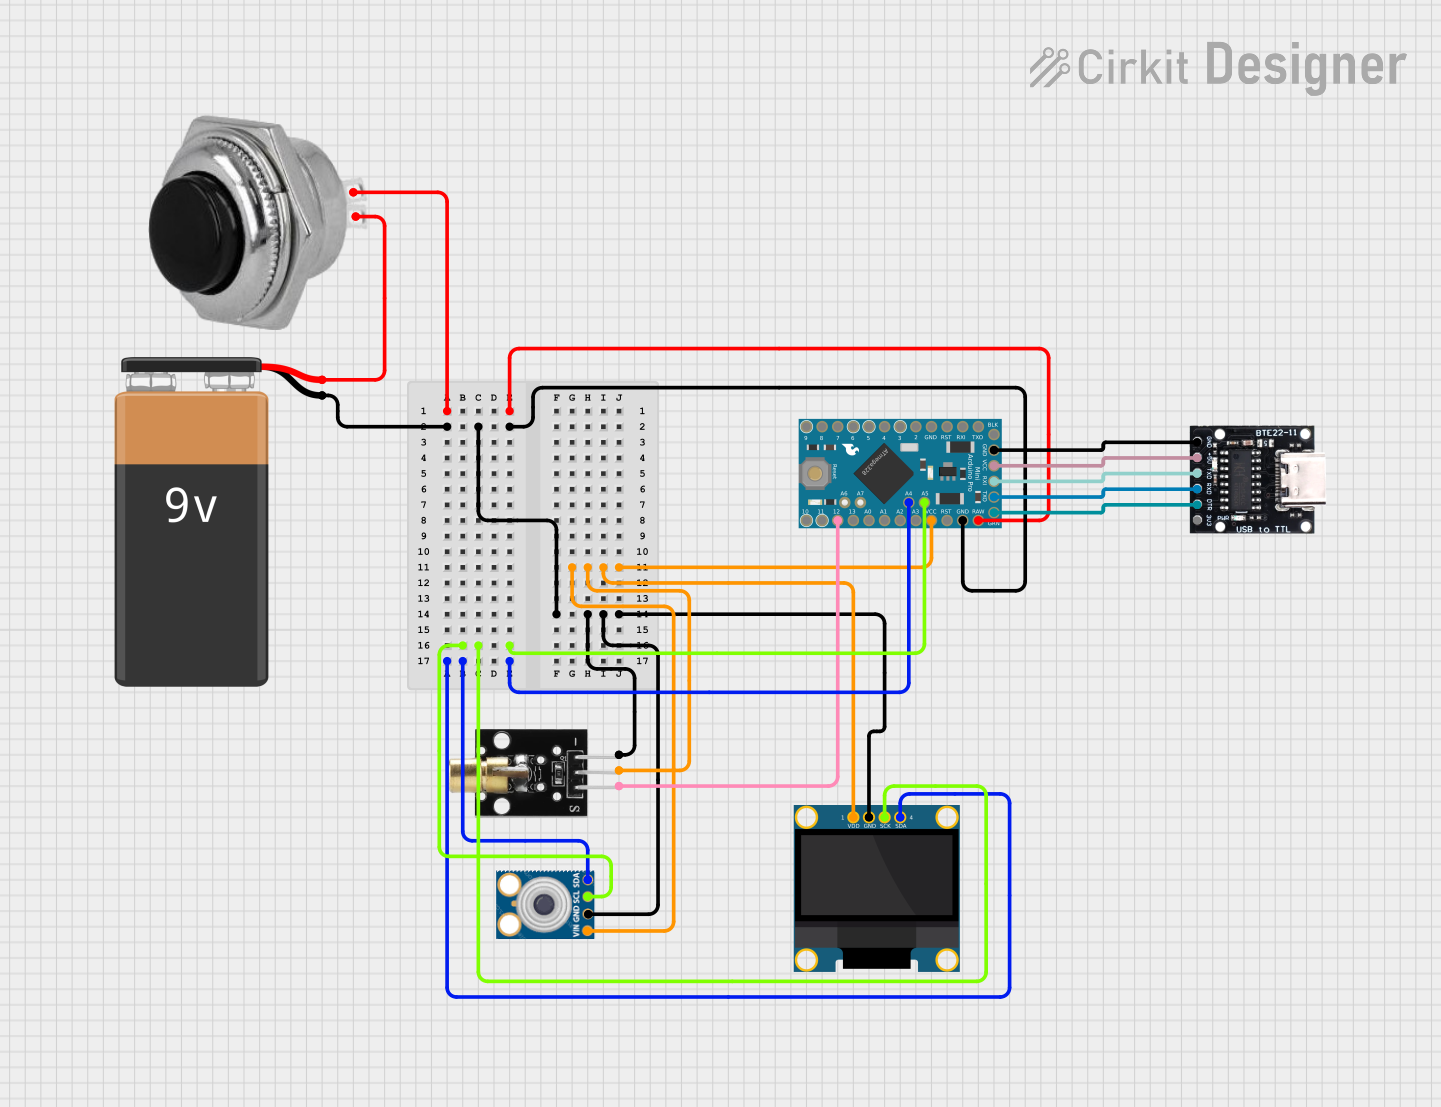
This circuit is a sensor and display system powered by a 9V battery, featuring an Arduino Pro Mini microcontroller. It includes a momentary switch to control power, a KY-008 laser emitter, an MLX90614 temperature sensor, and an OLED display for output. The system is designed to read temperature data and display it on the OLED screen, with the laser emitter potentially used for targeting or indication purposes.
Explore Projects Built with AK80-9
ESP32-Based Wi-Fi Controlled Robotic Car with OLED Display and Laser Shooting
This circuit is a remote-controlled shooting game system using an ESP32 microcontroller, which interfaces with a PS3 controller to control two DC motors via a TB6612FNG motor driver, and a laser for shooting. The system includes an OLED display for game status, a photocell for detecting laser hits, and a piezo buzzer for sound feedback.
ESP32-Based Security System with RFID and Laser Tripwire
This circuit is designed for a comprehensive security and access control system with motion detection, access via RFID, and a break-beam sensor. It includes a solenoid lock controlled by a relay, visual and audible alerts, and a robust power management system with solar and battery backup to ensure uninterrupted operation.
ESP32-Based Security System with RFID, PIR Sensor, and Laser Modules
This circuit is designed for a security and access control system with motion detection, beam-break detection, RFID-based access, and user input via a keypad. It is managed by an ESP32 microcontroller, which also controls an OLED display and an electric lock through a relay. The system is powered by a solar panel with a charge controller and UPS battery, with buck converters for voltage regulation.
Arduino Pro Mini-Based Battery-Powered Laser Emitter with Temperature Sensing and OLED Display
This circuit is a sensor and display system powered by a 9V battery, featuring an Arduino Pro Mini microcontroller. It includes a momentary switch to control power, a KY-008 laser emitter, an MLX90614 temperature sensor, and an OLED display for output. The system is designed to read temperature data and display it on the OLED screen, with the laser emitter potentially used for targeting or indication purposes.
Common Applications and Use Cases
- Robotics: Used in robotic arms, mobile robots, and humanoid robots for precise movement and control.
- Automation: Ideal for automated machinery and conveyor systems.
- Drones: Suitable for UAVs requiring high torque and efficiency.
- Medical Devices: Used in medical robots and automated surgical instruments.
Technical Specifications
Key Technical Details
| Parameter | Value |
|---|---|
| Rated Voltage | 24V |
| Rated Current | 5A |
| Peak Current | 15A |
| Rated Torque | 1.2 Nm |
| Peak Torque | 3.5 Nm |
| No-load Speed | 4000 RPM |
| Motor Efficiency | 85% |
| Weight | 0.5 kg |
| Dimensions | 80mm x 80mm x 90mm |
Pin Configuration and Descriptions
| Pin Number | Pin Name | Description |
|---|---|---|
| 1 | VCC | Power supply (24V) |
| 2 | GND | Ground |
| 3 | HALL_A | Hall sensor A |
| 4 | HALL_B | Hall sensor B |
| 5 | HALL_C | Hall sensor C |
| 6 | PHASE_A | Motor phase A |
| 7 | PHASE_B | Motor phase B |
| 8 | PHASE_C | Motor phase C |
Usage Instructions
How to Use the Component in a Circuit
- Power Supply: Connect the VCC pin to a 24V power supply and the GND pin to the ground.
- Motor Phases: Connect the PHASE_A, PHASE_B, and PHASE_C pins to the corresponding motor driver outputs.
- Hall Sensors: Connect the HALL_A, HALL_B, and HALL_C pins to the motor driver or microcontroller for feedback.
Important Considerations and Best Practices
- Heat Dissipation: Ensure proper heat dissipation to avoid overheating. Use heat sinks or cooling fans if necessary.
- Current Limiting: Use a motor driver with current limiting features to protect the motor from overcurrent conditions.
- Proper Wiring: Double-check all connections to avoid short circuits and ensure reliable operation.
- Calibration: Calibrate the motor driver settings for optimal performance and efficiency.
Example Code for Arduino UNO
#include <Arduino.h>

// Define pin connections
const int hallA = 2; // Hall sensor A connected to pin 2
const int hallB = 3; // Hall sensor B connected to pin 3
const int hallC = 4; // Hall sensor C connected to pin 4

void setup() {
  // Initialize serial communication
  Serial.begin(9600);

  // Set hall sensor pins as input
  pinMode(hallA, INPUT);
  pinMode(hallB, INPUT);
  pinMode(hallC, INPUT);
}

void loop() {
  // Read hall sensor values
  int hallAState = digitalRead(hallA);
  int hallBState = digitalRead(hallB);
  int hallCState = digitalRead(hallC);

  // Print hall sensor states to serial monitor
  Serial.print("Hall A: ");
  Serial.print(hallAState);
  Serial.print(" Hall B: ");
  Serial.print(hallBState);
  Serial.print(" Hall C: ");
  Serial.println(hallCState);

  // Add motor control logic here

  delay(100); // Delay for readability
}
Troubleshooting and FAQs
Common Issues Users Might Face
Motor Not Spinning:
- Solution: Check power supply connections and ensure the motor driver is properly configured.
Overheating:
- Solution: Ensure proper ventilation and consider adding heat sinks or cooling fans.
Erratic Movement:
- Solution: Verify hall sensor connections and ensure they are correctly wired.
Solutions and Tips for Troubleshooting
- Check Connections: Ensure all connections are secure and correctly wired.
- Use Proper Power Supply: Verify that the power supply meets the motor's voltage and current requirements.
- Monitor Temperature: Regularly check the motor temperature and ensure it stays within safe limits.
- Consult Datasheet: Refer to the manufacturer's datasheet for detailed specifications and guidelines.
By following this documentation, users can effectively integrate the AK80-9 brushless DC motor into their projects, ensuring reliable and efficient performance.