
Cirkit Designer LogoCirkit DesignerYour all-in-one circuit design IDE Launch Cirkit Designer App

How to Use Fermion: MEMS Ammonia NH3 Gas Detection Sensor (Breakout, 1-300ppm): Examples, Pinouts, and Specs

Image of Fermion: MEMS Ammonia NH3 Gas Detection Sensor (Breakout, 1-300ppm)Design with Fermion: MEMS Ammonia NH3 Gas Detection Sensor (Breakout, 1-300ppm) in Cirkit Designer

Introduction

The :Fermion: MEMS Ammonia NH3 Gas Detection Sensor is a high-precision module designed to detect ammonia gas concentrations in the range of 1-300ppm. Utilizing advanced MEMS (Micro-Electro-Mechanical Systems) technology, this sensor offers reliable and accurate measurements, making it ideal for various environmental monitoring applications. Common use cases include air quality monitoring, industrial safety, and agricultural applications.

Explore Projects Built with Fermion: MEMS Ammonia NH3 Gas Detection Sensor (Breakout, 1-300ppm)

Use Cirkit Designer to design, explore, and prototype these projects online. Some projects support real-time simulation. Click "Open Project" to start designing instantly!
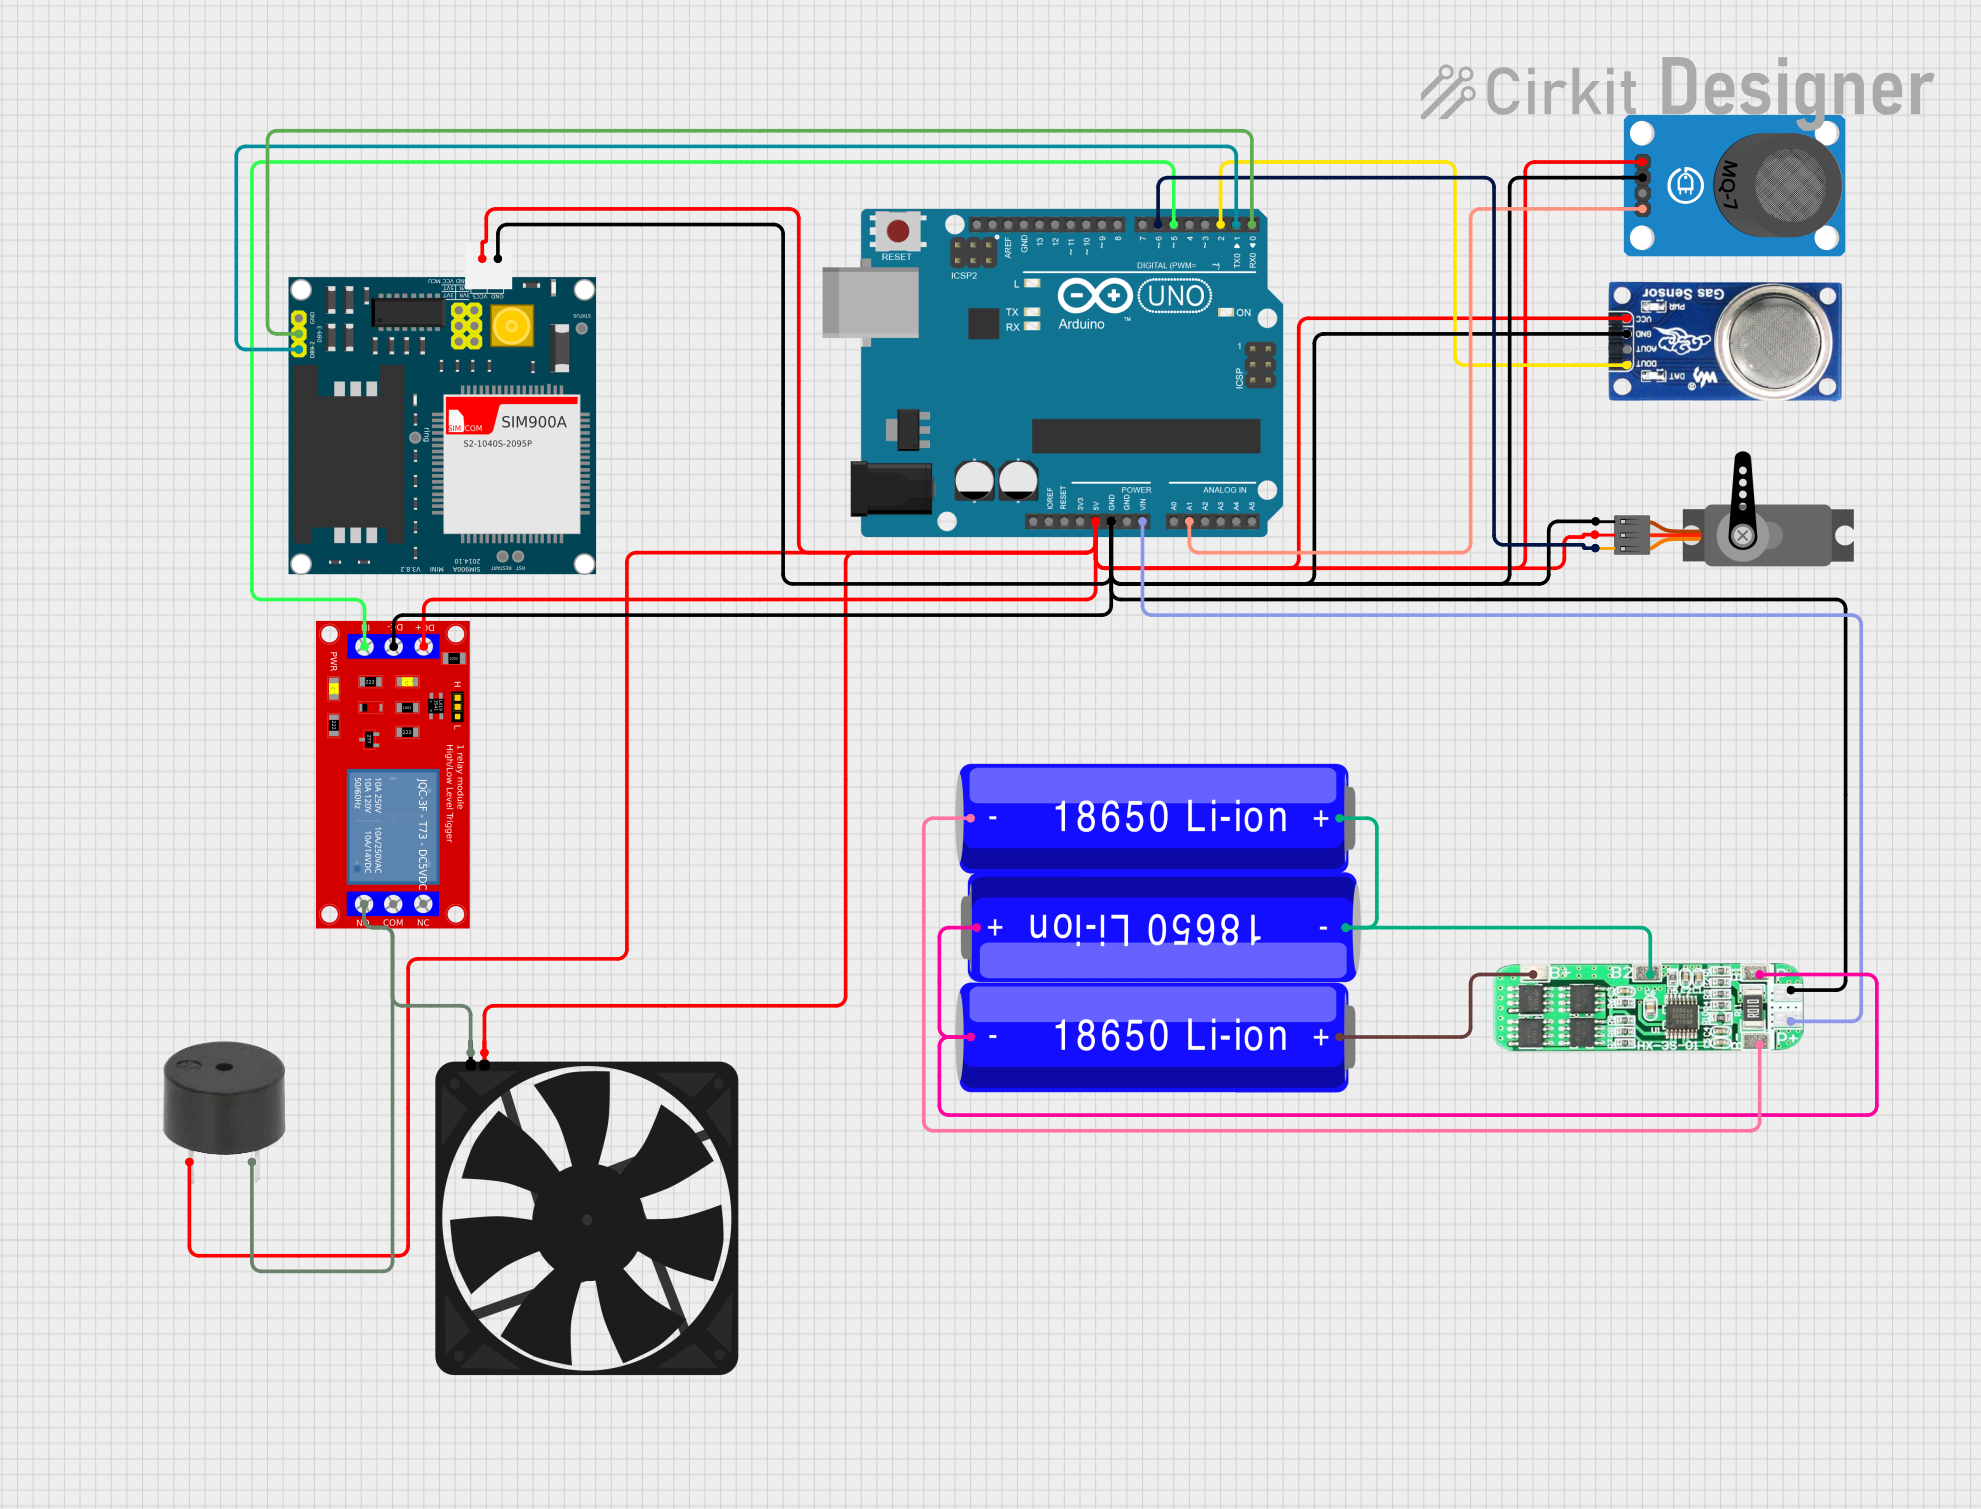
Image of Arduino UNO Based Gas Leak Detector with GSM Notification and Servo Valve Control: A project utilizing Fermion: MEMS Ammonia NH3 Gas Detection Sensor (Breakout, 1-300ppm) in a practical application

Arduino UNO Based Gas Leak Detector with GSM Notification and Servo Valve Control

This circuit is designed as a gas leakage detection system with SMS alert capabilities. It uses an Arduino UNO to monitor MQ-6 and MQ-7 gas sensors for LPG and CO levels, respectively, and activates a servo-controlled valve, buzzer, and exhaust fan if gas concentrations exceed preset thresholds. Additionally, the system uses a SIM900A GSM module to send SMS alerts in case of gas detection, and it is powered by a series of 18650 Li-ion batteries managed by a protection board.

Open Project in Cirkit Designer
Technical Specifications

Key Technical Details

Parameter Value
Detection Range 1-300 ppm
Operating Voltage 3.3V - 5V
Operating Current < 10mA
Response Time < 30 seconds
Recovery Time < 60 seconds
Operating Temperature -20°C to 50°C
Humidity Range 15% - 90% RH (non-condensing)

Pin Configuration and Descriptions

Pin Name Description
1 VCC Power supply (3.3V - 5V)
2 GND Ground
3 AOUT Analog output signal
4 DOUT Digital output signal (threshold)

Usage Instructions

How to Use the Component in a Circuit

  1. Power Supply: Connect the VCC pin to a 3.3V or 5V power supply and the GND pin to the ground.
  2. Analog Output: Connect the AOUT pin to an analog input pin on your microcontroller to read the ammonia concentration.
  3. Digital Output: Connect the DOUT pin to a digital input pin on your microcontroller to detect if the ammonia concentration exceeds a predefined threshold.

Important Considerations and Best Practices

Example Code for Arduino UNO

// Include necessary libraries
const int analogPin = A0; // Analog input pin connected to AOUT
const int digitalPin = 2; // Digital input pin connected to DOUT

void setup() {
  Serial.begin(9600); // Initialize serial communication at 9600 baud
  pinMode(digitalPin, INPUT); // Set digital pin as input
}

void loop() {
  int analogValue = analogRead(analogPin); // Read the analog value
  int digitalValue = digitalRead(digitalPin); // Read the digital value

  // Convert the analog value to a voltage
  float voltage = analogValue * (5.0 / 1023.0);

  // Print the analog value and voltage to the serial monitor
  Serial.print("Analog Value: ");
  Serial.print(analogValue);
  Serial.print(" - Voltage: ");
  Serial.print(voltage);
  Serial.println("V");

  // Check if the digital output is high
  if (digitalValue == HIGH) {
    Serial.println("Ammonia concentration exceeds threshold!");
  } else {
    Serial.println("Ammonia concentration is below threshold.");
  }

  delay(1000); // Wait for 1 second before the next reading
}

Troubleshooting and FAQs

Common Issues Users Might Face

  1. Inaccurate Readings: Ensure the sensor has been calibrated and has had sufficient warm-up time.
  2. No Output Signal: Check the power supply connections and ensure the sensor is receiving the correct voltage.
  3. Fluctuating Readings: Verify that the power supply is stable and that the sensor is placed in an area with consistent airflow.

Solutions and Tips for Troubleshooting

By following this documentation, users can effectively integrate the :Fermion: MEMS Ammonia NH3 Gas Detection Sensor into their projects, ensuring accurate and reliable ammonia gas detection.