How to Use XH-A158 - Pam8403 (2X5W Amplifier with Bluetooth 5.0): Examples, Pinouts, and Specs
Introduction
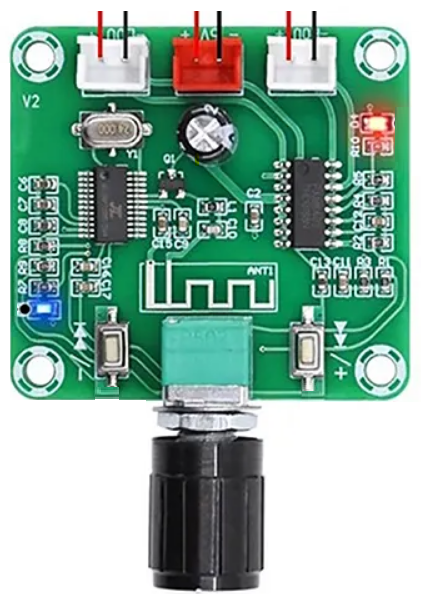
The XH-A158 is a compact audio amplifier module designed to deliver high-quality sound output with minimal power consumption. It features the PAM8403 amplifier chip, which provides 2x5W stereo output, and integrates Bluetooth 5.0 for seamless wireless audio streaming. This module is ideal for DIY audio projects, portable speaker systems, and other applications requiring a small yet powerful audio amplifier.
Explore Projects Built with XH-A158 - Pam8403 (2X5W Amplifier with Bluetooth 5.0)


Explore Projects Built with XH-A158 - Pam8403 (2X5W Amplifier with Bluetooth 5.0)
Common Applications
- DIY Bluetooth speakers
- Audio enhancement for small electronic projects
- Portable sound systems
- Wireless audio streaming for home automation systems
Technical Specifications
Below are the key technical details of the XH-A158 module:
| Parameter | Specification |
|---|---|
| Operating Voltage | 5V DC |
| Output Power | 2x5W (stereo) |
| Amplifier Chip | PAM8403 |
| Bluetooth Version | 5.0 |
| Frequency Response | 20Hz - 20kHz |
| Signal-to-Noise Ratio | ≥90dB |
| Input Modes | Bluetooth and AUX (3.5mm jack) |
| Dimensions | 45mm x 36mm x 13mm |
Pin Configuration and Descriptions
The XH-A158 module has the following pin configuration:
| Pin Name | Description |
|---|---|
| VCC | Power input (5V DC) |
| GND | Ground |
| L+ | Left channel positive speaker output |
| L- | Left channel negative speaker output |
| R+ | Right channel positive speaker output |
| R- | Right channel negative speaker output |
| AUX IN | 3.5mm audio input jack for wired audio sources |
Usage Instructions
How to Use the XH-A158 in a Circuit
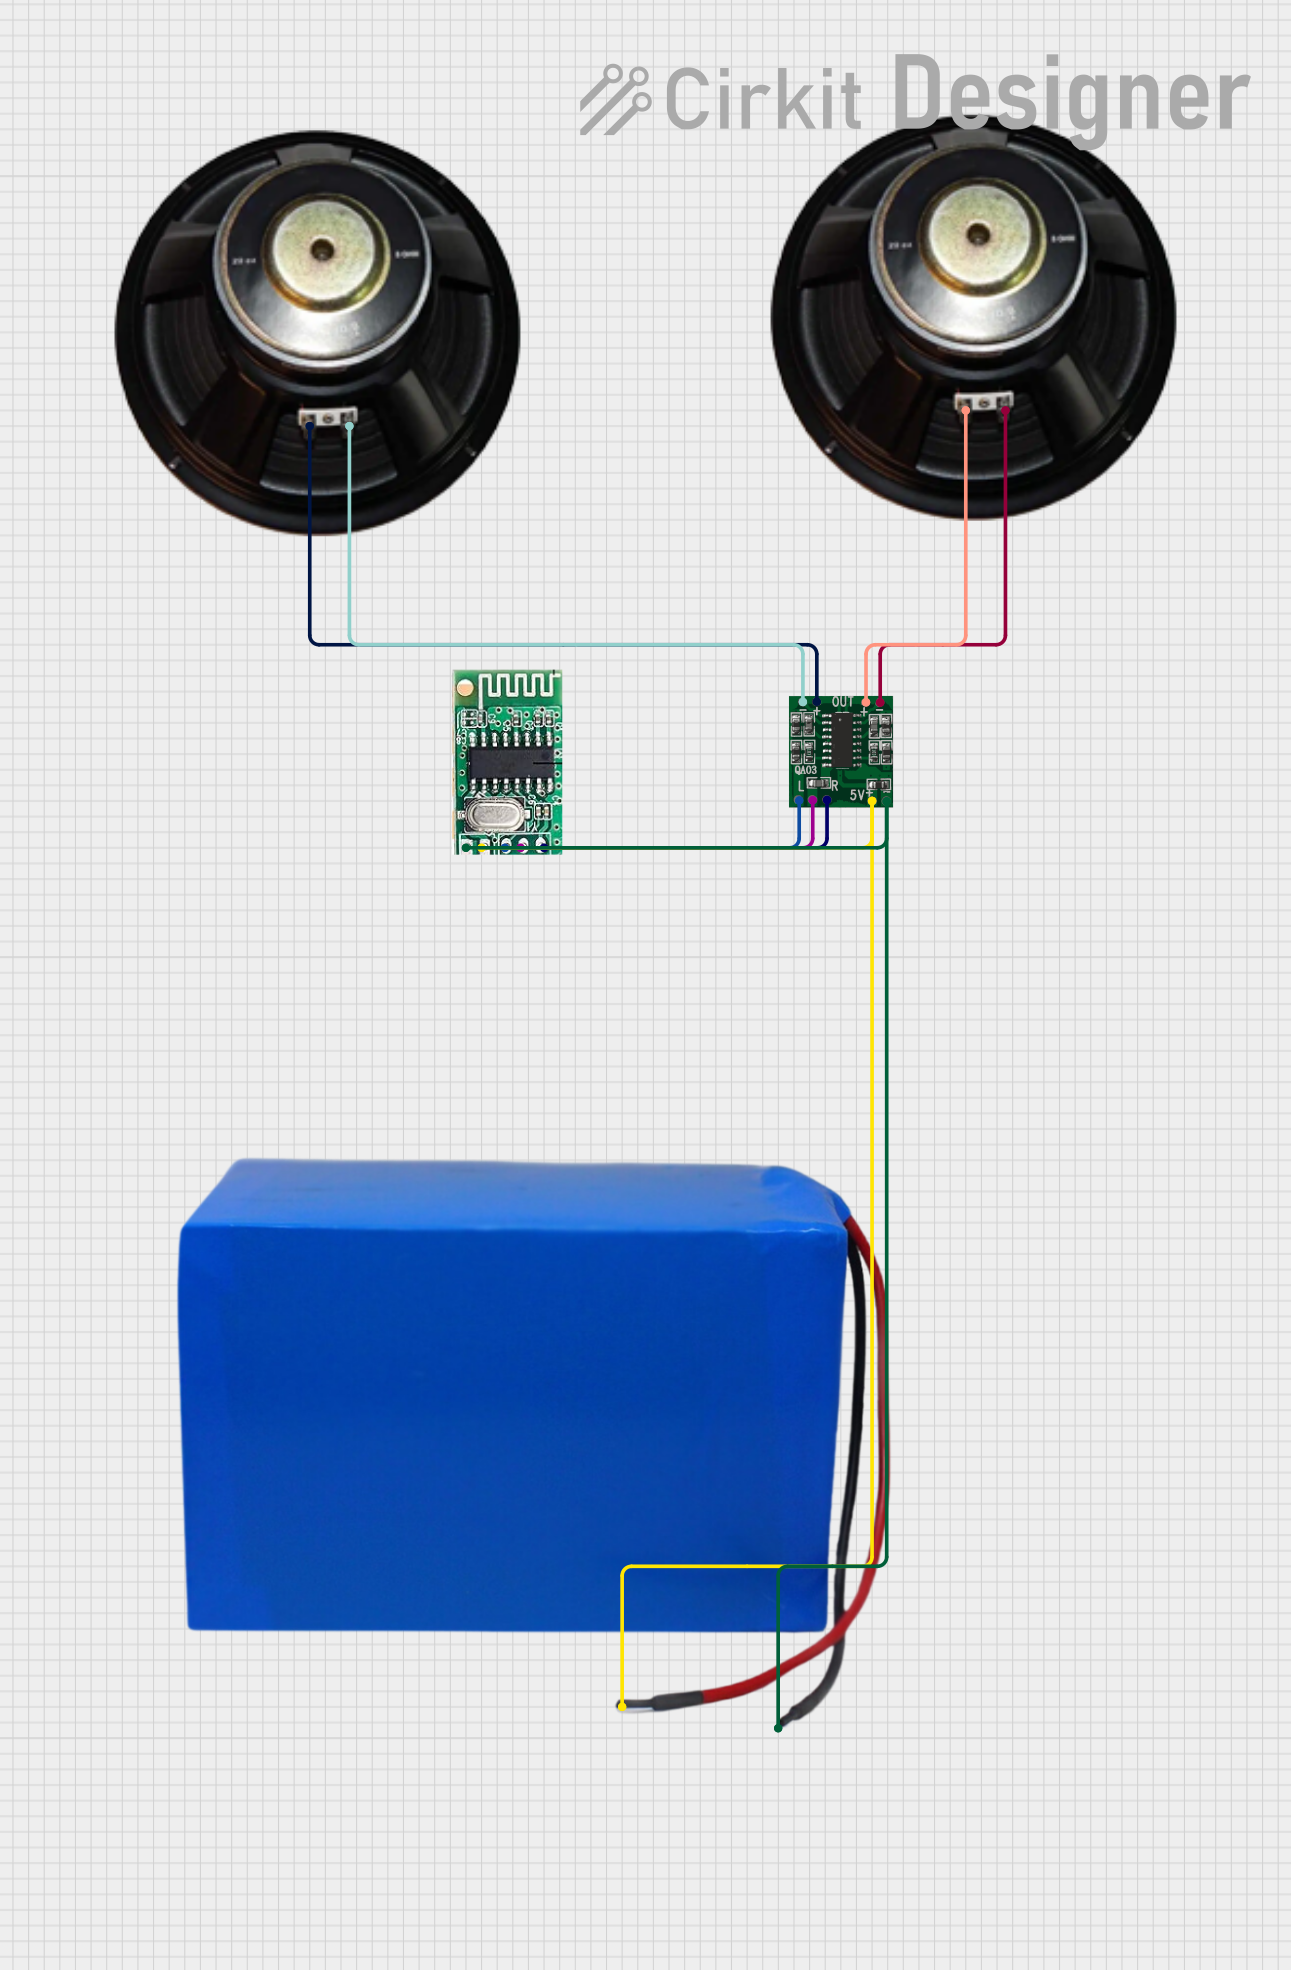
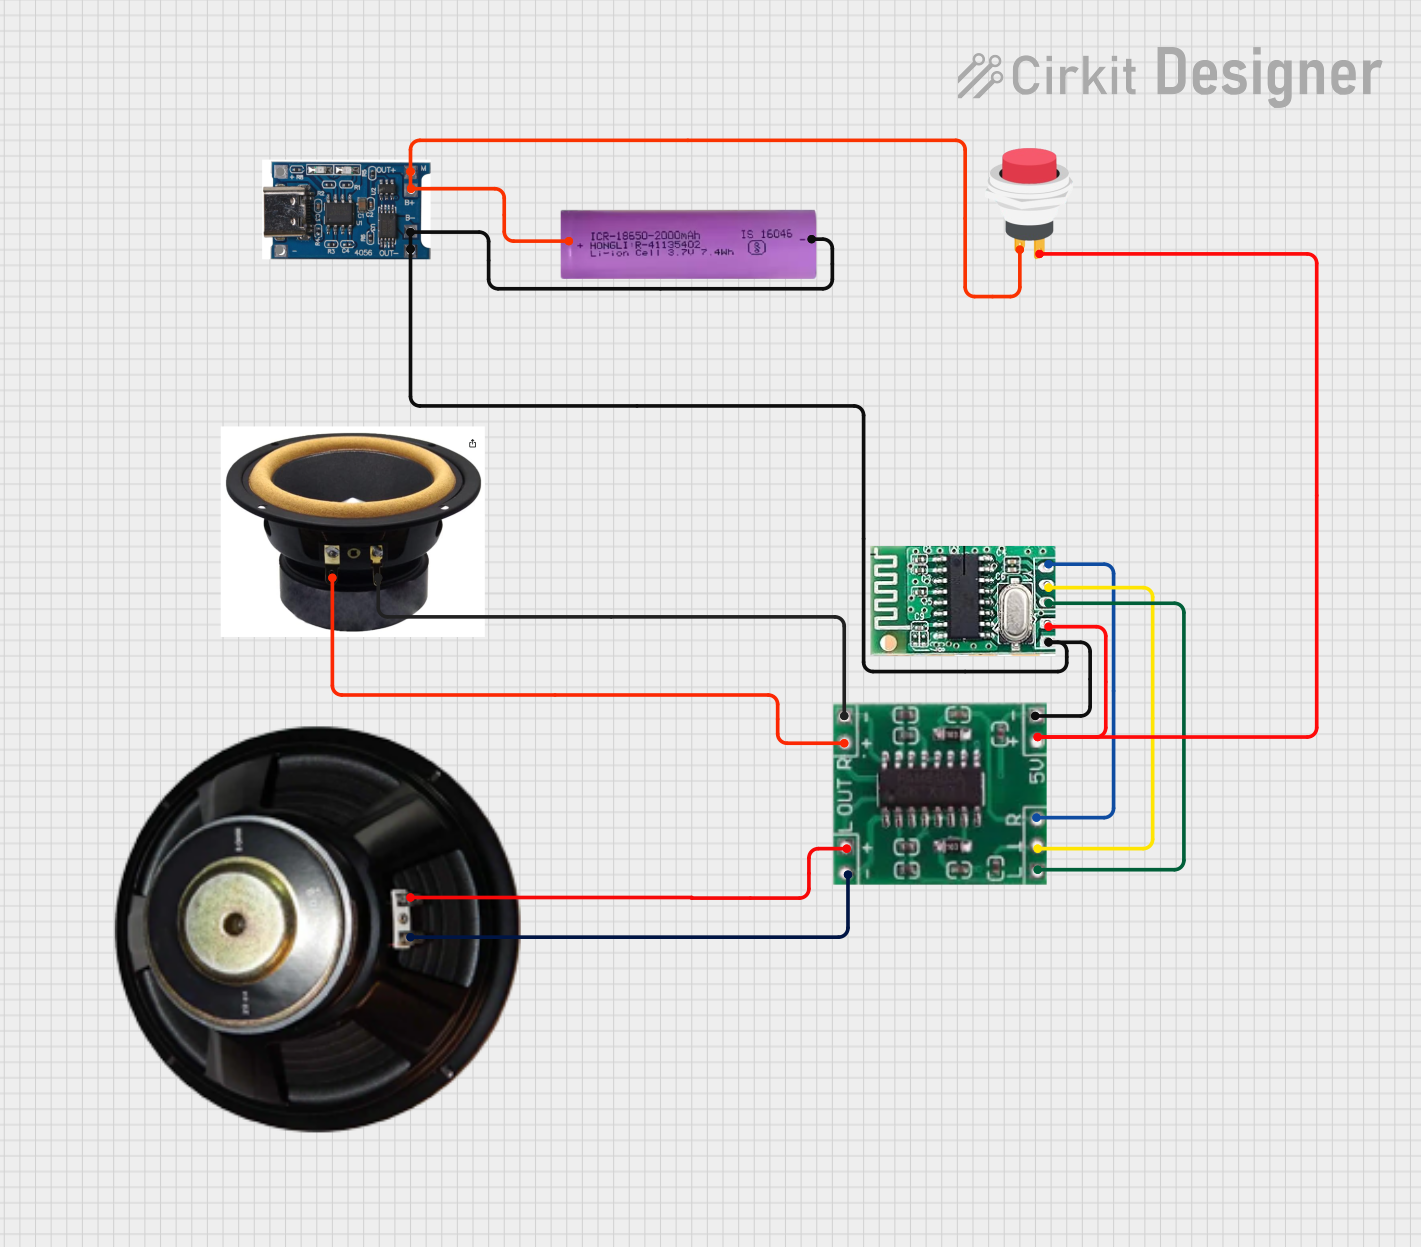
- Power Supply: Connect a stable 5V DC power source to the
VCCandGNDpins. Ensure the power supply can provide sufficient current (at least 1A) for optimal performance. - Speaker Connection: Connect the left and right speakers to the
L+,L-,R+, andR-pins. Use speakers with an impedance of 4Ω or 8Ω for best results. - Audio Input:
- For Bluetooth: Pair your device with the module (it will appear as a Bluetooth device, typically named "BT Speaker").
- For AUX: Connect an audio source to the 3.5mm AUX input jack.
- Operation: Once powered, the module will automatically switch between Bluetooth and AUX input based on the active connection.
Important Considerations and Best Practices
- Power Supply: Use a regulated 5V power supply to avoid noise or damage to the module.
- Speaker Selection: Ensure the speakers' power rating matches the module's output (5W per channel).
- Heat Dissipation: Although the PAM8403 chip is highly efficient, ensure proper ventilation to prevent overheating during prolonged use.
- Bluetooth Range: The Bluetooth 5.0 module provides a range of up to 10 meters in open spaces. Obstacles may reduce this range.
Example: Connecting to an Arduino UNO
While the XH-A158 is primarily a standalone module, it can be integrated with an Arduino UNO for controlling power or switching modes. Below is an example code snippet to control the module's power using a digital pin:
// Example: Controlling XH-A158 power with Arduino UNO
// Connect the module's VCC to a digital pin (e.g., pin 7) via a transistor or relay.
// GND of the module should be connected to Arduino GND.

const int powerPin = 7; // Pin connected to the module's power control

void setup() {
  pinMode(powerPin, OUTPUT); // Set the pin as output
  digitalWrite(powerPin, LOW); // Start with the module powered off
}

void loop() {
  // Turn the module on
  digitalWrite(powerPin, HIGH);
  delay(10000); // Keep it on for 10 seconds

  // Turn the module off
  digitalWrite(powerPin, LOW);
  delay(5000); // Keep it off for 5 seconds
}
Note: Use a transistor or relay to control the power to the module, as the Arduino pin cannot directly supply sufficient current.
Troubleshooting and FAQs
Common Issues and Solutions
No Sound Output:
- Ensure the speakers are properly connected to the output pins.
- Verify the power supply is stable and providing 5V DC.
- Check if the audio source is correctly paired (for Bluetooth) or connected (for AUX).
Distorted Sound:
- Reduce the volume on the audio source to prevent overdriving the amplifier.
- Ensure the speakers' impedance matches the module's specifications (4Ω or 8Ω).
Bluetooth Connection Issues:
- Ensure the module is powered and in pairing mode.
- Check for interference from other Bluetooth devices nearby.
- Restart the module and try pairing again.
Overheating:
- Ensure proper ventilation around the module.
- Avoid using speakers with a power rating lower than 5W.
FAQs
Q: Can I use a power bank to power the XH-A158?
A: Yes, a 5V power bank with at least 1A output can be used to power the module.
Q: Can I connect headphones to the output pins?
A: No, the output is designed for speakers, not headphones. Connecting headphones may damage the module or the headphones.
Q: How do I reset the Bluetooth pairing?
A: Turn off the module, then turn it back on. It will automatically enter pairing mode if no device is connected.
Q: Can I use this module with a 12V power supply?
A: No, the module is designed to operate at 5V DC. Using a higher voltage may damage the module.
By following this documentation, you can effectively integrate the XH-A158 module into your audio projects and troubleshoot common issues with ease.