How to Use 5/2 PNEUMATIC SOLENOID: Examples, Pinouts, and Specs
Introduction
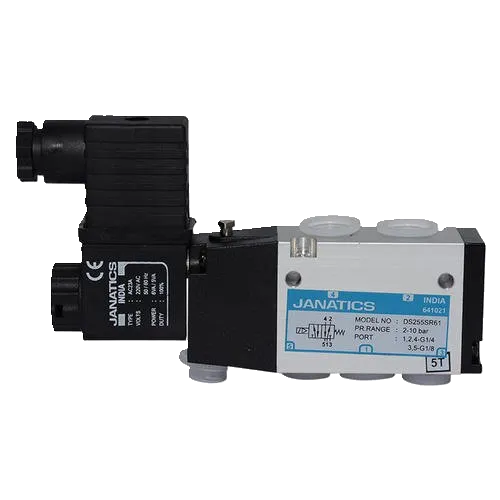
A 5/2 pneumatic solenoid is a type of valve designed to control the flow of compressed air in pneumatic systems. It features five ports and two positions, enabling it to direct air to different actuators or exhaust it. This functionality makes it essential for operating pneumatic cylinders, actuators, and other devices in automation and industrial applications.
Explore Projects Built with 5/2 PNEUMATIC SOLENOID


Explore Projects Built with 5/2 PNEUMATIC SOLENOID
Common Applications and Use Cases
- Industrial Automation: Used in assembly lines and robotic systems to control pneumatic actuators.
- Material Handling: Operates pneumatic grippers and lifters.
- Packaging Machines: Controls air cylinders for sealing, cutting, or positioning.
- Automotive Systems: Powers pneumatic tools and actuators in manufacturing processes.
- HVAC Systems: Regulates airflow in pneumatic dampers and valves.
Technical Specifications
Below are the key technical details of a typical 5/2 pneumatic solenoid:
| Parameter | Specification |
|---|---|
| Operating Voltage | 12V DC, 24V DC, or 110V AC (varies by model) |
| Power Consumption | 2W to 5W |
| Operating Pressure Range | 0.15 MPa to 0.8 MPa (1.5 bar to 8 bar) |
| Response Time | 20-50 ms |
| Port Size | 1/8", 1/4", or 1/2" (varies by model) |
| Operating Temperature | -10°C to 50°C |
| Material | Aluminum or brass body with NBR seals |
| Actuation Type | Solenoid-operated |
| Positions | 2 (Open and Closed) |
| Ports | 5 (2 for actuators, 2 exhaust, 1 supply) |
Pin Configuration and Descriptions
The 5/2 pneumatic solenoid typically has an electrical connector for the solenoid coil. Below is a table describing the pin configuration for a standard 2-pin solenoid coil:
| Pin | Description |
|---|---|
| Pin 1 | Positive terminal (VCC) |
| Pin 2 | Negative terminal (GND) |
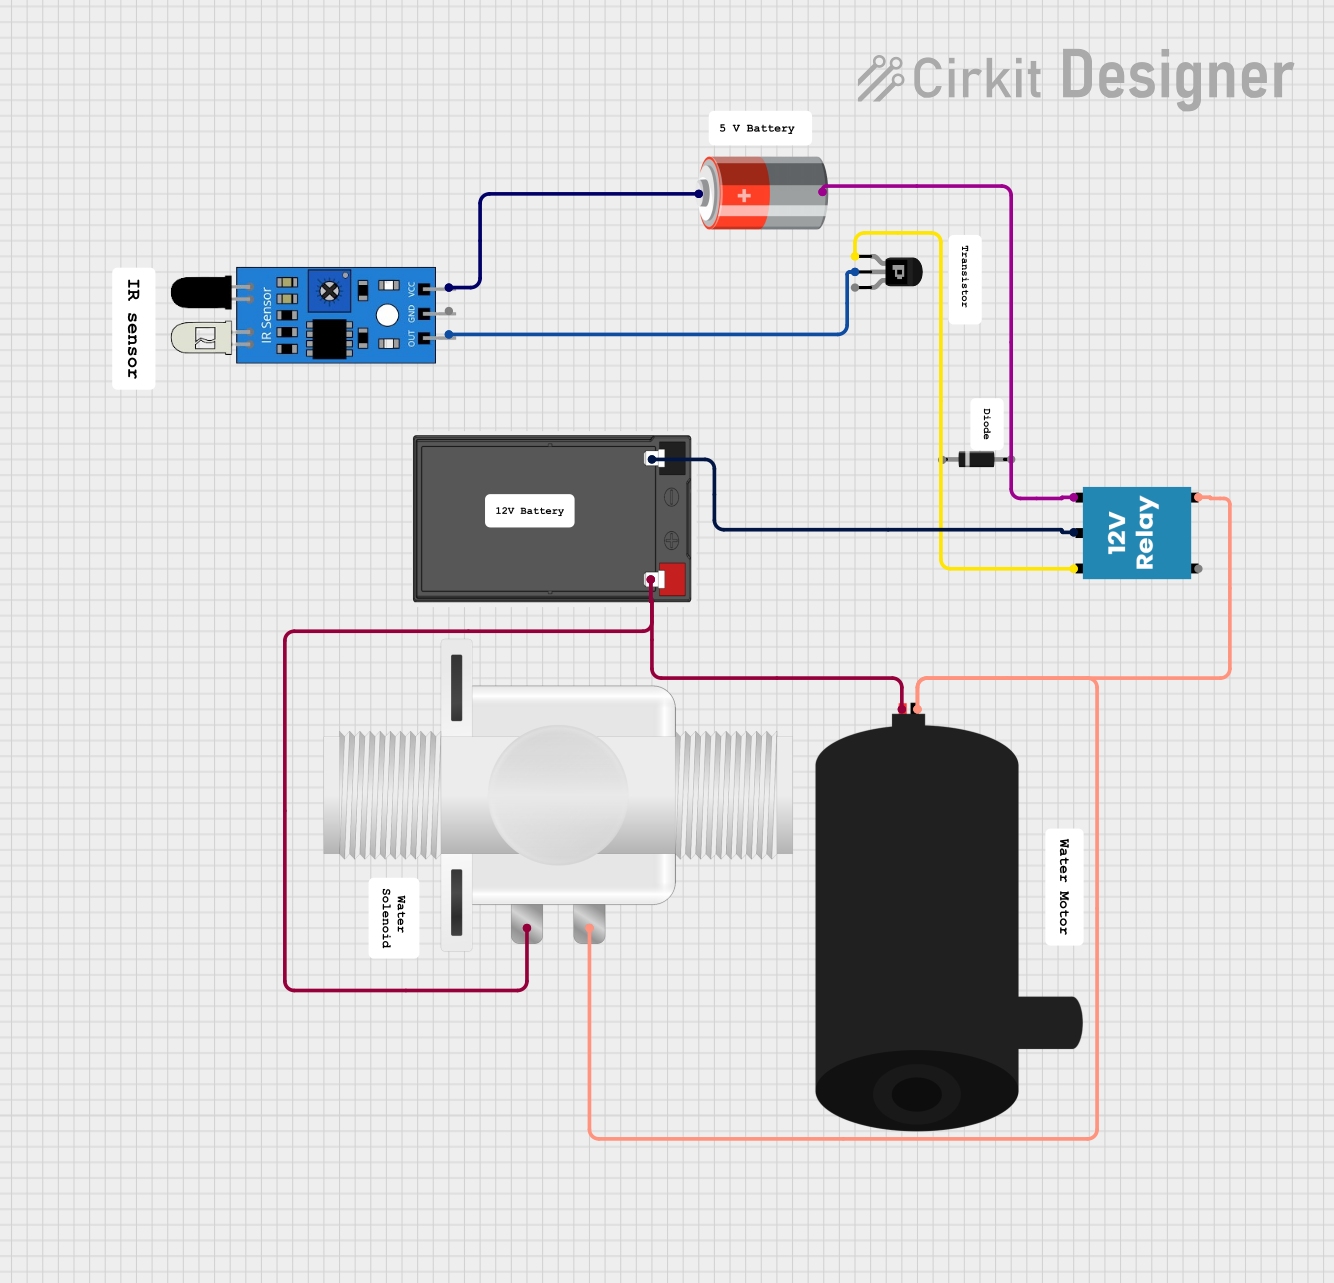
Usage Instructions
How to Use the Component in a Circuit
- Power Supply: Connect the solenoid coil to a suitable power source (e.g., 12V DC or 24V DC) based on the solenoid's specifications.
- Control Signal: Use a microcontroller, relay, or switch to control the solenoid. When the coil is energized, the valve shifts to one position; when de-energized, it returns to the default position.
- Pneumatic Connections:
- Connect the supply port (P) to the compressed air source.
- Connect the actuator ports (A and B) to the pneumatic cylinder or actuator.
- Connect the exhaust ports (EA and EB) to the atmosphere or a muffler to reduce noise.
Important Considerations and Best Practices
- Voltage Matching: Ensure the power supply matches the solenoid's rated voltage to avoid damage.
- Pressure Range: Operate the solenoid within its specified pressure range to ensure proper functionality.
- Filtration: Use an air filter to prevent debris from entering the valve and causing blockages.
- Mounting: Secure the solenoid valve to a stable surface to minimize vibration and movement.
- Heat Dissipation: Avoid prolonged energization of the coil to prevent overheating.
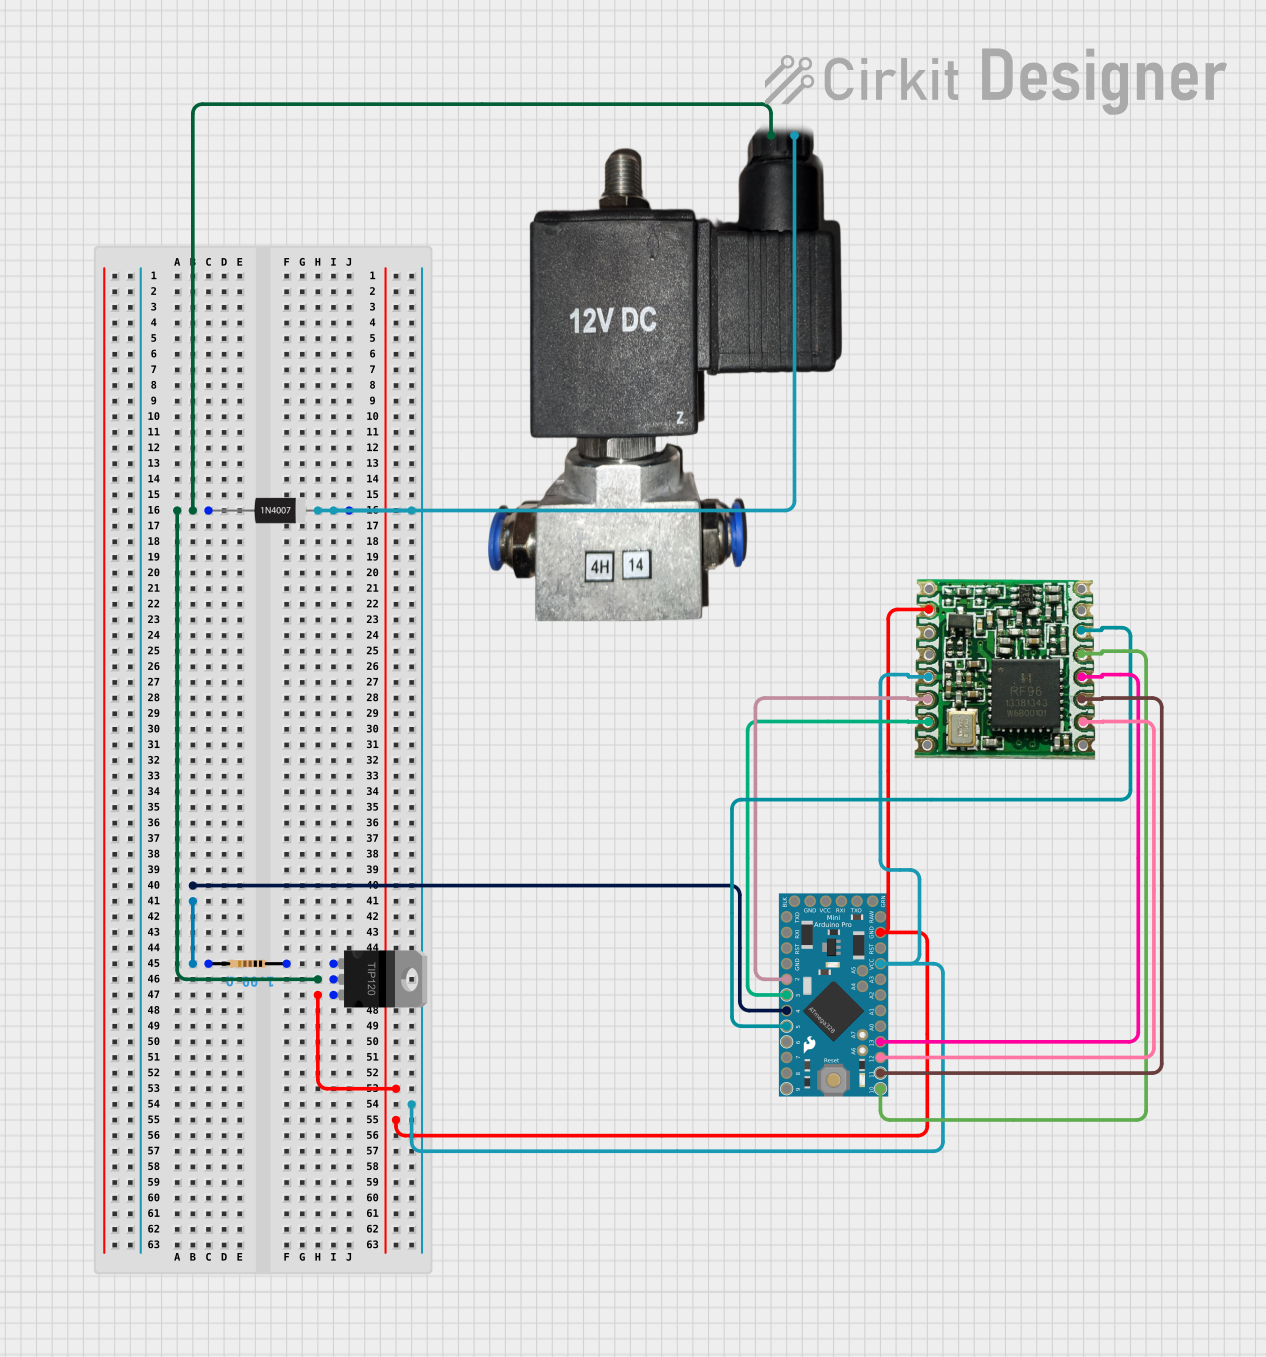
Example: Connecting to an Arduino UNO
The 5/2 pneumatic solenoid can be controlled using an Arduino UNO and a relay module. Below is an example code snippet:
// Define the relay pin connected to the solenoid
const int relayPin = 7;

void setup() {
  // Set the relay pin as an output
  pinMode(relayPin, OUTPUT);
}

void loop() {
  // Energize the solenoid (open position)
  digitalWrite(relayPin, HIGH);
  delay(2000); // Keep the solenoid open for 2 seconds

  // De-energize the solenoid (closed position)
  digitalWrite(relayPin, LOW);
  delay(2000); // Keep the solenoid closed for 2 seconds
}
Note: Use a relay module to interface the Arduino with the solenoid, as the solenoid's current requirements may exceed the Arduino's output capacity.
Troubleshooting and FAQs
Common Issues and Solutions
Solenoid Does Not Activate:
- Cause: Incorrect voltage or insufficient current.
- Solution: Verify the power supply matches the solenoid's specifications and check for loose connections.
Air Leakage:
- Cause: Damaged seals or improper connections.
- Solution: Inspect the seals and ensure all pneumatic fittings are tightened securely.
Overheating:
- Cause: Prolonged energization of the coil.
- Solution: Use a pulse-width modulation (PWM) signal or limit the duty cycle to reduce heat buildup.
Slow Response Time:
- Cause: Low air pressure or clogged ports.
- Solution: Check the air supply pressure and clean the ports if necessary.
FAQs
Q: Can I use the 5/2 pneumatic solenoid with AC power?
- A: Yes, but ensure the solenoid is rated for AC operation and use the correct voltage.
Q: What is the difference between a 5/2 and a 5/3 solenoid valve?
- A: A 5/2 valve has two positions (open and closed), while a 5/3 valve has three positions (open, closed, and a neutral position).
Q: How do I reduce noise from the exhaust ports?
- A: Install mufflers on the exhaust ports to minimize noise during operation.
Q: Can I control multiple solenoids with one Arduino?
- A: Yes, but use separate relays or a relay module for each solenoid to handle the current requirements.
This documentation provides a comprehensive guide to understanding, using, and troubleshooting the 5/2 pneumatic solenoid.