How to Use Force Sensor: Examples, Pinouts, and Specs
Introduction
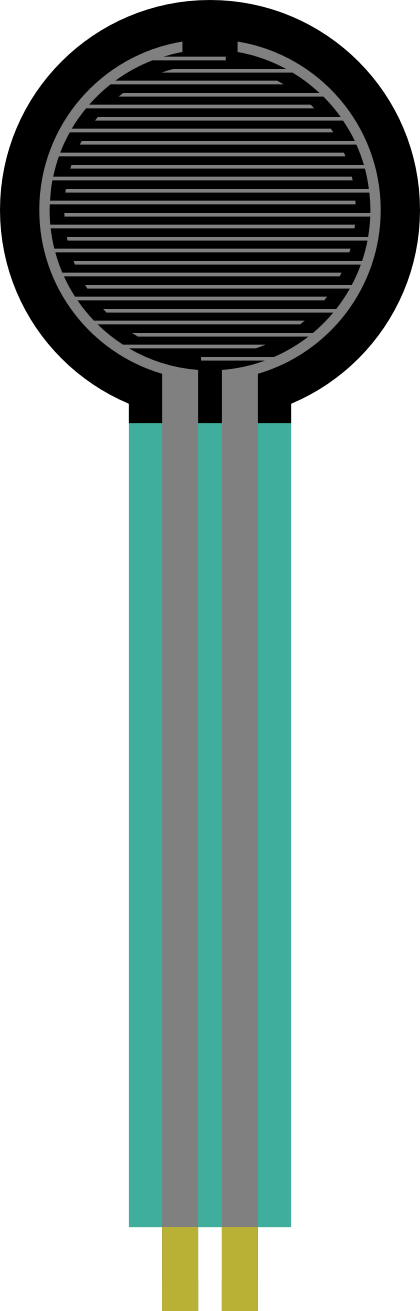
The Adafruit Interlink 402 Force Sensor is a versatile and reliable device designed to detect and measure the amount of force applied to its surface. This sensor is based on a resistive technology where the resistance decreases as the applied force increases. It is compact, lightweight, and easy to integrate into various electronic systems, making it ideal for applications such as robotics, weight measurement, pressure sensing, and user interface controls.
Explore Projects Built with Force Sensor
Explore Projects Built with Force Sensor
Common Applications
- Robotics: Detecting grip strength or object weight.
- Pressure-sensitive touchpads and user interfaces.
- Weight measurement systems.
- Industrial automation for force monitoring.
- Medical devices for pressure sensing.
Technical Specifications
Below are the key technical details of the Adafruit Interlink 402 Force Sensor:
| Parameter | Value |
|---|---|
| Manufacturer | Adafruit |
| Part ID | Interlink 402 |
| Force Sensitivity Range | 0.2 N to 20 N (approx. 20 g to 2 kg) |
| Resistance Range | >10 MΩ (no force) to ~1 kΩ (max force) |
| Actuation Force | ~0.2 N (minimum force to activate) |
| Response Time | <5 ms |
| Operating Temperature | -40°C to +60°C |
| Dimensions | 56 mm x 18 mm x 0.55 mm |
| Connector Type | Solder tabs or crimp pins |
Pin Configuration and Descriptions
The Interlink 402 Force Sensor has two terminals for electrical connection. These terminals are not polarized, meaning there is no specific positive or negative terminal.
| Pin | Description |
|---|---|
| 1 | Connect to one side of the circuit (e.g., voltage divider input). |
| 2 | Connect to the other side of the circuit (e.g., ground or ADC input). |
Usage Instructions
How to Use the Force Sensor in a Circuit
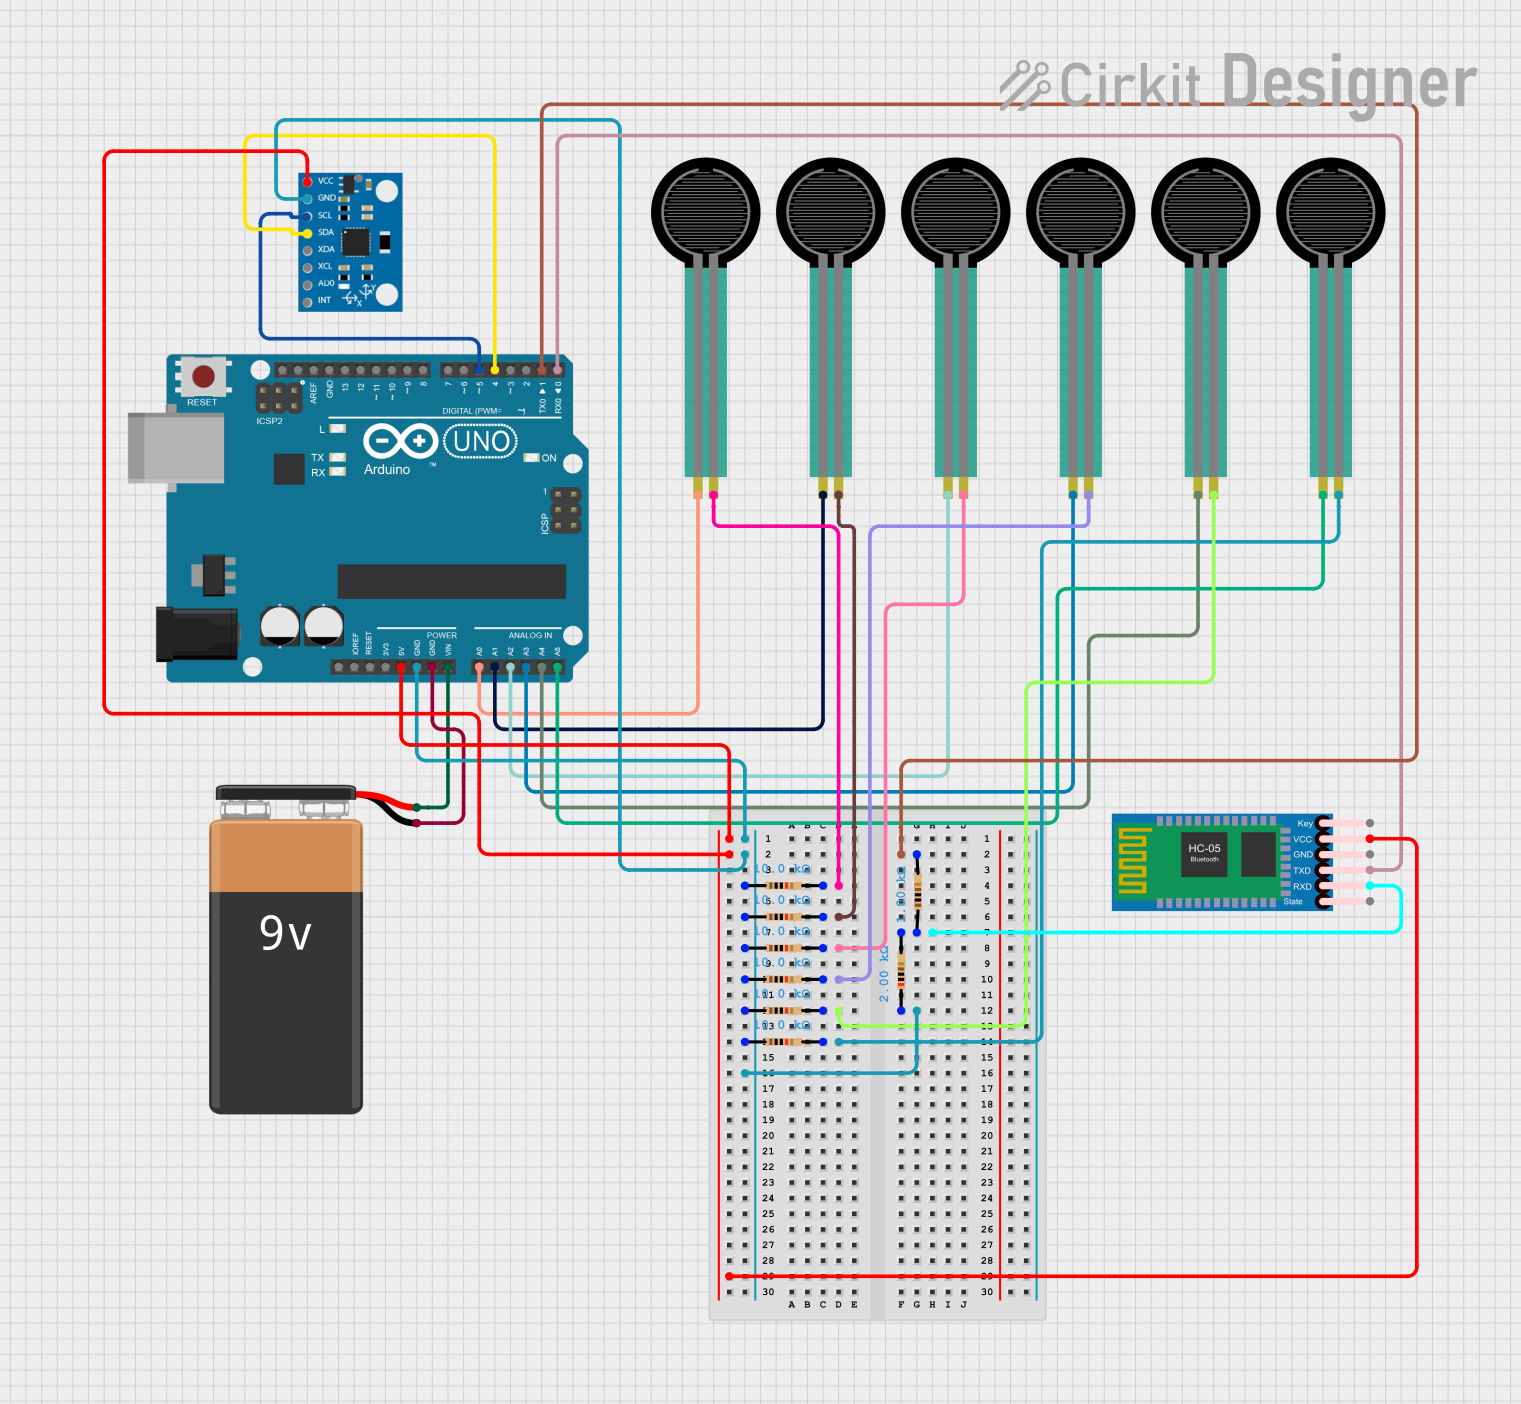
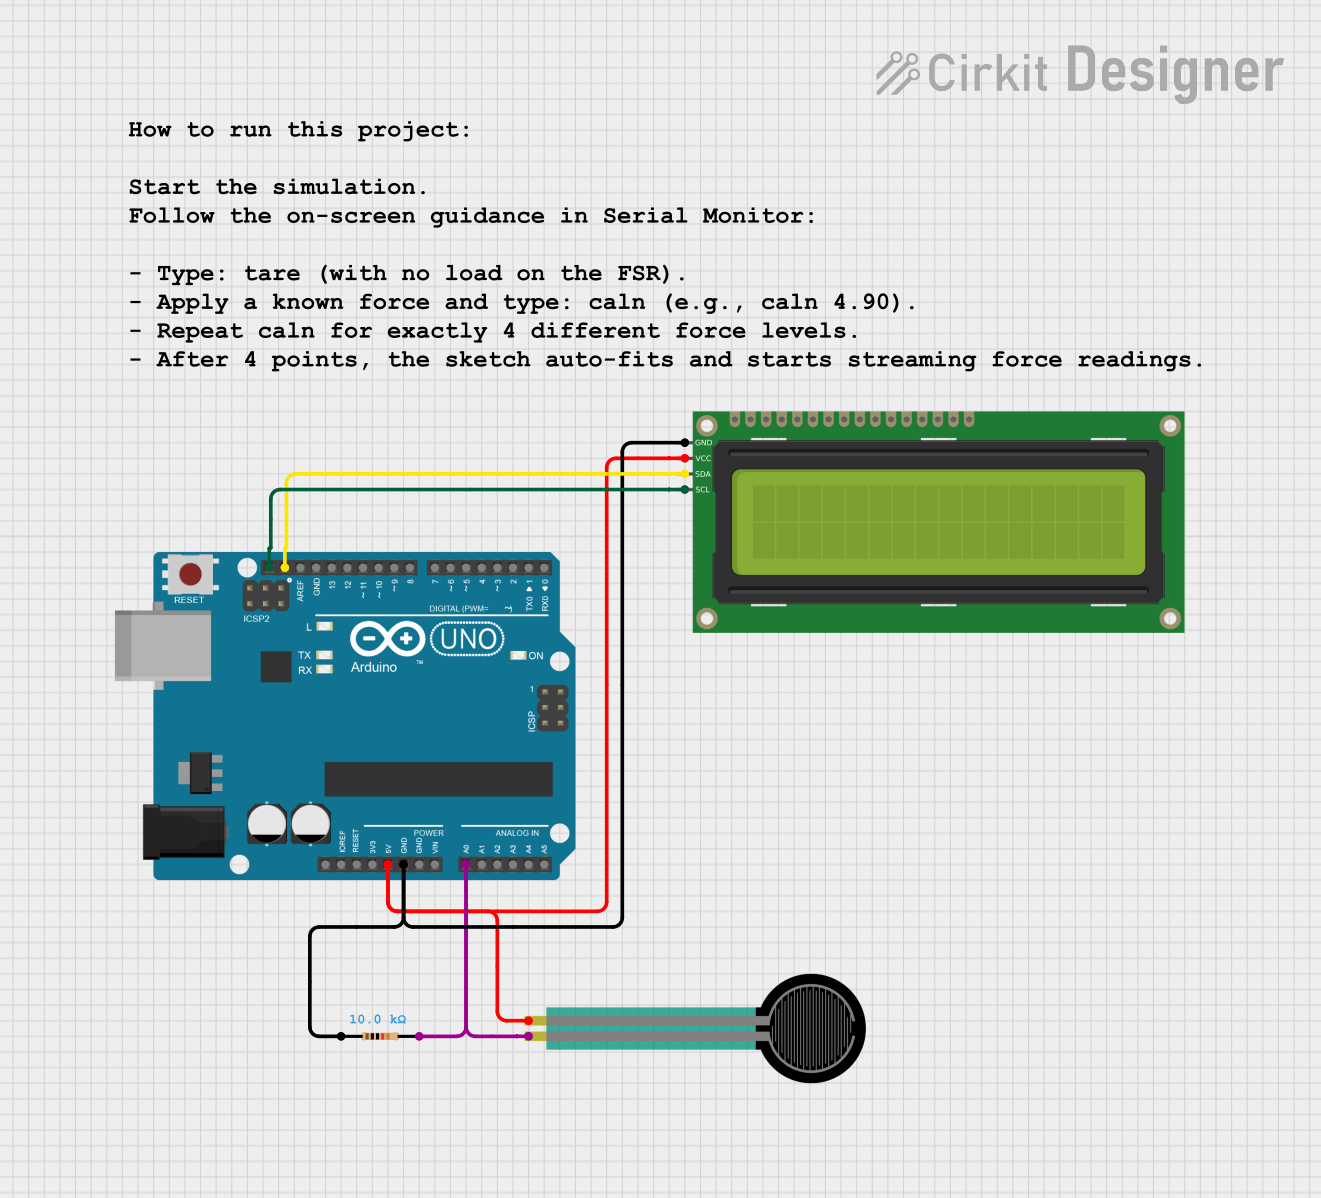
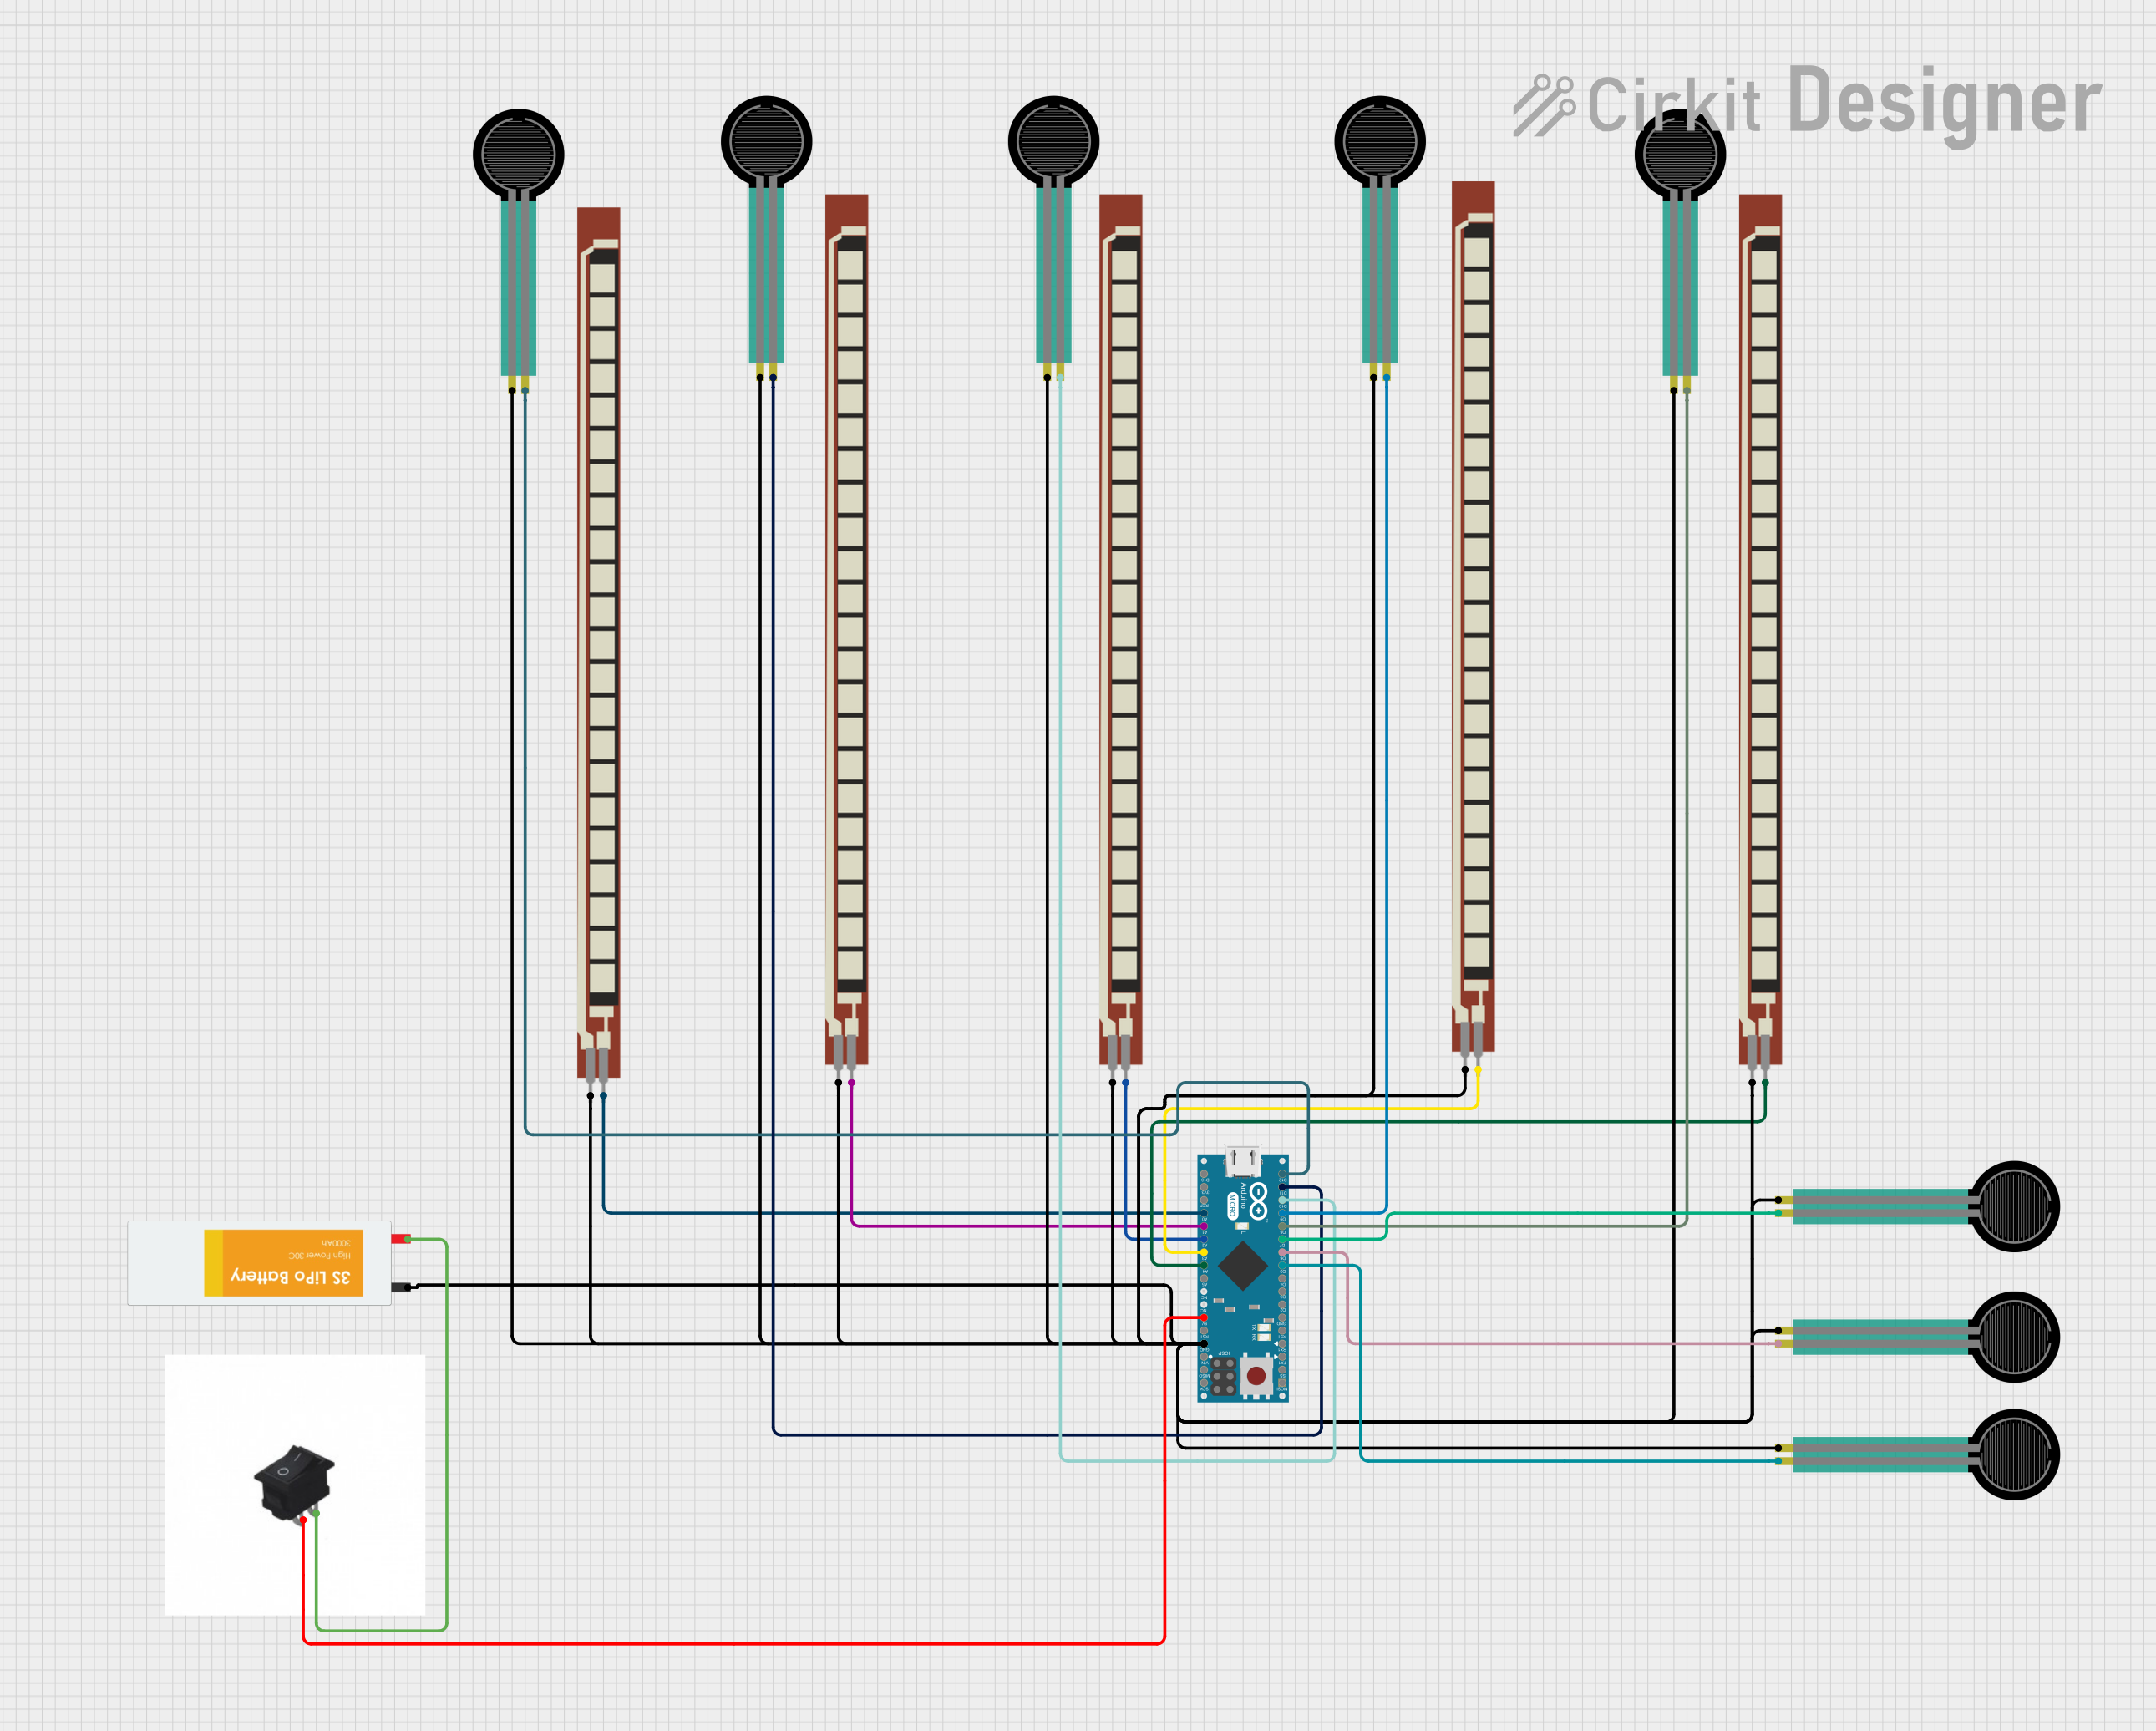
The Interlink 402 Force Sensor is typically used in a voltage divider configuration to measure the change in resistance as force is applied. Follow these steps to integrate the sensor into your circuit:
Set Up the Voltage Divider:
- Connect one terminal of the force sensor to a fixed resistor (e.g., 10 kΩ).
- Connect the other terminal of the force sensor to the ground.
- Connect the junction between the force sensor and the fixed resistor to an analog input pin of your microcontroller (e.g., Arduino).
Power the Circuit:
- Supply a stable voltage (e.g., 5V) to the other end of the fixed resistor.
Read the Analog Signal:
- The voltage at the junction will vary depending on the force applied to the sensor. This voltage can be read using an analog-to-digital converter (ADC) on your microcontroller.
Important Considerations and Best Practices
- Calibration: The sensor's output is not linear, so calibration is necessary to map the resistance or voltage to a specific force value.
- Force Range: Avoid applying forces beyond the specified range (20 N) to prevent damage.
- Mounting: Ensure the sensor is securely mounted to avoid inaccurate readings due to movement or vibration.
- Debouncing: If the sensor is used in a dynamic application, consider implementing software debouncing to filter out noise.
Example Code for Arduino UNO
Below is an example of how to use the Interlink 402 Force Sensor with an Arduino UNO:
// Define the analog pin connected to the force sensor
const int forceSensorPin = A0;

// Variable to store the sensor reading
int sensorValue = 0;

void setup() {
  // Initialize serial communication for debugging
  Serial.begin(9600);
}

void loop() {
  // Read the analog value from the force sensor
  sensorValue = analogRead(forceSensorPin);

  // Convert the analog value to a voltage (assuming 5V reference)
  float voltage = sensorValue * (5.0 / 1023.0);

  // Print the sensor value and voltage to the Serial Monitor
  Serial.print("Sensor Value: ");
  Serial.print(sensorValue);
  Serial.print(" | Voltage: ");
  Serial.println(voltage);

  // Add a small delay to stabilize readings
  delay(100);
}
Notes on the Code
- The
analogRead()function reads the voltage at the sensor's output and converts it to a digital value (0–1023). - The voltage is calculated assuming a 5V reference. Adjust this if using a different reference voltage.
- Use the sensor's calibration data to map the voltage to a force value.
Troubleshooting and FAQs
Common Issues and Solutions
No Response from the Sensor:
- Ensure the sensor is properly connected in the circuit.
- Verify that the microcontroller's analog pin is functioning correctly.
- Check for loose or broken connections.
Inconsistent Readings:
- Ensure the sensor is securely mounted and not moving during operation.
- Add a capacitor across the sensor terminals to filter out noise.
- Implement software filtering or averaging to smooth out the readings.
Sensor Output Stuck at Maximum or Minimum:
- Check if the sensor is damaged due to excessive force.
- Verify the fixed resistor value in the voltage divider circuit. A very high or low resistor value can cause saturation.
FAQs
Q: Can the sensor measure dynamic forces?
A: Yes, the Interlink 402 Force Sensor has a fast response time (<5 ms), making it suitable for dynamic force measurements.
Q: How do I calibrate the sensor?
A: Apply known forces to the sensor and record the corresponding voltage or resistance values. Use these data points to create a calibration curve.
Q: Can I use this sensor with a 3.3V system?
A: Yes, the sensor is compatible with 3.3V systems. Ensure the voltage divider and ADC reference voltage are adjusted accordingly.
Q: What happens if I exceed the maximum force rating?
A: Applying forces beyond 20 N may permanently damage the sensor or degrade its performance.
By following this documentation, you can effectively integrate and use the Adafruit Interlink 402 Force Sensor in your projects.