How to Use FadeCandy USB NeoPixel Driver: Examples, Pinouts, and Specs
Introduction
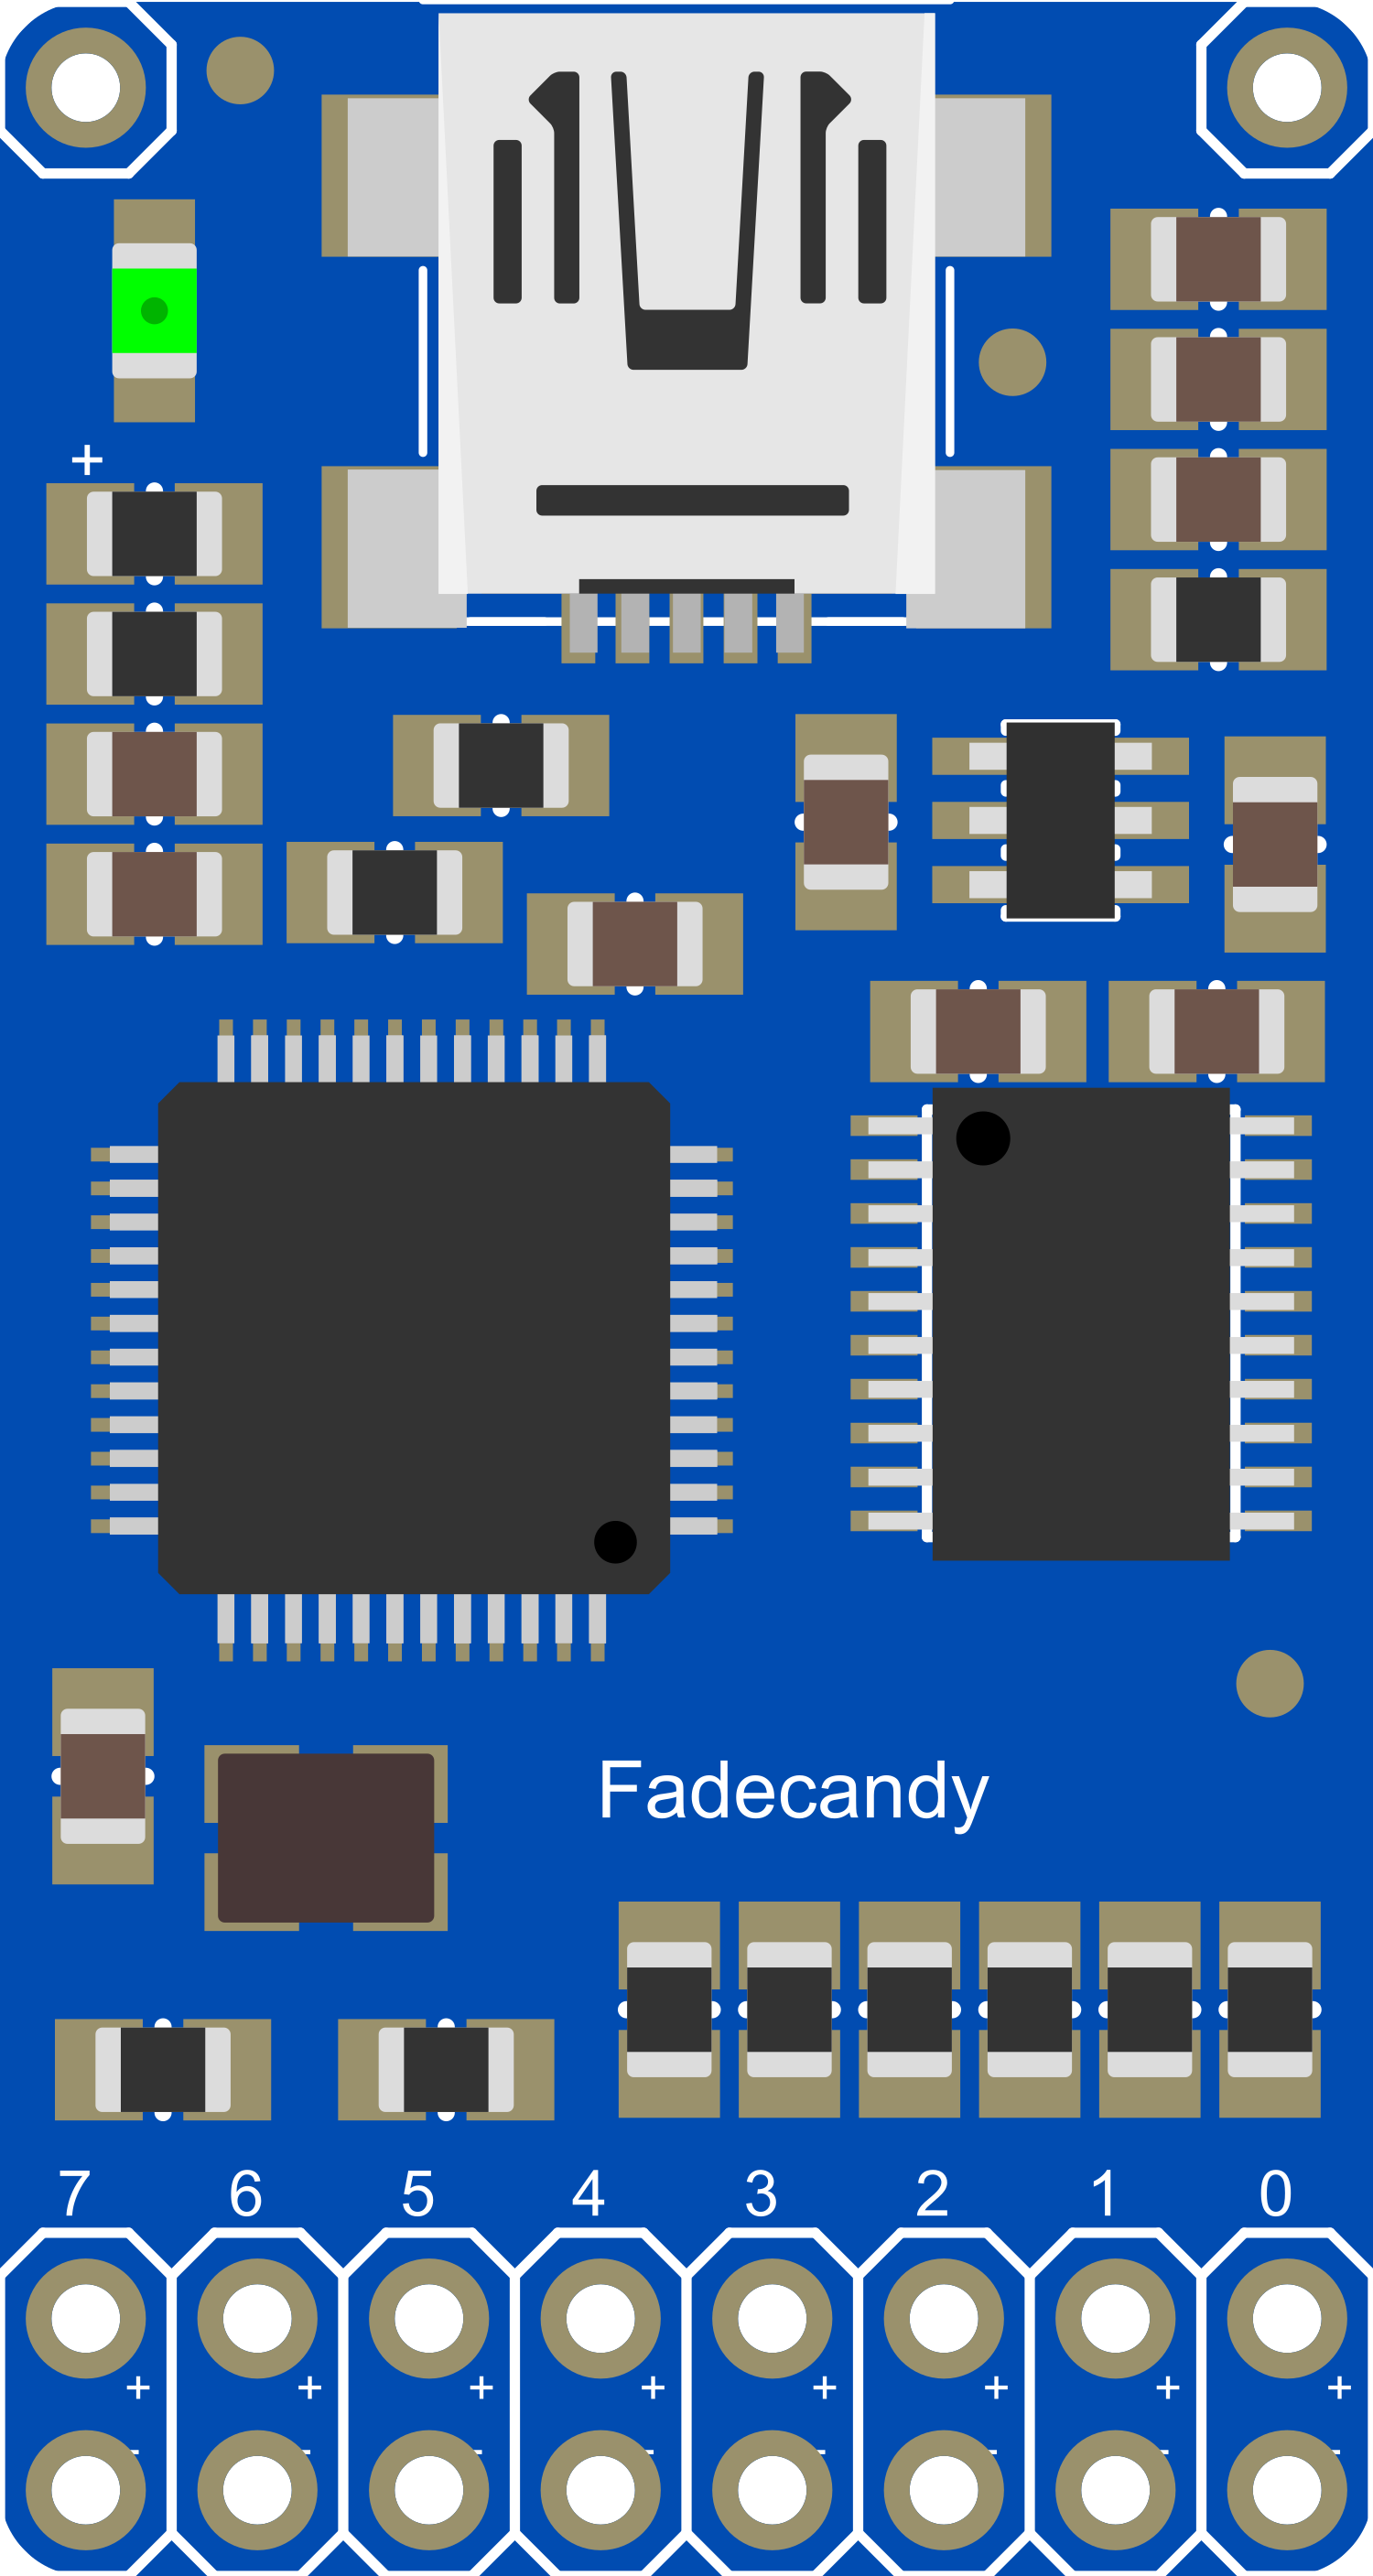
The FadeCandy USB NeoPixel Driver is a specialized controller designed to drive NeoPixel LED strips, providing a simple interface for creating smooth and sophisticated lighting effects. It is particularly well-suited for artists, hobbyists, and professionals looking to add a dynamic visual element to their projects. The FadeCandy is recognized for its ability to handle color blending and dithering, which results in exceptionally smooth color transitions and animations.
Explore Projects Built with FadeCandy USB NeoPixel Driver
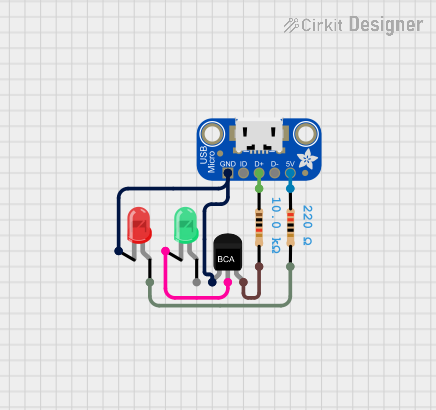
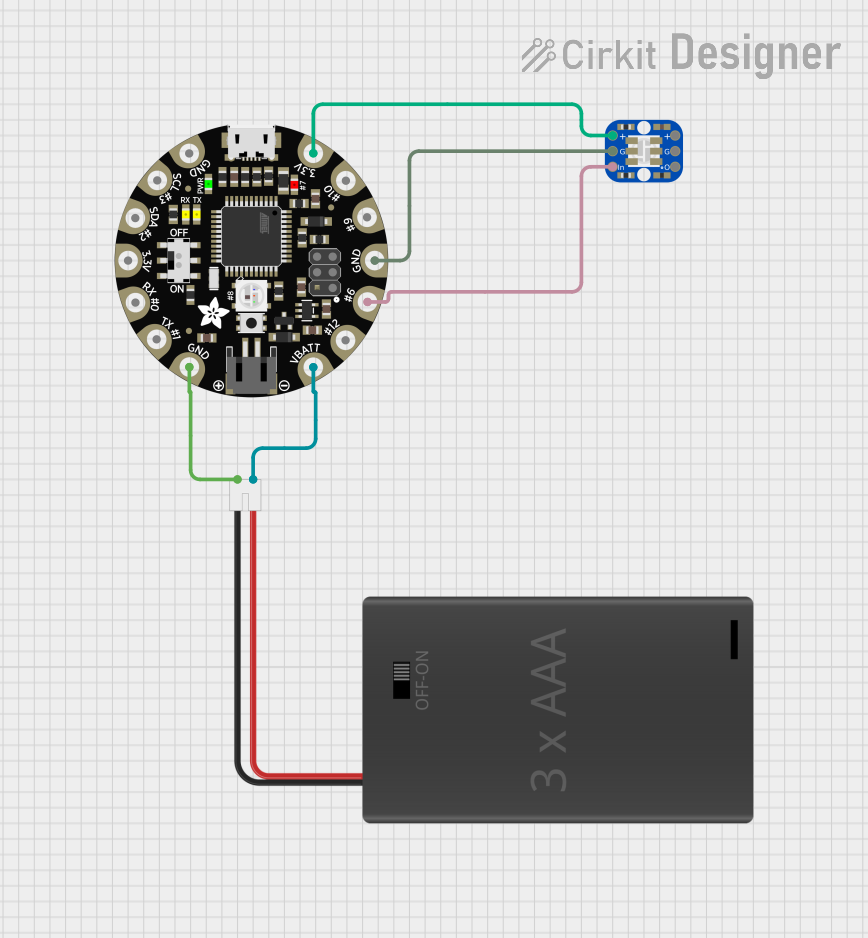
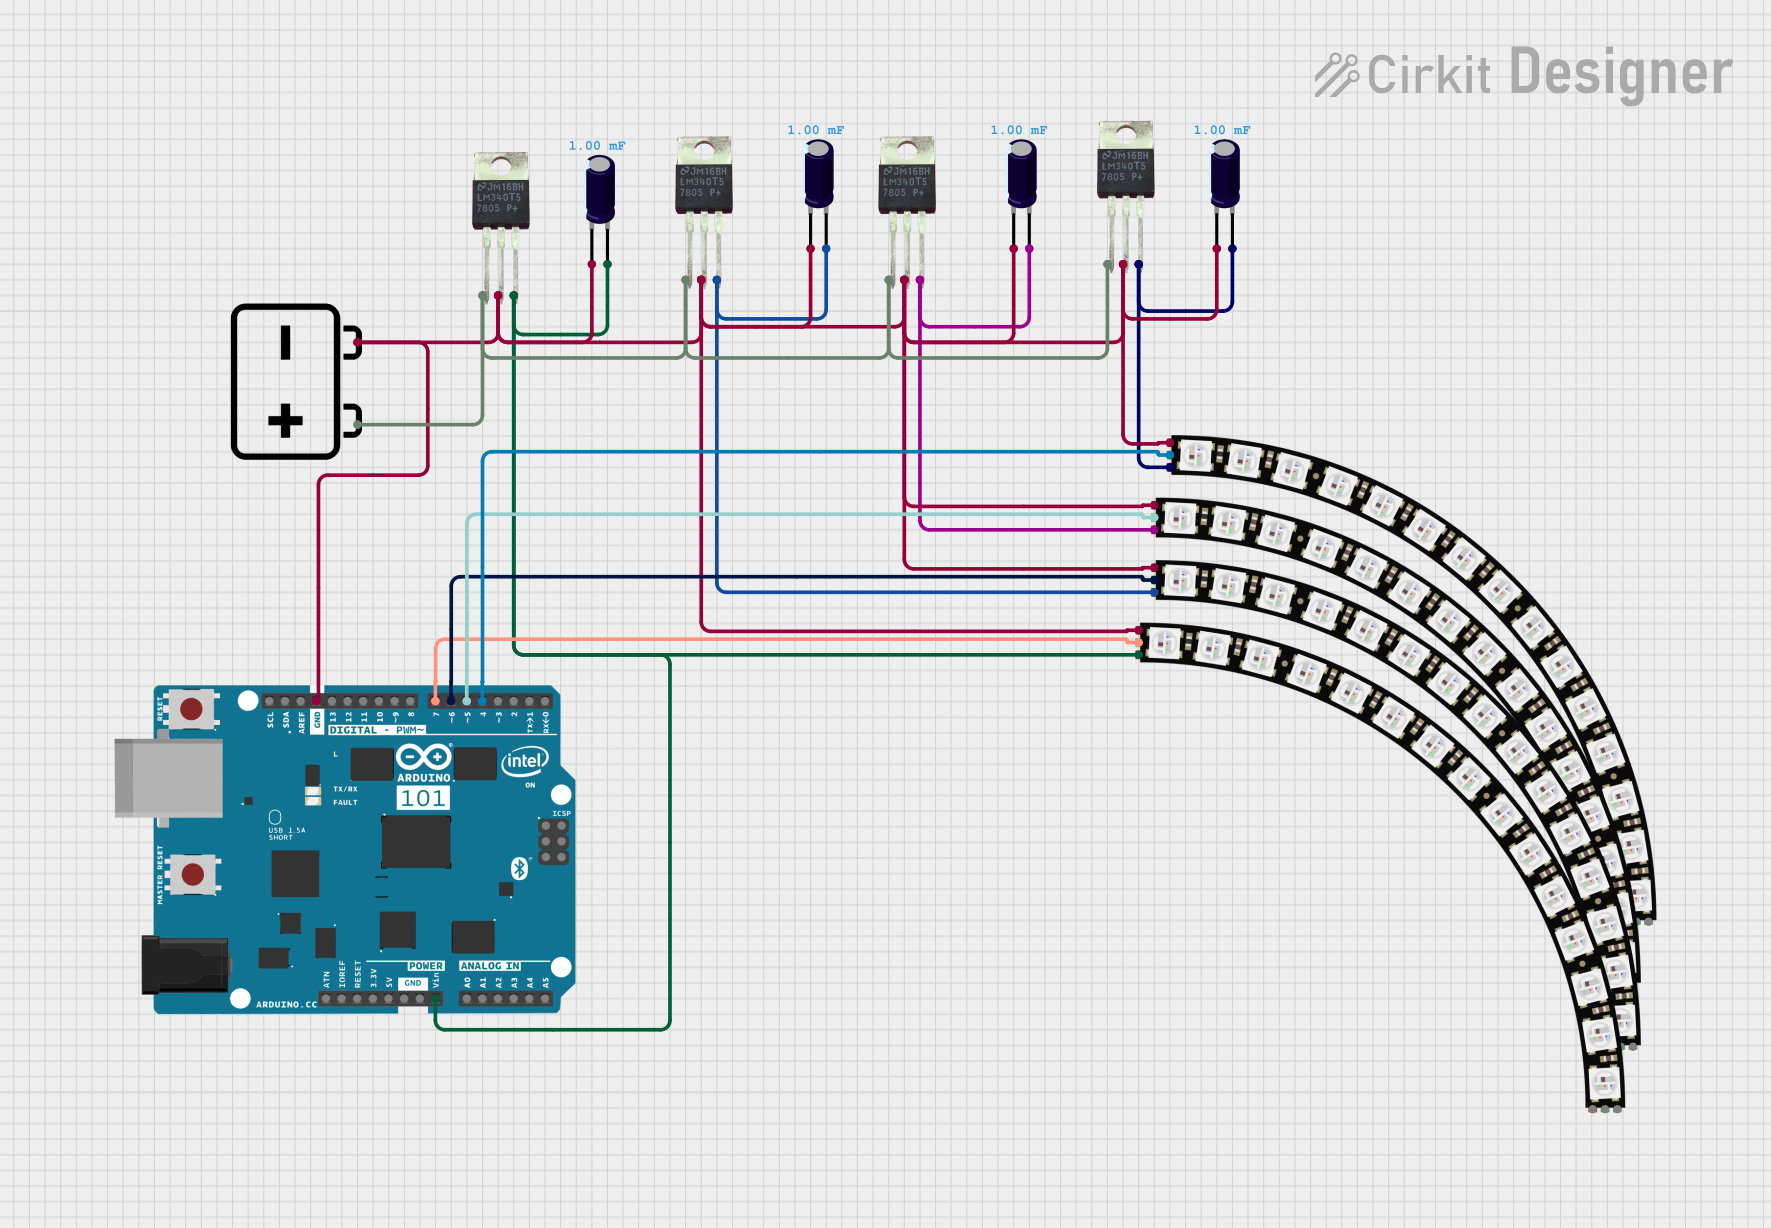
Explore Projects Built with FadeCandy USB NeoPixel Driver
Common Applications and Use Cases
- Interactive art installations
- Stage lighting for performances
- Themed attractions and decorations
- Custom gaming setups and PC case mods
- Architectural lighting
Technical Specifications
Key Technical Details
- Microcontroller: Atmel ATmega32U4
- Operating Voltage: 5V DC
- Output Channels: 8 (supports up to 512 LEDs)
- Connection Interface: USB Micro-B
- Compatible LED Types: WS2811, WS2812, WS2812B (NeoPixel)
- Dimensions: 20mm x 38mm
Pin Configuration and Descriptions
| Pin Number | Description |
|---|---|
| 1 | GND (Ground) |
| 2 | DIN (Data Input for LED Strip 1) |
| 3 | DIN (Data Input for LED Strip 2) |
| ... | ... |
| 8 | DIN (Data Input for LED Strip 8) |
| 9 | +5V (Power Supply for LED Strips) |
Usage Instructions
How to Use the Component in a Circuit
- Power Supply: Connect a 5V power supply to the +5V and GND pins on the FadeCandy. Ensure that the power supply can handle the current requirements of your LED strips.
- Connecting LED Strips: Attach the data input pin (DIN) of your NeoPixel LED strip to one of the eight output channels on the FadeCandy.
- USB Connection: Connect the FadeCandy to a computer using a USB Micro-B cable.
- Software Setup: Install the FadeCandy server software on your computer to communicate with the FadeCandy board.
Important Considerations and Best Practices
- Do not exceed the maximum number of LEDs per channel (64 LEDs).
- Ensure that the power supply is capable of providing sufficient current for all connected LED strips.
- Use a common ground for the FadeCandy and LED strips to prevent signal noise and erratic behavior.
- Avoid long wires between the FadeCandy and LED strips to minimize voltage drop and signal degradation.
Troubleshooting and FAQs
Common Issues Users Might Face
- LEDs Not Lighting Up: Check connections and ensure that the power supply is correctly connected and turned on.
- Flickering LEDs: This may be due to insufficient power or a poor connection. Verify that all connections are secure and that the power supply is adequate.
- Software Not Recognizing FadeCandy: Ensure that the FadeCandy drivers are installed and that the USB cable is functioning.
Solutions and Tips for Troubleshooting
- Double-check wiring against the pin configuration table.
- Use a multimeter to verify that the power supply is delivering 5V.
- Restart the FadeCandy server software if the device is not recognized.
Example Code for Arduino UNO
// This example assumes the use of the FadeCandy server and the OPC library for Arduino.

#include <SPI.h>
#include <Ethernet.h>
#include <OPC.h>

OPC Client client;

void setup() {
  // Initialize Ethernet and OPC.
  Ethernet.begin(mac, ip, gateway, subnet);
  client.begin("fadecandy_server_ip");

  // Set the number of LEDs.
  OPC::LEDs leds(64);
}

void loop() {
  // Write colors to the LEDs.
  for (int i = 0; i < leds.count(); i++) {
    leds[i] = OPC::RGB(255, 0, 0); // Set all LEDs to red.
  }

  // Send the data to the FadeCandy server.
  client.putPixels(0, leds);
}
Note: The above code is a basic example to illustrate how you might control NeoPixel LEDs using an Arduino UNO as an intermediary between the FadeCandy and the LEDs. The actual implementation will require the FadeCandy server to be running on a computer, and the OPC library to be installed on the Arduino.
Remember to replace "fadecandy_server_ip" with the actual IP address of the computer running the FadeCandy server. The mac, ip, gateway, and subnet variables should also be set according to your network configuration.
For more detailed information and advanced usage, please refer to the FadeCandy server documentation and the OPC library documentation.