How to Use RTL8720DN: Examples, Pinouts, and Specs
Introduction
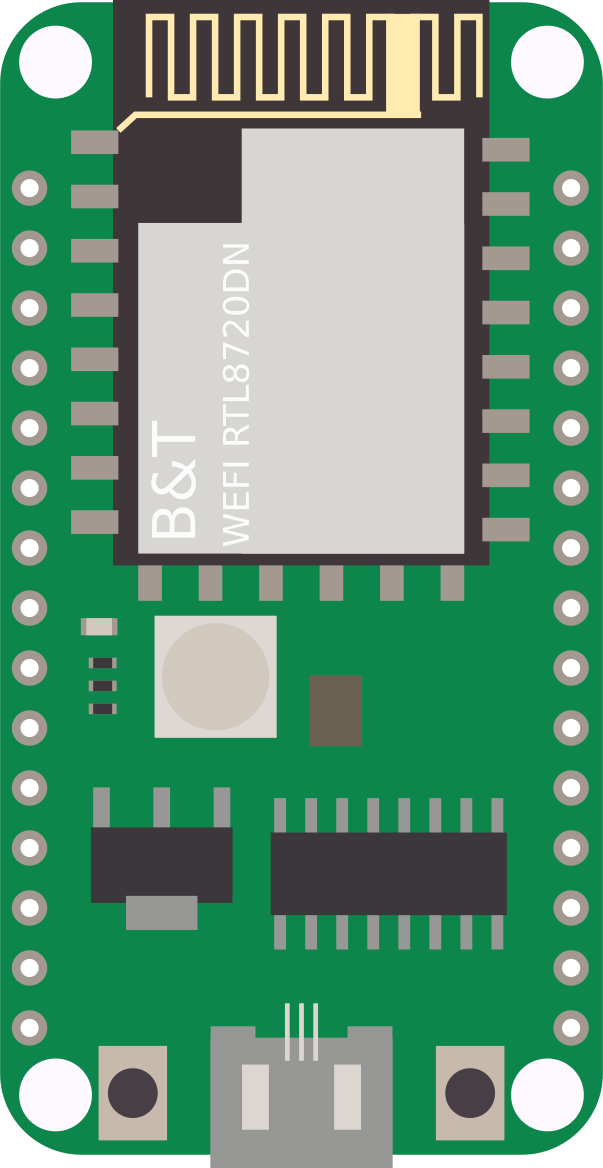
The RTL8720DN is a highly integrated Wi-Fi and Bluetooth module that offers dual-band wireless connectivity for Internet of Things (IoT) applications. It supports Wi-Fi 802.11b/g/n protocols and Bluetooth 5.0, enabling it to handle a wide range of applications that require wireless communication. Common use cases include smart home devices, wireless sensors, and IoT nodes that require both Wi-Fi and Bluetooth connectivity.
Explore Projects Built with RTL8720DN

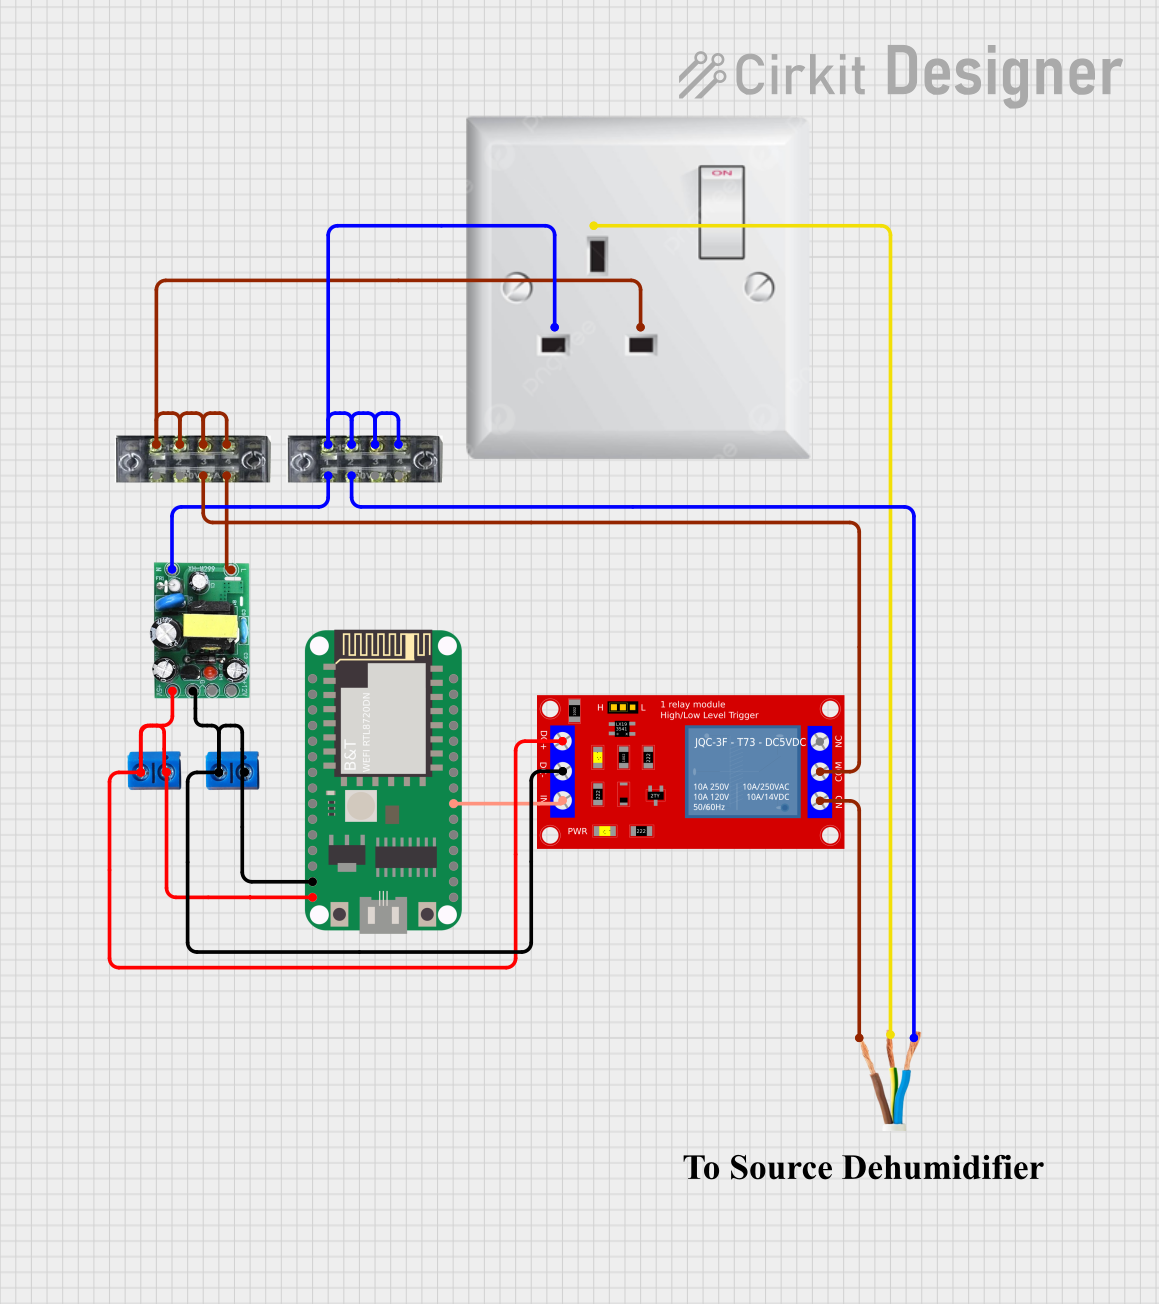
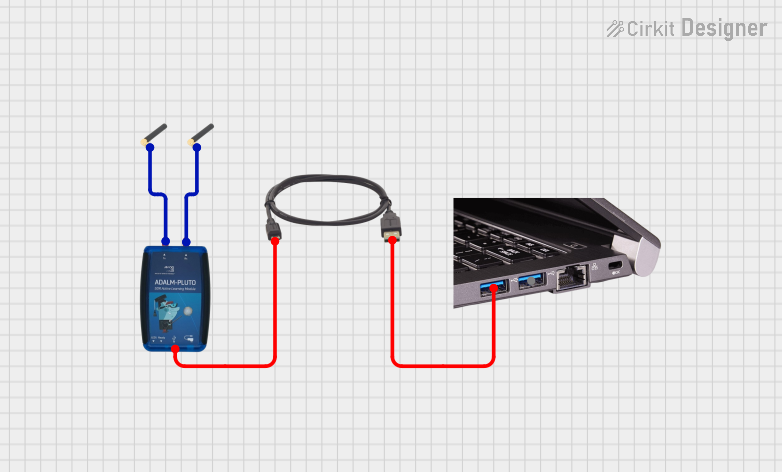

Explore Projects Built with RTL8720DN
Technical Specifications
General Features
- Wi-Fi Standards: IEEE 802.11b/g/n (2.4 GHz)
- Bluetooth Standard: Bluetooth 5.0 dual-mode (BR/EDR and Low Energy)
- CPU: ARM Cortex-M4
- Operating Voltage: 3.0V to 3.6V
- Operating Temperature: -40°C to 85°C
Wi-Fi Specifications
- Frequency Range: 2.4 GHz
- Channels: 1-14 (depending on region)
- Security: WPA/WPA2/WPA3-Personal, WPS
Bluetooth Specifications
- Frequency Range: 2.402 GHz to 2.480 GHz
- Maximum Output Power: +10 dBm
- Sensitivity: -92 dBm
Pin Configuration and Descriptions
| Pin Number | Pin Name | Description |
|---|---|---|
| 1 | VDD | Power supply (3.0V to 3.6V) |
| 2 | GND | Ground |
| 3 | TXD | UART Transmit |
| 4 | RXD | UART Receive |
| 5 | GPIO0 | General Purpose Input/Output |
| 6 | GPIO1 | General Purpose Input/Output |
| ... | ... | ... |
| n | RESET | Reset pin (active low) |
Note: This is a simplified pin configuration. Refer to the module's datasheet for a complete pinout and alternate functions.
Usage Instructions
Integrating with a Circuit
- Power Supply: Connect the VDD pin to a 3.3V power source and GND to the ground.
- UART Communication: Connect the TXD and RXD pins to a UART interface for serial communication.
- GPIO: Utilize GPIO pins for additional control or status indication.
- Antenna: Ensure that an appropriate antenna is connected for optimal wireless performance.
Best Practices
- Use a regulated power supply to avoid damage due to voltage spikes.
- Implement proper decoupling and filtering to minimize power supply noise.
- Ensure that the antenna placement and orientation are optimized for the application.
- Follow the recommended PCB layout guidelines for RF performance and EMC compliance.
Troubleshooting and FAQs
Common Issues
- Module not responding: Ensure that the power supply is stable and within the specified range. Check the UART connections and settings.
- Poor wireless performance: Verify the antenna connection and placement. Check for sources of interference.
FAQs
Can the RTL8720DN operate in both Wi-Fi and Bluetooth modes simultaneously? Yes, the module can maintain Wi-Fi and Bluetooth connections concurrently.
What is the maximum data rate for Wi-Fi and Bluetooth? The Wi-Fi data rate can go up to 150 Mbps, and the Bluetooth data rate depends on the specific Bluetooth profile used.
Example Code for Arduino UNO
Below is an example of how to initialize the RTL8720DN module with an Arduino UNO for serial communication.
#include <SoftwareSerial.h>

// Define the RX and TX pins connected to the RTL8720DN module
#define RTL8720DN_RX 10
#define RTL8720DN_TX 11

// Create a software serial object
SoftwareSerial rtlSerial(RTL8720DN_RX, RTL8720DN_TX);

void setup() {
  // Start the hardware serial communication
  Serial.begin(9600);
  // Start the software serial communication
  rtlSerial.begin(115200);

  Serial.println("RTL8720DN Wi-Fi and Bluetooth Module Example");
}

void loop() {
  // Check if data is available from the RTL8720DN module
  if (rtlSerial.available()) {
    char data = rtlSerial.read();
    Serial.write(data);
  }

  // Check if data is available from the Serial Monitor
  if (Serial.available()) {
    char data = Serial.read();
    rtlSerial.write(data);
  }
}
Note: This code is for demonstration purposes and does not include Wi-Fi or Bluetooth initialization. Refer to the RTL8720DN SDK for specific wireless communication setup.
Remember to keep the code comments concise and within the 80 character line length limit.