How to Use N12 Motor: Examples, Pinouts, and Specs
Introduction
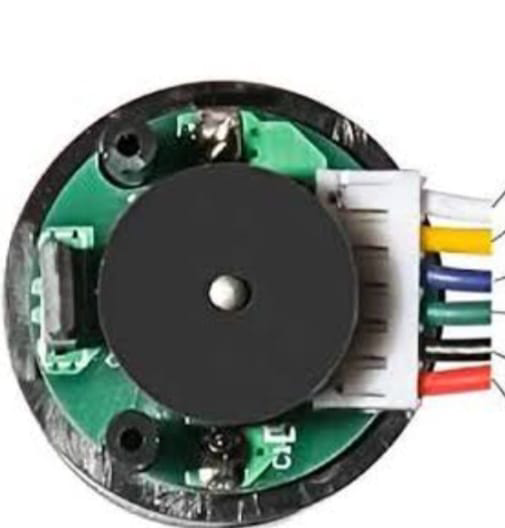
The N12 Motor is a small, lightweight DC motor designed for use in robotics, hobby projects, and other applications requiring compact and efficient performance. Manufactured by Motor with Encoder, the N12 is known for its reliability, ease of use, and compatibility with a wide range of microcontrollers and motor drivers. Its built-in encoder allows for precise speed and position control, making it ideal for projects that demand accuracy and feedback.
Explore Projects Built with N12 Motor
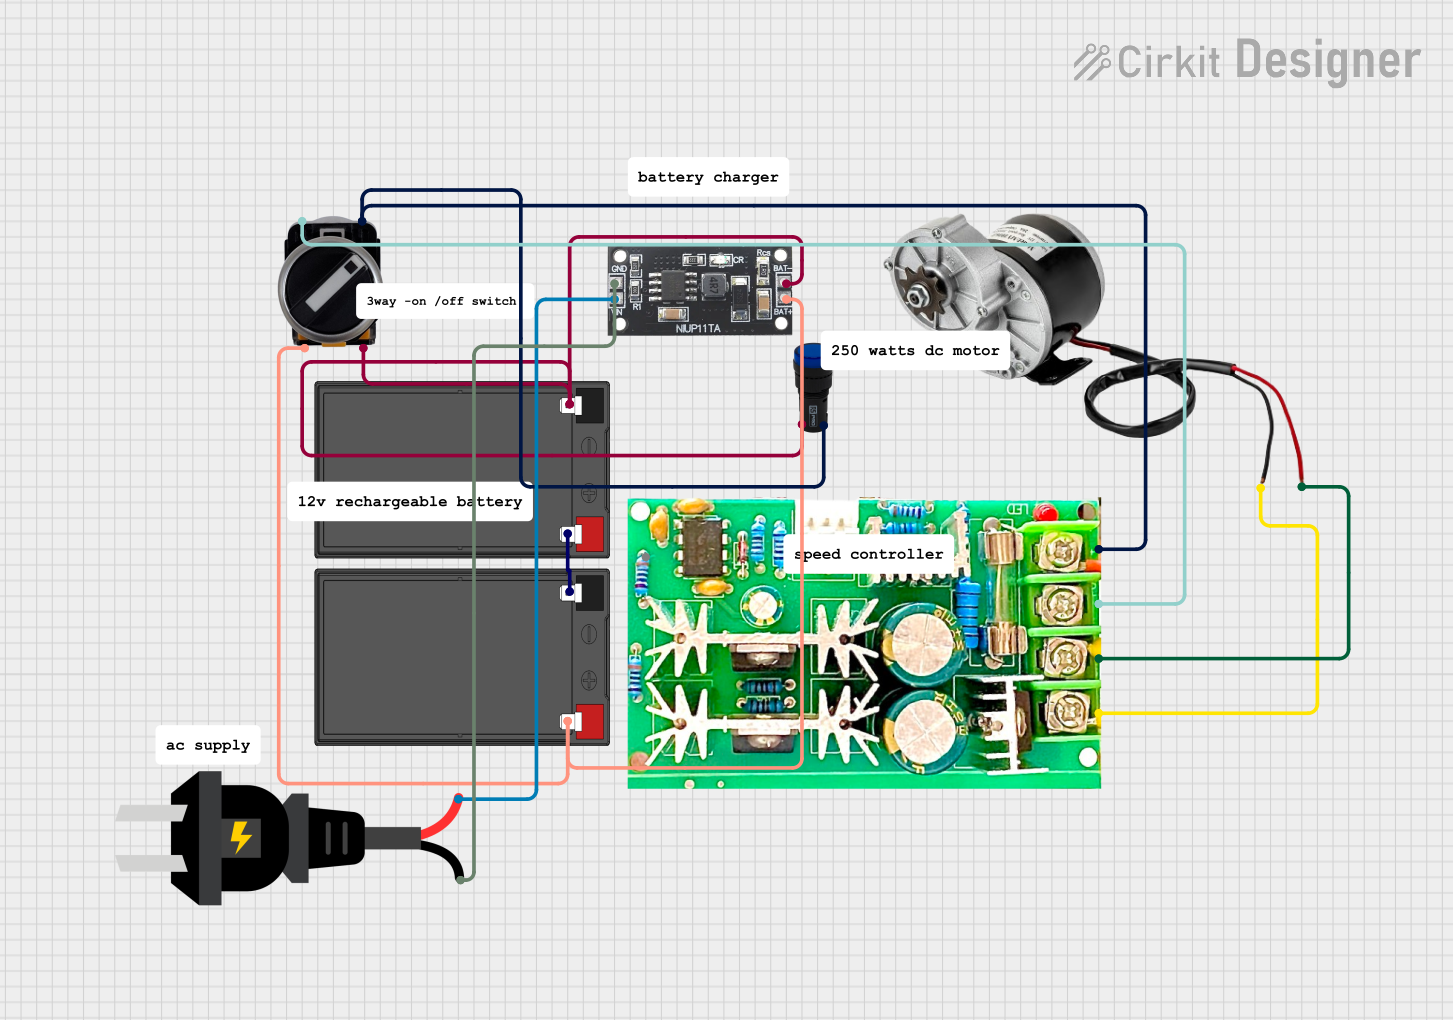

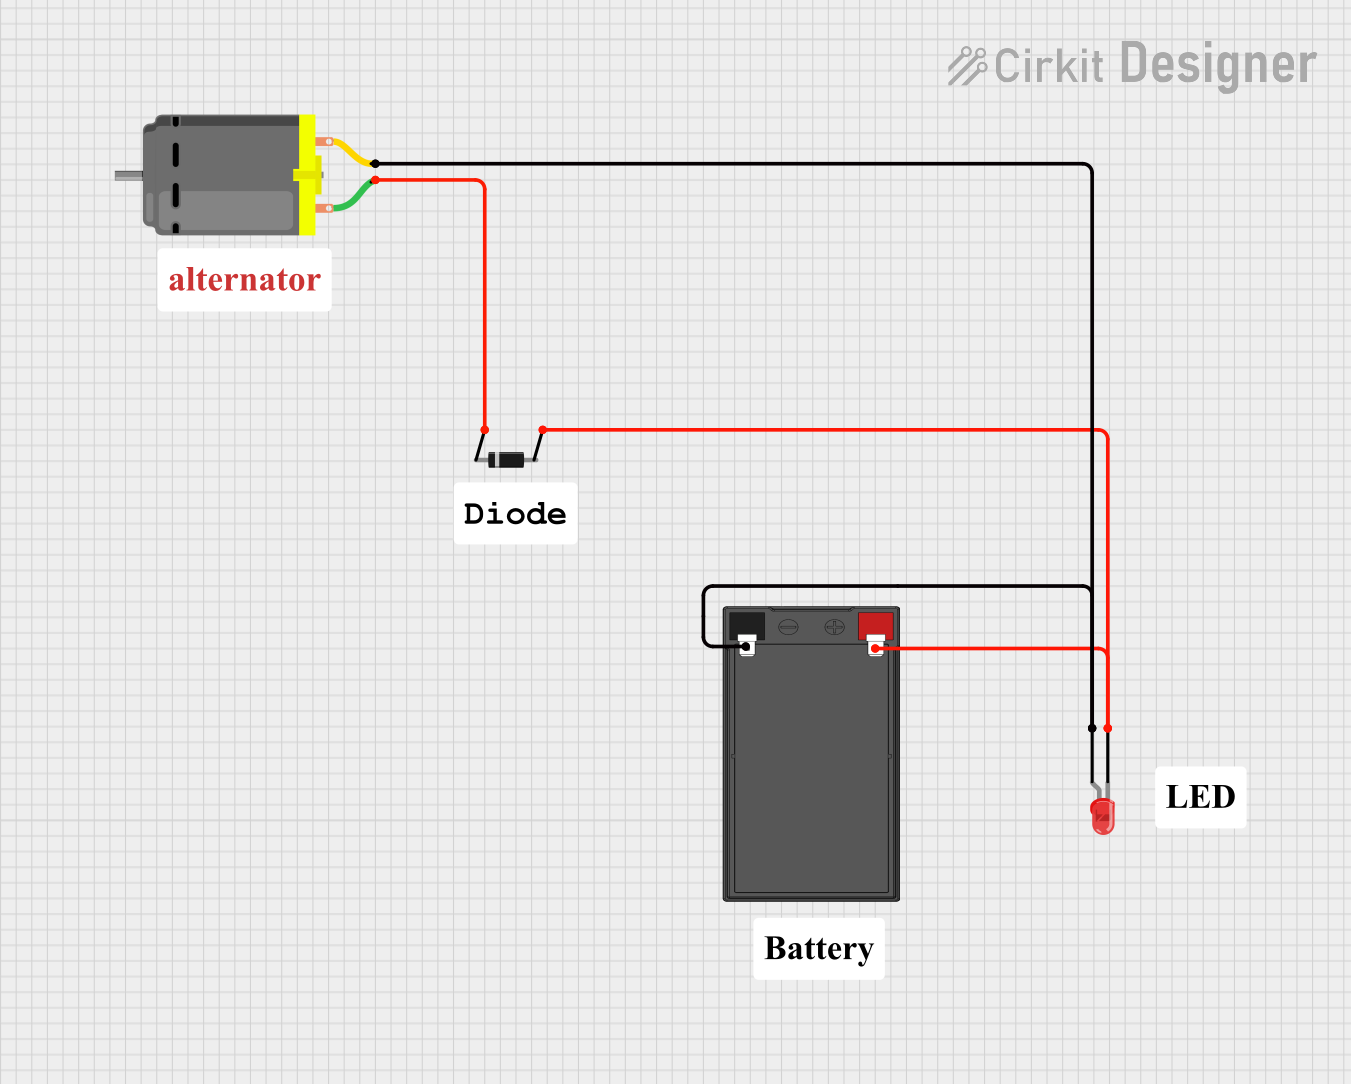
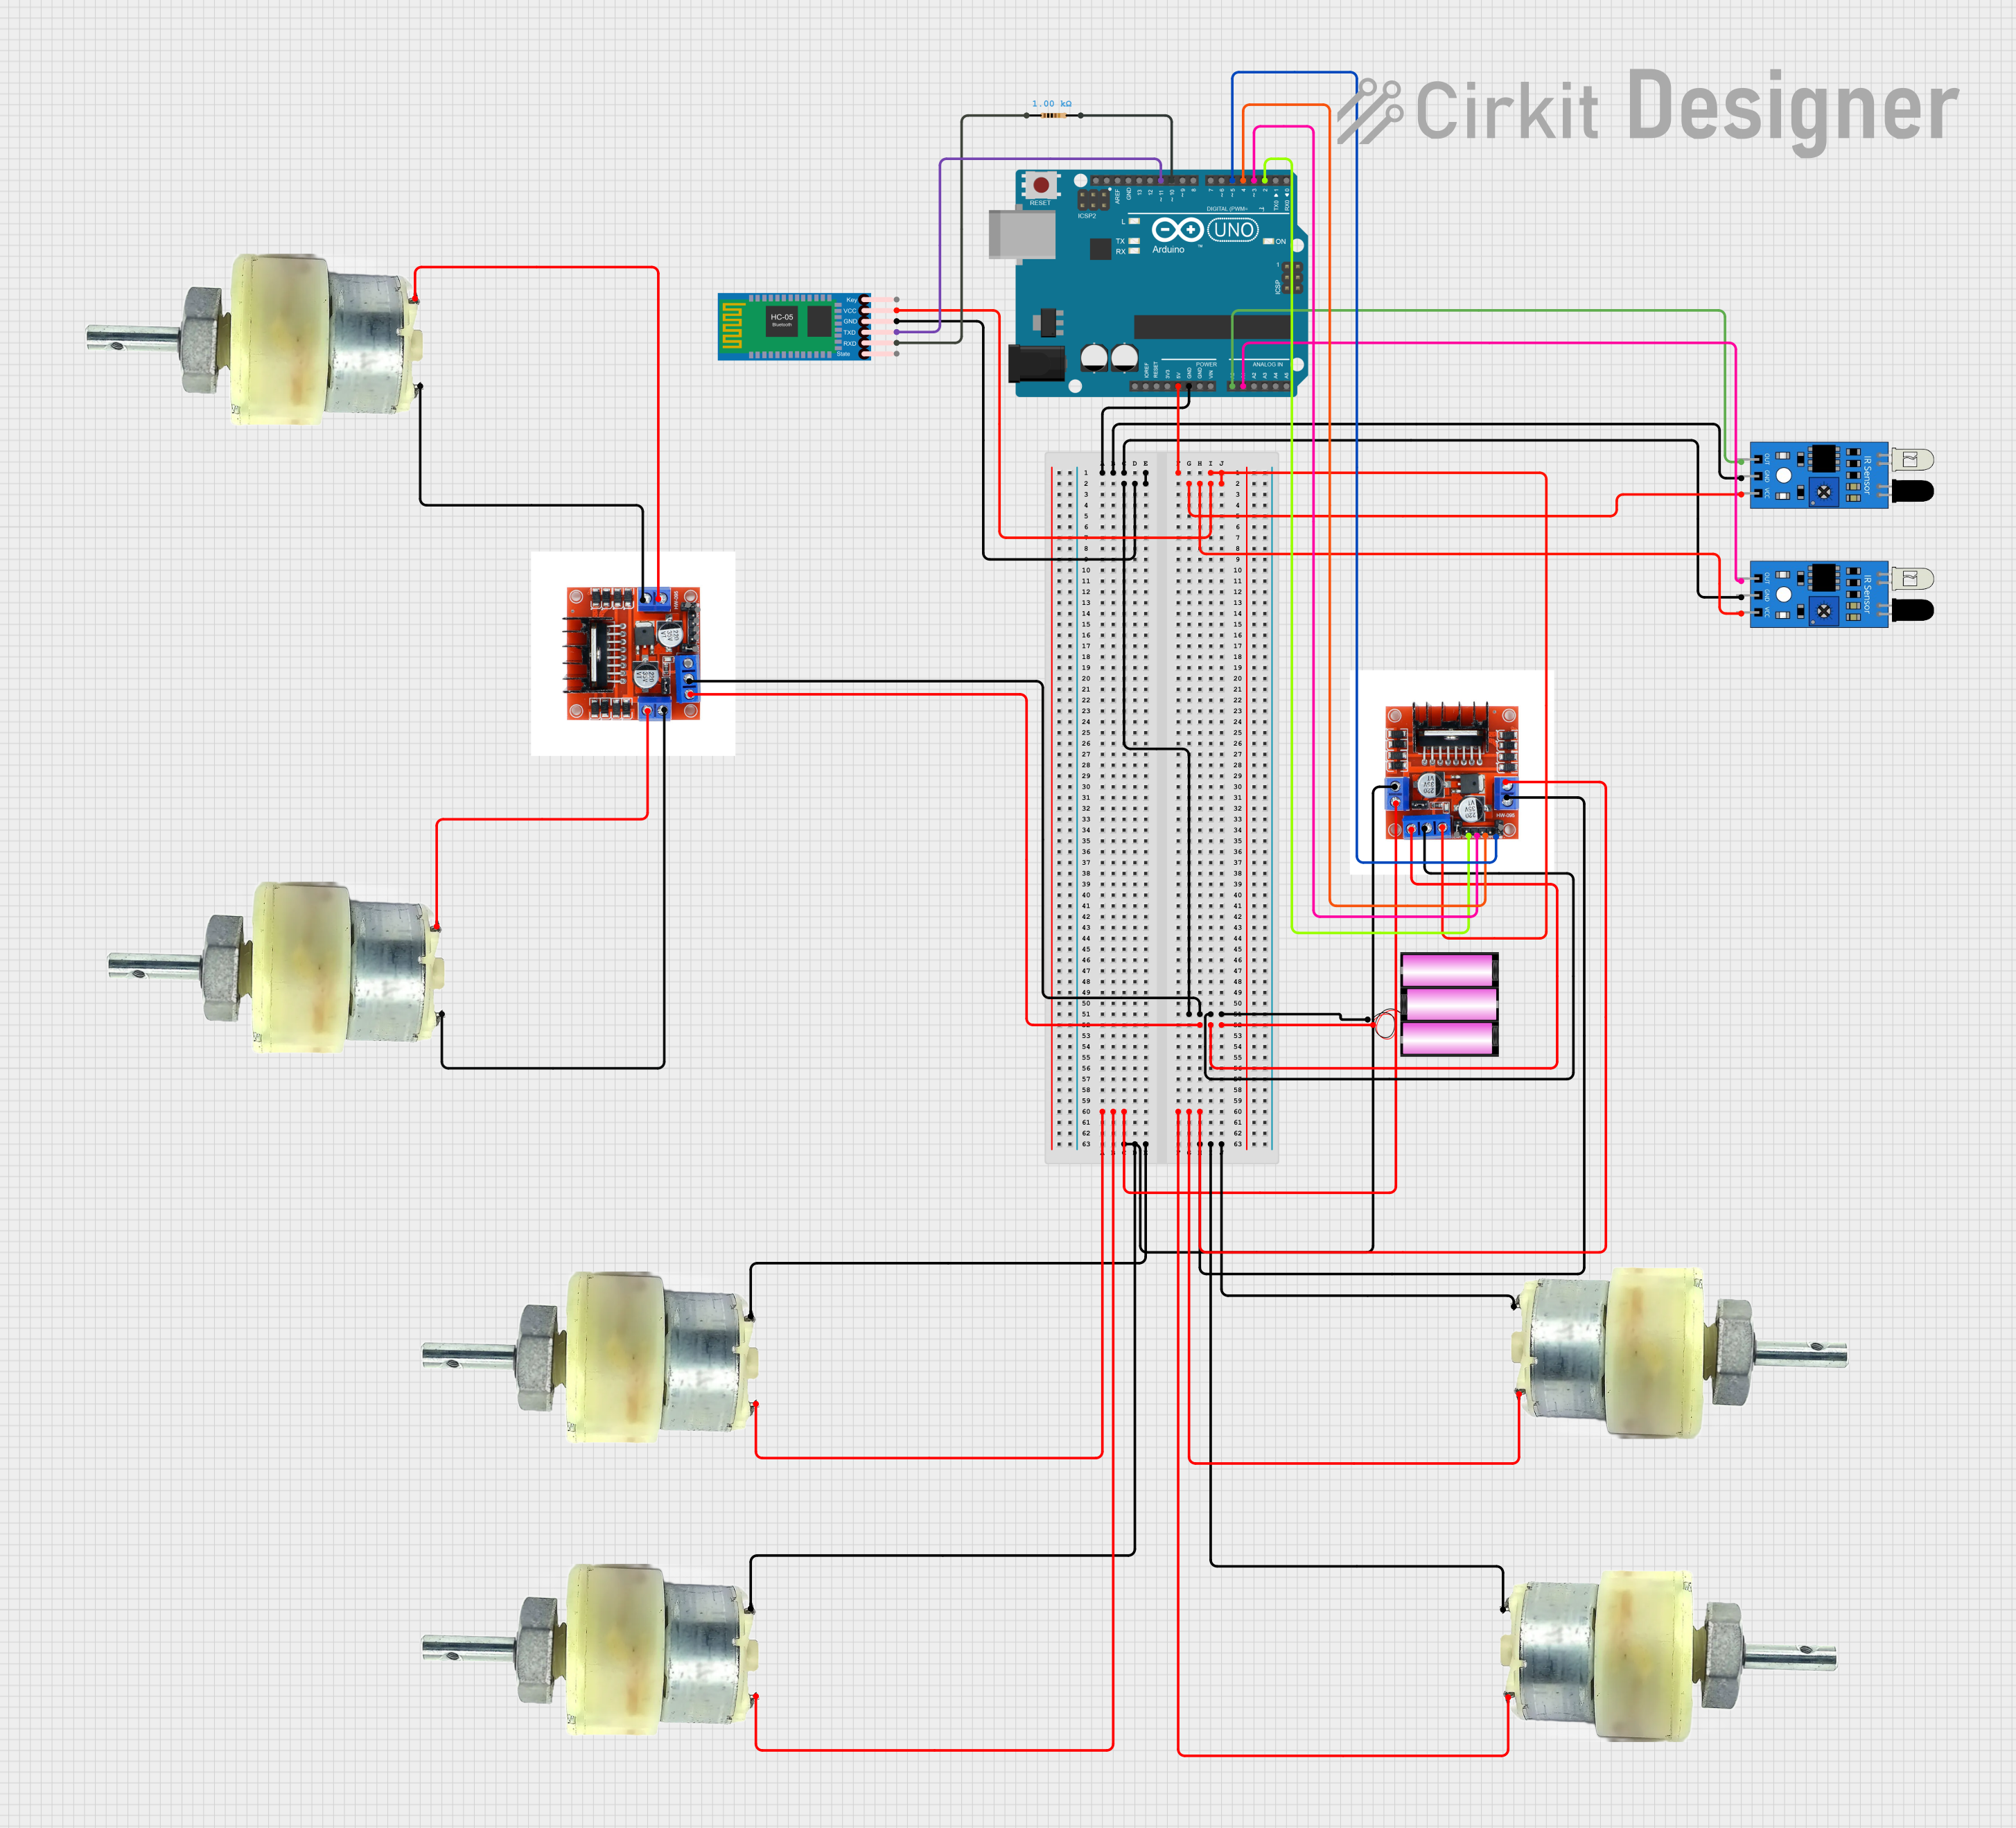
Explore Projects Built with N12 Motor
Common Applications
- Robotics (e.g., mobile robots, robotic arms)
- Hobby projects (e.g., RC cars, DIY gadgets)
- Automation systems
- Educational electronics projects
- Prototyping and experimentation
Technical Specifications
The following table outlines the key technical details of the N12 Motor:
| Parameter | Value |
|---|---|
| Manufacturer Part ID | N12 |
| Operating Voltage | 6V to 12V |
| Rated Current | 200 mA (no load) |
| Stall Current | 1.2 A |
| Rated Speed | 300 RPM @ 12V |
| Torque | 0.5 kg·cm |
| Encoder Type | Quadrature (2-channel) |
| Encoder Resolution | 20 pulses per revolution |
| Motor Dimensions | 30 mm x 20 mm x 15 mm |
| Shaft Diameter | 3 mm |
| Weight | 50 g |
Pin Configuration
The N12 Motor comes with a 6-pin connector for motor and encoder connections. The pinout is as follows:
| Pin Number | Name | Description |
|---|---|---|
| 1 | Motor+ | Positive terminal of the motor |
| 2 | Motor- | Negative terminal of the motor |
| 3 | Encoder A | Encoder channel A output |
| 4 | Encoder B | Encoder channel B output |
| 5 | Vcc | Power supply for the encoder (5V) |
| 6 | GND | Ground for the encoder |
Usage Instructions
Connecting the N12 Motor
- Power Supply: Connect the Motor+ and Motor- pins to a motor driver capable of handling the motor's voltage and current requirements. Ensure the driver can provide sufficient current to avoid stalling.
- Encoder Connections: Connect the Encoder A and Encoder B pins to the input pins of your microcontroller or motor driver. Use the Vcc and GND pins to power the encoder (typically 5V).
- Microcontroller Compatibility: The N12 Motor is compatible with popular microcontrollers like Arduino, Raspberry Pi, and ESP32. Use a motor driver (e.g., L298N, L293D, or TB6612FNG) to control the motor.
Example: Using the N12 Motor with Arduino UNO
Below is an example of how to control the N12 Motor with an Arduino UNO and read encoder data:
Circuit Setup
- Connect Motor+ and Motor- to the output terminals of the motor driver.
- Connect Encoder A to Arduino pin 2 and Encoder B to Arduino pin 3.
- Connect Vcc and GND of the encoder to the 5V and GND pins of the Arduino.
Code Example
// Example code to control the N12 Motor and read encoder data
// Connect Encoder A to pin 2 and Encoder B to pin 3 on Arduino UNO

volatile int encoderCount = 0; // Variable to store encoder count

void setup() {
  pinMode(2, INPUT); // Set pin 2 as input for Encoder A
  pinMode(3, INPUT); // Set pin 3 as input for Encoder B
  attachInterrupt(digitalPinToInterrupt(2), encoderISR, RISING);
  // Attach interrupt to Encoder A pin

  Serial.begin(9600); // Initialize serial communication
}

void loop() {
  Serial.print("Encoder Count: ");
  Serial.println(encoderCount); // Print encoder count to Serial Monitor
  delay(500); // Delay for readability
}

// Interrupt Service Routine (ISR) for Encoder A
void encoderISR() {
  if (digitalRead(3) == HIGH) {
    // If Encoder B is HIGH, increment count
    encoderCount++;
  } else {
    // If Encoder B is LOW, decrement count
    encoderCount--;
  }
}
Best Practices
- Use a motor driver with sufficient current capacity to prevent overheating or damage.
- Add a capacitor across the motor terminals to reduce electrical noise.
- Secure the motor firmly in your project to prevent vibrations or misalignment.
- Use pull-up resistors on the encoder pins if necessary to ensure clean signals.
Troubleshooting and FAQs
Common Issues
Motor Not Spinning
- Cause: Insufficient power supply or incorrect wiring.
- Solution: Verify the power supply voltage and current. Check the wiring to ensure proper connections.
Encoder Not Working
- Cause: Incorrect pin connections or missing pull-up resistors.
- Solution: Double-check the encoder pin connections. Add pull-up resistors if the signal is unstable.
Motor Overheating
- Cause: Excessive load or insufficient ventilation.
- Solution: Reduce the load on the motor or improve ventilation around the motor.
Noisy Operation
- Cause: Electrical noise or mechanical misalignment.
- Solution: Add a capacitor across the motor terminals and ensure proper alignment.
FAQs
Q: Can the N12 Motor be powered directly from an Arduino?
A: No, the N12 Motor requires more current than the Arduino can provide. Use a motor driver to control the motor.
Q: What is the purpose of the encoder?
A: The encoder provides feedback on the motor's speed and position, enabling precise control in applications like robotics.
Q: Can I use the N12 Motor with a 3.3V microcontroller?
A: Yes, but ensure the encoder's Vcc pin is connected to a 5V source, as it requires 5V to operate.
Q: How do I calculate the motor's speed using the encoder?
A: Measure the time between encoder pulses and use the encoder resolution (20 pulses per revolution) to calculate the speed.
By following this documentation, you can effectively integrate the N12 Motor into your projects and troubleshoot common issues.