How to Use UV Ballast: Examples, Pinouts, and Specs
Introduction
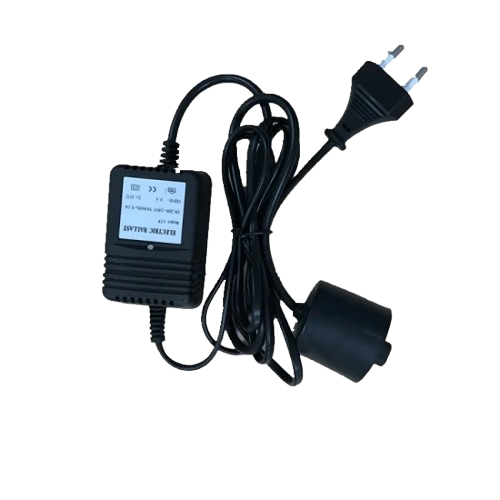
A UV ballast is an electronic device designed to regulate the current supplied to a UV lamp. It ensures stable operation by maintaining a consistent current flow, preventing flickering, and protecting the lamp from damage caused by overcurrent. UV ballasts are essential for the proper functioning of UV lamps, which are commonly used in applications such as water purification, air sterilization, and medical equipment.
Explore Projects Built with UV Ballast
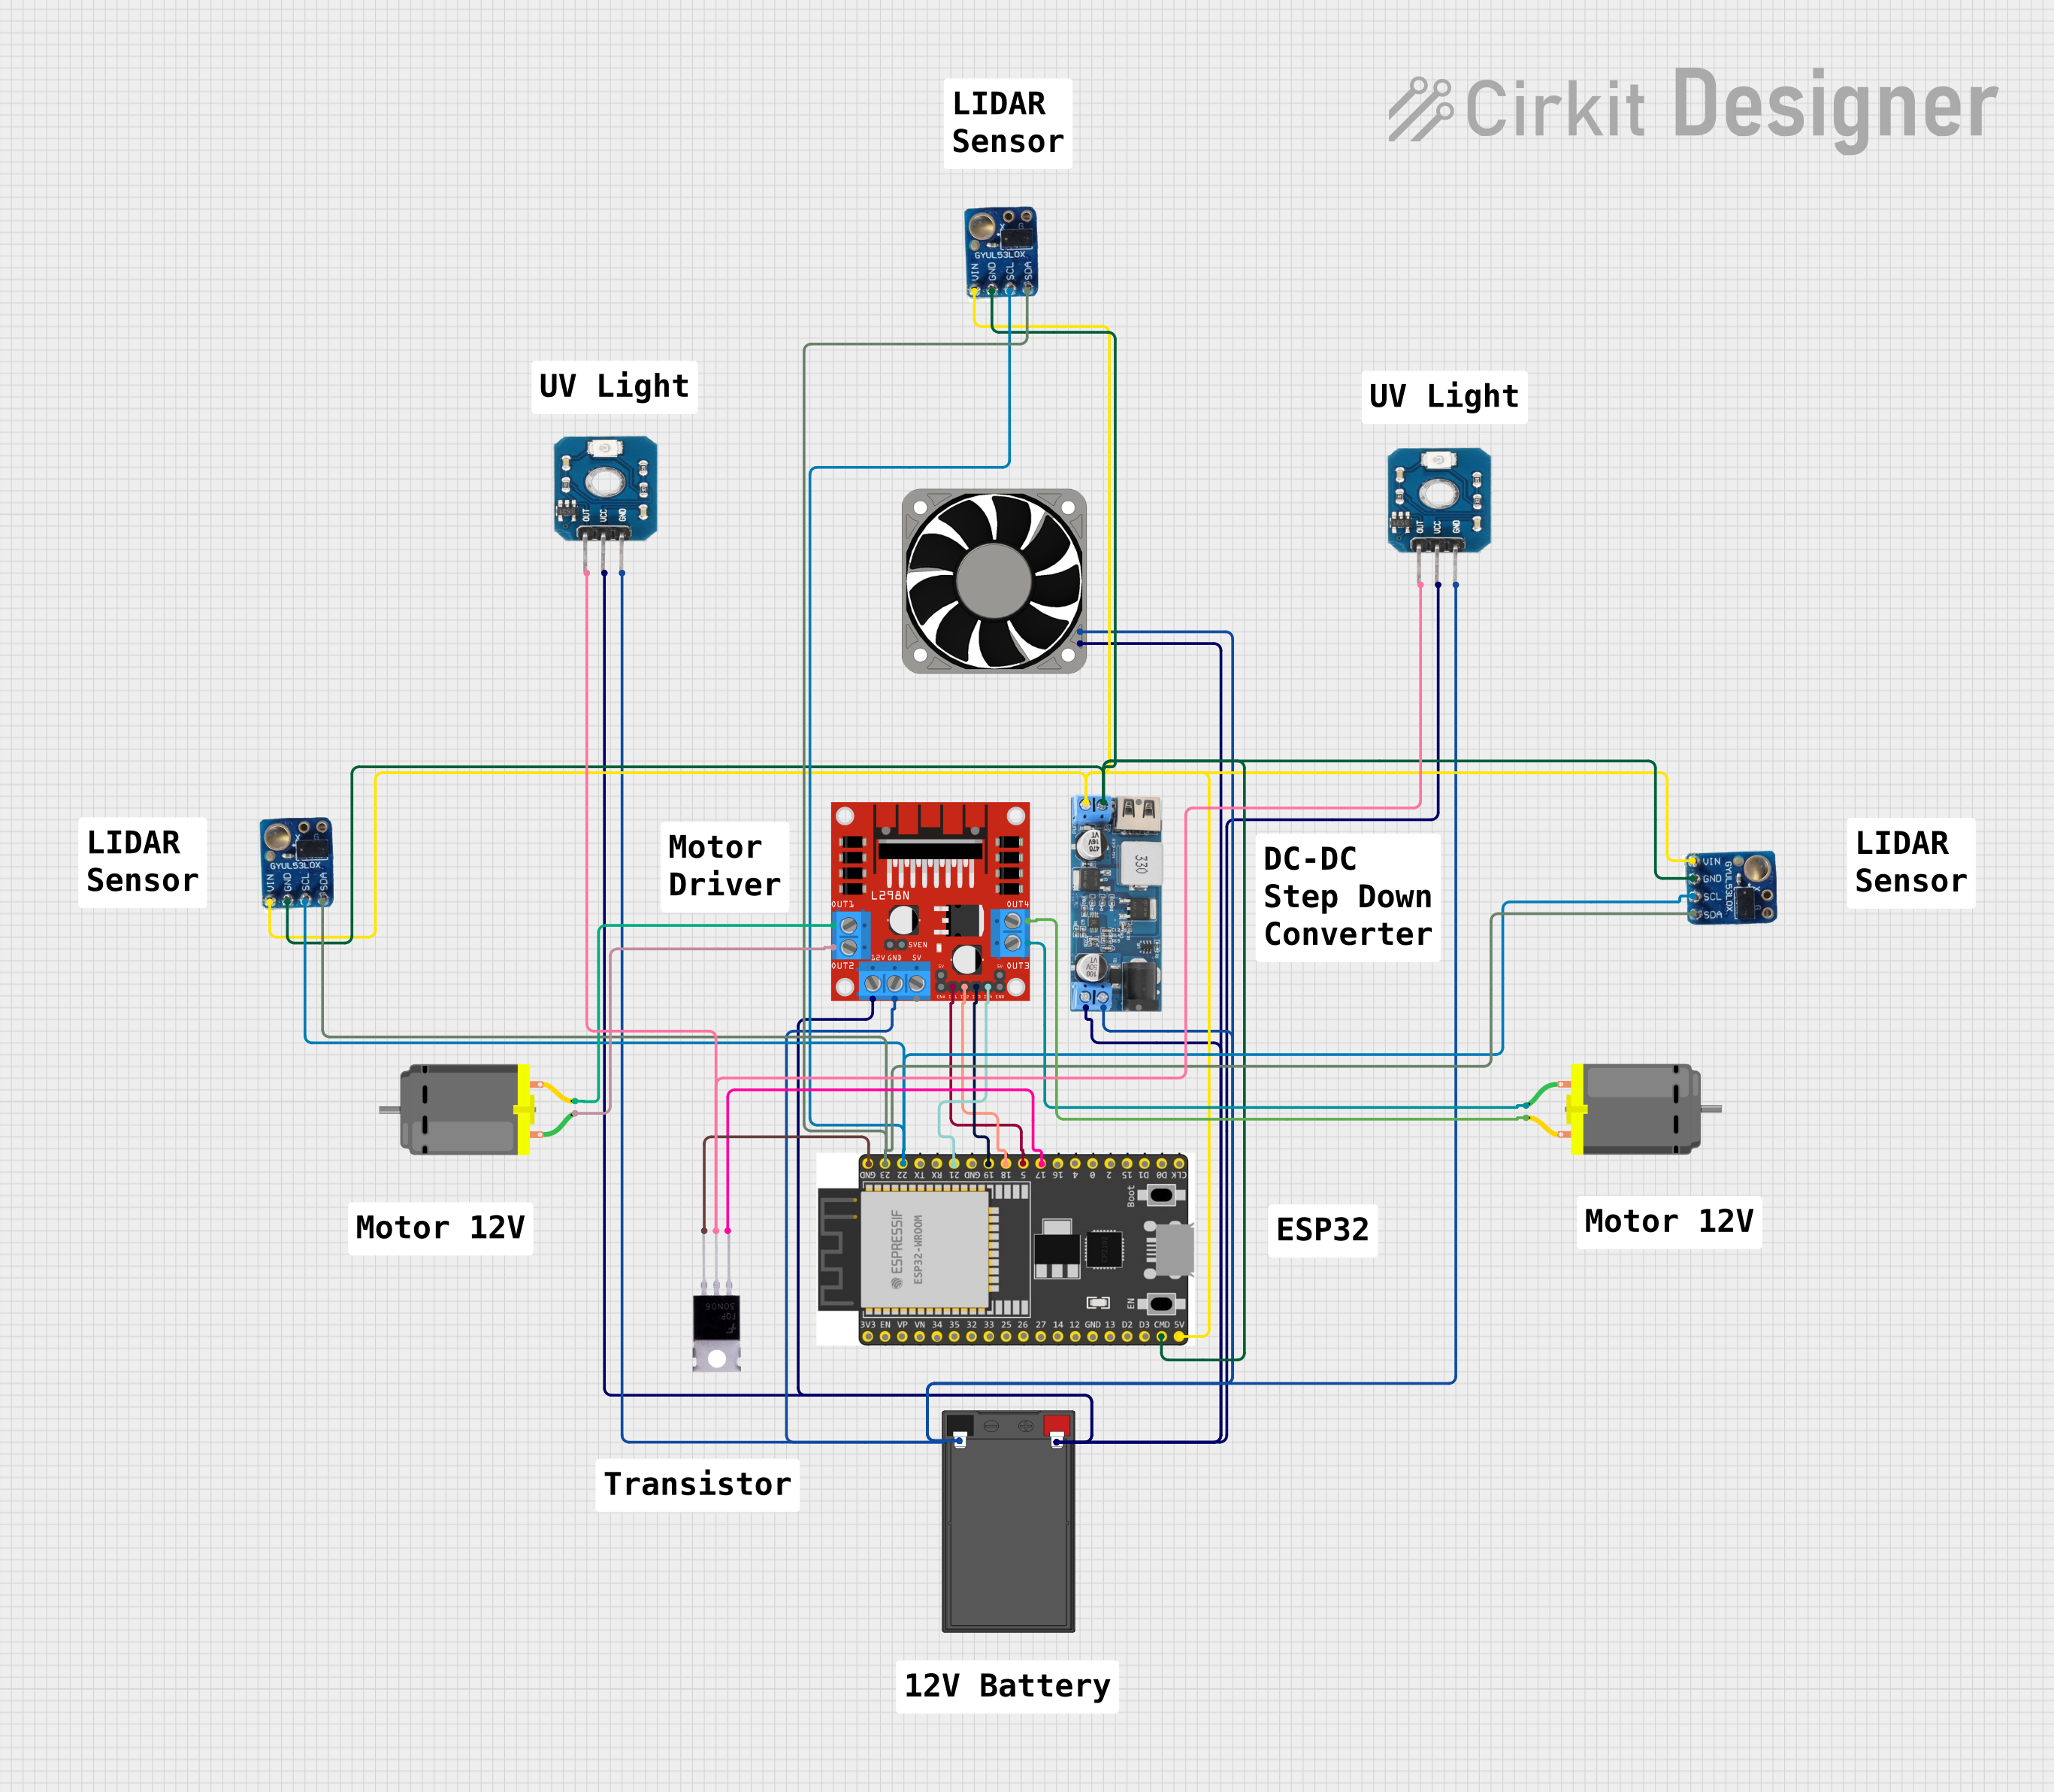
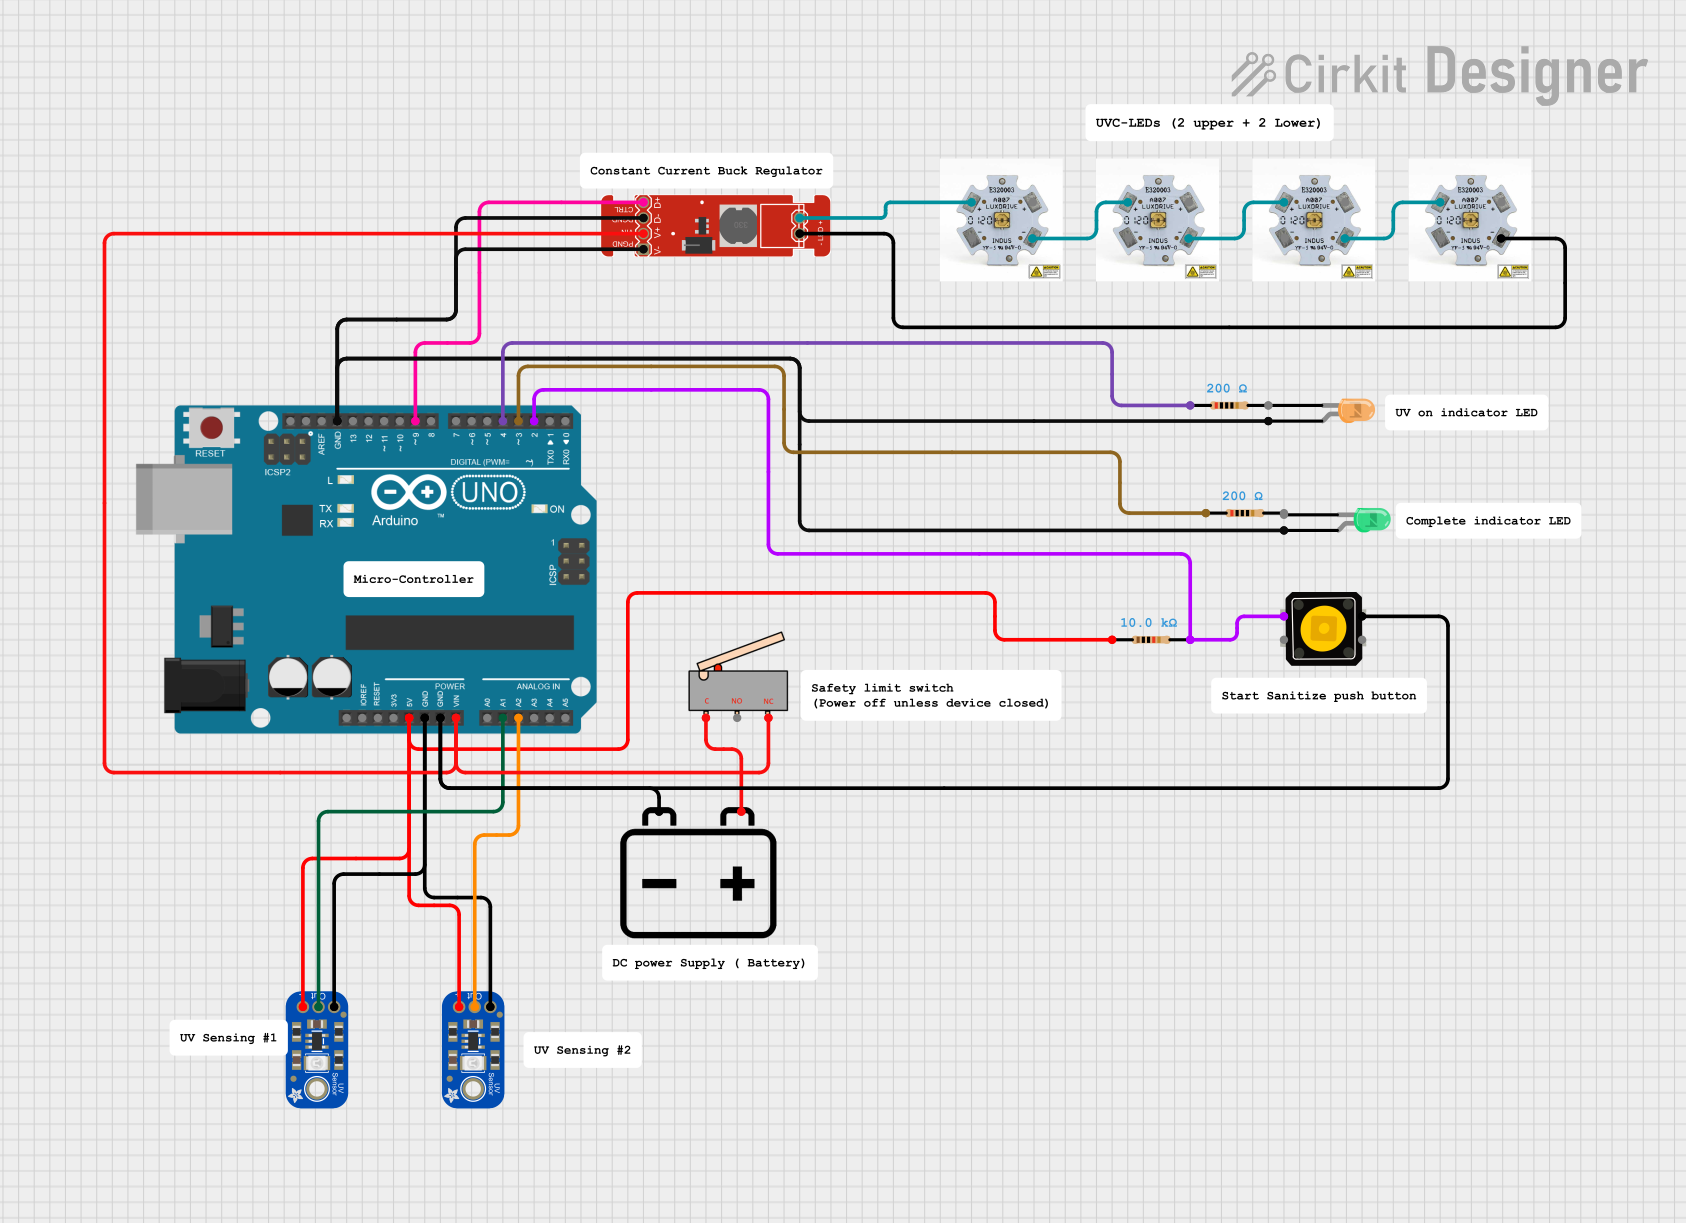
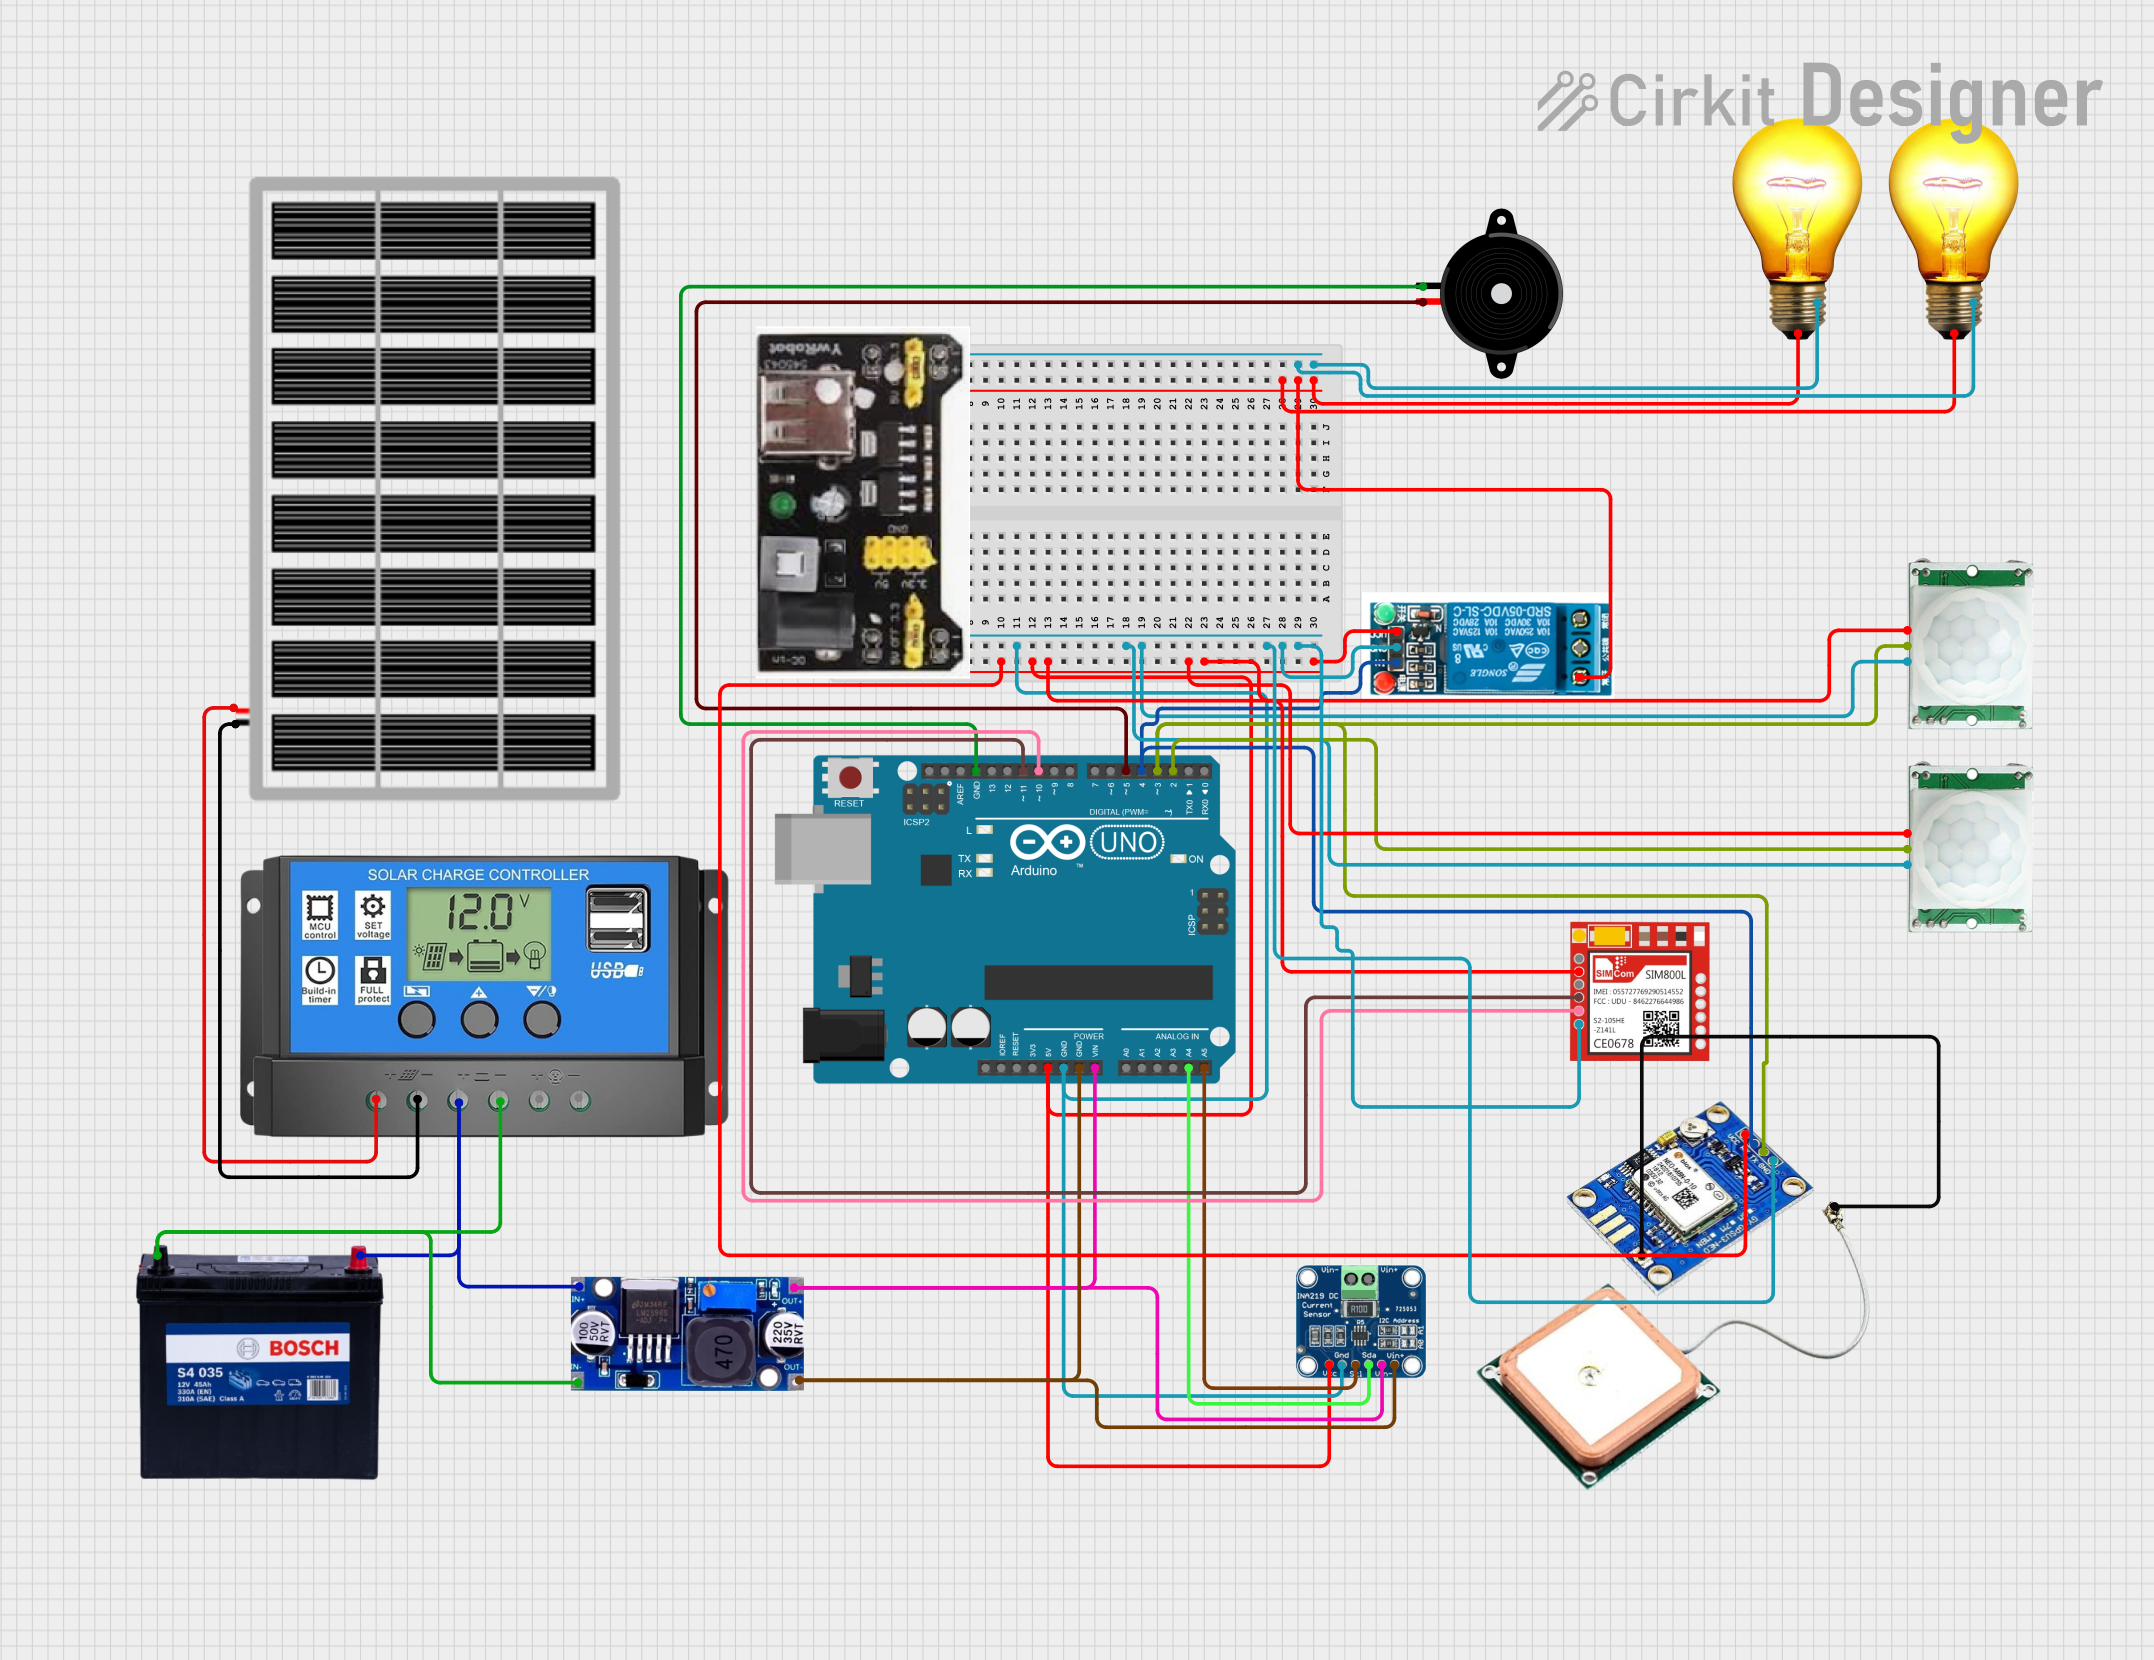
Explore Projects Built with UV Ballast
Common Applications and Use Cases
- Water treatment systems (e.g., UV disinfection units)
- Air purification systems
- Medical sterilization equipment
- Industrial curing processes
- Germicidal UV lamps for surface disinfection
Technical Specifications
Below are the key technical details for a typical UV ballast. Specifications may vary depending on the model and manufacturer.
General Specifications
| Parameter | Value |
|---|---|
| Input Voltage | 120V AC or 230V AC |
| Output Voltage | 300V to 600V (depending on lamp type) |
| Operating Frequency | 50 Hz / 60 Hz |
| Power Rating | 10W to 200W (varies by model) |
| Lamp Compatibility | Low-pressure or medium-pressure UV lamps |
| Operating Temperature | -10°C to 50°C |
| Efficiency | ≥ 90% |
Pin Configuration and Descriptions
The UV ballast typically has a set of input and output terminals. Below is a general pin configuration:
Input Terminals
| Pin Name | Description |
|---|---|
| L | Live AC input (120V or 230V) |
| N | Neutral AC input |
| GND | Ground connection for safety |
Output Terminals
| Pin Name | Description |
|---|---|
| UV+ | Positive output to UV lamp |
| UV- | Negative output to UV lamp |
Usage Instructions
How to Use the UV Ballast in a Circuit
Connect the Input Terminals:
- Connect the
Lterminal to the live AC supply (120V or 230V, depending on the ballast rating). - Connect the
Nterminal to the neutral AC supply. - Ensure the
GNDterminal is properly grounded for safety.
- Connect the
Connect the Output Terminals:
- Connect the
UV+terminal to the positive terminal of the UV lamp. - Connect the
UV-terminal to the negative terminal of the UV lamp.
- Connect the
Power On:
- After verifying all connections, power on the AC supply. The ballast will regulate the current to the UV lamp, ensuring stable operation.
Important Considerations and Best Practices
- Compatibility: Ensure the ballast is compatible with the UV lamp type (e.g., low-pressure or medium-pressure).
- Voltage Rating: Verify that the input voltage matches the ballast's rated input voltage.
- Ventilation: Install the ballast in a well-ventilated area to prevent overheating.
- Safety: Always disconnect the power supply before making any connections or adjustments.
- Wiring: Use appropriate wire gauges for input and output connections to handle the current safely.
Example: Connecting a UV Ballast to an Arduino UNO
While UV ballasts are not directly controlled by microcontrollers like the Arduino UNO, you can use a relay module to switch the ballast on and off. Below is an example code snippet for controlling a UV ballast using an Arduino UNO and a relay module.
// Example code to control a UV ballast using an Arduino UNO and a relay module
const int relayPin = 7; // Pin connected to the relay module

void setup() {
  pinMode(relayPin, OUTPUT); // Set relay pin as output
  digitalWrite(relayPin, LOW); // Ensure relay is off at startup
}

void loop() {
  // Turn on the UV ballast
  digitalWrite(relayPin, HIGH); // Activate relay
  delay(10000); // Keep the ballast on for 10 seconds

  // Turn off the UV ballast
  digitalWrite(relayPin, LOW); // Deactivate relay
  delay(5000); // Wait for 5 seconds before turning it on again
}
Notes:
- Use a relay module rated for the ballast's input voltage and current.
- Ensure proper isolation between the Arduino and the high-voltage AC circuit.
Troubleshooting and FAQs
Common Issues and Solutions
UV Lamp Flickering:
- Cause: Loose connections or incompatible ballast.
- Solution: Check all connections and ensure the ballast is compatible with the lamp.
Ballast Overheating:
- Cause: Poor ventilation or excessive load.
- Solution: Install the ballast in a well-ventilated area and ensure the lamp's power rating matches the ballast.
UV Lamp Not Turning On:
- Cause: Faulty wiring or damaged ballast.
- Solution: Verify all connections and test the ballast with a multimeter.
Humming Noise from Ballast:
- Cause: Normal operation or loose mounting.
- Solution: Ensure the ballast is securely mounted. If the noise persists, consult the manufacturer.
FAQs
Q1: Can I use a UV ballast with any type of UV lamp?
A1: No, UV ballasts are designed for specific types of UV lamps (e.g., low-pressure or medium-pressure). Always check compatibility before use.
Q2: How do I know if my ballast is faulty?
A2: Signs of a faulty ballast include flickering lamps, overheating, or the lamp not turning on. Use a multimeter to test the ballast's output voltage.
Q3: Is it safe to install a UV ballast myself?
A3: If you are experienced with electrical systems, you can install a UV ballast. Otherwise, consult a qualified electrician to ensure safety.
Q4: Can I dim a UV lamp using the ballast?
A4: Most UV ballasts do not support dimming. Use a ballast specifically designed for dimmable UV lamps if required.