How to Use Dfplayer mini: Examples, Pinouts, and Specs
Introduction
The DFPlayer Mini is a compact MP3 player module designed for standalone audio playback or integration into microcontroller-based projects. Manufactured by ESP32, this module can play audio files directly from a micro SD card and features a built-in amplifier for driving small speakers. It supports various audio formats, including MP3, WAV, and WMA, making it a versatile choice for audio playback applications.
Explore Projects Built with Dfplayer mini

Explore Projects Built with Dfplayer mini
Common Applications
- DIY audio projects
- Voice prompts and notifications
- Interactive exhibits and kiosks
- Alarm systems with audio alerts
- Embedded systems requiring sound output
Technical Specifications
The DFPlayer Mini is a feature-rich module with the following key specifications:
| Parameter | Value |
|---|---|
| Operating Voltage | 3.2V - 5.0V |
| Operating Current | 20mA - 30mA (idle), up to 100mA (playback) |
| Audio Formats Supported | MP3, WAV, WMA |
| Storage Media | Micro SD card (up to 32GB, FAT16/FAT32) |
| Communication Interface | UART (9600 bps default) |
| Output Modes | DAC (headphone/speaker), PWM |
| Built-in Amplifier | 3W mono amplifier |
| Dimensions | 22mm x 30mm |
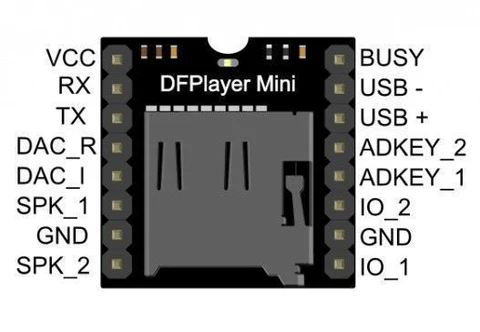
Pin Configuration
The DFPlayer Mini has 16 pins, but only a subset is commonly used. Below is the pin configuration:
| Pin | Name | Description |
|---|---|---|
| 1 | VCC | Power supply input (3.2V - 5.0V) |
| 2 | GND | Ground |
| 3 | RX | UART receive pin (connect to TX of microcontroller) |
| 4 | TX | UART transmit pin (connect to RX of microcontroller) |
| 5 | SPK_1 | Speaker output (+) for mono speaker |
| 6 | SPK_2 | Speaker output (-) for mono speaker |
| 7 | DAC_R | Right channel audio output (for external amplifier or headphones) |
| 8 | DAC_L | Left channel audio output (for external amplifier or headphones) |
| 9-16 | Other Pins | Reserved for advanced features (not commonly used in basic applications) |
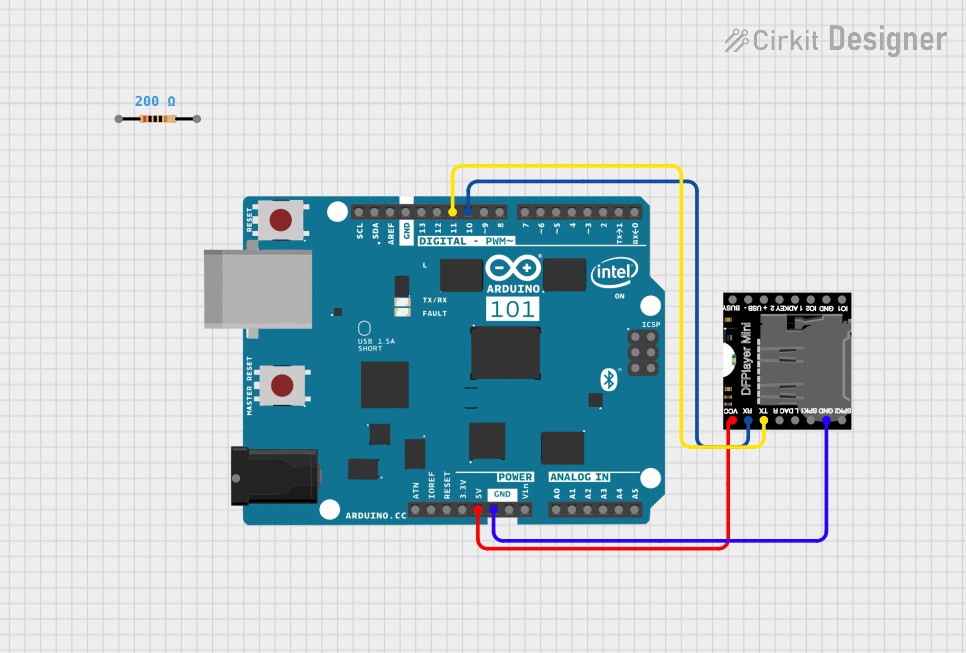
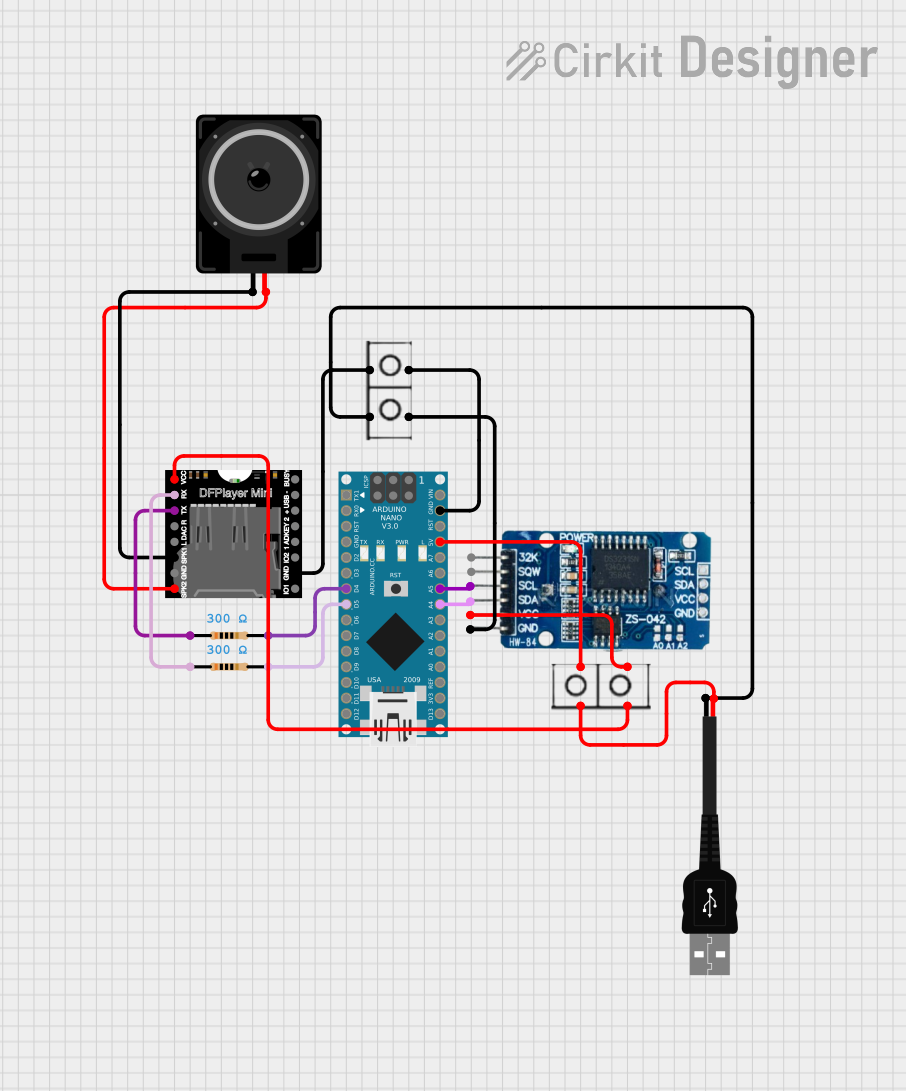
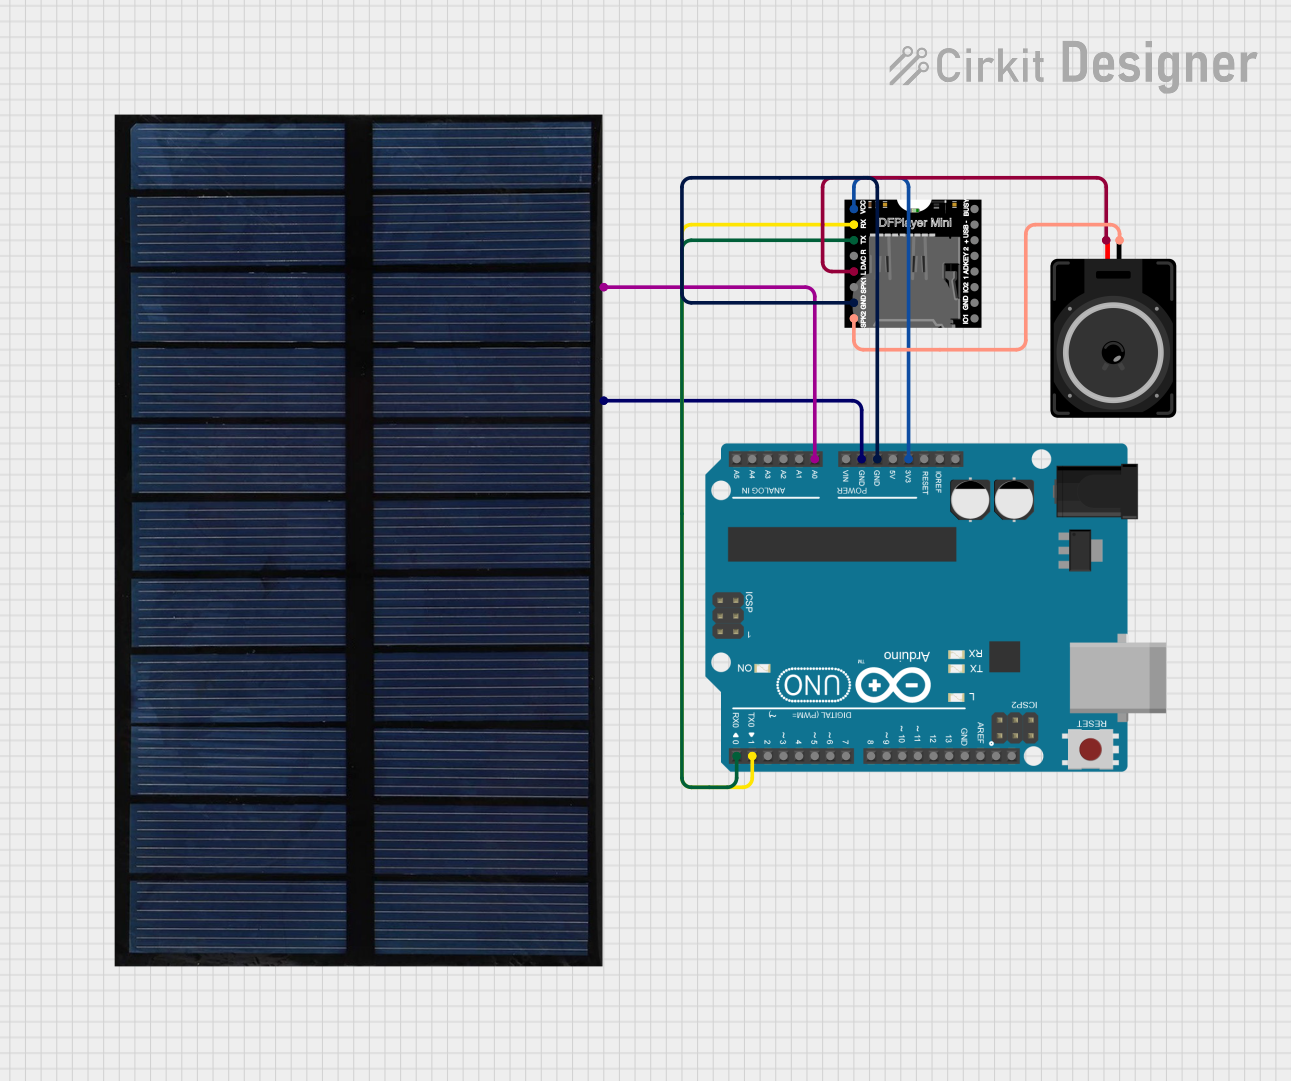
Usage Instructions
Connecting the DFPlayer Mini
To use the DFPlayer Mini in a circuit, follow these steps:
- Power Supply: Connect the
VCCpin to a 3.3V or 5V power source and theGNDpin to ground. - Speaker Connection: For a mono speaker, connect the speaker terminals to
SPK_1andSPK_2. For stereo output, useDAC_LandDAC_Rwith an external amplifier. - Microcontroller Interface: Connect the
RXpin of the DFPlayer Mini to theTXpin of the microcontroller and theTXpin of the DFPlayer Mini to theRXpin of the microcontroller. - Micro SD Card: Format the micro SD card as FAT16 or FAT32 and load audio files into the root directory. Insert the card into the DFPlayer Mini.
Important Considerations
- Ensure the micro SD card is properly formatted and contains supported audio files.
- Use a decoupling capacitor (e.g., 100µF) across the power supply pins to reduce noise.
- Avoid exceeding the maximum power rating of the built-in amplifier when connecting speakers.
- Use a logic level shifter if interfacing with a 3.3V microcontroller to avoid damaging the module.
Example Code for Arduino UNO
Below is an example of how to control the DFPlayer Mini using an Arduino UNO:
#include "SoftwareSerial.h"

// Define RX and TX pins for SoftwareSerial
SoftwareSerial mySerial(10, 11); // RX = Pin 10, TX = Pin 11

void setup() {
  mySerial.begin(9600); // Initialize SoftwareSerial at 9600 bps
  Serial.begin(9600);   // Initialize Serial Monitor for debugging

  // Send initialization command to DFPlayer Mini
  mySerial.write(0x7E); // Start byte
  mySerial.write(0xFF); // Version
  mySerial.write(0x06); // Length
  mySerial.write(0x09); // Command: Play track 1
  mySerial.write(0x00); // Feedback
  mySerial.write(0x00); // Parameter 1
  mySerial.write(0x01); // Parameter 2 (track number)
  mySerial.write(0xEF); // End byte

  Serial.println("DFPlayer Mini initialized and playing track 1.");
}

void loop() {
  // Add code here to control playback, volume, etc.
}
Notes on the Code
- The
SoftwareSeriallibrary is used to communicate with the DFPlayer Mini. - Replace
10and11with the desired pins forRXandTXon your Arduino UNO. - Ensure the audio file is named correctly (e.g.,
0001.mp3) and placed in the root directory of the micro SD card.
Troubleshooting and FAQs
Common Issues
No Sound Output
- Ensure the speaker is properly connected to
SPK_1andSPK_2. - Verify that the audio file format is supported (MP3, WAV, or WMA).
- Check the micro SD card for proper formatting (FAT16/FAT32).
- Ensure the speaker is properly connected to
Module Not Responding
- Confirm the
RXandTXconnections between the DFPlayer Mini and the microcontroller. - Ensure the baud rate is set to 9600 bps in the code.
- Check the power supply voltage (3.2V - 5.0V).
- Confirm the
Distorted Audio
- Reduce the volume level in the code or use a lower-power speaker.
- Add a decoupling capacitor across the power supply pins to minimize noise.
FAQs
Q: Can I use the DFPlayer Mini without a microcontroller?
A: Yes, the DFPlayer Mini can operate in standalone mode by connecting buttons to specific pins for basic playback control.
Q: What is the maximum storage capacity supported?
A: The DFPlayer Mini supports micro SD cards up to 32GB formatted as FAT16 or FAT32.
Q: Can I control the volume programmatically?
A: Yes, the volume can be adjusted using UART commands from the microcontroller.
Q: Is an external amplifier required?
A: No, the DFPlayer Mini has a built-in 3W mono amplifier, but you can use an external amplifier for higher-quality audio or stereo output.
By following this documentation, you can effectively integrate the DFPlayer Mini into your projects and troubleshoot common issues.