The SIM800L GSM module is a compact and versatile component that enables GSM/GPRS communication for embedded systems. It operates on a range of frequencies suitable for global mobile networks and supports functionalities such as SMS, voice calls, and data transmission over GPRS. This module is widely used in IoT projects, remote monitoring systems, and mobile communication applications due to its small form factor and comprehensive feature set.
Explore Projects Built with SIM800L GSM Module
Use Cirkit Designer to design, explore, and prototype these projects online. Some projects support real-time simulation. Click "Open Project" to start designing instantly!
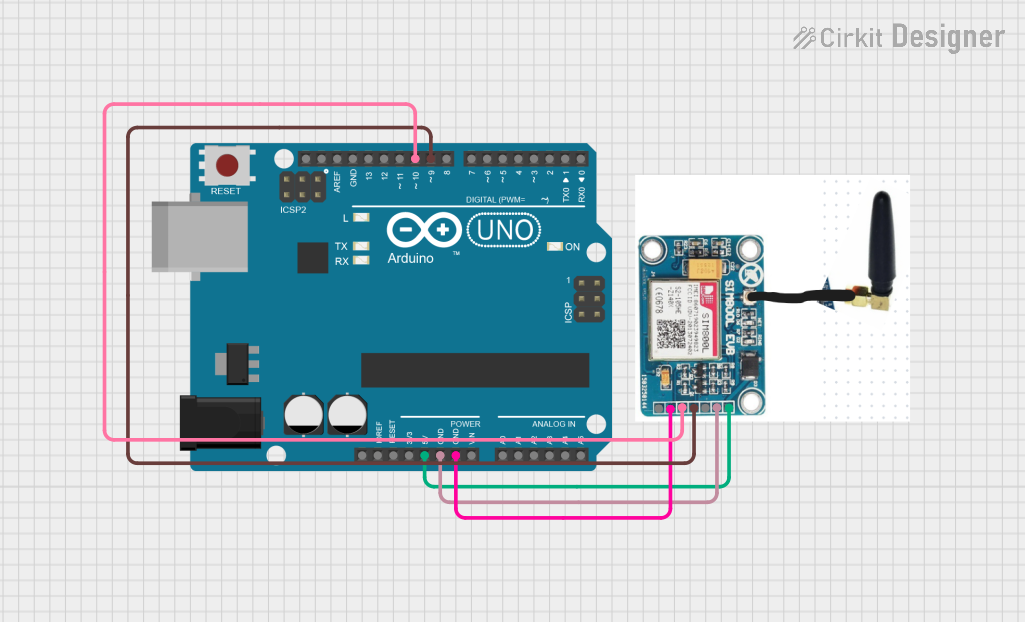
This circuit consists of an Arduino UNO connected to a SIM 800L GSM module. The Arduino UNO communicates with the SIM 800L module via software serial to send and receive SMS messages, with the Arduino providing power and ground connections to the GSM module.
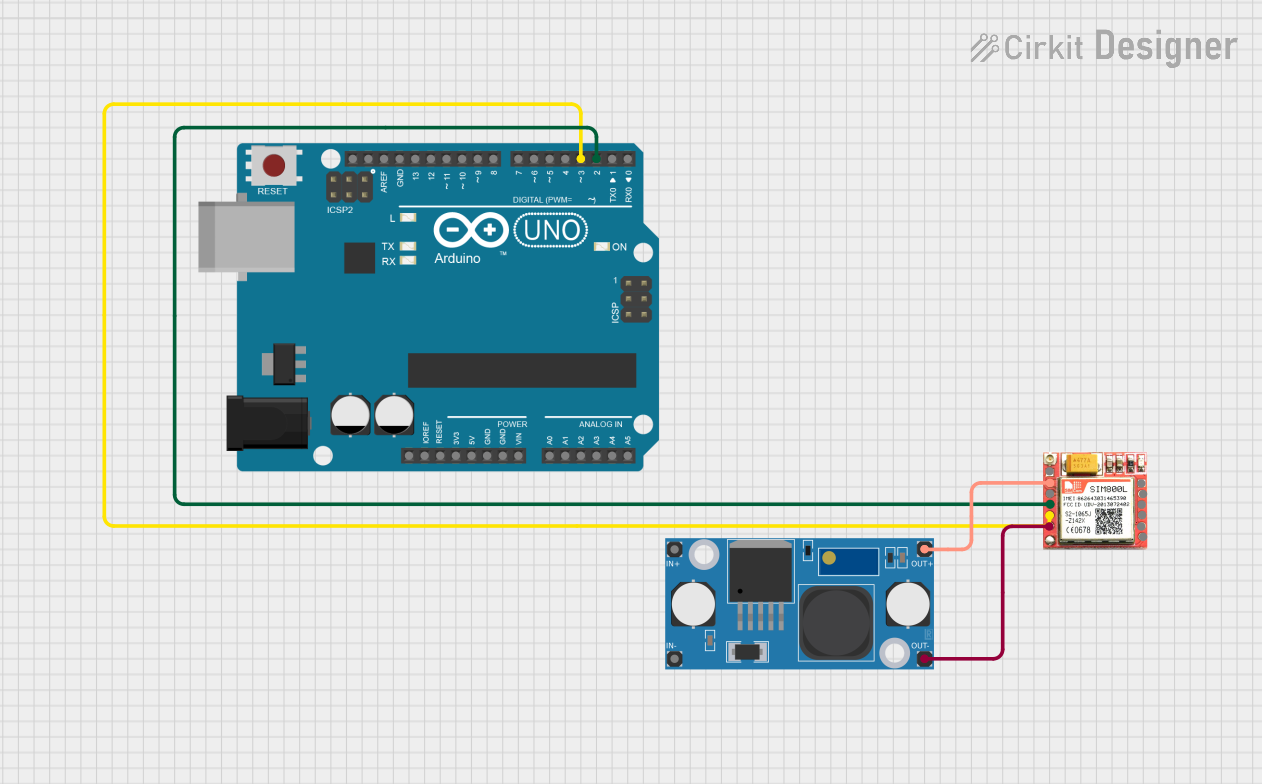
This circuit features an Arduino UNO microcontroller interfaced with a SIM 800L GSM module for communication purposes. The SIM 800L is powered by an LM2596 step-down module, which provides the necessary voltage regulation. The Arduino communicates with the SIM 800L via digital pins D2 and D3 for RX and TX respectively.
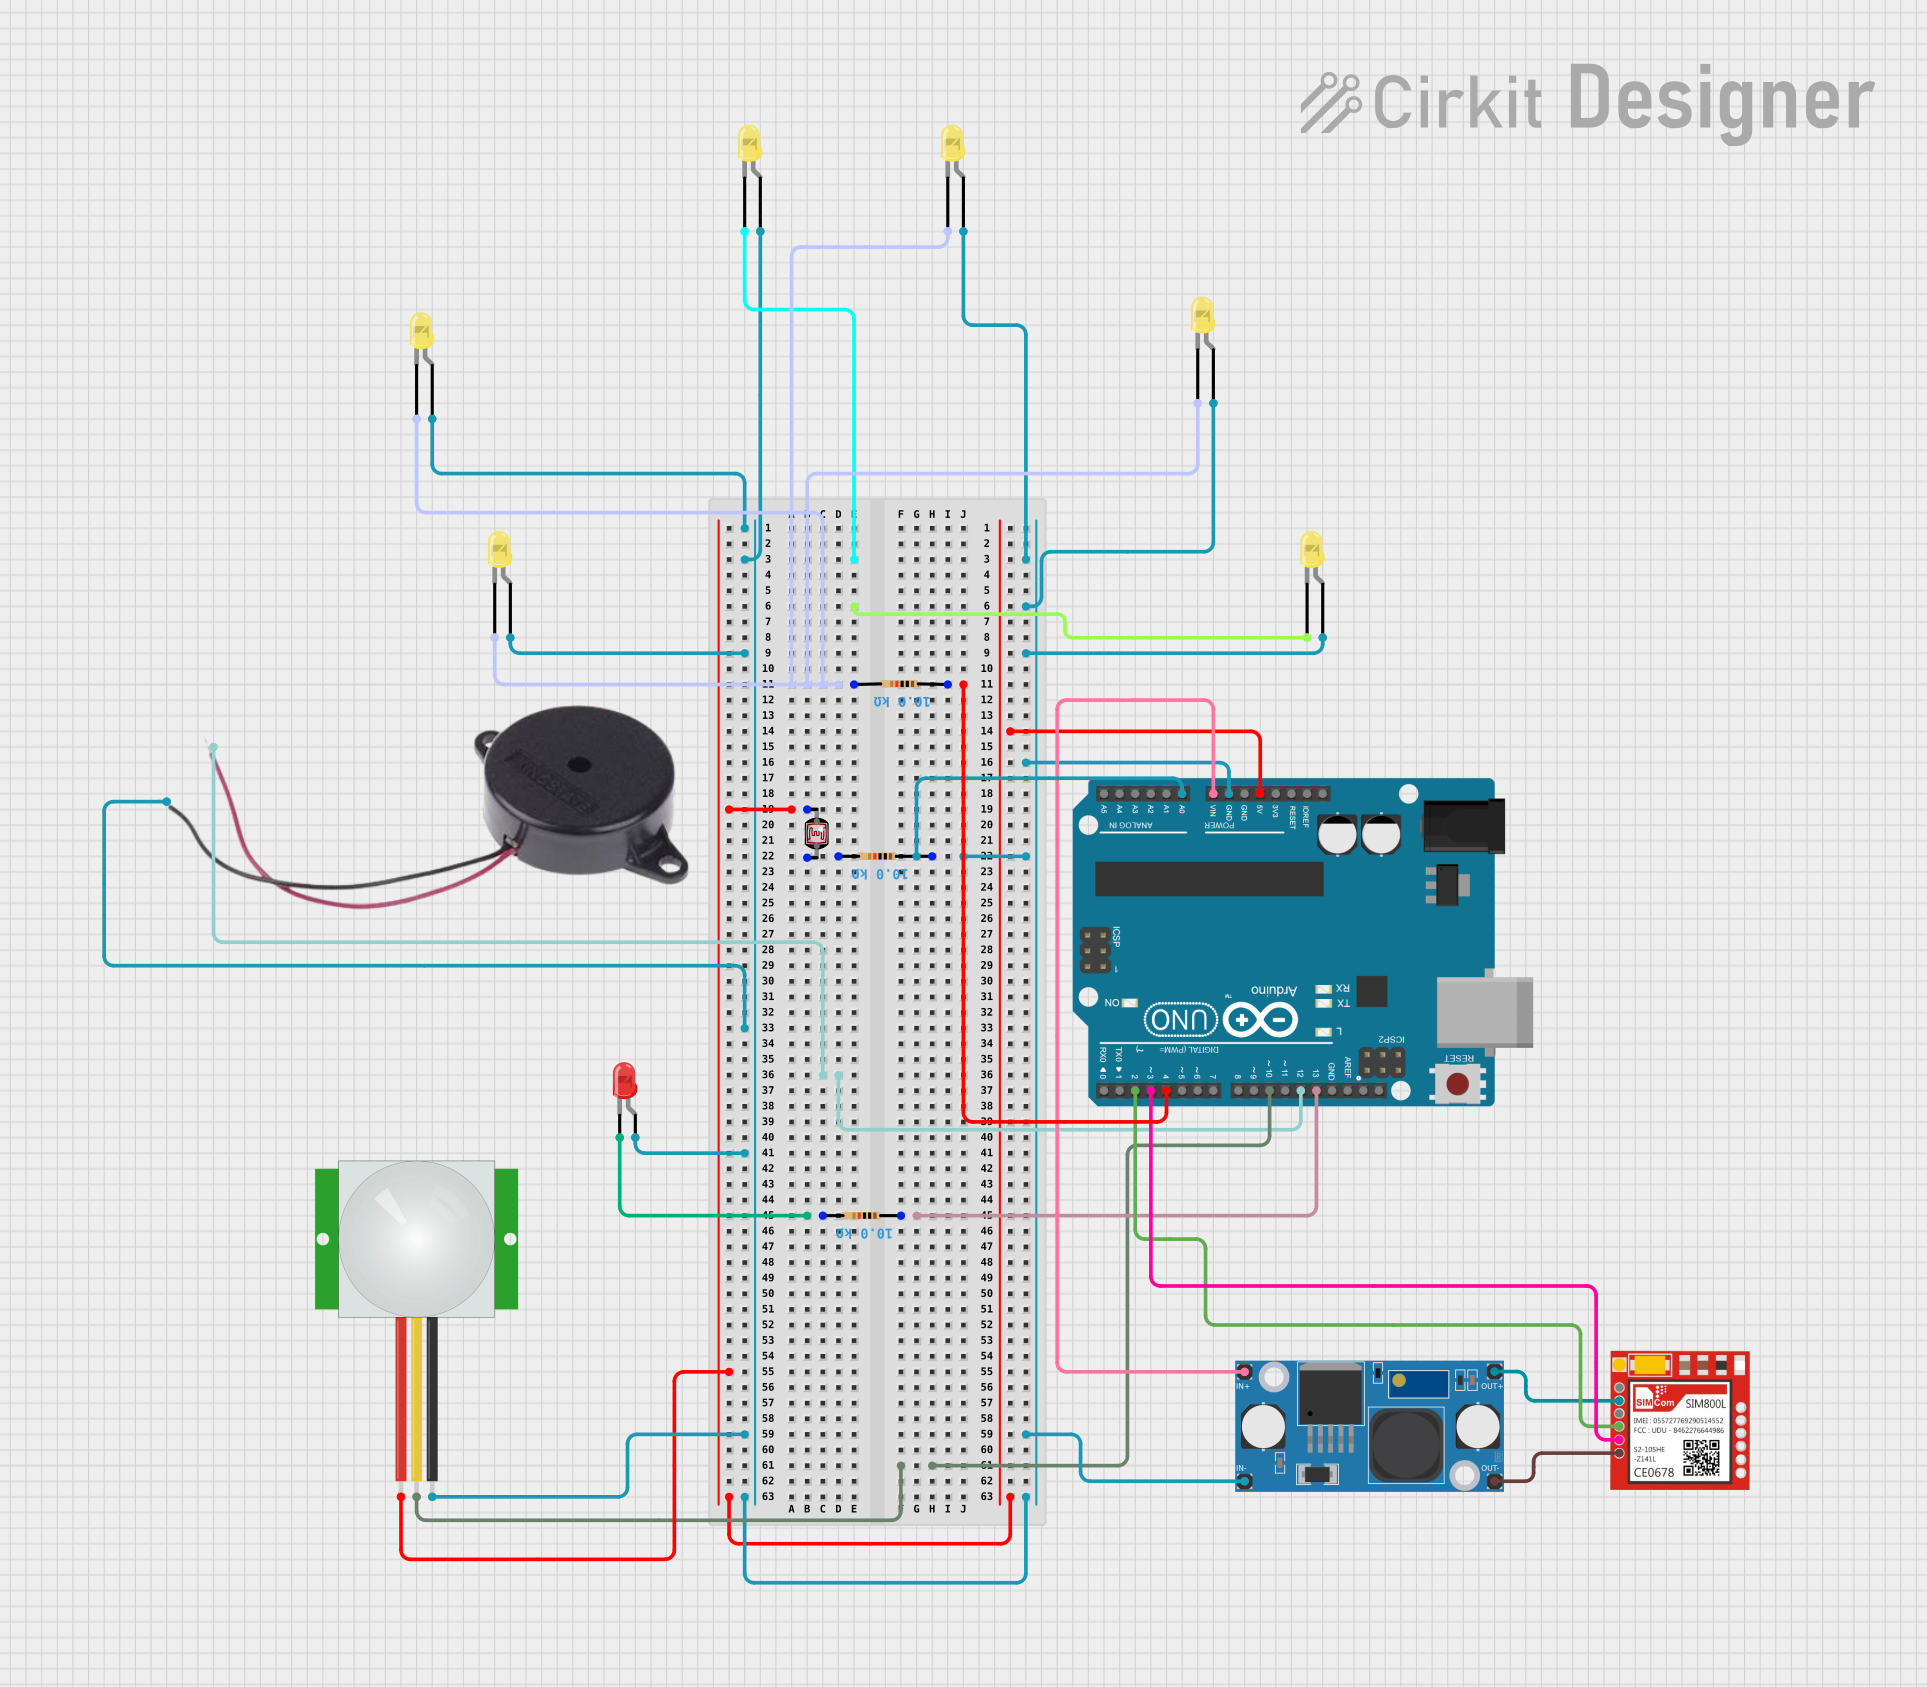
This circuit is designed to interface an Arduino UNO with a SIM800L GSM module, PIR sensor, photocell, buzzer, and multiple LEDs. It is likely intended for environmental monitoring and alerting, with the capability to communicate over GSM for remote notifications. The LM2596 module provides voltage regulation for the GSM module.
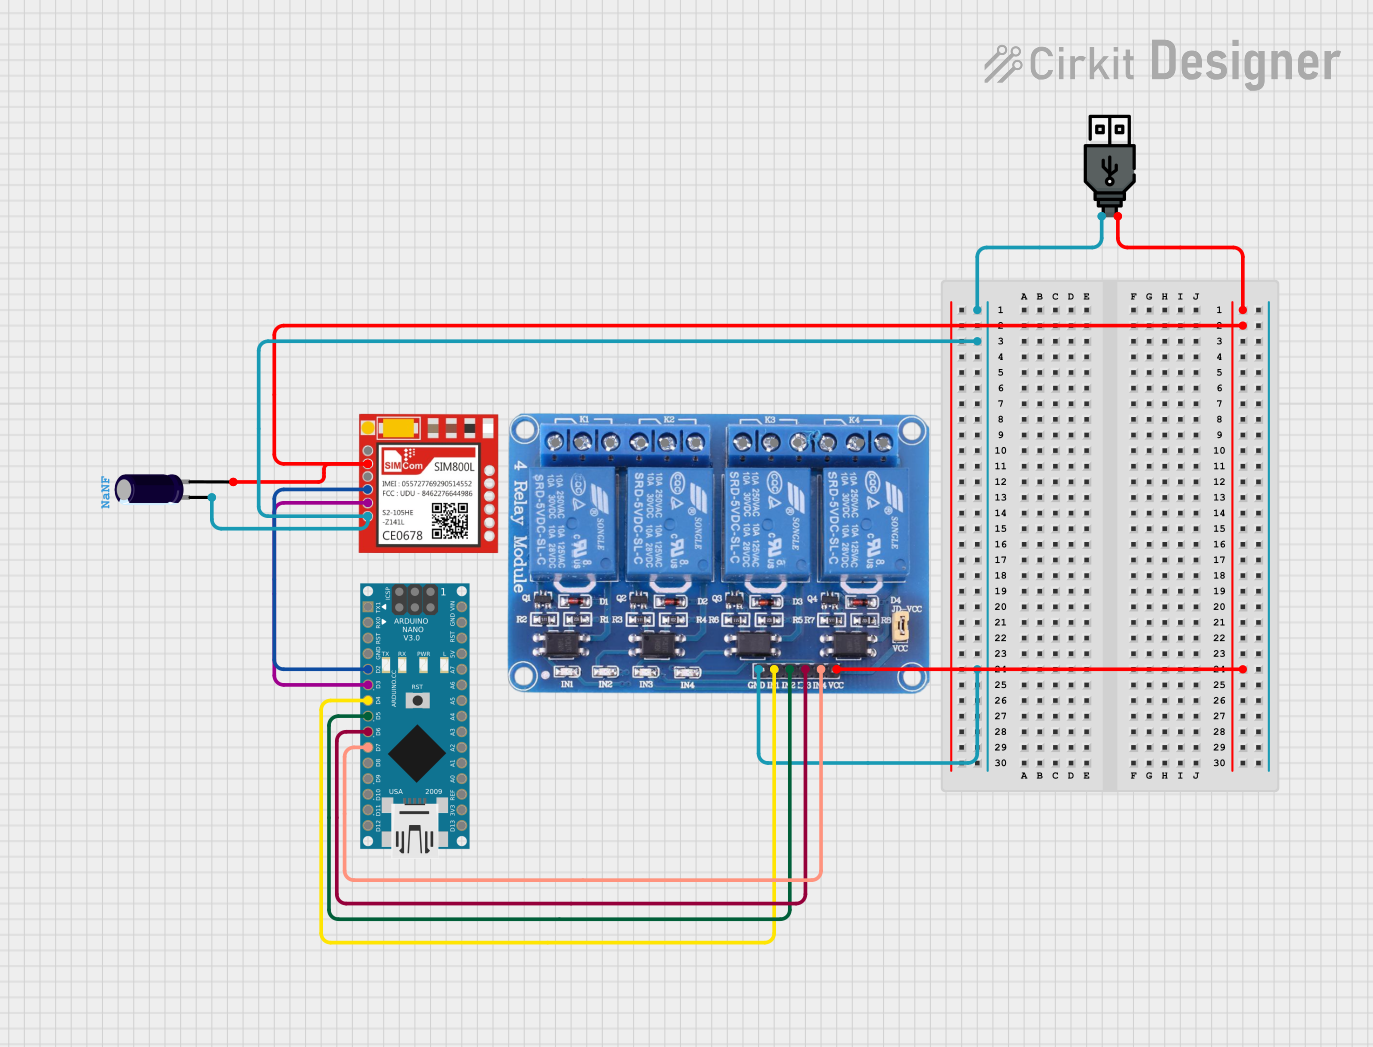
This circuit features an Arduino Nano microcontroller interfaced with a SIM800L GSM module and a 4-channel 5V relay module. The Arduino controls the relay channels via digital pins D4 to D7 and communicates with the SIM800L module through serial communication using pins D2 and D3. A USB power source provides power to the circuit, with an electrolytic capacitor likely used for voltage smoothing.
Control via AT Commands: 3GPP TS 27.007, 27.005, and SIMCOM enhanced AT Commands
Pin Configuration and Descriptions
Pin Number
Pin Name
Description
1
VCC
Power supply (3.4V to 4.4V)
2
RST
Reset pin (active low)
3
RXD
Serial data receive pin
4
TXD
Serial data transmit pin
5
GND
Ground
6
NET
Network status indicator (optional usage)
Usage Instructions
How to Use the Component in a Circuit
Power Supply: Connect a stable power source to the VCC and GND pins, ensuring that the voltage is within the specified range.
Serial Communication: Connect the RXD and TXD pins to the corresponding TX and RX pins of your microcontroller, such as an Arduino UNO.
Antenna: Attach an appropriate GSM antenna to the module to ensure proper network connectivity.
SIM Card: Insert a micro SIM card into the SIM card holder of the module.
Important Considerations and Best Practices
Ensure that the power supply can deliver sufficient current (up to 2A during transmission bursts).
Use a level shifter or voltage divider if interfacing with a 5V microcontroller to avoid damaging the module.
Place the module away from sources of electrical noise and ensure the antenna has a clear view of the sky for optimal signal reception.
Follow local regulations regarding radio communication and GSM network usage.
Example Code for Arduino UNO
#include <SoftwareSerial.h>

SoftwareSerial sim800l(10, 11); // RX, TX pins for SIM800L connection

void setup() {
  sim800l.begin(9600); // Start GSM module communication at 9600 baud rate
  Serial.begin(9600);  // Start serial communication with PC for debugging
  delay(1000);         // Wait for module to stabilize

  Serial.println("Sending AT command...");
  sim800l.println("AT"); // Send AT command to check communication
}

void loop() {
  if (sim800l.available()) { // Check if the module has sent a response
    Serial.write(sim800l.read()); // Display the response on the Serial Monitor
  }
  if (Serial.available()) { // Check if there is a new command from the Serial Monitor
    sim800l.write(Serial.read()); // Send the command to the module
  }
}
Troubleshooting and FAQs
Common Issues Users Might Face
Power Issues: The module does not power up or frequently restarts.
Solution: Check the power supply for proper voltage and current capabilities.
Signal Issues: Poor signal strength or no network connectivity.
Solution: Verify the antenna connection and placement, and ensure the SIM card is active and has network coverage.
Communication Issues: Inability to communicate with the module via serial interface.
Solution: Confirm the correct baud rate and wiring. Use level shifting if necessary.
FAQs
Q: Can the SIM800L module be used with a 5V microcontroller like Arduino UNO?
A: Yes, but a level shifter or voltage divider is recommended to protect the module's RXD pin.
Q: How can I reduce the power consumption of the SIM800L module?
A: Utilize the module's power-saving modes through AT commands and ensure the power supply is only active when necessary.
Q: What is the maximum length of an SMS message that can be sent using the SIM800L?
A: The maximum length is 160 characters for standard GSM encoding or 70 characters for UCS2 (Unicode) encoding.
For further assistance, consult the SIM800L datasheet and the manufacturer's technical support resources.


 Open Project in Cirkit Designer