How to Use Tft Display 2.4": Examples, Pinouts, and Specs
Introduction
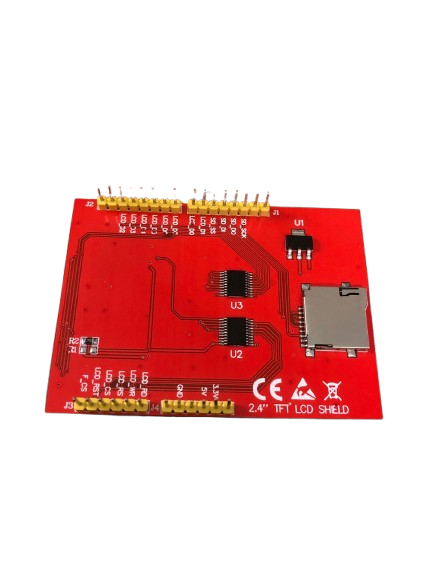
The 2.4-inch TFT Display is a high-quality, full-color graphical display designed for use in embedded systems and portable devices. Manufactured by Arduino, this display is compatible with the Arduino UNO (Part ID: UNO) and is ideal for creating user interfaces, visualizing data, and displaying images or animations. Its compact size and vibrant color output make it a popular choice for hobbyists and professionals alike.
Explore Projects Built with Tft Display 2.4"


Explore Projects Built with Tft Display 2.4"
Common Applications and Use Cases
- User interfaces for embedded systems
- Portable devices and handheld gadgets
- Data visualization (e.g., graphs, charts)
- Displaying images, animations, or custom graphics
- Educational projects and prototyping
Technical Specifications
The following table outlines the key technical details of the 2.4-inch TFT Display:
| Specification | Details |
|---|---|
| Display Type | TFT (Thin-Film Transistor) |
| Screen Size | 2.4 inches |
| Resolution | 240 x 320 pixels |
| Color Depth | 65,536 colors (16-bit) |
| Interface | Parallel (8-bit or 16-bit) |
| Operating Voltage | 3.3V (logic level) |
| Backlight Voltage | 3.3V |
| Current Consumption | ~100mA |
| Touchscreen | Resistive (optional, depending on model) |
| Dimensions | 71mm x 52mm x 7mm |
Pin Configuration and Descriptions
The TFT Display connects to the Arduino UNO via a set of pins. Below is the pinout table:
| Pin Name | Arduino Pin | Description |
|---|---|---|
| VCC | 3.3V | Power supply for the display |
| GND | GND | Ground connection |
| CS | D10 | Chip Select |
| RESET | D8 | Reset pin |
| DC/RS | D9 | Data/Command control |
| SDI/MOSI | D11 | Serial Data Input / Master Out Slave In |
| SCK | D13 | Serial Clock |
| LED | 3.3V | Backlight power |
| T_CLK | D13 | Touchscreen clock (if applicable) |
| T_CS | D4 | Touchscreen chip select (if applicable) |
| T_DIN | D11 | Touchscreen data input (if applicable) |
| T_DO | D12 | Touchscreen data output (if applicable) |
Note: Some models may have additional or fewer pins depending on the specific variant.
Usage Instructions
How to Use the TFT Display in a Circuit
- Connect the Pins: Wire the TFT Display to the Arduino UNO as per the pin configuration table above. Ensure proper connections for power (VCC, GND) and communication (CS, RESET, DC/RS, etc.).
- Install Required Libraries: Download and install the
Adafruit_GFXandAdafruit_TFTLCDlibraries from the Arduino Library Manager. - Upload Example Code: Use the example code provided below to test the display.
Example Code
The following code demonstrates how to initialize the TFT Display and draw basic shapes:
#include <Adafruit_GFX.h>    // Core graphics library
#include <Adafruit_TFTLCD.h> // Hardware-specific library for TFT

#define LCD_CS A3 // Chip Select
#define LCD_CD A2 // Command/Data
#define LCD_WR A1 // LCD Write
#define LCD_RD A0 // LCD Read
#define LCD_RESET A4 // Reset

// Create an instance of the display
Adafruit_TFTLCD tft(LCD_CS, LCD_CD, LCD_WR, LCD_RD, LCD_RESET);

void setup() {
  tft.reset(); // Reset the display
  tft.begin(0x9341); // Initialize with the ILI9341 driver ID

  tft.fillScreen(0x0000); // Clear the screen (black)
  tft.setCursor(0, 0);    // Set cursor to top-left corner
  tft.setTextColor(0xFFFF); // Set text color to white
  tft.setTextSize(2);     // Set text size
  tft.println("Hello, TFT!"); // Print text to the screen

  // Draw a red rectangle
  tft.fillRect(50, 50, 100, 50, 0xF800); // x, y, width, height, color
}

void loop() {
  // Nothing to do here
}
Important Considerations and Best Practices
- Voltage Levels: Ensure the display operates at 3.3V logic levels. Using 5V logic may damage the display.
- Library Compatibility: Always use the latest versions of the
Adafruit_GFXandAdafruit_TFTLCDlibraries for optimal performance. - Touchscreen Models: If your display includes a resistive touchscreen, additional libraries (e.g.,
Adafruit_TouchScreen) may be required. - Power Supply: Ensure your power source can provide sufficient current (~100mA) for the display and backlight.
Troubleshooting and FAQs
Common Issues and Solutions
Display Not Turning On:
- Check the power connections (VCC and GND).
- Ensure the backlight pin (LED) is connected to 3.3V.
No Output on the Screen:
- Verify the pin connections between the Arduino and the display.
- Ensure the correct driver ID (e.g.,
0x9341) is used in the code.
Distorted or Incorrect Colors:
- Check for loose or incorrect wiring.
- Ensure the display is operating at 3.3V logic levels.
Touchscreen Not Responding:
- Confirm that the touchscreen pins (T_CLK, T_CS, T_DIN, T_DO) are correctly connected.
- Use the
Adafruit_TouchScreenlibrary to test touchscreen functionality.
FAQs
Q: Can I use this display with a 5V Arduino board?
A: The display operates at 3.3V logic levels. If using a 5V Arduino, you must use level shifters to avoid damaging the display.
Q: How do I display images on the screen?
A: You can use the Adafruit_GFX library to load BMP images from an SD card. Ensure the display has an SD card slot and is properly connected.
Q: Is the display compatible with other microcontrollers?
A: Yes, the display can be used with other microcontrollers (e.g., ESP32, STM32) as long as the correct libraries and voltage levels are used.
Q: Can I adjust the brightness of the backlight?
A: Yes, you can connect the LED pin to a PWM-capable pin on the Arduino and use analogWrite() to control brightness.
By following this documentation, you can successfully integrate and use the 2.4-inch TFT Display in your projects!