How to Use MQ-2 GAS SENSOR: Examples, Pinouts, and Specs
Introduction
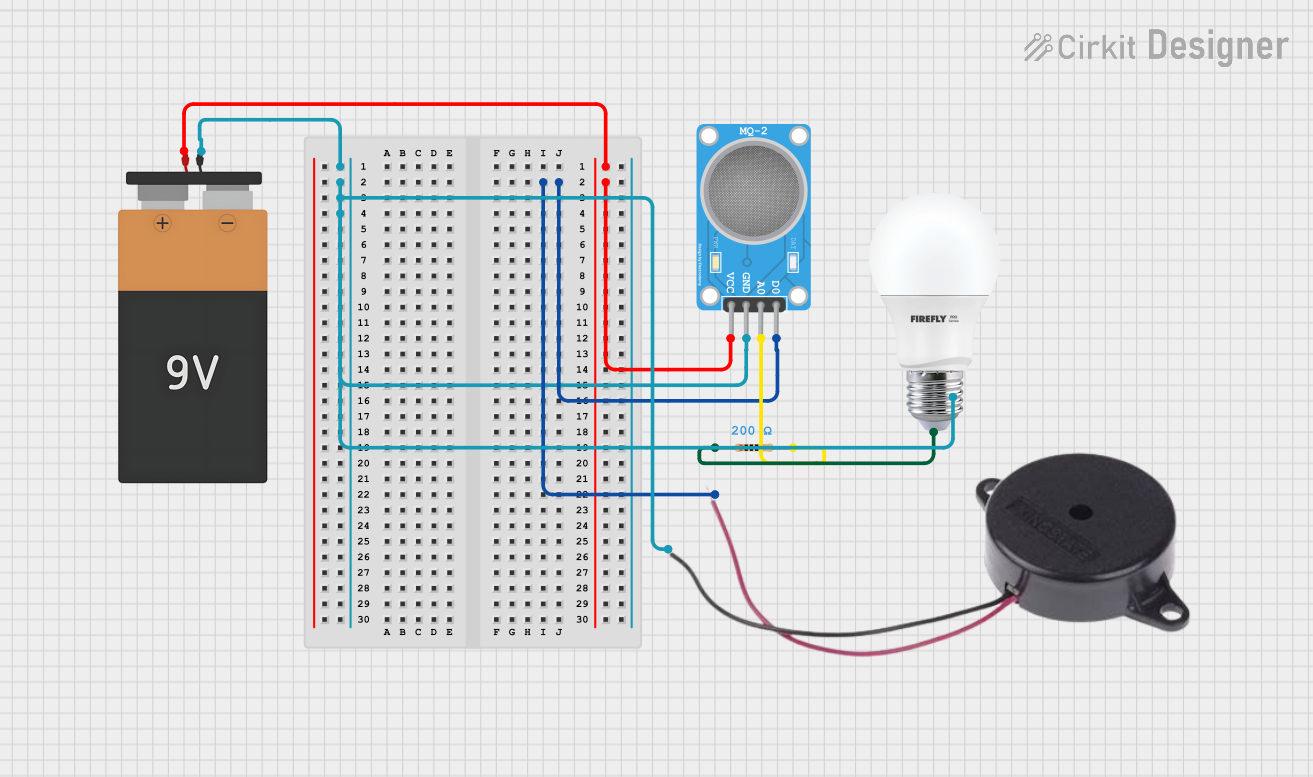
The MQ-2 gas sensor is a versatile and widely used electronic component designed to detect the presence of gases such as LPG, propane, methane, hydrogen, and smoke. It operates on the principle of resistive change, where the sensor's resistance varies in response to the concentration of target gases in the environment. The sensor outputs an analog signal proportional to the gas concentration, making it easy to interface with microcontrollers and other electronic systems.
Explore Projects Built with MQ-2 GAS SENSOR
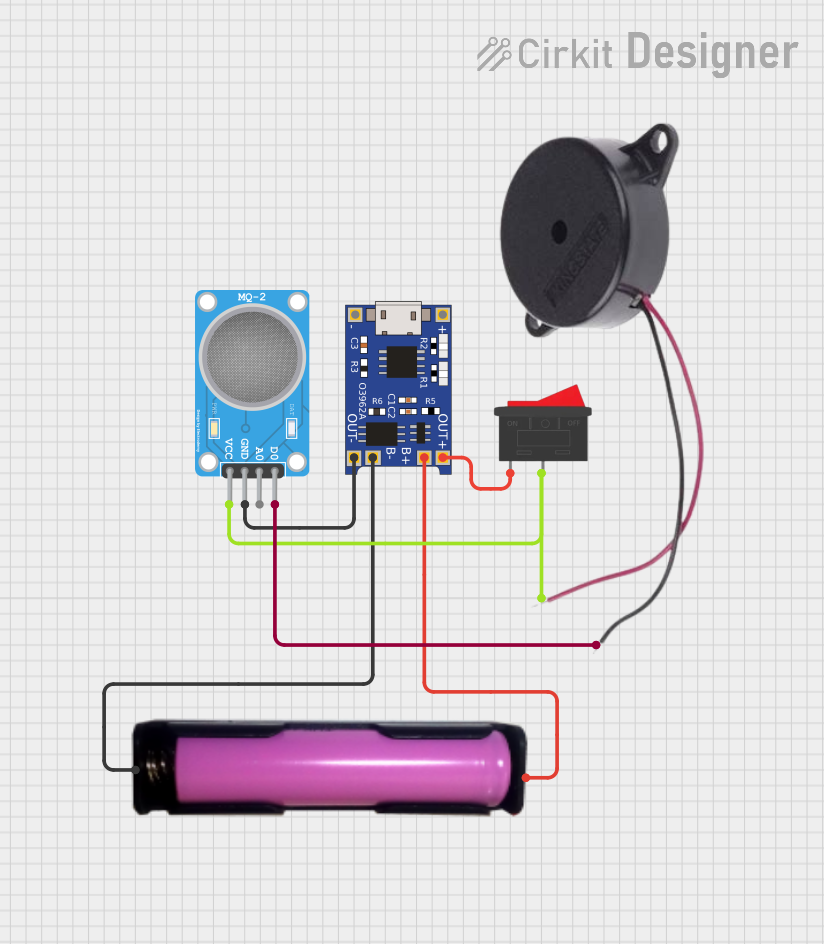
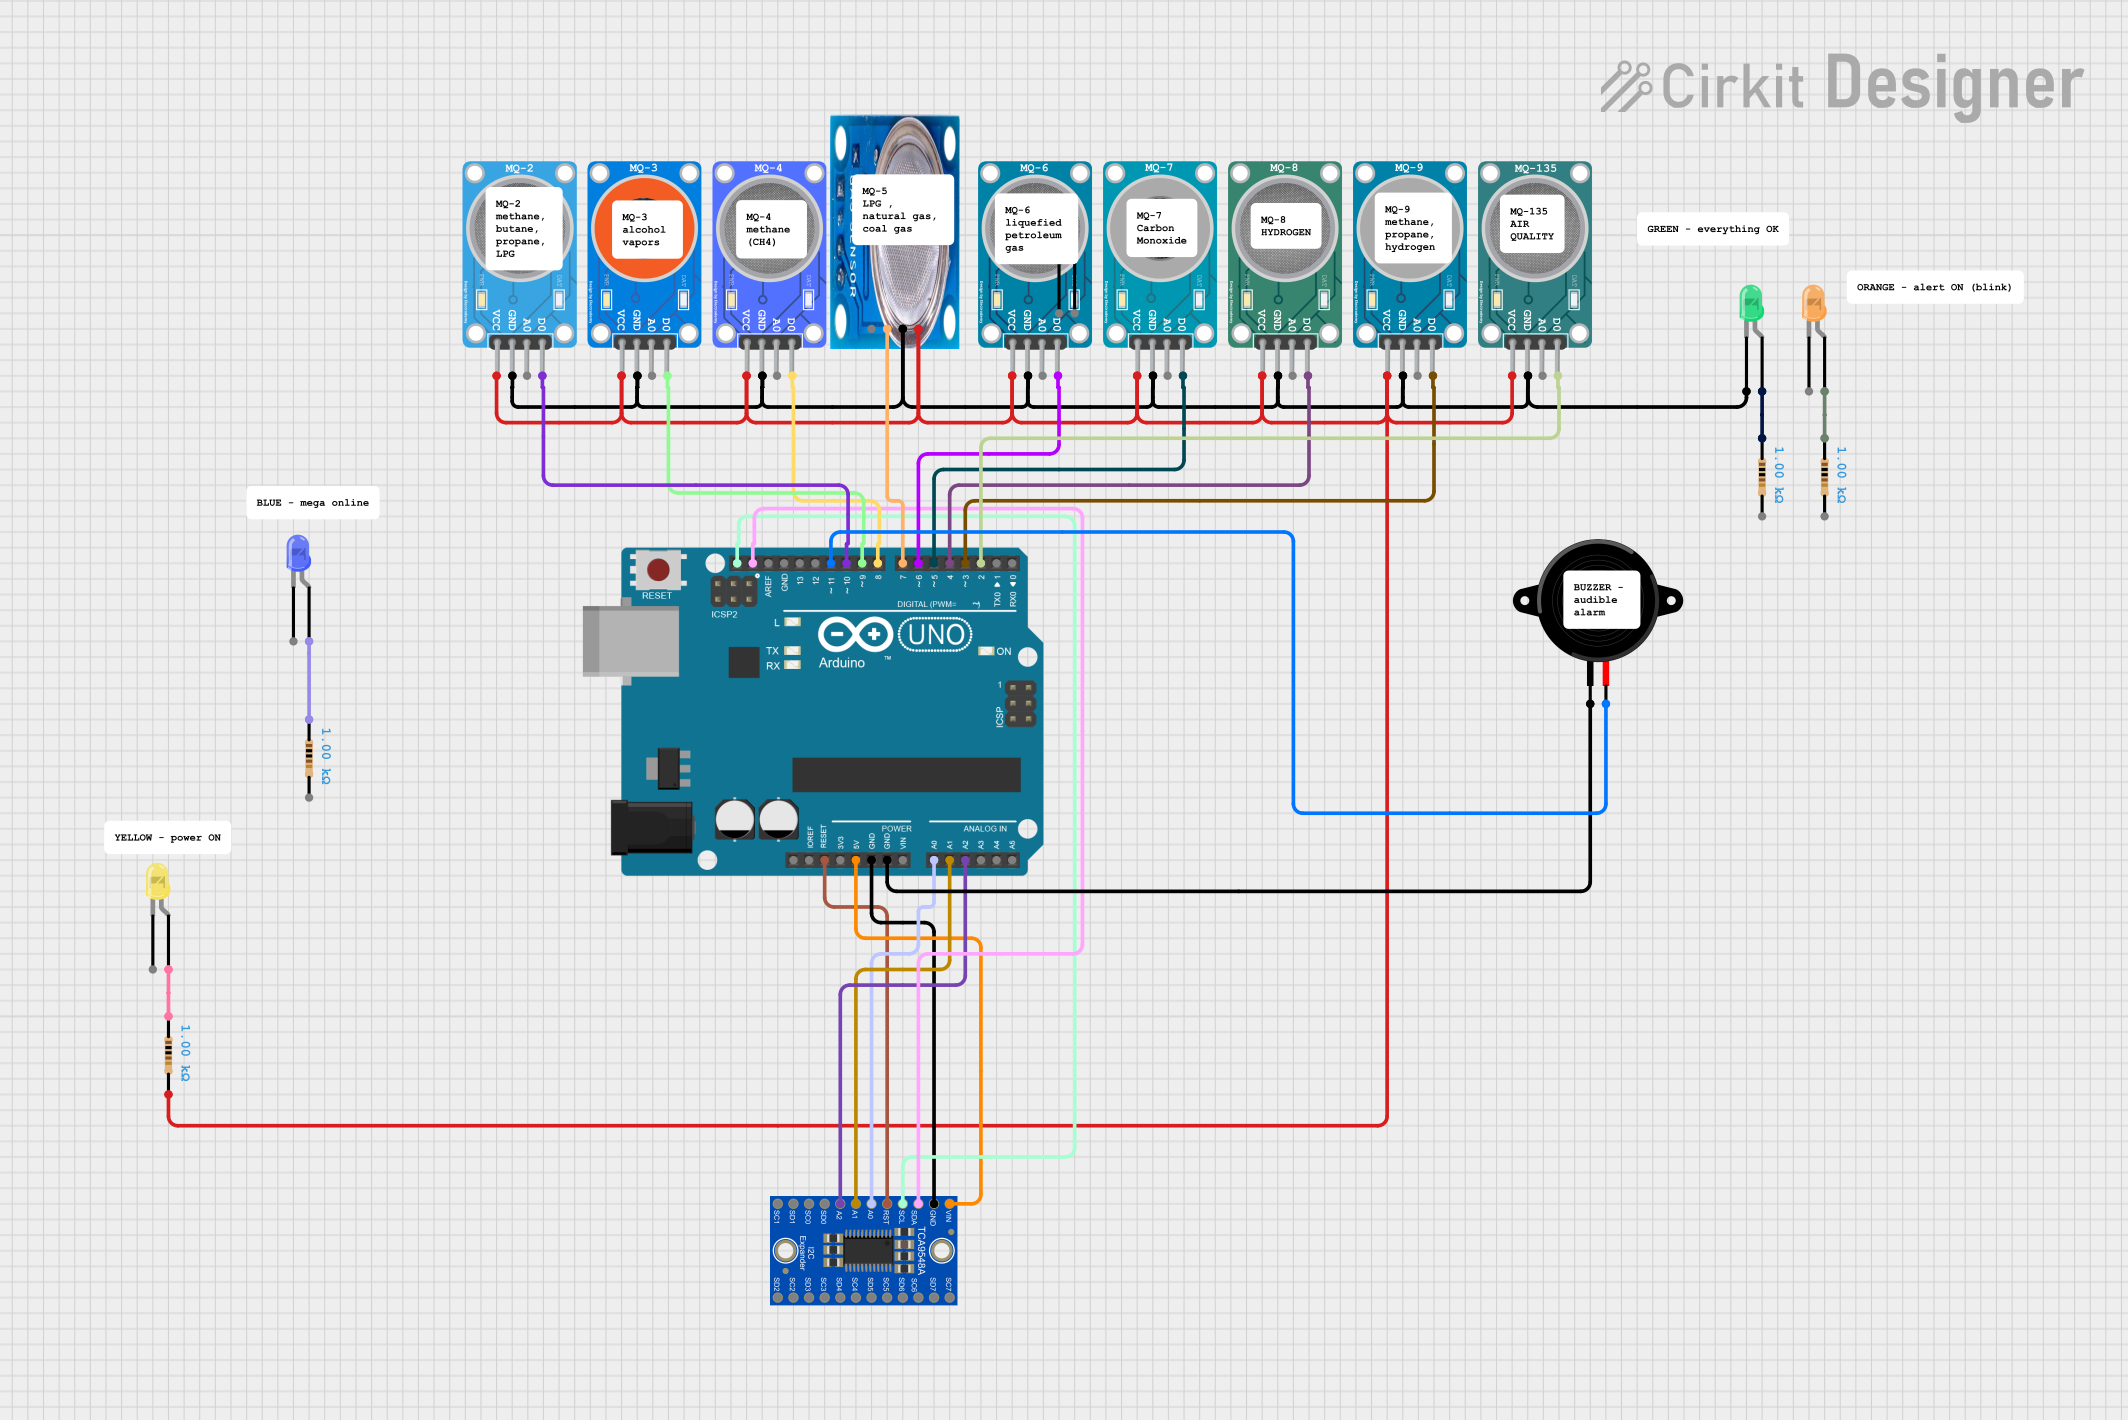
Explore Projects Built with MQ-2 GAS SENSOR
Common Applications
- Gas leak detection systems
- Air quality monitoring
- Smoke detection in fire alarm systems
- Industrial safety systems
- Home automation for environmental monitoring
Technical Specifications
The MQ-2 gas sensor is a compact and efficient device with the following key specifications:
| Parameter | Value |
|---|---|
| Operating Voltage | 5V DC |
| Load Resistance (RL) | Adjustable (typically 4.7kΩ - 10kΩ) |
| Heater Voltage (VH) | 5V ± 0.2V DC or AC |
| Heater Current (IH) | < 150mA |
| Detection Range | 200 - 10,000 ppm (parts per million) |
| Preheat Time | ≥ 24 hours for optimal performance |
| Sensitivity | Detects LPG, propane, methane, hydrogen, and smoke |
| Output Signal | Analog voltage |
| Operating Temperature | -20°C to 50°C |
| Humidity Range | 33% to 85% RH |
| Dimensions | 32mm x 20mm x 22mm (approx.) |
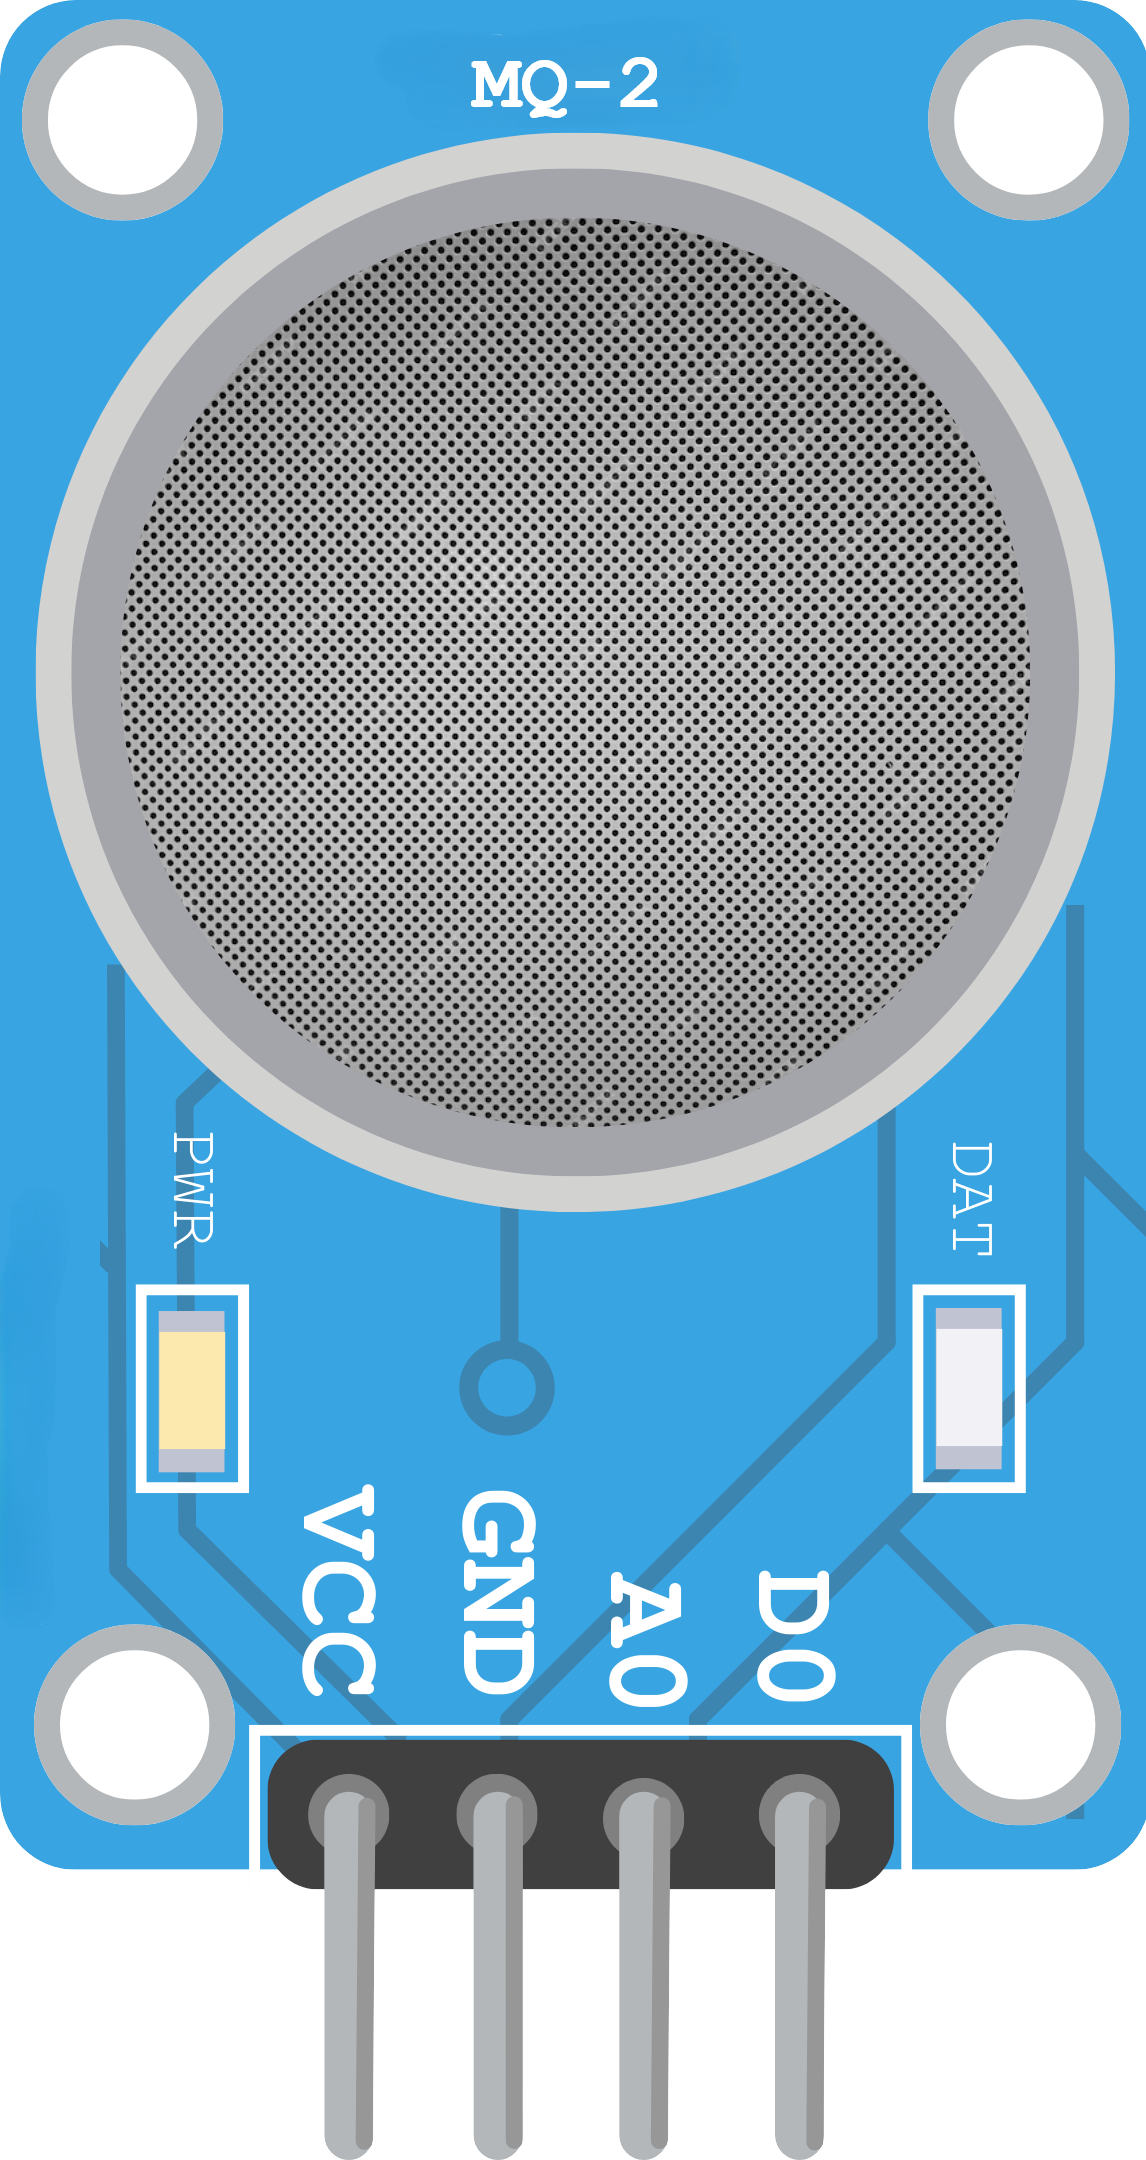
Pin Configuration and Descriptions
The MQ-2 gas sensor typically comes with four pins or six pins, depending on the module version. Below is the pin configuration for the most common 4-pin module:
| Pin | Name | Description |
|---|---|---|
| 1 | VCC | Power supply pin. Connect to 5V DC. |
| 2 | GND | Ground pin. Connect to the ground of the circuit. |
| 3 | AOUT | Analog output pin. Provides a voltage proportional to the gas concentration. |
| 4 | DOUT | Digital output pin. Outputs HIGH or LOW based on a preset threshold (adjustable). |
Usage Instructions
How to Use the MQ-2 Gas Sensor in a Circuit
- Power the Sensor: Connect the VCC pin to a 5V DC power source and the GND pin to the ground.
- Read the Output:
- Use the AOUT pin to read the analog signal. This pin provides a voltage proportional to the gas concentration.
- Optionally, use the DOUT pin for a digital HIGH/LOW signal. Adjust the onboard potentiometer to set the threshold for the digital output.
- Preheat the Sensor: Allow the sensor to preheat for at least 24 hours before use to ensure accurate readings.
- Connect to a Microcontroller: Interface the sensor with a microcontroller (e.g., Arduino UNO) to process the output signal and implement your application logic.
Important Considerations and Best Practices
- Preheating: The sensor requires a preheating period of at least 24 hours for optimal performance. During this time, the internal heater stabilizes the sensor's resistance.
- Calibration: Calibrate the sensor in a known gas concentration environment to improve accuracy.
- Ventilation: Ensure proper ventilation around the sensor to avoid saturation and improve response time.
- Avoid Contaminants: Keep the sensor away from water, oil, and other contaminants that may damage its surface.
- Power Supply: Use a stable 5V power source to avoid fluctuations in the sensor's output.
Example Code for Arduino UNO
Below is an example of how to interface the MQ-2 gas sensor with an Arduino UNO to read the analog output:
// Define the analog pin connected to the MQ-2 sensor
const int analogPin = A0; // AOUT pin of MQ-2 connected to A0 on Arduino

void setup() {
  Serial.begin(9600); // Initialize serial communication at 9600 baud
  Serial.println("MQ-2 Gas Sensor Test");
}

void loop() {
  int sensorValue = analogRead(analogPin); // Read the analog value from the sensor
  float voltage = sensorValue * (5.0 / 1023.0); // Convert to voltage (0-5V range)

  // Print the sensor value and voltage to the Serial Monitor
  Serial.print("Sensor Value: ");
  Serial.print(sensorValue);
  Serial.print(" | Voltage: ");
  Serial.print(voltage);
  Serial.println(" V");

  delay(1000); // Wait for 1 second before the next reading
}
Troubleshooting and FAQs
Common Issues and Solutions
No Output Signal:
- Cause: Incorrect wiring or insufficient power supply.
- Solution: Double-check the connections and ensure the sensor is powered with 5V DC.
Inaccurate Readings:
- Cause: Insufficient preheating time or improper calibration.
- Solution: Allow the sensor to preheat for at least 24 hours and calibrate it in a known gas concentration.
Digital Output Always HIGH or LOW:
- Cause: Threshold not set correctly on the potentiometer.
- Solution: Adjust the potentiometer to set the desired threshold for the digital output.
Slow Response Time:
- Cause: Poor ventilation or sensor saturation.
- Solution: Ensure proper airflow around the sensor and avoid exposing it to high gas concentrations for extended periods.
FAQs
Q1: Can the MQ-2 detect multiple gases simultaneously?
A1: Yes, the MQ-2 can detect multiple gases, but it cannot differentiate between them. The output signal represents the combined concentration of all detectable gases.
Q2: How do I calibrate the MQ-2 sensor?
A2: To calibrate the sensor, expose it to a known concentration of the target gas and adjust the load resistance (RL) or use software calibration to map the analog output to the gas concentration.
Q3: Can I use the MQ-2 sensor outdoors?
A3: The MQ-2 is not designed for outdoor use as it may be affected by humidity, temperature fluctuations, and contaminants. Use it in controlled indoor environments for best results.
Q4: What is the lifespan of the MQ-2 sensor?
A4: The typical lifespan of the MQ-2 sensor is around 2-3 years, depending on usage and environmental conditions. Regular maintenance and proper handling can extend its life.