Cirkit Designer Logo
Cirkit Designer
Your all-in-one circuit design IDE
Home / 
Component Documentation

How to Use nn: Examples, Pinouts, and Specs

Image of nn
Cirkit Designer LogoDesign with nn in Cirkit Designer

Introduction

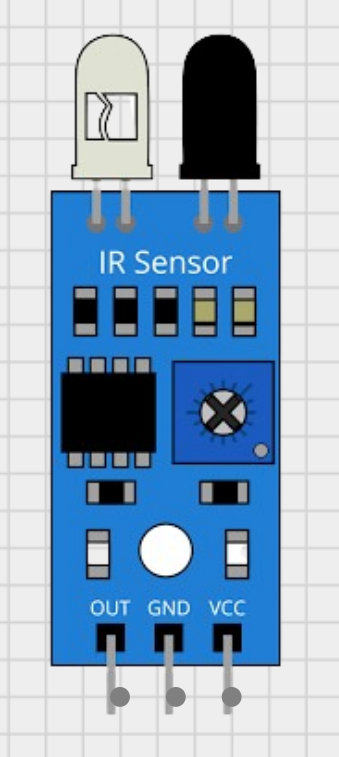
The ARDUANO SARA is a versatile and robust electronic component designed for a wide range of applications. This component is particularly well-suited for use in embedded systems, IoT devices, and various automation projects. Its compatibility with microcontrollers like the Arduino UNO makes it a popular choice among hobbyists and professionals alike.

Explore Projects Built with nn

Use Cirkit Designer to design, explore, and prototype these projects online. Some projects support real-time simulation. Click "Open Project" to start designing instantly!
Arduino Nano Controlled Wireless Joystick Interface with LCD Feedback
Image of gt70: A project utilizing nn in a practical application
This circuit features an Arduino Nano interfaced with a Nokia 5110 LCD, two KY-023 Dual Axis Joystick Modules, an NRF24L01 wireless module, and multiple potentiometers and toggle switches. The joysticks, potentiometers, and switches are likely used for input control, with their signals read by the Arduino's analog and digital pins. The Arduino controls the LCD display and communicates wirelessly using the NRF24L01, possibly to transmit the input control data or receive commands.
Cirkit Designer LogoOpen Project in Cirkit Designer
Arduino Nano and nRF24L01 Wireless Controlled Robotic Platform
Image of Wheel ChAIR: A project utilizing nn in a practical application
This circuit is a wireless controlled robotic vehicle system. It features two Arduino Nanos with nRF24L01 modules for remote communication, a joystick for control input, and a L298N motor driver to operate two DC gearmotors. Power is managed by 18650 Li-Ion batteries and 7805 voltage regulators, with rocker switches for power control.
Cirkit Designer LogoOpen Project in Cirkit Designer
Battery-Powered Emergency Alert System with NUCLEO-F072RB, SIM800L, and GPS NEO 6M
Image of women safety: A project utilizing nn in a practical application
This circuit is an emergency alert system that uses a NUCLEO-F072RB microcontroller to send SMS alerts and make calls via a SIM800L GSM module, while obtaining location data from a GPS NEO 6M module. The system is powered by a Li-ion battery and includes a TP4056 module for battery charging and protection, with a rocker switch to control power to the microcontroller.
Cirkit Designer LogoOpen Project in Cirkit Designer
Arduino Nano-Based Environmental Monitoring System with Nextion Touch LCD and CAN BUS Communication
Image of Circuito_CAIXAV2: A project utilizing nn in a practical application
This circuit features an Arduino Nano microcontroller interfaced with a Nextion Touch LCD for user input/output, multiple SSR-10A solid-state relays for controlling high-power devices, and a single-channel relay for additional switching capabilities. It includes an Adafruit MCP9600 for temperature measurements, an MQ-5 gas sensor for detecting gas concentrations, a Hall effect sensor for magnetic field detection, and a CAN BUS module for vehicle communication. The circuit is powered by an LM2596 step-down module and includes various resistors for voltage/current adjustments and protection.
Cirkit Designer LogoOpen Project in Cirkit Designer

Explore Projects Built with nn

Use Cirkit Designer to design, explore, and prototype these projects online. Some projects support real-time simulation. Click "Open Project" to start designing instantly!
Image of gt70: A project utilizing nn in a practical application
Arduino Nano Controlled Wireless Joystick Interface with LCD Feedback
This circuit features an Arduino Nano interfaced with a Nokia 5110 LCD, two KY-023 Dual Axis Joystick Modules, an NRF24L01 wireless module, and multiple potentiometers and toggle switches. The joysticks, potentiometers, and switches are likely used for input control, with their signals read by the Arduino's analog and digital pins. The Arduino controls the LCD display and communicates wirelessly using the NRF24L01, possibly to transmit the input control data or receive commands.
Cirkit Designer LogoOpen Project in Cirkit Designer
Image of Wheel ChAIR: A project utilizing nn in a practical application
Arduino Nano and nRF24L01 Wireless Controlled Robotic Platform
This circuit is a wireless controlled robotic vehicle system. It features two Arduino Nanos with nRF24L01 modules for remote communication, a joystick for control input, and a L298N motor driver to operate two DC gearmotors. Power is managed by 18650 Li-Ion batteries and 7805 voltage regulators, with rocker switches for power control.
Cirkit Designer LogoOpen Project in Cirkit Designer
Image of women safety: A project utilizing nn in a practical application
Battery-Powered Emergency Alert System with NUCLEO-F072RB, SIM800L, and GPS NEO 6M
This circuit is an emergency alert system that uses a NUCLEO-F072RB microcontroller to send SMS alerts and make calls via a SIM800L GSM module, while obtaining location data from a GPS NEO 6M module. The system is powered by a Li-ion battery and includes a TP4056 module for battery charging and protection, with a rocker switch to control power to the microcontroller.
Cirkit Designer LogoOpen Project in Cirkit Designer
Image of Circuito_CAIXAV2: A project utilizing nn in a practical application
Arduino Nano-Based Environmental Monitoring System with Nextion Touch LCD and CAN BUS Communication
This circuit features an Arduino Nano microcontroller interfaced with a Nextion Touch LCD for user input/output, multiple SSR-10A solid-state relays for controlling high-power devices, and a single-channel relay for additional switching capabilities. It includes an Adafruit MCP9600 for temperature measurements, an MQ-5 gas sensor for detecting gas concentrations, a Hall effect sensor for magnetic field detection, and a CAN BUS module for vehicle communication. The circuit is powered by an LM2596 step-down module and includes various resistors for voltage/current adjustments and protection.
Cirkit Designer LogoOpen Project in Cirkit Designer

Technical Specifications

The ARDUANO SARA component boasts impressive technical specifications that ensure reliable performance in various applications. Below are the key technical details and pin configuration:

Key Technical Details

Parameter Value
Operating Voltage 3.3V - 5V
Current Rating 20mA
Power Rating 100mW
Communication I2C, SPI, UART
Operating Temp -40°C to 85°C
Dimensions 25mm x 15mm x 5mm

Pin Configuration and Descriptions

Pin No. Pin Name Description
1 VCC Power Supply (3.3V - 5V)
2 GND Ground
3 SDA I2C Data Line
4 SCL I2C Clock Line
5 MOSI SPI Master Out Slave In
6 MISO SPI Master In Slave Out
7 SCK SPI Clock
8 TX UART Transmit
9 RX UART Receive
10 INT Interrupt Pin

Usage Instructions

How to Use the Component in a Circuit

To use the ARDUANO SARA component in a circuit, follow these steps:

  1. Power Supply: Connect the VCC pin to a 3.3V or 5V power supply and the GND pin to the ground.
  2. Communication Interface: Choose the appropriate communication interface (I2C, SPI, or UART) based on your application requirements.
    • For I2C: Connect the SDA and SCL pins to the corresponding pins on your microcontroller.
    • For SPI: Connect the MOSI, MISO, and SCK pins to the corresponding pins on your microcontroller.
    • For UART: Connect the TX and RX pins to the corresponding pins on your microcontroller.
  3. Interrupt Pin: If your application requires an interrupt, connect the INT pin to an interrupt-capable pin on your microcontroller.

Important Considerations and Best Practices

  • Voltage Levels: Ensure that the voltage levels of the component and the microcontroller are compatible. Use level shifters if necessary.
  • Pull-up Resistors: For I2C communication, use appropriate pull-up resistors on the SDA and SCL lines.
  • Decoupling Capacitors: Place decoupling capacitors close to the VCC pin to filter out noise and ensure stable operation.
  • Proper Grounding: Ensure a solid ground connection to avoid noise and interference issues.

Example Code for Arduino UNO

Below is an example code to interface the ARDUANO SARA component with an Arduino UNO using the I2C communication protocol:

#include <Wire.h>

#define SARA_ADDRESS 0x40 // Replace with the actual I2C address of the component

void setup() {
  Wire.begin(); // Initialize I2C communication
  Serial.begin(9600); // Initialize serial communication for debugging
}

void loop() {
  Wire.beginTransmission(SARA_ADDRESS); // Start communication with SARA
  Wire.write(0x00); // Send a command or register address
  Wire.endTransmission(); // End transmission

  Wire.requestFrom(SARA_ADDRESS, 1); // Request 1 byte of data from SARA
  if (Wire.available()) {
    int data = Wire.read(); // Read the data
    Serial.println(data); // Print the data to the serial monitor
  }

  delay(1000); // Wait for 1 second before the next loop
}

Troubleshooting and FAQs

Common Issues Users Might Face

  1. No Communication with the Component:

    • Solution: Check the wiring and ensure that the correct communication protocol is selected. Verify the I2C address if using I2C communication.
  2. Incorrect Data Readings:

    • Solution: Ensure proper grounding and use decoupling capacitors. Check for noise and interference in the circuit.
  3. Component Not Powering On:

    • Solution: Verify the power supply voltage and connections. Ensure that the VCC and GND pins are properly connected.

Solutions and Tips for Troubleshooting

  • Check Connections: Ensure all connections are secure and correctly placed.
  • Use a Multimeter: Measure voltage levels and continuity to diagnose issues.
  • Consult Datasheet: Refer to the component's datasheet for detailed information and troubleshooting tips.
  • Update Firmware: Ensure that your microcontroller's firmware is up to date.

By following this documentation, users can effectively integrate the ARDUANO SARA component into their projects, ensuring reliable and efficient performance.