How to Use SparkFun Triad Spectroscopy Sensor - AS7265x (Qwicc): Examples, Pinouts, and Specs
Introduction
The SparkFun Triad Spectroscopy Sensor is a sophisticated sensing device that utilizes the AS7265x chipset to provide detailed spectral measurements across a wide range of light wavelengths. This sensor is capable of detecting the intensity of light at 18 different wavelengths, grouped into three sensors: AS72651, AS72652, and AS72653, which cover the ultraviolet, visible, and near-infrared regions, respectively. It is commonly used in color sensing, light analysis, and scientific applications where precise spectral data is required.
Explore Projects Built with SparkFun Triad Spectroscopy Sensor - AS7265x (Qwicc)


Explore Projects Built with SparkFun Triad Spectroscopy Sensor - AS7265x (Qwicc)
Common Applications and Use Cases
- Color matching and calibration
- Light analysis and monitoring
- Agricultural crop health monitoring
- Chemical analysis
- Environmental sensing
Technical Specifications
Key Technical Details
- Spectral Range: 410nm - 940nm
- Channels: 18 spectral channels (6 channels per sensor)
- Interface: I2C (via Qwiic connectors)
- Operating Voltage: 3.3V
- Current Consumption: 25mA (typical)
- Field of View: 20 degrees
- Integration Time: 2.8ms to 714ms
- Operating Temperature: -40°C to 85°C
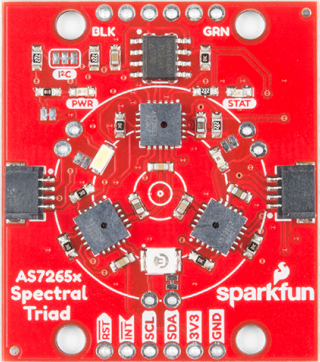
Pin Configuration and Descriptions
| Pin Name | Description |
|---|---|
| GND | Ground connection |
| 3V3 | 3.3V power supply input |
| SDA | I2C data line |
| SCL | I2C clock line |
| INT | Interrupt pin (active low) |
| RST | Reset pin (active low) |
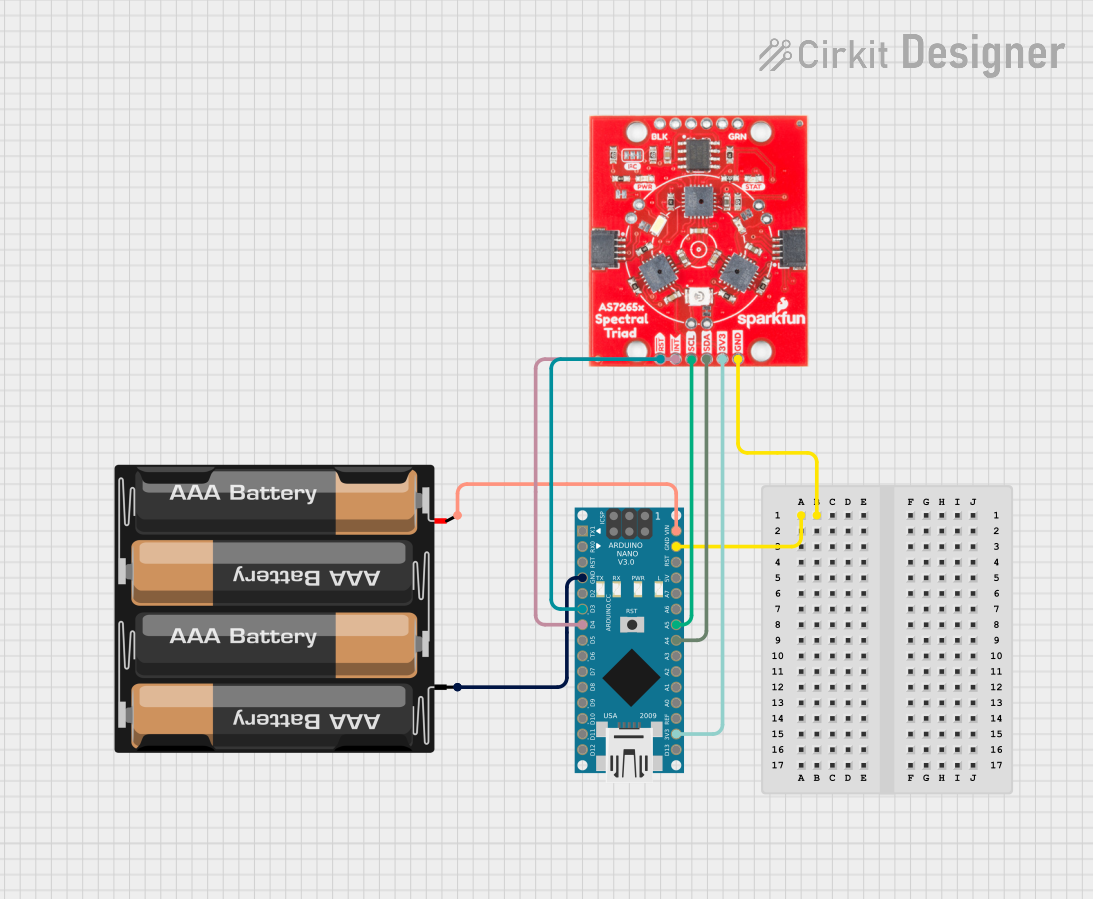
Usage Instructions
How to Use the Component in a Circuit
- Powering the Sensor: Connect the 3V3 and GND pins to a 3.3V power source and ground, respectively.
- I2C Communication: Connect the SDA and SCL pins to the corresponding I2C data and clock lines on your microcontroller.
- Interrupts (Optional): The INT pin can be connected to an interrupt-capable GPIO pin on your microcontroller to handle asynchronous events.
- Reset (Optional): The RST pin can be connected to a GPIO pin to allow software reset of the sensor.
Important Considerations and Best Practices
- Ensure that the power supply is stable and within the specified voltage range.
- Use pull-up resistors on the I2C lines if they are not already present on your microcontroller board.
- Avoid exposing the sensor to direct sunlight or high-intensity light sources that could saturate the sensors.
- For accurate measurements, calibrate the sensor periodically using a known light source.
Example Code for Arduino UNO
#include <Wire.h>
#include <SparkFun_AS726X.h>

SparkFun_AS726X sensor;

void setup() {
  Wire.begin();
  Serial.begin(115200);
  sensor.begin(Wire, GND, 3V3);
}

void loop() {
  if (sensor.dataAvailable()) {
    sensor.takeMeasurements();
    Serial.print("410nm: ");
    Serial.println(sensor.getViolet());
    // Add additional print statements for other wavelengths as needed
  }
  delay(1000); // Delay between readings
}
Troubleshooting and FAQs
Common Issues
- No Data Received: Ensure that the I2C connections are secure and that the correct I2C address is being used.
- Inaccurate Readings: Verify that the sensor is properly calibrated and not exposed to light sources that could cause saturation.
- Intermittent Communication: Check for loose connections and ensure that the pull-up resistors are correctly installed on the I2C lines.
Solutions and Tips for Troubleshooting
- Double-check wiring and solder joints for any physical connection issues.
- Use I2C scanning code to confirm that the sensor is detected on the I2C bus.
- Reset the sensor using the RST pin if it becomes unresponsive.
- Consult the sensor's datasheet for detailed operational characteristics and troubleshooting steps.
FAQs
Q: Can the sensor be used with a 5V microcontroller? A: Yes, but level shifting for the I2C lines and a 3.3V power supply for the sensor are required.
Q: How often should the sensor be calibrated? A: Calibration frequency depends on the application's precision requirements. Regular calibration is recommended for critical applications.
Q: Is it possible to connect multiple sensors to the same I2C bus? A: Yes, the AS7265x supports multiple devices on the same I2C bus with different addresses. Ensure that each sensor has a unique address.
Q: What is the maximum I2C speed supported by the sensor? A: The sensor supports standard (100kHz) and fast (400kHz) I2C speeds.