
How to Use 3.5in TFT 480x320 Touch + MicroSD: Examples, Pinouts, and Specs
 Design with 3.5in TFT 480x320 Touch + MicroSD in Cirkit Designer
Introduction
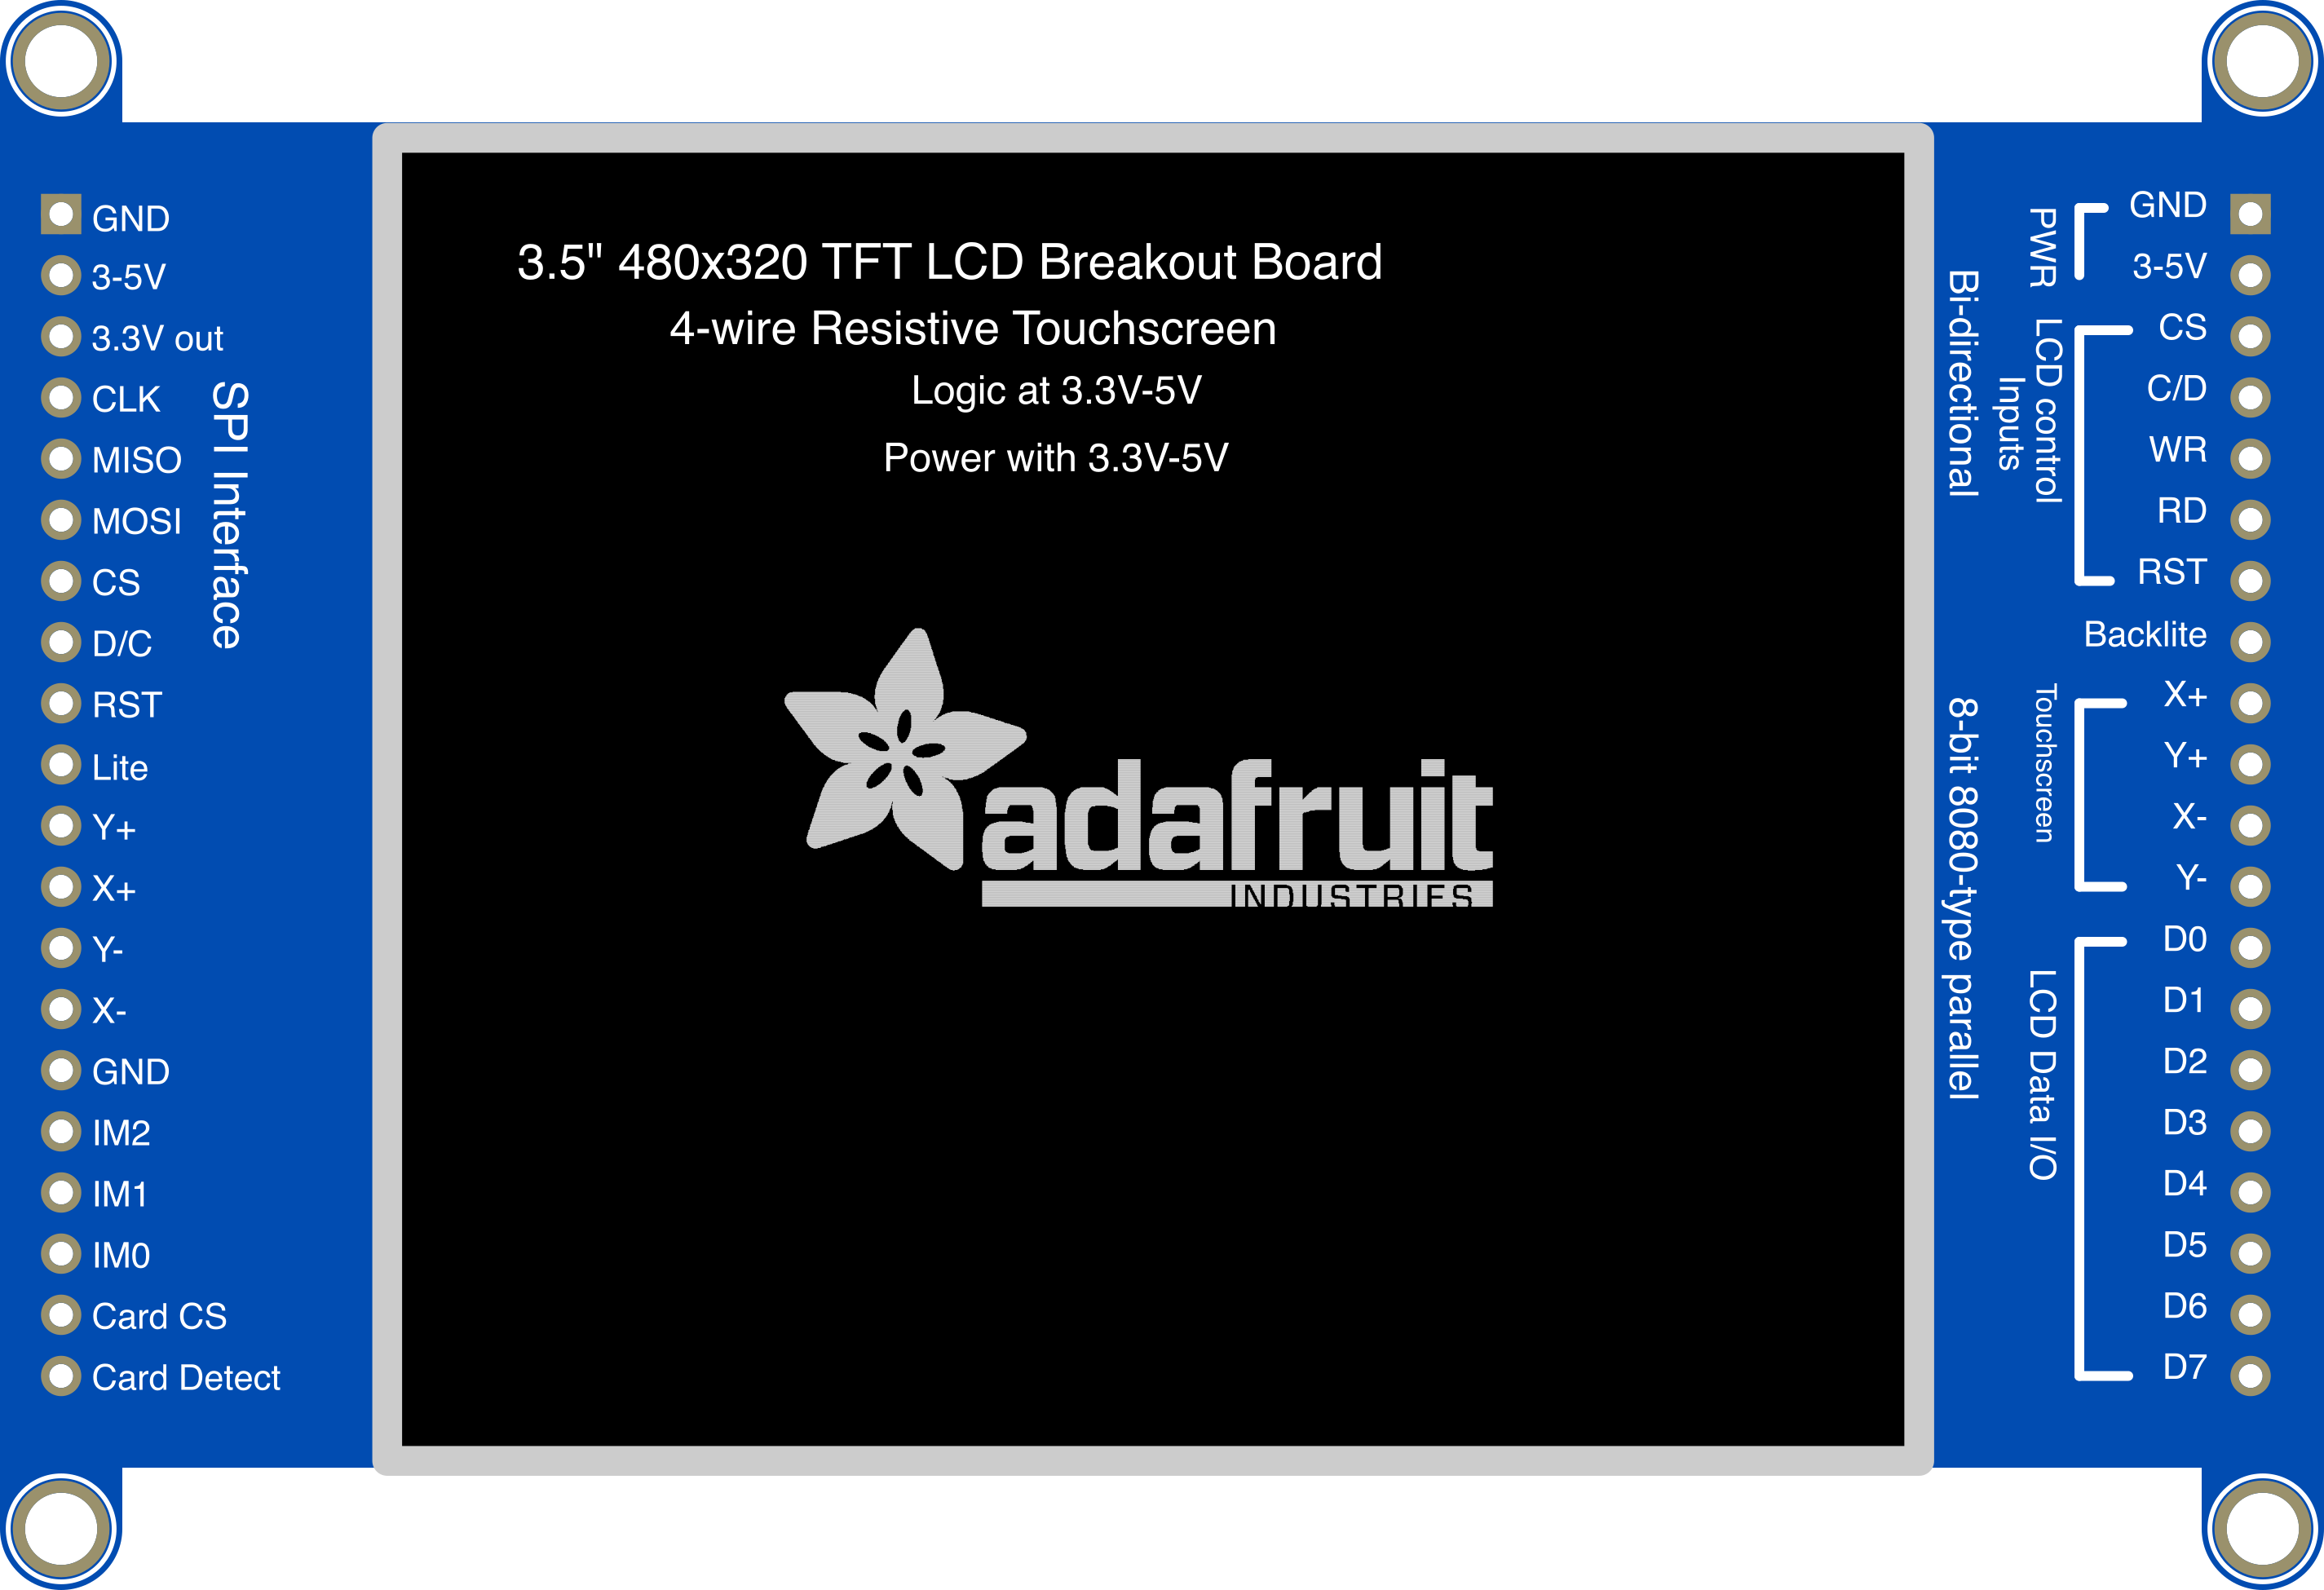
The Adafruit 3.5-inch TFT 480x320 Touch + MicroSD (Part ID: 2050) is a versatile display module designed for interactive and graphical applications. It features a 3.5-inch TFT display with a resolution of 480x320 pixels, a resistive touchscreen for user input, and an integrated MicroSD card slot for external storage. This component is ideal for projects requiring a graphical user interface (GUI), data visualization, or image display.
Explore Projects Built with 3.5in TFT 480x320 Touch + MicroSD
 Open Project in Cirkit Designer
 Open Project in Cirkit Designer
 Open Project in Cirkit Designer
 Open Project in Cirkit Designer
Explore Projects Built with 3.5in TFT 480x320 Touch + MicroSD
Open Project in Cirkit DesignerOpen Project in Cirkit DesignerOpen Project in Cirkit DesignerOpen Project in Cirkit DesignerCommon Applications
- Graphical user interfaces for embedded systems
- Interactive kiosks and control panels
- Data visualization for IoT devices
- Image and video display in portable devices
- Educational and hobbyist projects with Arduino or Raspberry Pi
Technical Specifications
Key Specifications
| Parameter | Value |
|---|---|
| Display Type | TFT (Thin-Film Transistor) |
| Screen Size | 3.5 inches |
| Resolution | 480x320 pixels |
| Touchscreen Type | Resistive |
| Interface | SPI (Serial Peripheral Interface) |
| Backlight | LED |
| Operating Voltage | 3.3V or 5V |
| Current Consumption | ~100mA (typical) |
| MicroSD Slot | Yes |
| Dimensions | 85mm x 56mm x 5mm |
Pin Configuration
The 3.5-inch TFT display uses a standard SPI interface for communication. Below is the pin configuration:
| Pin Name | Description | Notes |
|---|---|---|
| VCC | Power Supply (3.3V or 5V) | Connect to 3.3V or 5V source |
| GND | Ground | Connect to ground |
| CS | Chip Select for TFT | Active low |
| DC | Data/Command Select | High for data, low for command |
| MOSI | Master Out Slave In (SPI Data) | Connect to microcontroller SPI MOSI |
| SCK | Serial Clock (SPI Clock) | Connect to microcontroller SPI SCK |
| T_CS | Chip Select for Touchscreen | Active low |
| T_IRQ | Touchscreen Interrupt | Optional, for touch detection |
| MISO | Master In Slave Out (SPI Data) | Used for MicroSD communication |
| SD_CS | Chip Select for MicroSD | Active low |
Usage Instructions
Connecting the Display to an Arduino UNO
To use the Adafruit 3.5-inch TFT display with an Arduino UNO, follow these steps:
Wiring the Display:
- Connect the
VCCpin to the 5V pin on the Arduino. - Connect the
GNDpin to the GND pin on the Arduino. - Connect the
CSpin to Arduino pin 10. - Connect the
DCpin to Arduino pin 9. - Connect the
MOSIpin to Arduino pin 11. - Connect the
SCKpin to Arduino pin 13. - Connect the
T_CSpin to Arduino pin 8. - Connect the
T_IRQpin to Arduino pin 7 (optional, for touch detection). - Connect the
SD_CSpin to Arduino pin 4.
- Connect the
Install Required Libraries:
- Install the Adafruit GFX library and Adafruit TFTLCD library from the Arduino Library Manager.
- Install the Adafruit TouchScreen library for touchscreen functionality.
- Install the SD library for MicroSD card support.
Example Code: Below is an example sketch to initialize the display and draw a simple graphic:
// Include necessary libraries
#include <Adafruit_GFX.h>       // Core graphics library
#include <Adafruit_TFTLCD.h>   // Hardware-specific library
#include <TouchScreen.h>       // Touchscreen library
#include <SD.h>                // SD card library

// Define pin connections
#define LCD_CS A3  // Chip Select for TFT
#define LCD_CD A2  // Command/Data Select
#define LCD_WR A1  // Write
#define LCD_RD A0  // Read
#define LCD_RESET A4 // Reset

// Touchscreen pins
#define YP A3  // Must be an analog pin
#define XM A2  // Must be an analog pin
#define YM 9   // Can be a digital pin
#define XP 8   // Can be a digital pin

// Initialize TFT and touchscreen
Adafruit_TFTLCD tft(LCD_CS, LCD_CD, LCD_WR, LCD_RD, LCD_RESET);
TouchScreen ts = TouchScreen(XP, YP, XM, YM, 300);

void setup() {
  tft.begin(0x9341); // Initialize with ILI9341 driver
  tft.setRotation(1); // Set display orientation
  tft.fillScreen(0x0000); // Clear screen (black)

  // Draw a simple rectangle
  tft.fillRect(50, 50, 100, 100, 0xF800); // Red rectangle
}

void loop() {
  // Touchscreen interaction can be added here
}
Important Considerations
- Ensure the display is powered with the correct voltage (3.3V or 5V).
- Use level shifters if your microcontroller operates at 3.3V logic levels.
- Avoid touching the screen with sharp objects to prevent damage.
- Format the MicroSD card as FAT16 or FAT32 for compatibility.
Troubleshooting and FAQs
Common Issues
The display does not turn on:
- Verify all connections are secure and correct.
- Ensure the power supply voltage matches the display's requirements.
Touchscreen is unresponsive:
- Check the
T_CSandT_IRQconnections. - Ensure the touchscreen library is correctly installed and initialized.
- Check the
MicroSD card is not detected:
- Verify the
SD_CSpin connection. - Ensure the MicroSD card is formatted as FAT16 or FAT32.
- Verify the
Graphics appear distorted or incorrect:
- Confirm the correct driver (e.g., ILI9341) is being used in the code.
- Check for loose or incorrect wiring.
Tips for Troubleshooting
- Use a multimeter to check for continuity and proper voltage levels.
- Test the display with example sketches from the Adafruit libraries to rule out software issues.
- Consult the Adafruit forums or documentation for additional support.
By following this documentation, you can effectively integrate and utilize the Adafruit 3.5-inch TFT 480x320 Touch + MicroSD display in your projects.