How to Use Adafruit MPL3115A2 I2C Barometric Pressure, Altitude, Temperature Sensor: Examples, Pinouts, and Specs
Introduction
The Adafruit MPL3115A2 is a compact, high-precision sensor capable of measuring barometric pressure, altitude, and temperature. Utilizing I2C communication, it is ideal for a variety of applications including weather monitoring, altimeters, and navigation systems. Its small form factor and low power consumption make it suitable for portable devices and remote sensing applications.
Explore Projects Built with Adafruit MPL3115A2 I2C Barometric Pressure, Altitude, Temperature Sensor

Explore Projects Built with Adafruit MPL3115A2 I2C Barometric Pressure, Altitude, Temperature Sensor
Technical Specifications
Key Features
- Pressure Range: 20 to 110 kPa
- Altitude Range: -700 to 10,000 m
- Temperature Range: -40 to 85°C
- Resolution: 0.01 kPa (pressure), 0.3 m (altitude), 0.1°C (temperature)
- Operating Voltage: 2.5V to 5.5V
- Interface: I2C (up to 400 kHz)
- 2.5 µA low power consumption
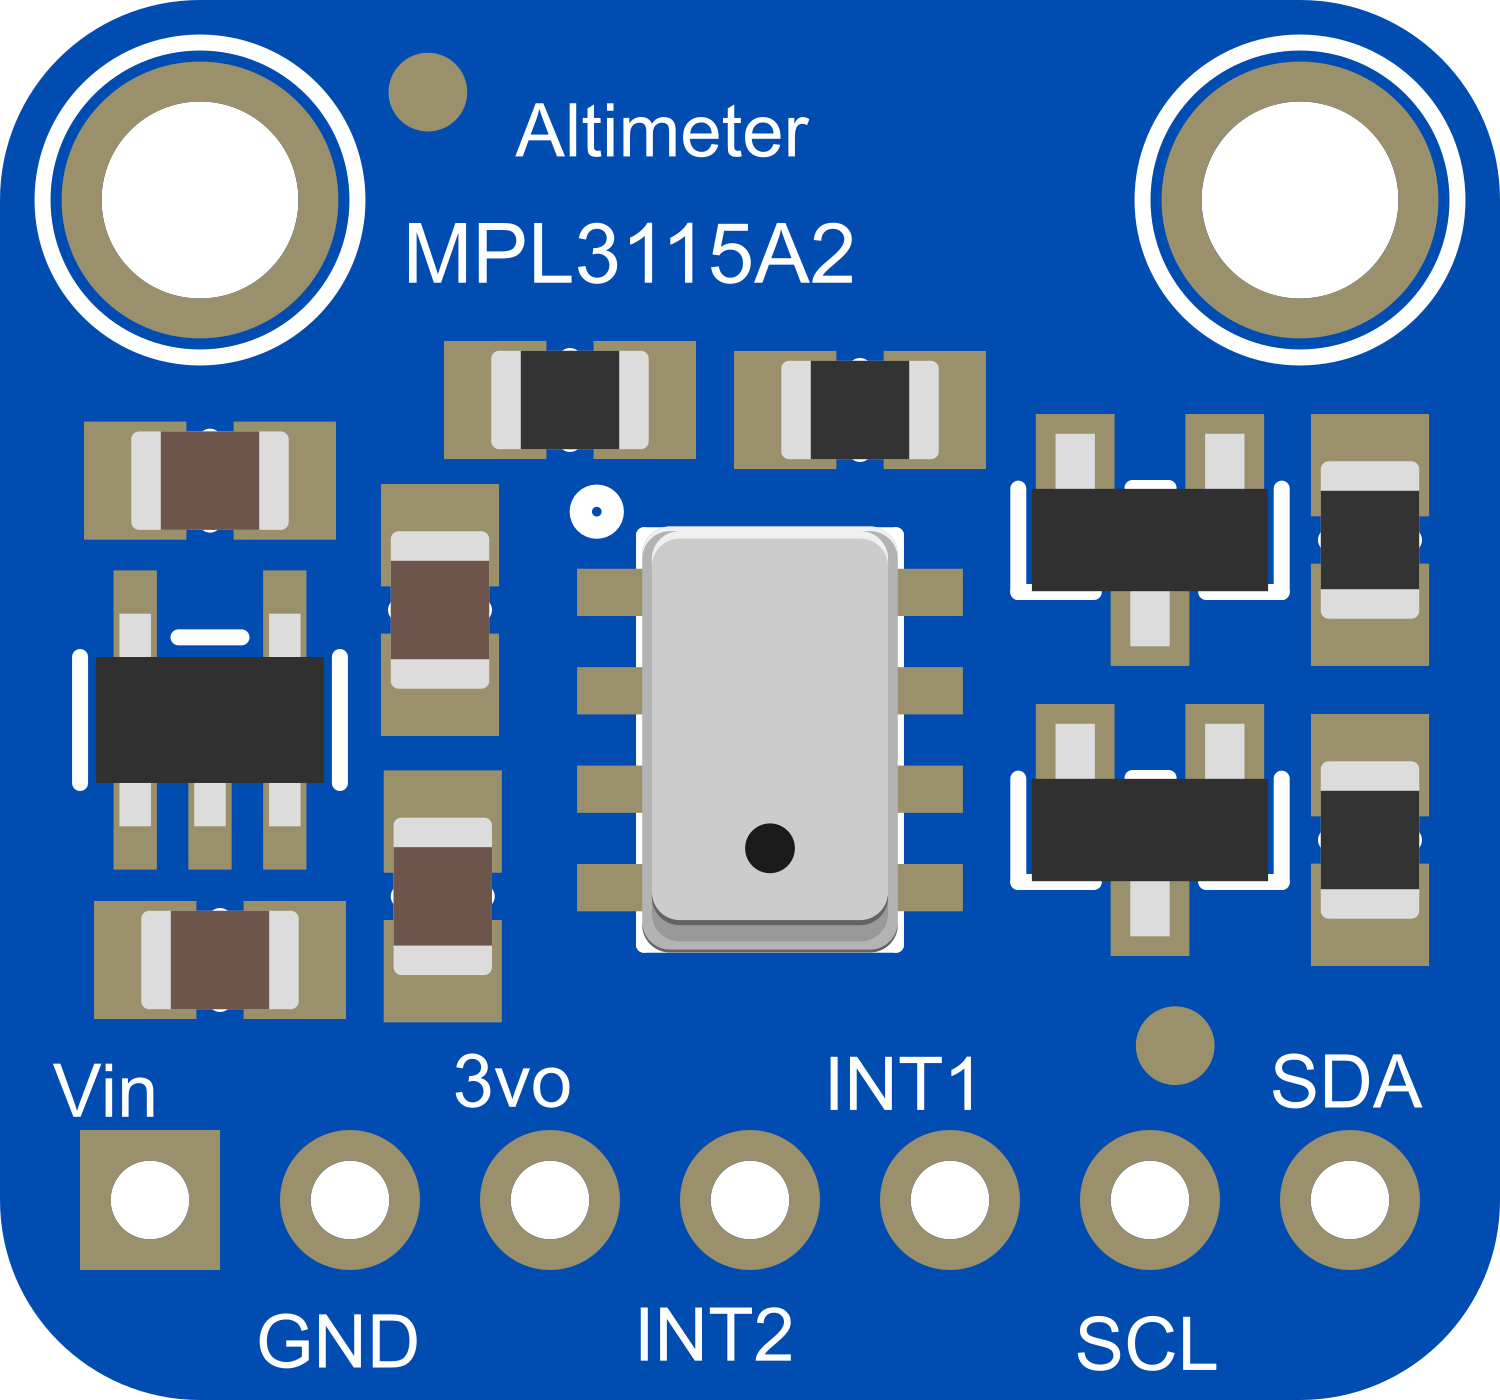
Pin Configuration
| Pin Number | Name | Description |
|---|---|---|
| 1 | VDD | Power supply (2.5V to 5.5V) |
| 2 | GND | Ground connection |
| 3 | SCL | I2C clock line |
| 4 | SDA | I2C data line |
| 5 | INT | Interrupt output (active low) |
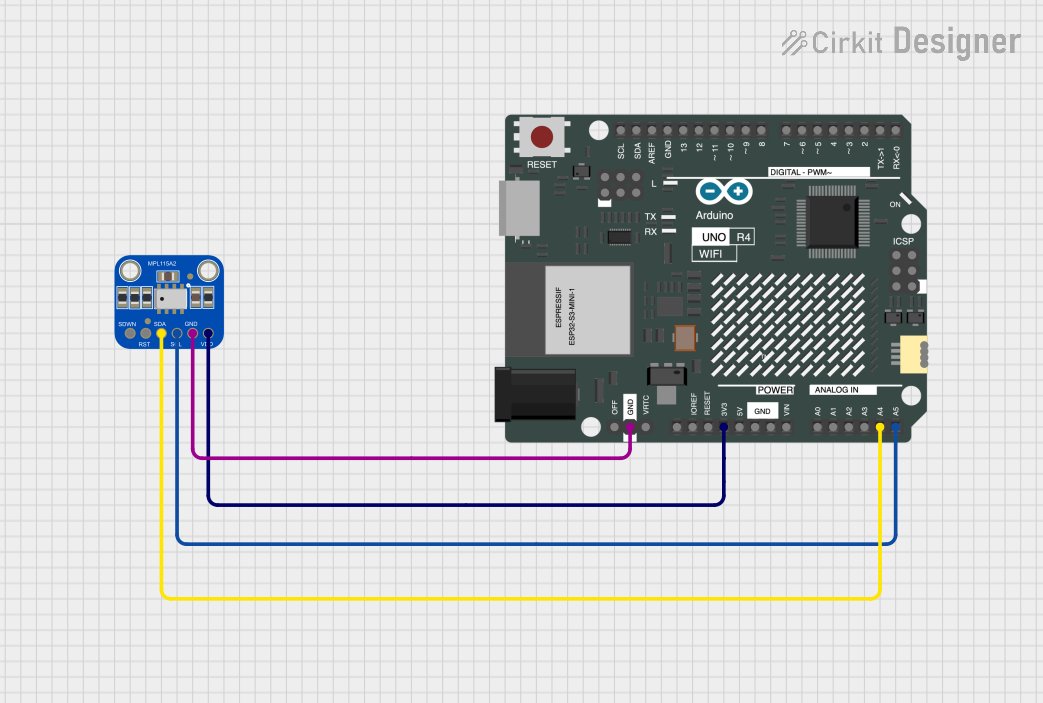
Usage Instructions
Integration with a Circuit
- Connect VDD to the power supply (2.5V to 5.5V).
- Connect GND to the ground of the power supply.
- Connect SCL to the I2C clock line on your microcontroller.
- Connect SDA to the I2C data line on your microcontroller.
- (Optional) Connect INT to an interrupt pin on your microcontroller if interrupt-driven measurements are needed.
Best Practices
- Ensure that the power supply is stable and within the specified voltage range.
- Use pull-up resistors on the SCL and SDA lines, typically 4.7kΩ to 10kΩ.
- Keep the I2C lines as short as possible to reduce noise and improve communication reliability.
- Avoid placing the sensor near heat sources to prevent inaccurate temperature readings.
Example Code for Arduino UNO
#include <Wire.h>
#include <Adafruit_MPL3115A2.h>

// Create an MPL3115A2 instance
Adafruit_MPL3115A2 baro = Adafruit_MPL3115A2();

void setup() {
  Serial.begin(9600);
  if (!baro.begin()) {
    Serial.println("Could not find a valid MPL3115A2 sensor, check wiring!");
    while (1);
  }
}

void loop() {
  float pressure = baro.getPressure(); // Get pressure in Pascals
  float altitude = baro.getAltitude(); // Get altitude in meters
  float temperature = baro.getTemperature(); // Get temperature in degrees Celsius

  // Print the readings
  Serial.print("Pressure: ");
  Serial.print(pressure);
  Serial.println(" Pa");
  Serial.print("Altitude: ");
  Serial.print(altitude);
  Serial.println(" m");
  Serial.print("Temperature: ");
  Serial.print(temperature);
  Serial.println(" C");

  delay(500); // Wait for half a second before next reading
}
Troubleshooting and FAQs
Common Issues
- Sensor not detected: Ensure that the wiring is correct and that the sensor is properly powered. Check the I2C address and connections.
- Inaccurate readings: Verify that the sensor is not placed near heat sources or objects that may affect pressure readings. Calibrate the sensor if necessary.
- No data on I2C lines: Check for proper pull-up resistors on the SCL and SDA lines and ensure there are no shorts or open circuits.
FAQs
Q: Can the MPL3115A2 sensor be used with a 3.3V system? A: Yes, the sensor can operate at voltages as low as 2.5V, making it compatible with 3.3V systems.
Q: How can I calibrate the altitude readings? A: Altitude readings can be calibrated by providing a known sea-level pressure to the sensor or by setting a current known altitude.
Q: What is the default I2C address of the MPL3115A2? A: The default I2C address is 0x60 (96 in decimal).
Q: How do I use the interrupt pin? A: The INT pin can be configured to trigger an interrupt on certain conditions like data ready or threshold crossing. Refer to the sensor's datasheet for detailed configuration.
Q: Is it necessary to use the Adafruit library? A: While it is not strictly necessary, the Adafruit MPL3115A2 library simplifies the interface with the sensor and provides convenient functions for accessing sensor data.
For further assistance, consult the MPL3115A2 datasheet and the Adafruit MPL3115A2 library documentation.