How to Use Solenoid Hydraulic Valve 1 Coil: Examples, Pinouts, and Specs
Introduction
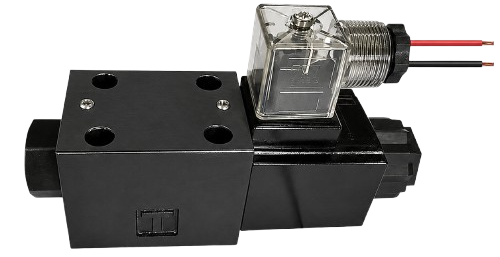
The Solenoid Hydraulic Valve 1 Coil is an electromagnetic device designed to control the flow of hydraulic fluid in a system. It operates by using an electric current to energize its coil, which in turn opens or closes the valve. This component is widely used in industrial automation, agricultural machinery, and hydraulic systems where precise fluid control is required.
Explore Projects Built with Solenoid Hydraulic Valve 1 Coil
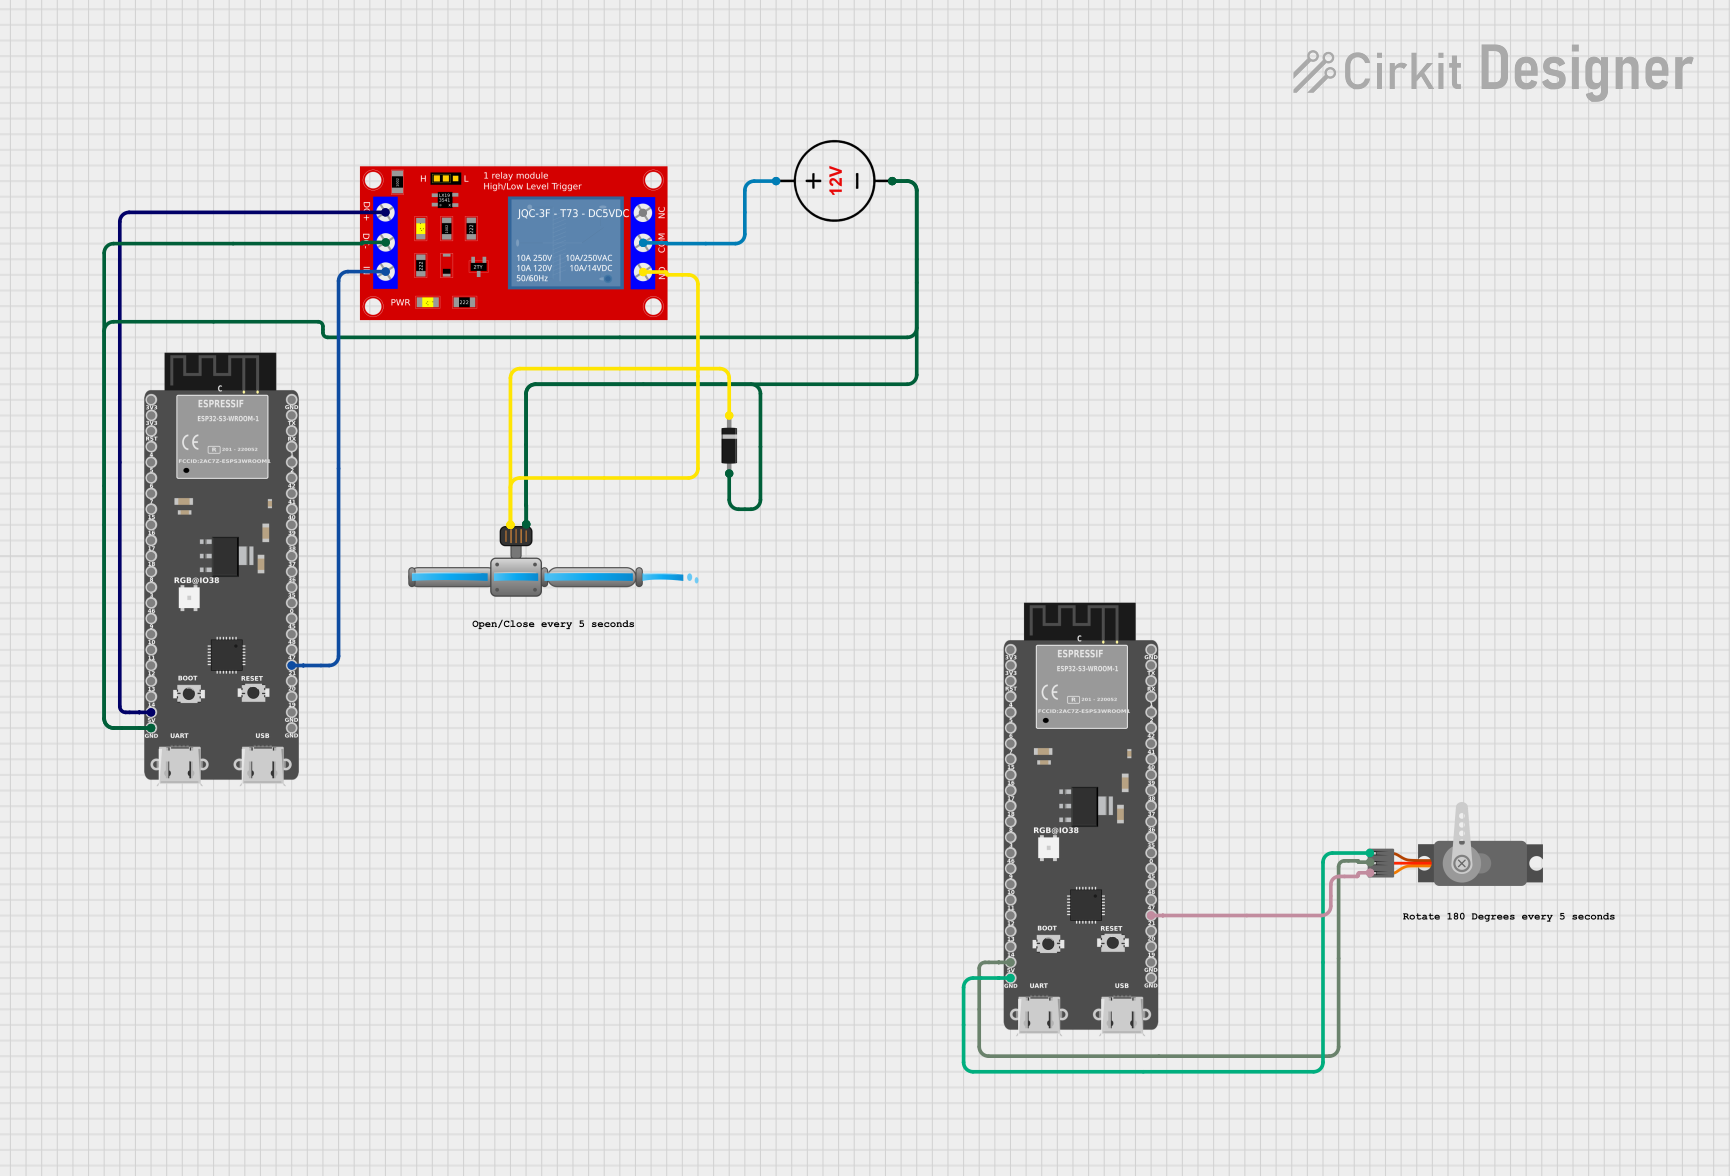
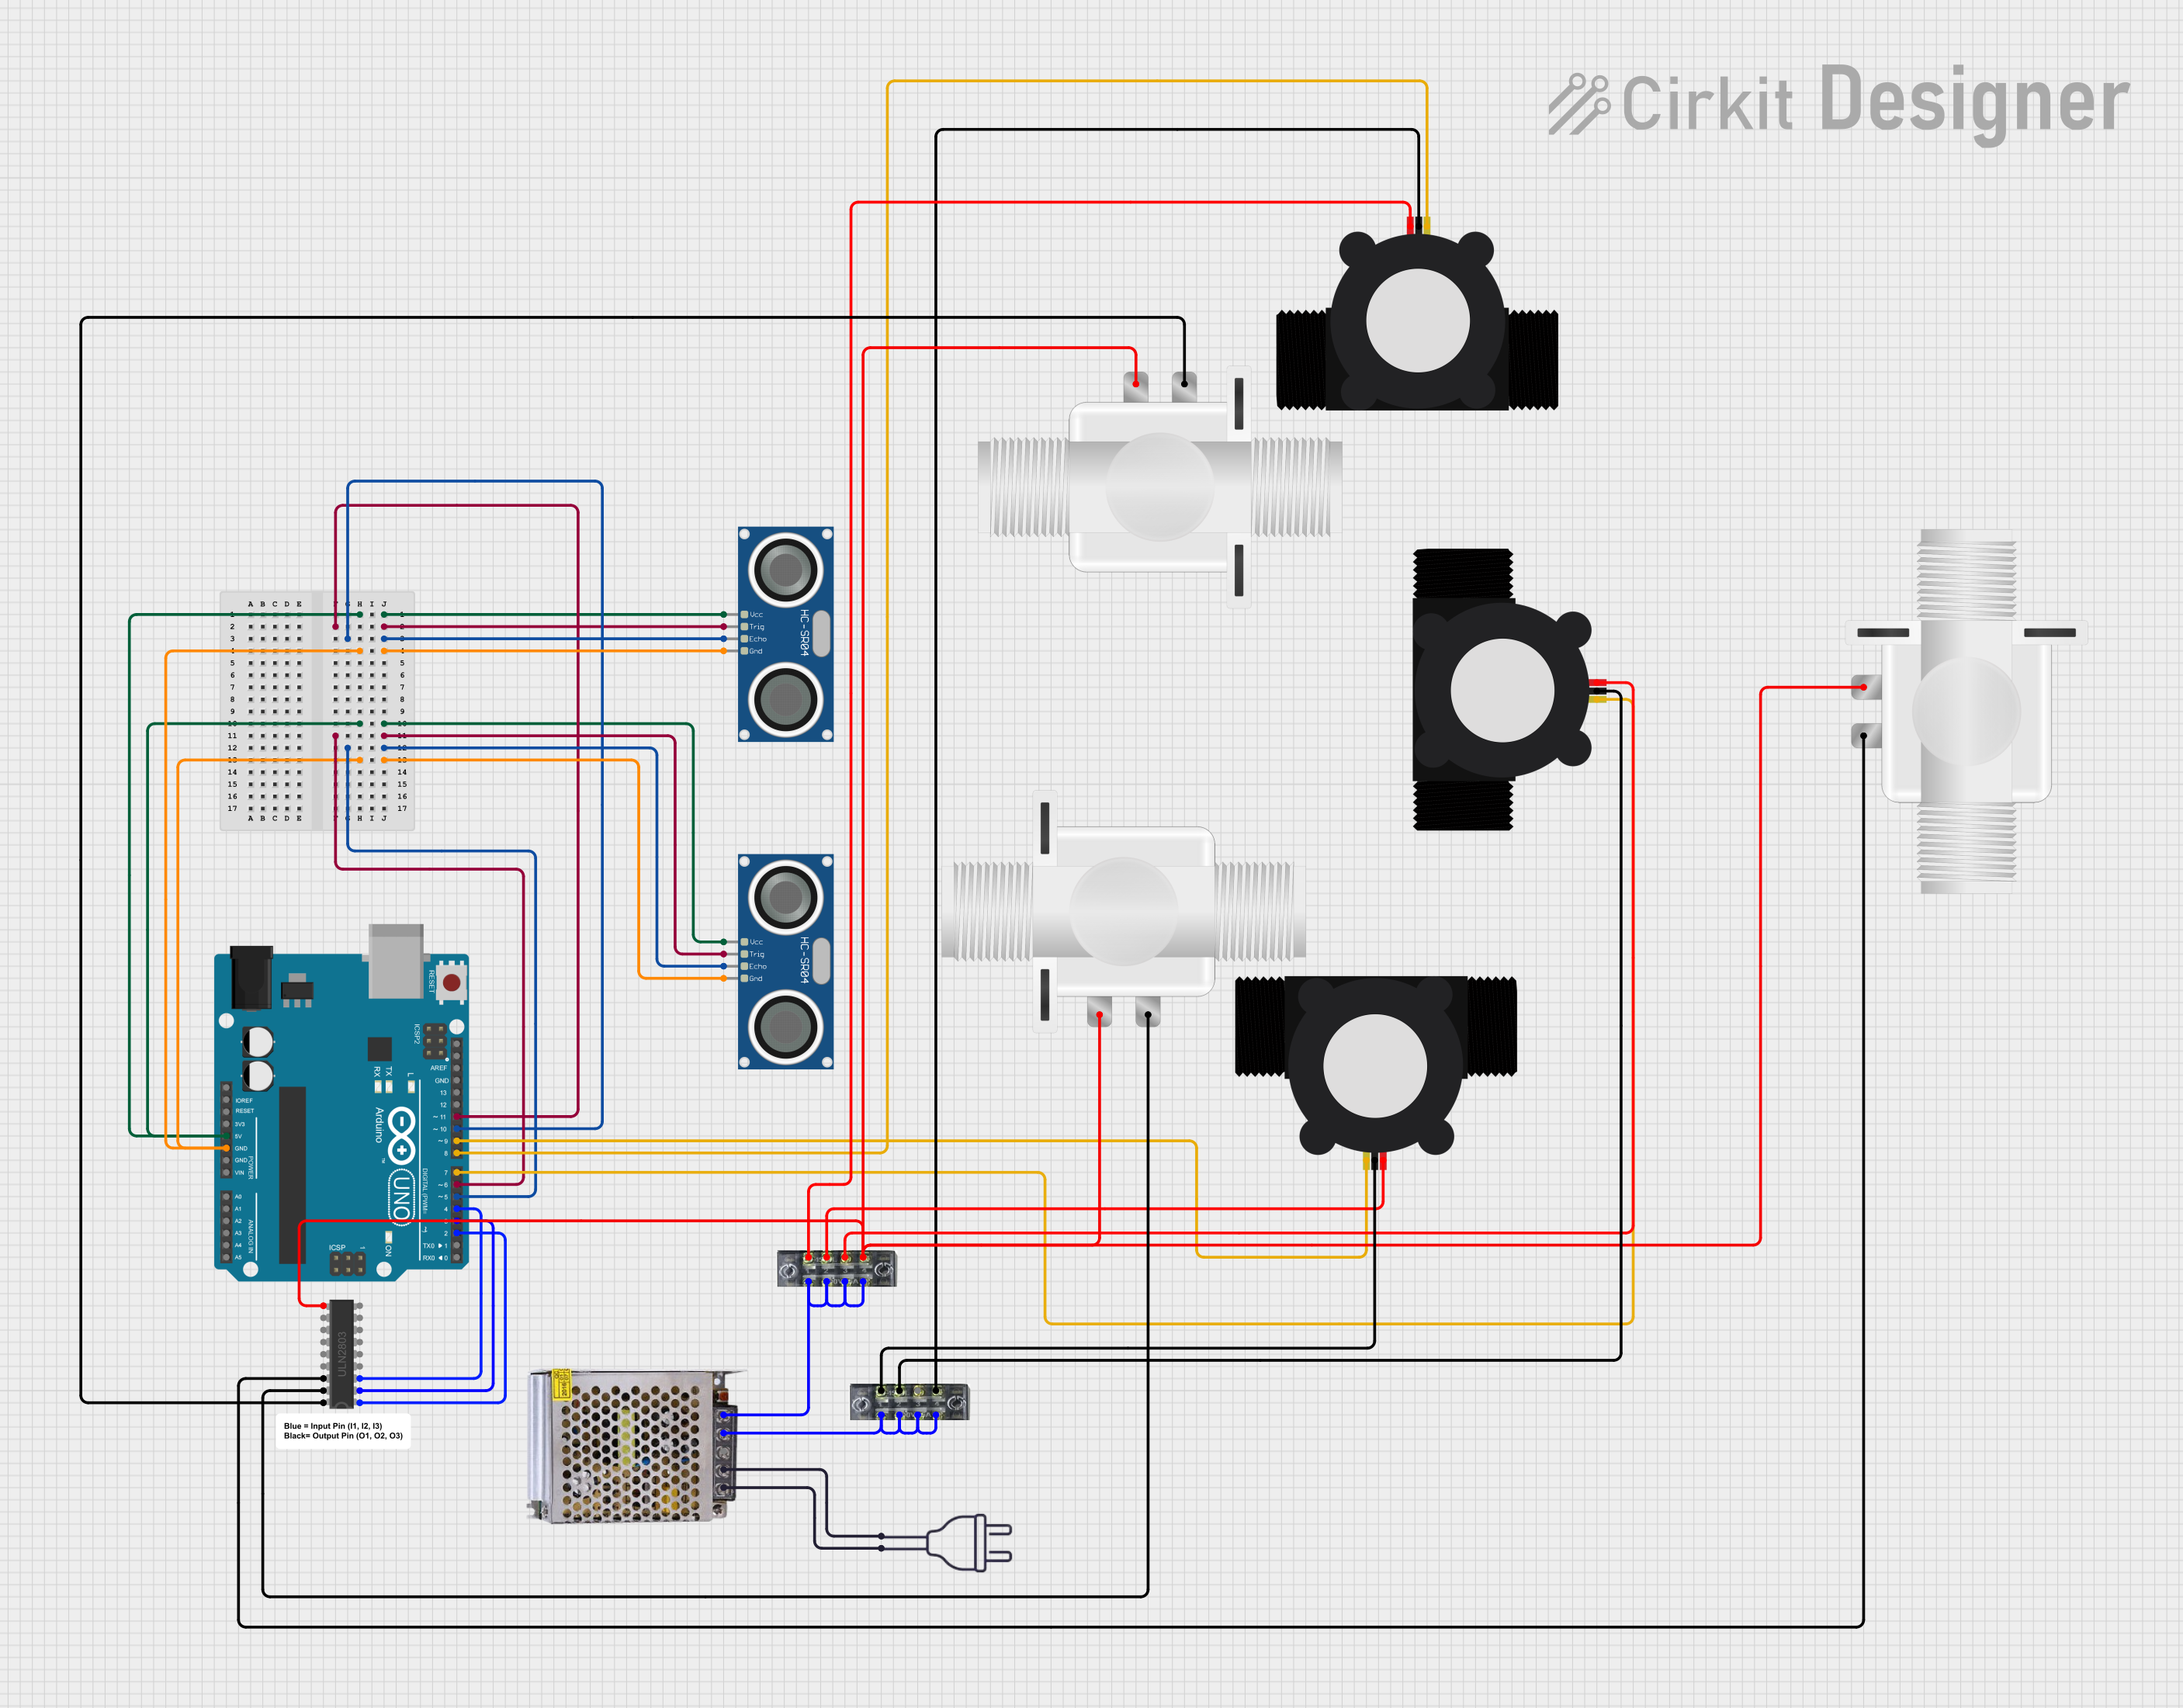
Explore Projects Built with Solenoid Hydraulic Valve 1 Coil
Common Applications and Use Cases
- Industrial hydraulic systems for controlling actuators and cylinders
- Agricultural machinery for fluid flow regulation
- Automotive systems, such as automatic transmissions
- Robotics and automation for precise motion control
- Heavy machinery, including excavators and loaders
Technical Specifications
Below are the key technical details and pin configuration for the Solenoid Hydraulic Valve 1 Coil:
Key Technical Details
| Parameter | Specification |
|---|---|
| Operating Voltage | 12V DC or 24V DC (model-specific) |
| Coil Resistance | 10–50 ohms (depending on model) |
| Current Consumption | 0.5–2.5 A |
| Hydraulic Pressure Rating | Up to 350 bar (5,000 psi) |
| Response Time | 20–50 ms |
| Operating Temperature | -20°C to 80°C |
| Connector Type | DIN 43650 or custom plug |
Pin Configuration and Descriptions
| Pin Number | Label | Description |
|---|---|---|
| 1 | +V (Positive) | Connect to the positive terminal of the power supply. |
| 2 | GND (Ground) | Connect to the ground terminal of the power supply. |
| 3 (Optional) | Signal | For advanced models, used for PWM or control signals. |
Usage Instructions
How to Use the Component in a Circuit
- Power Supply: Ensure the power supply matches the operating voltage of the solenoid valve (e.g., 12V DC or 24V DC). Use a regulated power source to avoid voltage spikes.
- Wiring: Connect the positive terminal of the power supply to the
+Vpin and the ground terminal to theGNDpin. For advanced models, connect the control signal to theSignalpin if applicable. - Control: The valve can be controlled by simply applying or removing power to the coil. For more precise control, use a Pulse Width Modulation (PWM) signal on the
Signalpin (if supported). - Hydraulic Connections: Attach the hydraulic input and output lines to the valve ports. Ensure the connections are secure and leak-free.
Important Considerations and Best Practices
- Voltage Matching: Always verify the operating voltage of the solenoid valve before connecting it to a power source.
- Current Handling: Ensure the power supply can handle the current requirements of the solenoid coil.
- Heat Dissipation: Prolonged operation may cause the coil to heat up. Ensure adequate ventilation or cooling to prevent overheating.
- Hydraulic Pressure: Do not exceed the maximum hydraulic pressure rating of the valve.
- Debris Prevention: Use a hydraulic filter to prevent debris from clogging the valve.
Example: Connecting to an Arduino UNO
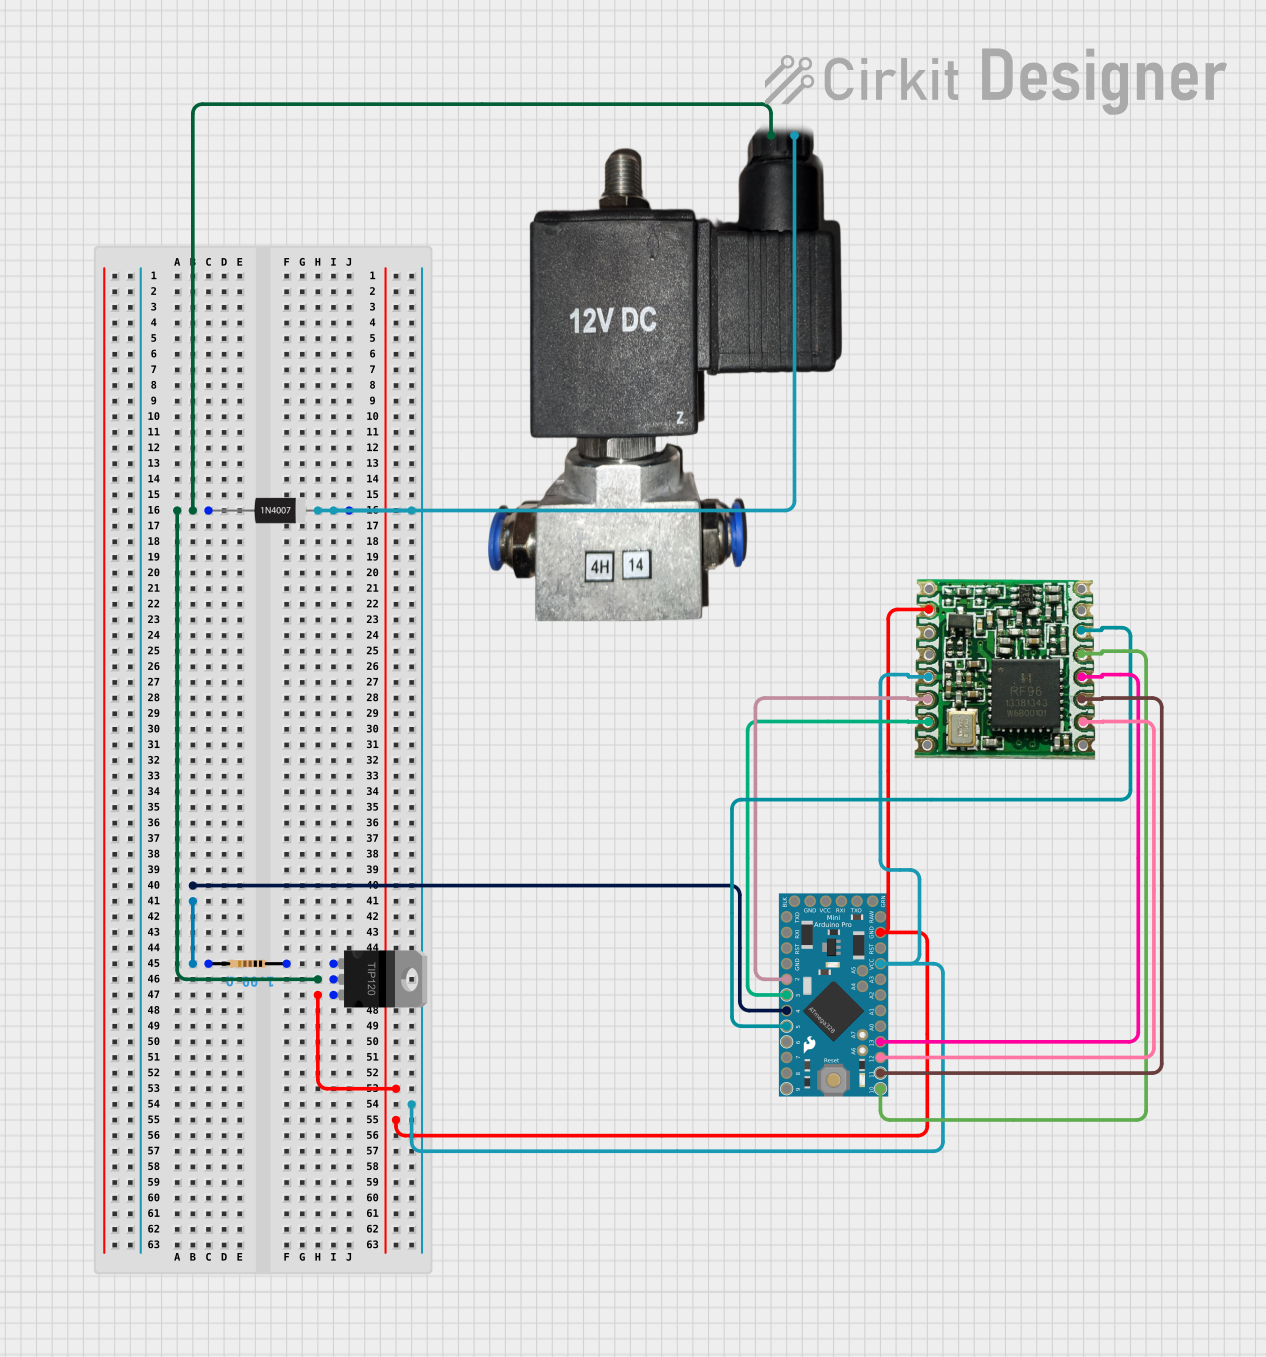
The Solenoid Hydraulic Valve 1 Coil can be controlled using an Arduino UNO. Below is an example circuit and code for controlling the valve using a digital output pin.
Circuit Diagram
- Connect the
+Vpin of the solenoid valve to the 12V DC power supply. - Connect the
GNDpin of the solenoid valve to the ground of the power supply and Arduino. - Use an NPN transistor (e.g., 2N2222) to switch the solenoid valve. Connect the base of the transistor to an Arduino digital pin through a 1kΩ resistor.
Arduino Code
// Define the pin connected to the transistor base
const int solenoidPin = 7;

void setup() {
  // Set the solenoid pin as an output
  pinMode(solenoidPin, OUTPUT);
}

void loop() {
  // Turn the solenoid valve ON
  digitalWrite(solenoidPin, HIGH);
  delay(1000); // Keep the valve open for 1 second

  // Turn the solenoid valve OFF
  digitalWrite(solenoidPin, LOW);
  delay(1000); // Keep the valve closed for 1 second
}
Troubleshooting and FAQs
Common Issues Users Might Face
Valve Not Activating:
- Cause: Insufficient voltage or current.
- Solution: Verify the power supply voltage and current ratings. Ensure proper connections.
Overheating:
- Cause: Prolonged activation or insufficient cooling.
- Solution: Limit the duty cycle or provide additional cooling.
Hydraulic Leaks:
- Cause: Loose or damaged hydraulic connections.
- Solution: Tighten connections and inspect for damaged seals.
Noisy Operation:
- Cause: Air trapped in the hydraulic system.
- Solution: Bleed the hydraulic system to remove air.
Solutions and Tips for Troubleshooting
- Use a multimeter to check the voltage and current supplied to the solenoid coil.
- Inspect the coil for physical damage or signs of wear.
- Ensure the hydraulic system is clean and free of contaminants.
- If using PWM control, ensure the frequency is within the recommended range for the solenoid valve.
By following this documentation, users can effectively integrate and troubleshoot the Solenoid Hydraulic Valve 1 Coil in their hydraulic systems.