How to Use Tilt de Mercurio: Examples, Pinouts, and Specs
Introduction
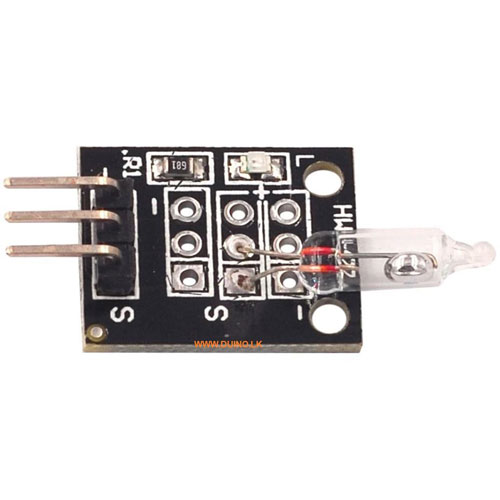
The Tilt de Mercurio (manufacturer: Keys, part ID: Mercury) is a mercury tilt switch designed to open or close an electrical circuit based on its orientation. The device contains a small amount of mercury that moves within a sealed glass or metal tube. When tilted, the mercury bridges two electrical contacts, completing the circuit. This component is widely used in applications requiring level sensing, motion detection, or safety mechanisms.
Explore Projects Built with Tilt de Mercurio
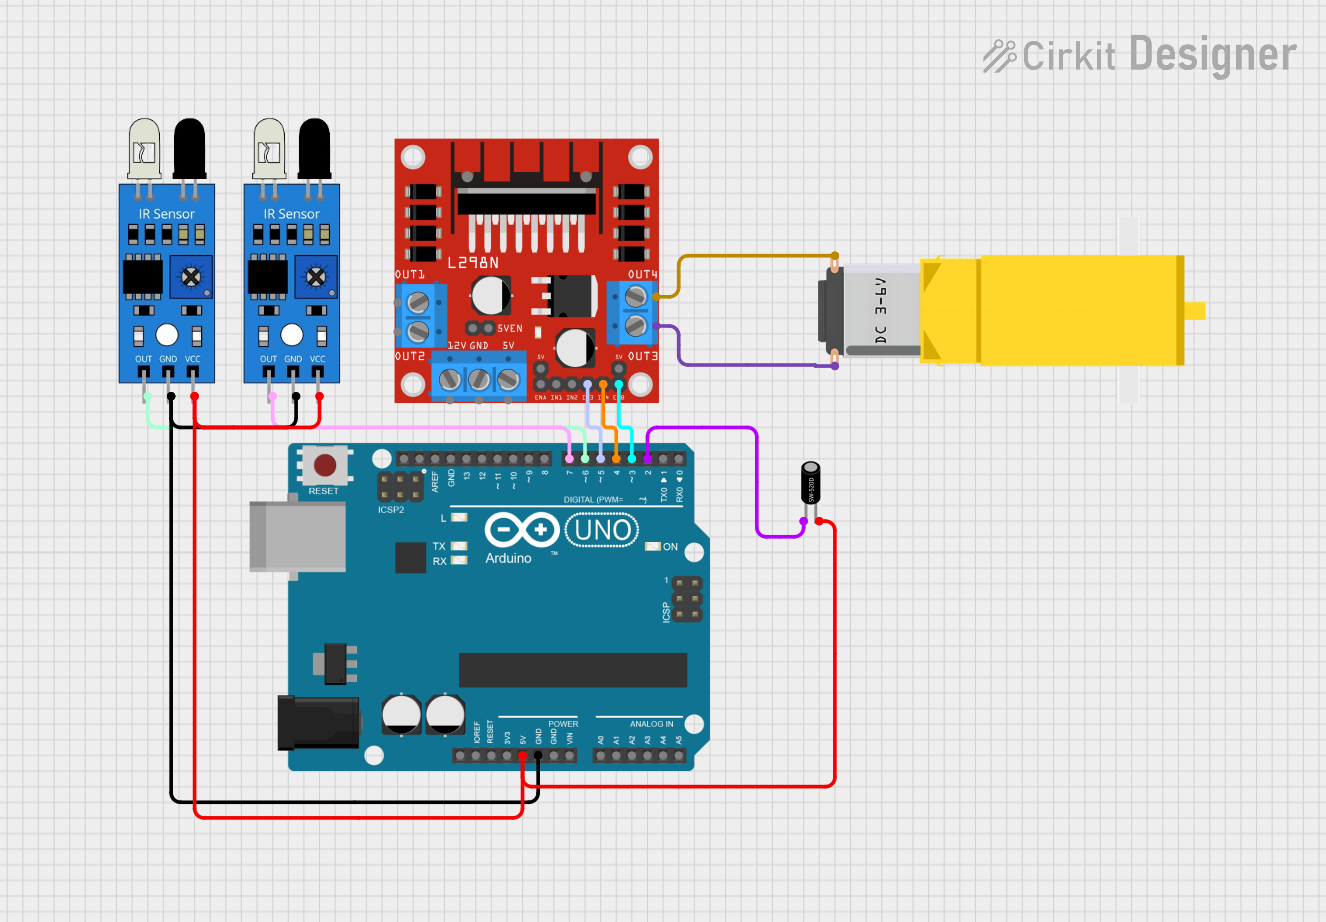
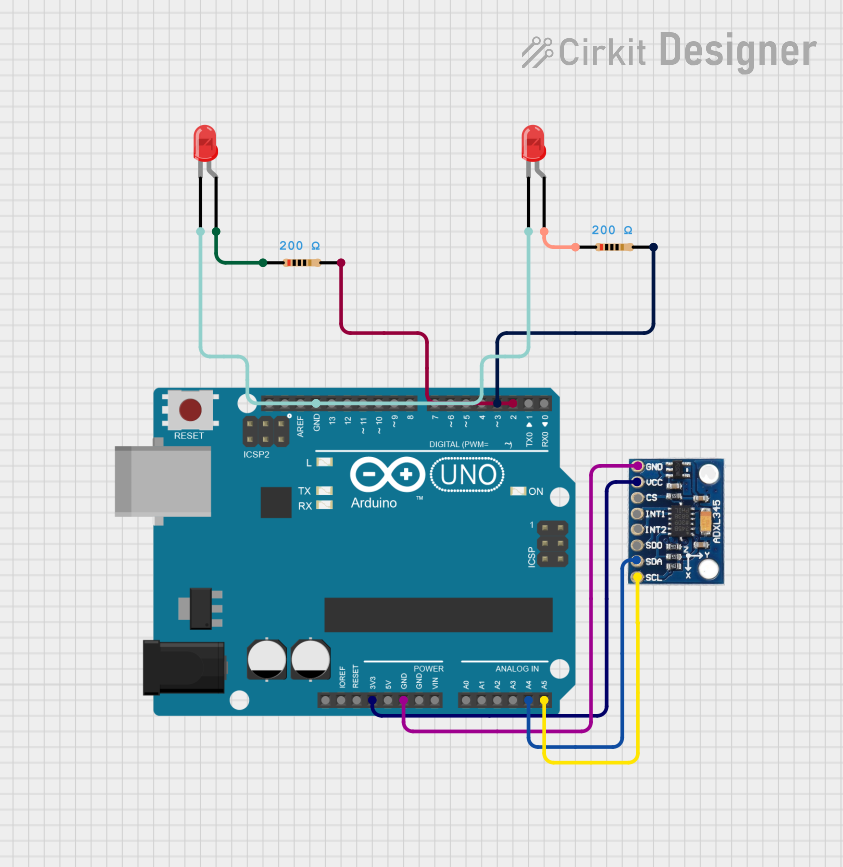
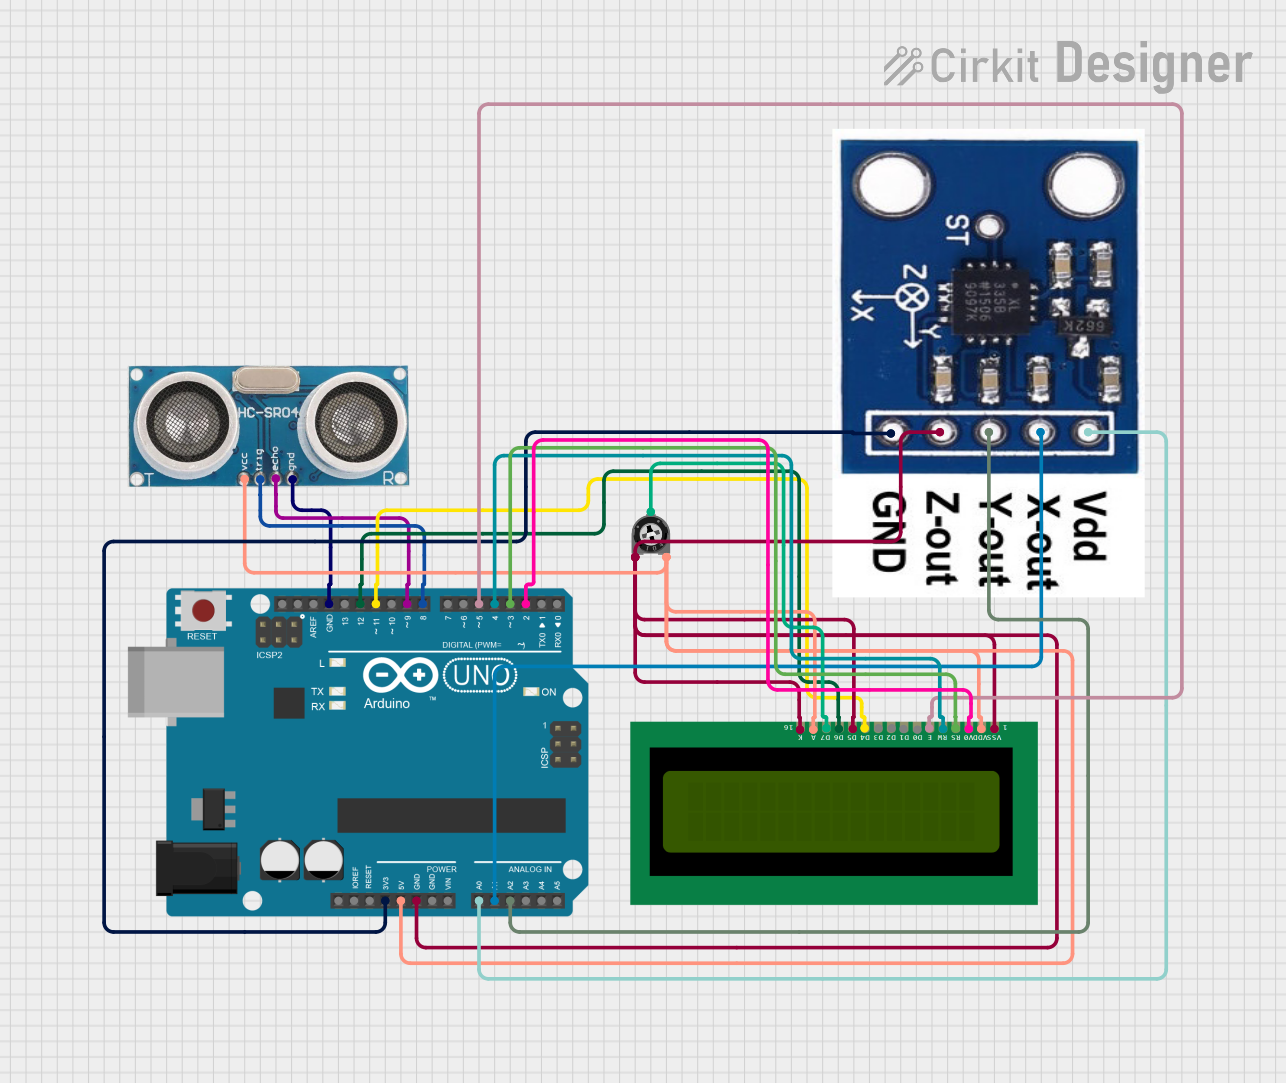

Explore Projects Built with Tilt de Mercurio
Common Applications
- Level sensing: Detecting the tilt or orientation of an object.
- Safety switches: Automatically shutting off devices when tilted or overturned.
- Motion detection: Triggering alarms or activating systems based on movement.
- Industrial equipment: Monitoring the position of machinery or components.
Technical Specifications
The following table outlines the key technical details of the Tilt de Mercurio:
| Parameter | Value |
|---|---|
| Manufacturer | Keys |
| Part ID | Mercury |
| Operating Voltage | 3V to 24V DC |
| Maximum Current | 500 mA |
| Contact Resistance | < 100 mΩ |
| Operating Temperature | -40°C to +85°C |
| Housing Material | Glass or metal (sealed) |
| Orientation Sensitivity | Typically ±10° from horizontal |
Pin Configuration and Descriptions
The Tilt de Mercurio has two pins, as described below:
| Pin | Description |
|---|---|
| Pin 1 | Electrical contact 1 (connect to power or signal) |
| Pin 2 | Electrical contact 2 (connect to ground or load) |
Usage Instructions
How to Use the Component in a Circuit
Basic Connection:
- Connect Pin 1 to the positive terminal of the power supply or signal input.
- Connect Pin 2 to the load or ground, depending on the circuit design.
- When the switch is tilted to the appropriate angle, the mercury will complete the circuit, allowing current to flow.
Example Circuit:
- Use a resistor in series with the load to limit current and protect the switch.
- For digital applications, connect the output to a microcontroller input pin to detect the tilt state.
Arduino UNO Example: Below is an example of how to use the Tilt de Mercurio with an Arduino UNO to detect tilt and light up an LED:
// Define the pin connected to the tilt switch
const int tiltSwitchPin = 2; // Digital pin 2
const int ledPin = 13;      // Built-in LED pin

void setup() {
  pinMode(tiltSwitchPin, INPUT); // Set tilt switch pin as input
  pinMode(ledPin, OUTPUT);       // Set LED pin as output
  Serial.begin(9600);           // Initialize serial communication
}

void loop() {
  int tiltState = digitalRead(tiltSwitchPin); // Read the tilt switch state

  if (tiltState == HIGH) {
    // If the switch is tilted, turn on the LED
    digitalWrite(ledPin, HIGH);
    Serial.println("Tilt detected!");
  } else {
    // If not tilted, turn off the LED
    digitalWrite(ledPin, LOW);
    Serial.println("No tilt detected.");
  }

  delay(500); // Wait for 500ms before checking again
}
Important Considerations and Best Practices
- Orientation: Ensure the switch is mounted in the correct orientation for your application.
- Vibration: Avoid excessive vibration, as it may cause false triggering.
- Current Limiting: Use a resistor to limit current through the switch and prevent damage.
- Environmental Conditions: Ensure the operating temperature and humidity are within the specified range to avoid malfunction.
Troubleshooting and FAQs
Common Issues and Solutions
Issue: The switch does not respond to tilting.
- Solution: Verify the orientation of the switch. Ensure it is mounted correctly and within the sensitivity range (±10° from horizontal).
Issue: False triggering due to vibration or movement.
- Solution: Use mechanical damping or mount the switch in a stable location to minimize vibration effects.
Issue: The circuit does not complete when tilted.
- Solution: Check the connections and ensure the pins are properly soldered or secured. Also, verify that the current and voltage are within the specified range.
Issue: The switch is damaged or leaking mercury.
- Solution: Immediately stop using the switch and dispose of it according to local hazardous material regulations. Replace it with a new component.
FAQs
Q: Can the Tilt de Mercurio be used in high-vibration environments?
A: It is not recommended, as vibrations may cause false triggering. Consider using a solid-state tilt sensor for such applications.Q: Is the mercury inside the switch hazardous?
A: Yes, mercury is toxic. Handle the switch carefully and avoid breaking it. Dispose of damaged switches properly.Q: Can this switch handle AC voltage?
A: The Tilt de Mercurio is primarily designed for DC applications. If AC is required, ensure the voltage and current ratings are not exceeded.Q: How do I clean the switch if it gets dirty?
A: Avoid cleaning with water or solvents. Use a dry, soft cloth to gently clean the exterior.
This concludes the documentation for the Tilt de Mercurio. For further assistance, refer to the manufacturer's datasheet or contact Keys support.