Cirkit Designer Logo
Cirkit Designer
Your all-in-one circuit design IDE
Home / 
Component Documentation

How to Use LCD 16x2 I2C Display: Examples, Pinouts, and Specs

Image of LCD 16x2 I2C Display
Cirkit Designer LogoDesign with LCD 16x2 I2C Display in Cirkit Designer

Introduction

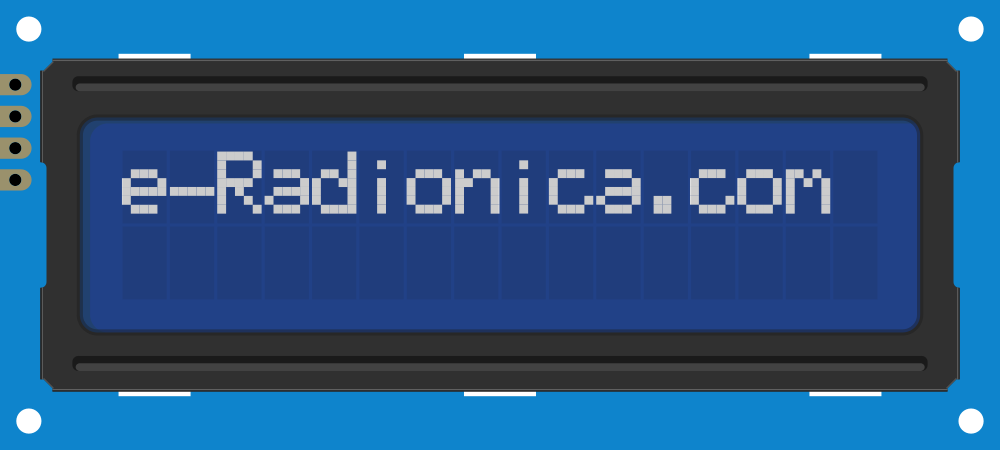
The LCD 16x2 I2C Display (Manufacturer Part ID: PCF8574_LCD1602) is a liquid crystal display module capable of showing 16 characters per line across 2 lines. It features an I2C interface, which significantly reduces the number of pins required for connection, making it ideal for microcontroller-based projects. This display is widely used in applications such as DIY electronics, embedded systems, and prototyping where a simple and efficient text display is needed.

Explore Projects Built with LCD 16x2 I2C Display

Use Cirkit Designer to design, explore, and prototype these projects online. Some projects support real-time simulation. Click "Open Project" to start designing instantly!
Arduino Leonardo Controlled LCD Display with I2C Interface
Image of ert: A project utilizing LCD 16x2 I2C Display in a practical application
This circuit connects an Arduino Leonardo microcontroller to a 16x2 LCD display via an LCM1602 IIC interface module, enabling the display of text on the LCD. The Arduino is programmed to display the messages 'TEST LCD i2C' and 'KelasRobot.com' on the LCD. The IIC module facilitates communication between the Arduino and the LCD using the I2C protocol, simplifying the wiring and pin usage.
Cirkit Designer LogoOpen Project in Cirkit Designer
I2C LCD Display Module with Power Supply Interface
Image of J8 +j22 lcd closeup: A project utilizing LCD 16x2 I2C Display in a practical application
This circuit interfaces a 20x4 I2C LCD display with a power source and an I2C communication bus. The LCD is powered by a 4.2V supply from a connector and communicates via I2C through another connector, which provides the SCL and SDA lines as well as ground.
Cirkit Designer LogoOpen Project in Cirkit Designer
Arduino UNO and 16x2 I2C LCD Display Interface for Data Visualization
Image of lcd: A project utilizing LCD 16x2 I2C Display in a practical application
This circuit consists of an Arduino UNO microcontroller connected to a 16x2 I2C LCD display. The Arduino UNO provides power and I2C communication to the LCD, allowing it to display information controlled by the Arduino.
Cirkit Designer LogoOpen Project in Cirkit Designer
Arduino Leonardo Controlled I2C LCD Display for Text Scrolling
Image of final year project: A project utilizing LCD 16x2 I2C Display in a practical application
This circuit features an Arduino Leonardo microcontroller connected to a 16x2 I2C LCD screen, powered by a 5V battery. The Arduino is programmed to display and continuously scroll a message on the LCD. The I2C communication protocol is used for the microcontroller to interface with the LCD, utilizing the SDA and SCL connections for data transfer.
Cirkit Designer LogoOpen Project in Cirkit Designer

Explore Projects Built with LCD 16x2 I2C Display

Use Cirkit Designer to design, explore, and prototype these projects online. Some projects support real-time simulation. Click "Open Project" to start designing instantly!
Image of ert: A project utilizing LCD 16x2 I2C Display in a practical application
Arduino Leonardo Controlled LCD Display with I2C Interface
This circuit connects an Arduino Leonardo microcontroller to a 16x2 LCD display via an LCM1602 IIC interface module, enabling the display of text on the LCD. The Arduino is programmed to display the messages 'TEST LCD i2C' and 'KelasRobot.com' on the LCD. The IIC module facilitates communication between the Arduino and the LCD using the I2C protocol, simplifying the wiring and pin usage.
Cirkit Designer LogoOpen Project in Cirkit Designer
Image of J8 +j22 lcd closeup: A project utilizing LCD 16x2 I2C Display in a practical application
I2C LCD Display Module with Power Supply Interface
This circuit interfaces a 20x4 I2C LCD display with a power source and an I2C communication bus. The LCD is powered by a 4.2V supply from a connector and communicates via I2C through another connector, which provides the SCL and SDA lines as well as ground.
Cirkit Designer LogoOpen Project in Cirkit Designer
Image of lcd: A project utilizing LCD 16x2 I2C Display in a practical application
Arduino UNO and 16x2 I2C LCD Display Interface for Data Visualization
This circuit consists of an Arduino UNO microcontroller connected to a 16x2 I2C LCD display. The Arduino UNO provides power and I2C communication to the LCD, allowing it to display information controlled by the Arduino.
Cirkit Designer LogoOpen Project in Cirkit Designer
Image of final year project: A project utilizing LCD 16x2 I2C Display in a practical application
Arduino Leonardo Controlled I2C LCD Display for Text Scrolling
This circuit features an Arduino Leonardo microcontroller connected to a 16x2 I2C LCD screen, powered by a 5V battery. The Arduino is programmed to display and continuously scroll a message on the LCD. The I2C communication protocol is used for the microcontroller to interface with the LCD, utilizing the SDA and SCL connections for data transfer.
Cirkit Designer LogoOpen Project in Cirkit Designer

Common Applications

  • Microcontroller-based projects (e.g., Arduino, Raspberry Pi)
  • Home automation systems
  • Industrial control panels
  • Educational and prototyping projects
  • Data logging and monitoring systems

Technical Specifications

The following table outlines the key technical details of the LCD 16x2 I2C Display:

Parameter Value
Manufacturer Generic
Part ID PCF8574_LCD1602
Display Type 16x2 Character LCD
Interface I2C (Inter-Integrated Circuit)
Operating Voltage 5V DC
Backlight LED (controllable via software)
I2C Address (Default) 0x27 (configurable)
Character Size 5x8 dot matrix
Operating Temperature -20°C to +70°C
Dimensions 80mm x 36mm x 12mm

Pin Configuration

The LCD 16x2 I2C Display uses an I2C interface, which requires only four connections: VCC, GND, SDA, and SCL. The pin configuration is as follows:

Pin Name Description
1 VCC Power supply (5V DC)
2 GND Ground
3 SDA Serial Data Line (I2C data)
4 SCL Serial Clock Line (I2C clock)

Usage Instructions

Connecting the LCD 16x2 I2C Display

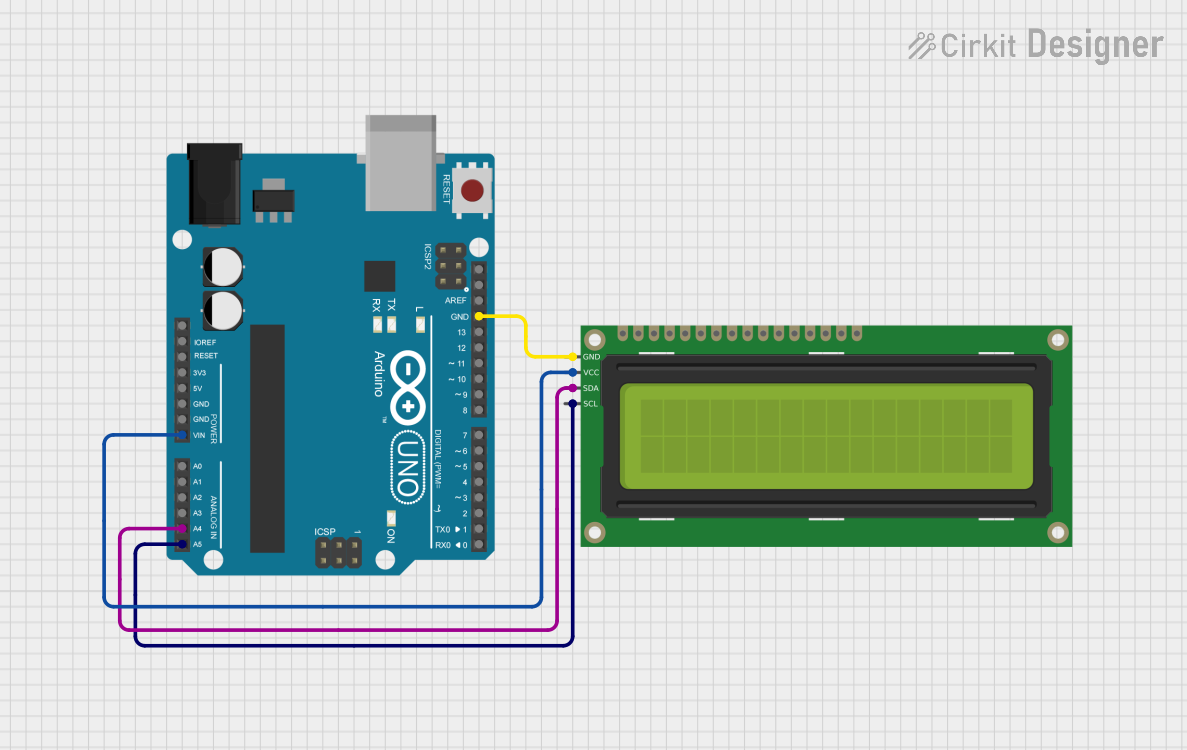
To use the LCD 16x2 I2C Display with a microcontroller such as an Arduino UNO, follow these steps:

  1. Wiring:

    • Connect the VCC pin of the display to the 5V pin on the Arduino.
    • Connect the GND pin of the display to the GND pin on the Arduino.
    • Connect the SDA pin of the display to the A4 pin on the Arduino UNO.
    • Connect the SCL pin of the display to the A5 pin on the Arduino UNO.
  2. Install Required Libraries:

    • Open the Arduino IDE.
    • Go to Sketch > Include Library > Manage Libraries.
    • Search for and install the LiquidCrystal_I2C library.
  3. Upload Example Code: Use the following example code to display text on the LCD:

    // Include the LiquidCrystal_I2C library
    #include <Wire.h>
    #include <LiquidCrystal_I2C.h>
    
    // Initialize the LCD with I2C address 0x27 and 16x2 dimensions
    LiquidCrystal_I2C lcd(0x27, 16, 2);
    
    void setup() {
      // Initialize the LCD
      lcd.begin();
      
      // Turn on the backlight
      lcd.backlight();
      
      // Display a message on the LCD
      lcd.setCursor(0, 0); // Set cursor to column 0, row 0
      lcd.print("Hello, World!");
      lcd.setCursor(0, 1); // Set cursor to column 0, row 1
      lcd.print("I2C LCD Test");
    }
    
    void loop() {
      // No actions in the loop for this example
    }
    

Important Considerations

  • I2C Address: The default I2C address is 0x27, but some modules may use 0x3F. If the display does not work, use an I2C scanner sketch to determine the correct address.
  • Power Supply: Ensure a stable 5V power supply to avoid flickering or malfunctioning of the display.
  • Contrast Adjustment: Some modules include a potentiometer for adjusting the contrast. If the text is not visible, adjust the potentiometer.

Troubleshooting and FAQs

Common Issues and Solutions

  1. No Text Displayed:

    • Verify the wiring connections (VCC, GND, SDA, SCL).
    • Check the I2C address using an I2C scanner sketch.
    • Adjust the contrast potentiometer on the module.
  2. Flickering or Unstable Display:

    • Ensure the power supply provides a stable 5V.
    • Check for loose connections in the circuit.
  3. Backlight Not Working:

    • Ensure the lcd.backlight() function is called in the code.
    • Verify the module's backlight jumper or soldering.
  4. Incorrect Characters Displayed:

    • Confirm the correct I2C address is used in the code.
    • Ensure the LiquidCrystal_I2C library is properly installed and up to date.

FAQs

Q: Can I use this display with a 3.3V microcontroller?
A: Yes, but you will need a logic level shifter to safely interface the 3.3V microcontroller with the 5V I2C lines.

Q: How do I find the I2C address of my display?
A: Use an I2C scanner sketch available online to detect the address of your display.

Q: Can I turn off the backlight programmatically?
A: Yes, use the lcd.noBacklight() function in your code to turn off the backlight.

Q: Is it possible to display custom characters?
A: Yes, the LiquidCrystal_I2C library supports custom characters. Refer to the library documentation for details.

This concludes the documentation for the LCD 16x2 I2C Display.