How to Use Flush Switch: Examples, Pinouts, and Specs
Introduction
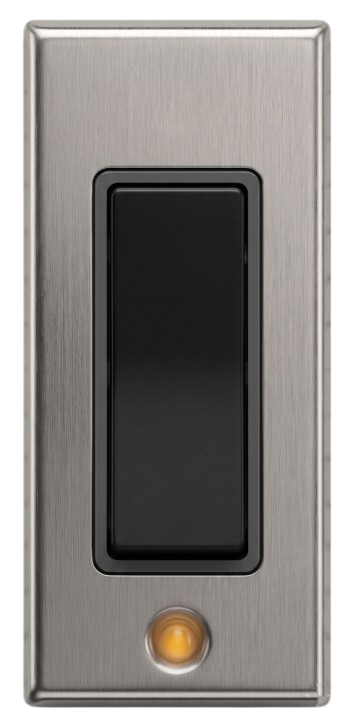
A flush switch is a type of electrical switch designed to be mounted flush with the surface of a wall, providing a sleek and unobtrusive appearance. It is commonly used in residential, commercial, and industrial settings to control lighting, fans, or other electrical devices. The switch is activated by pressing its surface, making it a simple and user-friendly interface for electrical control.
Explore Projects Built with Flush Switch
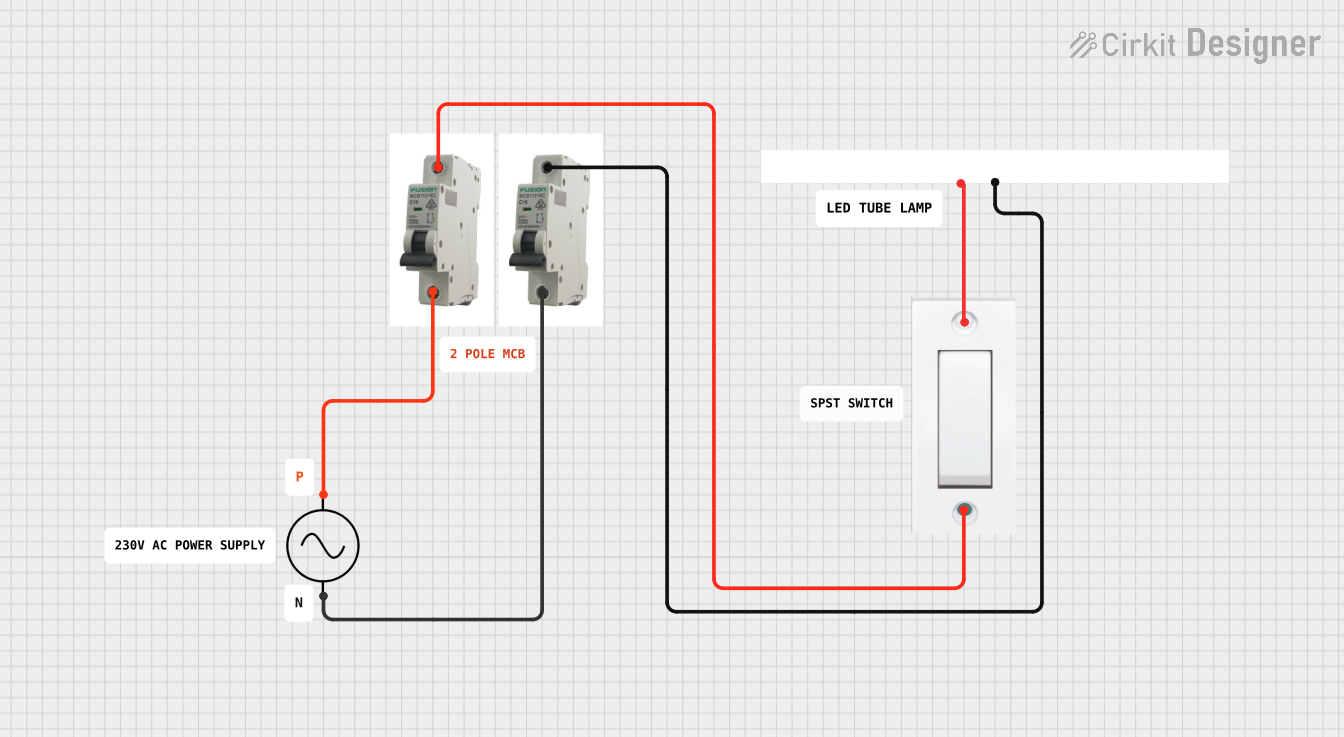
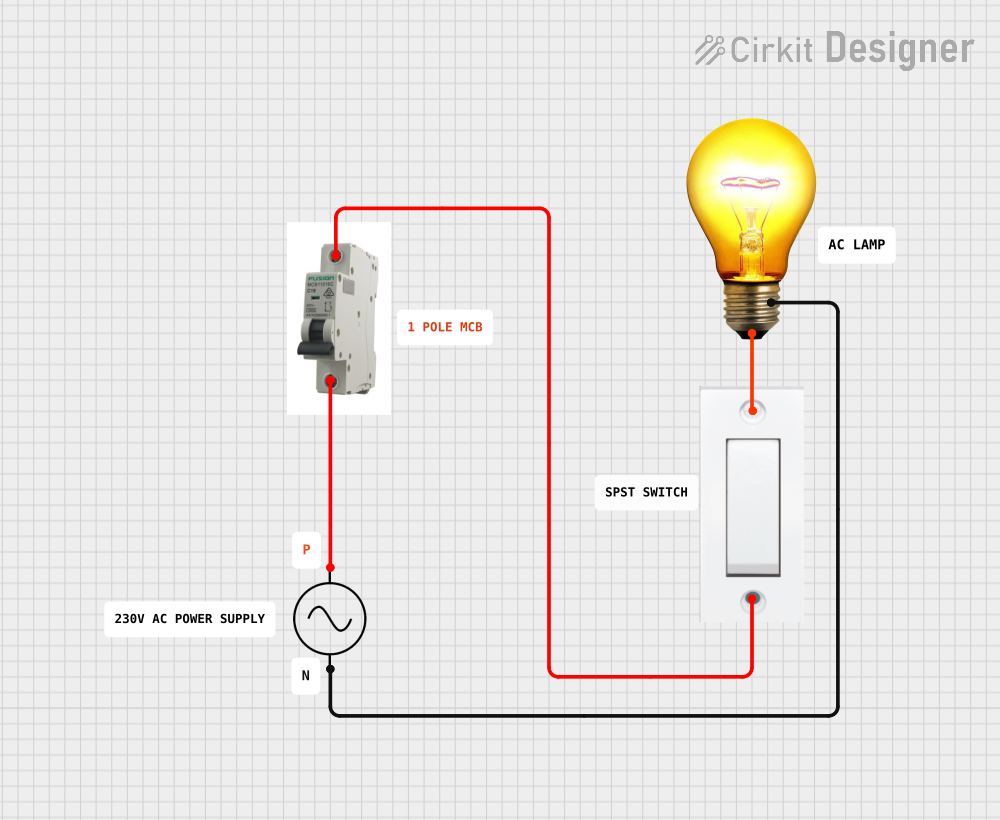

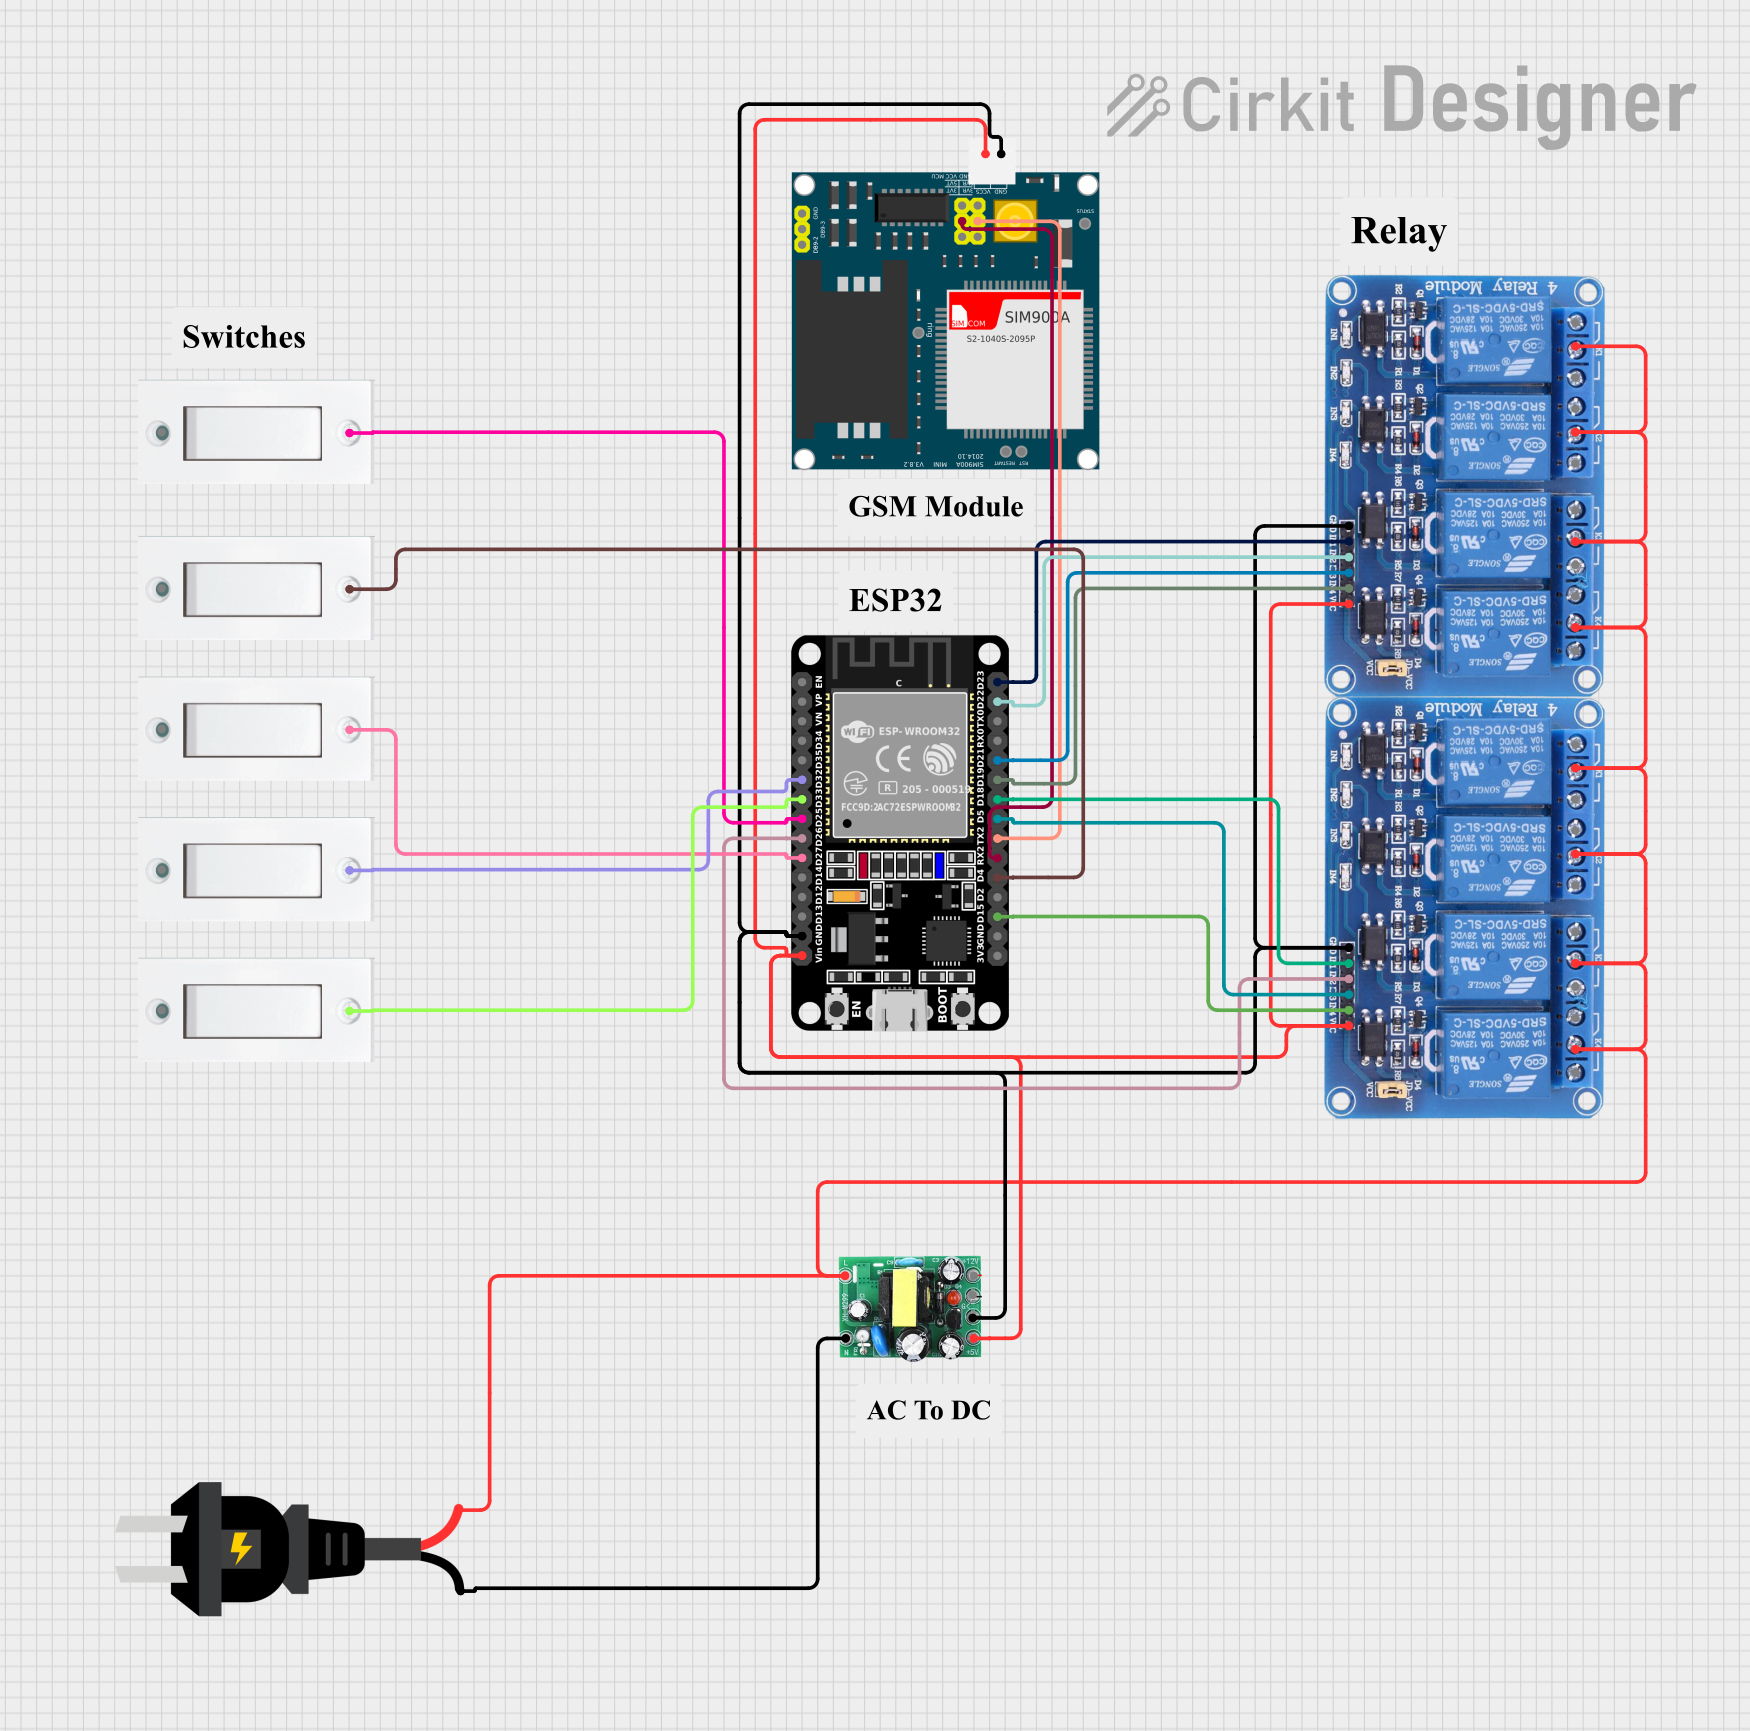
Explore Projects Built with Flush Switch
Common Applications and Use Cases
- Controlling lighting systems in homes, offices, and public spaces
- Operating ceiling fans or exhaust fans
- Activating electrical appliances or devices
- Used in smart home systems when integrated with automation modules
Technical Specifications
Key Technical Details
- Rated Voltage: 110V AC to 250V AC (varies by model)
- Rated Current: 6A to 16A (depending on the application)
- Material: Flame-retardant plastic or polycarbonate housing
- Mounting Type: Flush-mounted (requires a wall box)
- Switch Type: Single-pole, double-pole, or multi-way configurations
- Operating Temperature: -10°C to 50°C
- Lifespan: Typically 50,000 to 100,000 operations
Pin Configuration and Descriptions
Flush switches typically have two or more terminals for wiring. Below is a general description of the terminals:
| Terminal | Description |
|---|---|
| L (Line) | Connects to the live (hot) wire from the power source. |
| L1 | Connects to the load (e.g., light bulb, fan) to complete the circuit. |
| L2 (optional) | Used in multi-way switches for controlling a single load from multiple points. |
Note: The exact terminal configuration may vary depending on the type of flush switch (e.g., single-pole or multi-way).
Usage Instructions
How to Use the Component in a Circuit
- Turn Off Power: Before installation, ensure the power supply to the circuit is turned off to avoid electrical hazards.
- Prepare the Wall Box: Install a standard wall box in the desired location if not already present.
- Connect the Wires:
- Connect the live (hot) wire from the power source to the L terminal.
- Connect the load wire (e.g., leading to a light bulb) to the L1 terminal.
- For multi-way switches, connect the traveler wires to the L2 terminals as per the wiring diagram.
- Secure the Switch: Mount the flush switch into the wall box and secure it with screws.
- Restore Power: Turn the power back on and test the switch to ensure proper operation.
Important Considerations and Best Practices
- Always follow local electrical codes and regulations when installing the switch.
- Use appropriate wire gauges based on the current rating of the switch.
- Ensure the wall box is properly grounded to prevent electrical shocks.
- Avoid overloading the switch beyond its rated current capacity.
- For smart home integration, ensure compatibility with the automation system.
Example: Connecting a Flush Switch to an Arduino UNO
Flush switches can also be used as input devices for microcontrollers like the Arduino UNO. Below is an example of how to connect and use a flush switch with an Arduino:
Circuit Diagram
- Connect one terminal of the flush switch to a digital input pin (e.g., pin 2) on the Arduino.
- Connect the other terminal of the switch to the ground (GND) pin on the Arduino.
- Use a pull-up resistor (10kΩ) between the input pin and the 5V pin to ensure stable readings.
Arduino Code
// Define the pin connected to the flush switch
const int switchPin = 2;

// Variable to store the switch state
int switchState = 0;

void setup() {
  // Set the switch pin as input with an internal pull-up resistor
  pinMode(switchPin, INPUT_PULLUP);

  // Initialize serial communication for debugging
  Serial.begin(9600);
}

void loop() {
  // Read the state of the switch (LOW when pressed, HIGH when released)
  switchState = digitalRead(switchPin);

  // Print the switch state to the Serial Monitor
  if (switchState == LOW) {
    Serial.println("Switch Pressed");
  } else {
    Serial.println("Switch Released");
  }

  // Add a small delay to debounce the switch
  delay(50);
}
Note: The internal pull-up resistor in the Arduino is used to simplify the circuit. If you prefer, you can use an external pull-up resistor instead.
Troubleshooting and FAQs
Common Issues Users Might Face
Switch Does Not Work After Installation:
- Ensure the power supply is turned on.
- Verify that the wires are connected to the correct terminals.
- Check for loose connections or damaged wires.
Flickering Lights:
- This may indicate a loose connection or a faulty switch. Recheck the wiring and replace the switch if necessary.
Overheating of the Switch:
- Ensure the connected load does not exceed the switch's rated current capacity.
- Check for proper ventilation around the switch.
Switch Feels Loose in the Wall:
- Verify that the wall box is securely mounted and the switch is properly fastened.
Solutions and Tips for Troubleshooting
- Use a multimeter to check for continuity and proper voltage levels at the terminals.
- If the switch is part of a multi-way configuration, ensure all switches in the circuit are wired correctly.
- For smart switches, ensure the firmware is updated and the device is properly paired with the control system.
By following this documentation, users can confidently install, use, and troubleshoot a flush switch in various applications.