How to Use Wire Thermocouple Amplifier(MAX31850K): Examples, Pinouts, and Specs
Introduction
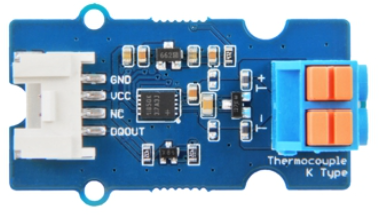
The MAX31850K is a sophisticated thermocouple-to-digital converter designed to interface with K-type thermocouples. It simplifies temperature measurement by converting the small voltage generated by the thermocouple into a digital signal that can be easily read by microcontrollers. The MAX31850K also includes cold-junction compensation, ensuring accurate temperature readings across a wide range of environments.
Explore Projects Built with Wire Thermocouple Amplifier(MAX31850K)
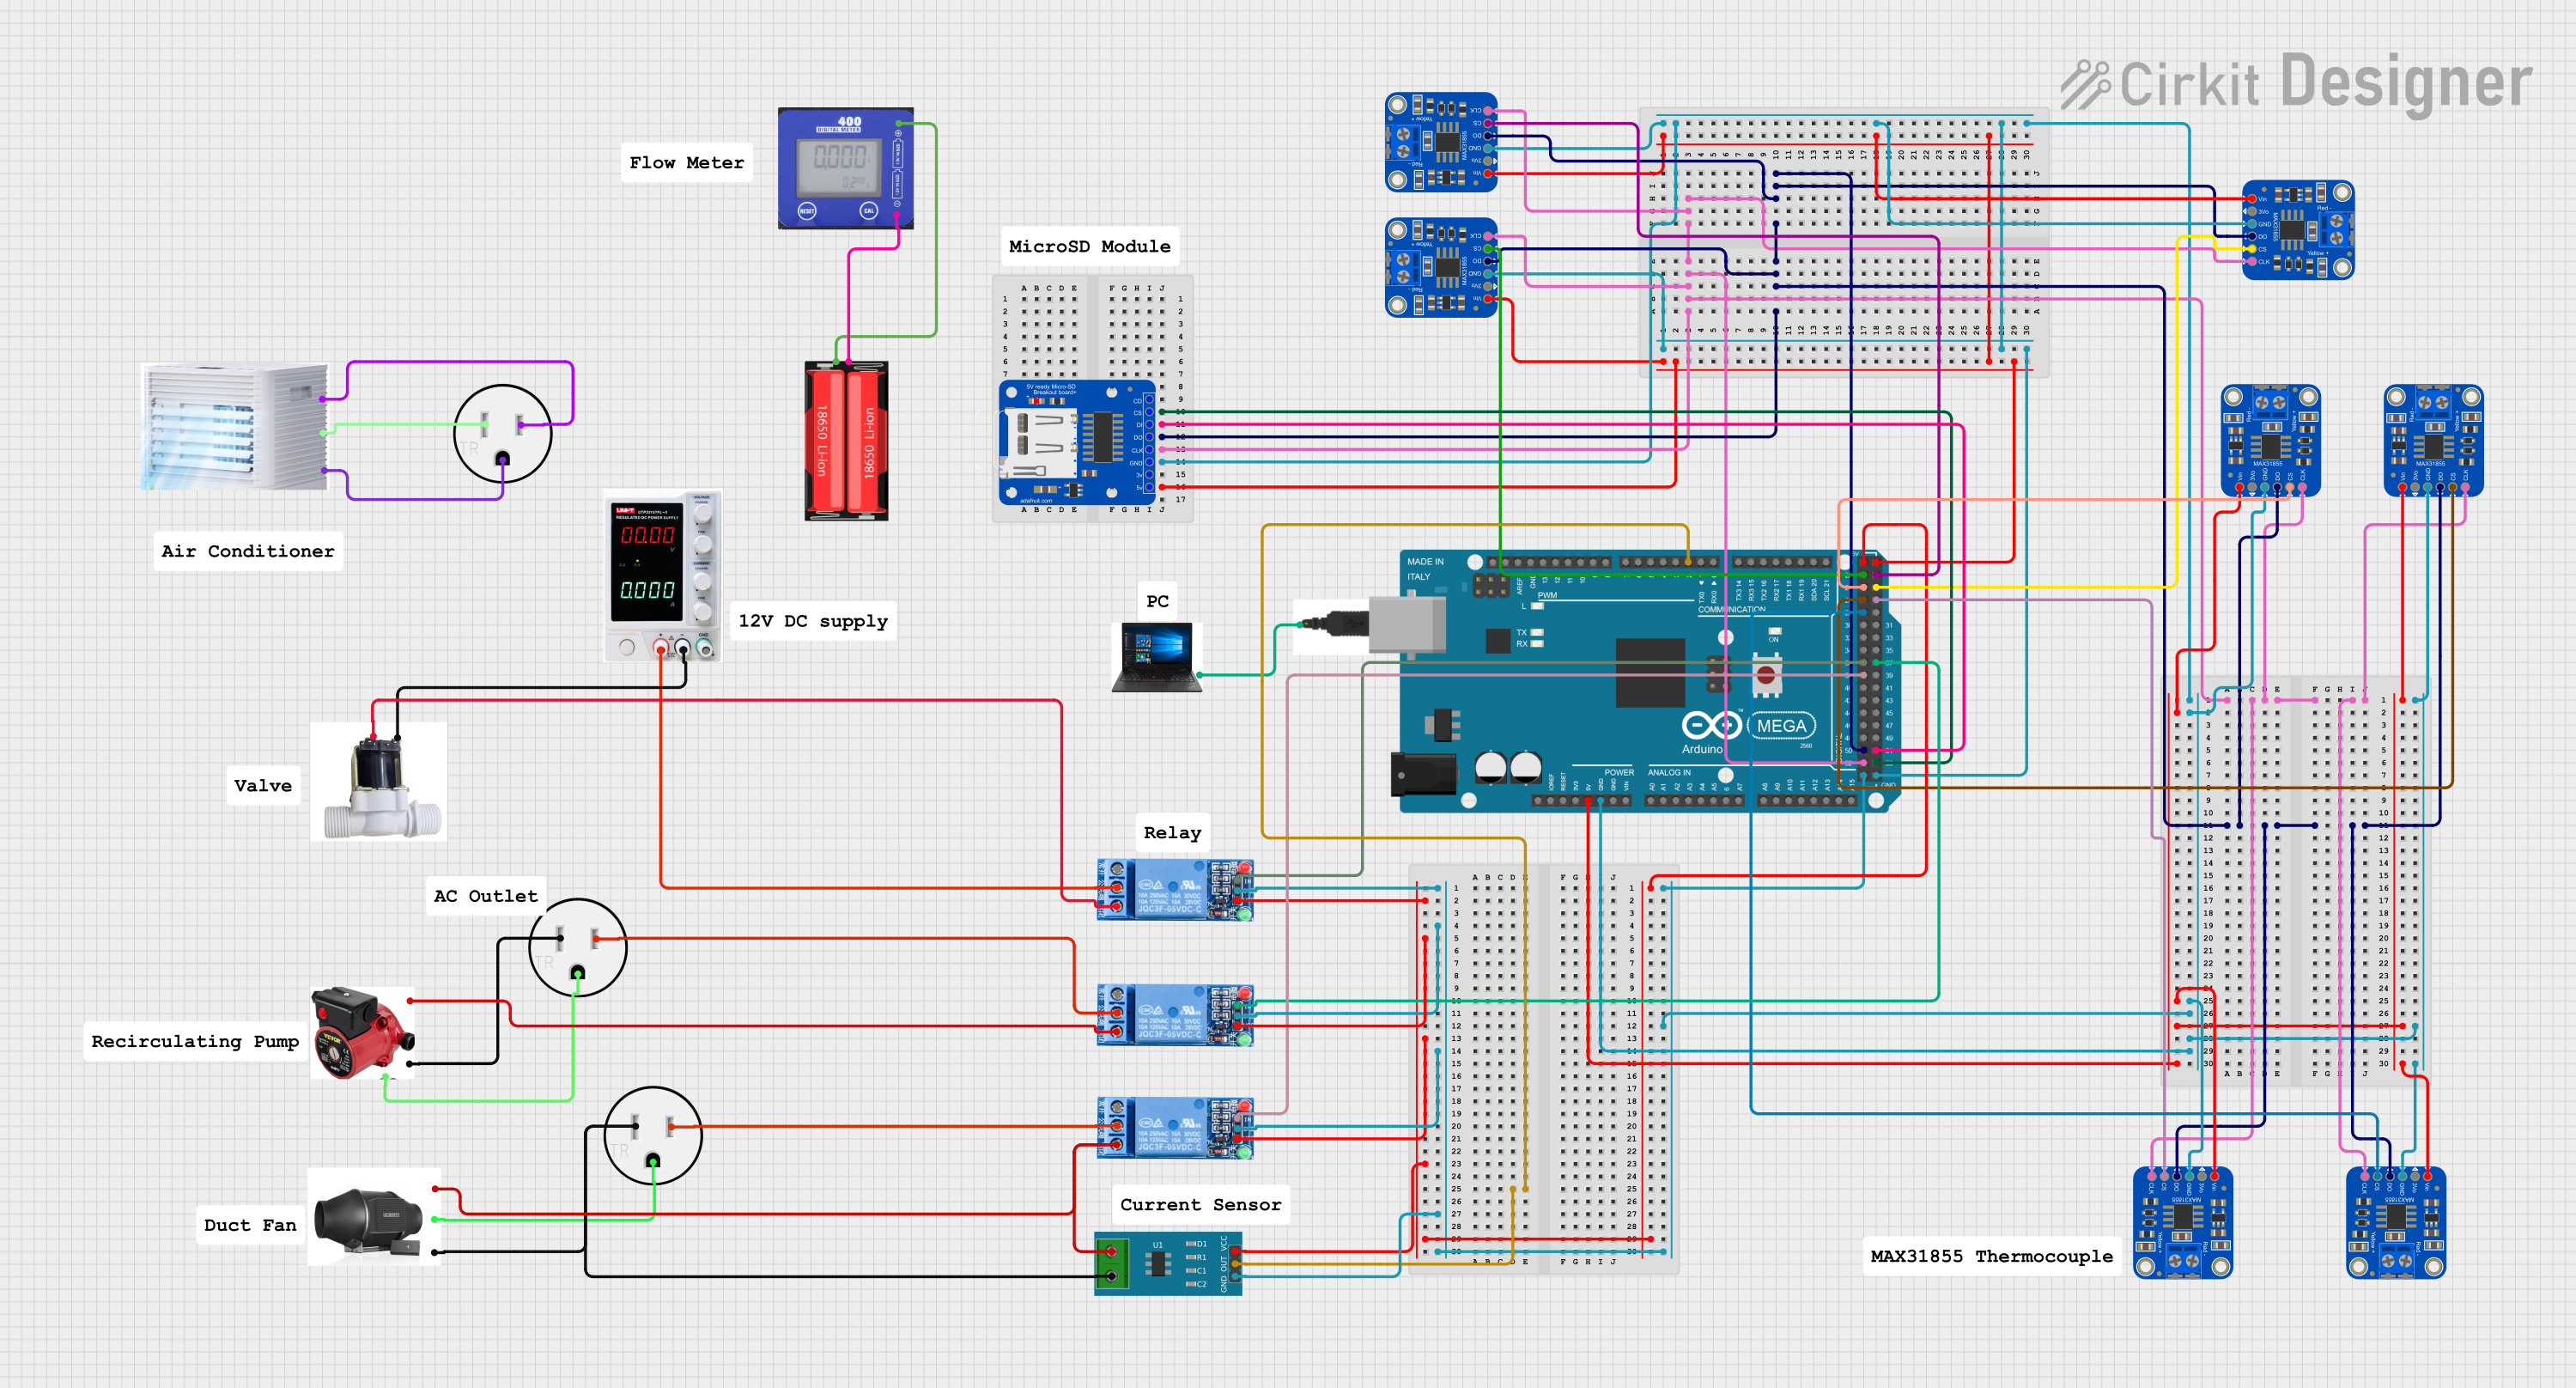
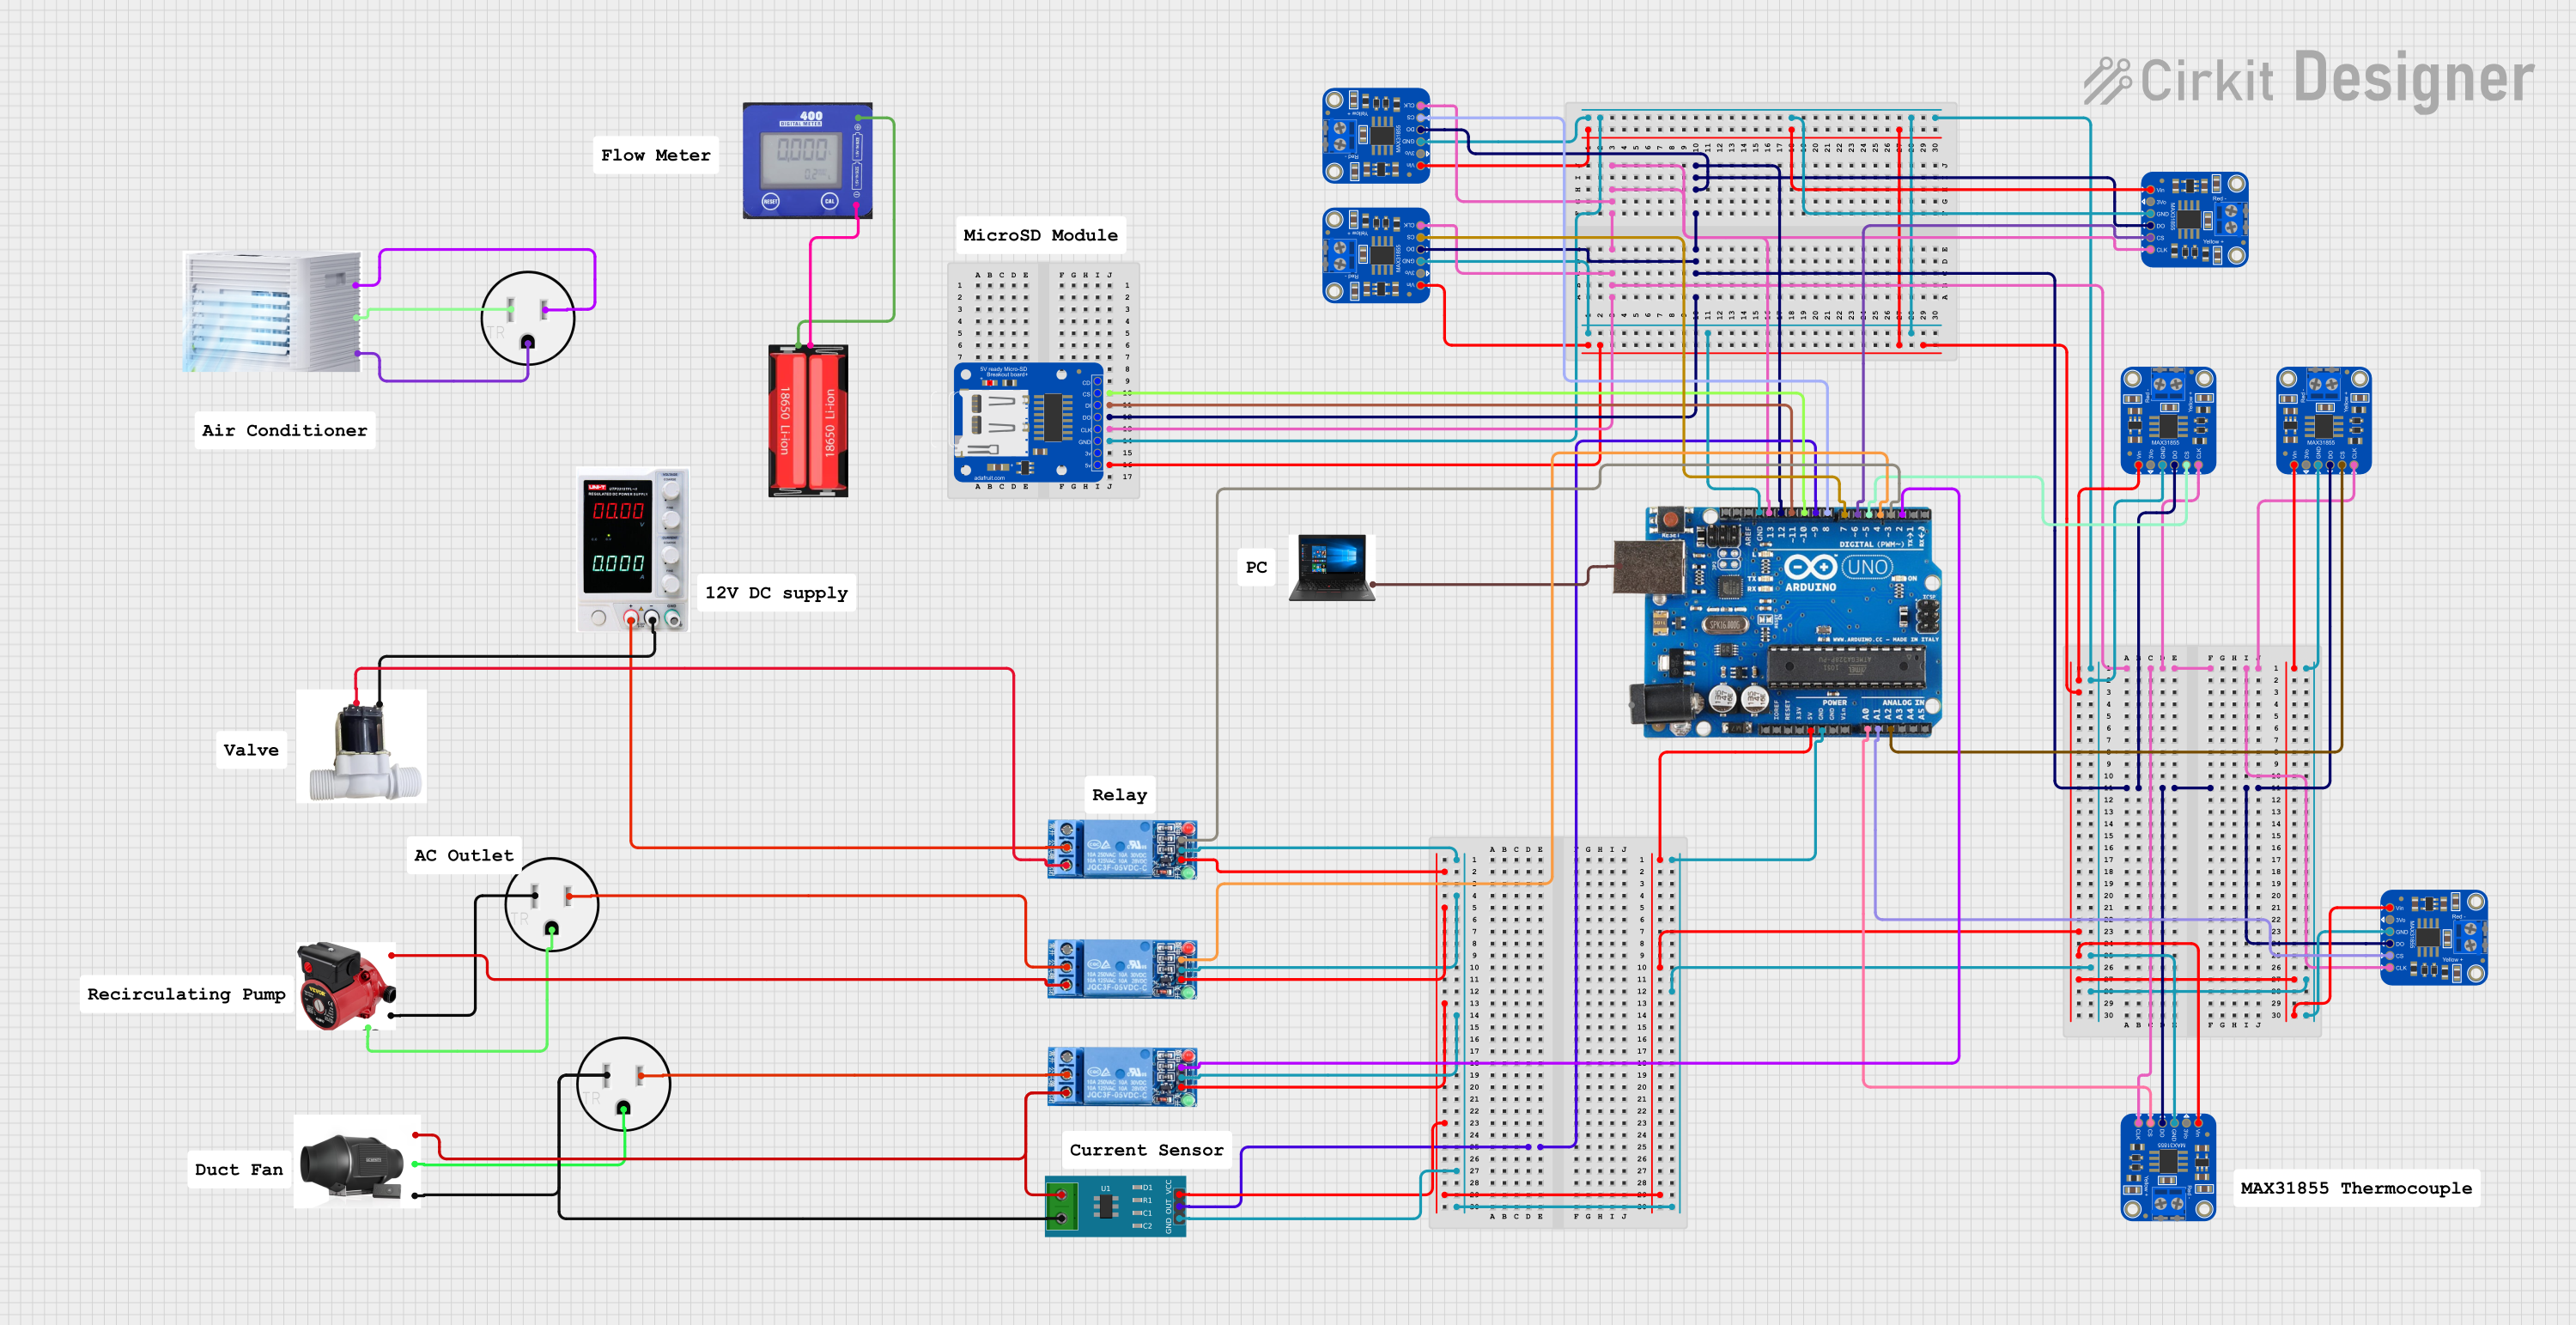
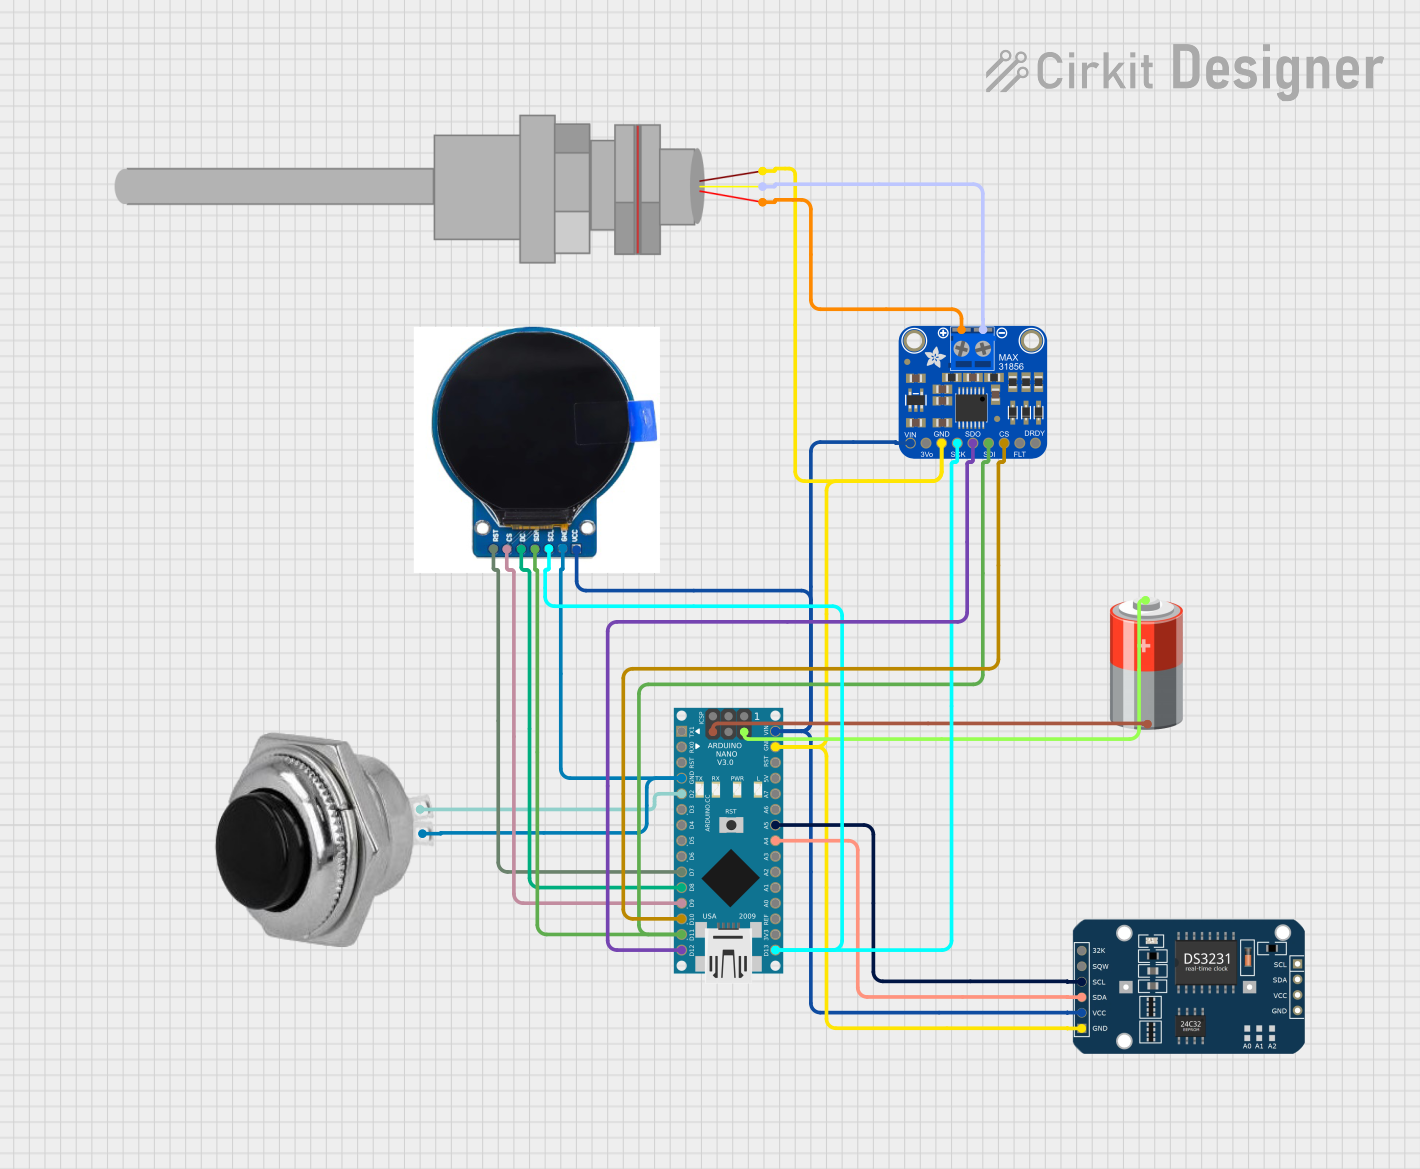

Explore Projects Built with Wire Thermocouple Amplifier(MAX31850K)
Common Applications and Use Cases
- Industrial temperature monitoring
- HVAC systems
- Food processing and storage
- Scientific experiments and laboratory equipment
- Home automation systems requiring precise temperature control
Technical Specifications
The MAX31850K is designed to work seamlessly with K-type thermocouples and offers the following key specifications:
Key Technical Details
| Parameter | Value |
|---|---|
| Operating Voltage | 3.0V to 3.6V |
| Temperature Range | -270°C to +1372°C (K-type thermocouple) |
| Cold-Junction Compensation | Built-in |
| Communication Protocol | 1-Wire |
| Resolution | 14-bit |
| Accuracy | ±2°C (typical) |
| Operating Current | 1.5mA (typical) |
| Standby Current | 2µA (typical) |
Pin Configuration and Descriptions
The MAX31850K is typically available in an 8-pin SOIC package. Below is the pinout and description:
| Pin Number | Pin Name | Description |
|---|---|---|
| 1 | GND | Ground |
| 2 | DQ | 1-Wire Data Line |
| 3 | NC | No Connection |
| 4 | NC | No Connection |
| 5 | NC | No Connection |
| 6 | NC | No Connection |
| 7 | VDD | Power Supply (3.0V to 3.6V) |
| 8 | T- | Negative Terminal for Thermocouple |
Usage Instructions
How to Use the MAX31850K in a Circuit
- Power Supply: Connect the
VDDpin to a 3.3V power source and theGNDpin to ground. - Thermocouple Connection: Attach the positive lead of the K-type thermocouple to the
DQpin and the negative lead to theT-pin. - 1-Wire Communication: Use a microcontroller (e.g., Arduino) to communicate with the MAX31850K via the 1-Wire protocol. A pull-up resistor (typically 4.7kΩ) is required on the
DQline. - Cold-Junction Compensation: The MAX31850K automatically compensates for cold-junction temperature, so no additional circuitry is needed.
Important Considerations and Best Practices
- Ensure the thermocouple leads are properly connected to avoid polarity issues.
- Use shielded cables for the thermocouple in noisy environments to minimize interference.
- Avoid exposing the thermocouple to temperatures beyond its specified range to prevent damage.
- Use a decoupling capacitor (e.g., 0.1µF) between
VDDandGNDto stabilize the power supply.
Example Code for Arduino UNO
Below is an example of how to interface the MAX31850K with an Arduino UNO using the OneWire library:
#include <OneWire.h>

// Define the pin connected to the MAX31850K's DQ pin
#define ONE_WIRE_BUS 2

// Create a OneWire instance
OneWire oneWire(ONE_WIRE_BUS);

void setup() {
  Serial.begin(9600);  // Initialize serial communication
  Serial.println("MAX31850K Thermocouple Reader");
}

void loop() {
  byte data[9];
  byte addr[8];

  // Search for devices on the 1-Wire bus
  if (!oneWire.search(addr)) {
    Serial.println("No more devices found");
    oneWire.reset_search();
    delay(1000);
    return;
  }

  // Check if the device is a MAX31850K
  if (OneWire::crc8(addr, 7) != addr[7]) {
    Serial.println("CRC is not valid!");
    return;
  }

  // Send the command to read the temperature
  oneWire.reset();
  oneWire.select(addr);
  oneWire.write(0x44, 1);  // Start temperature conversion
  delay(750);              // Wait for conversion to complete

  // Read the scratchpad
  oneWire.reset();
  oneWire.select(addr);
  oneWire.write(0xBE);  // Read Scratchpad command

  for (int i = 0; i < 9; i++) {
    data[i] = oneWire.read();
  }

  // Convert the data to temperature
  int16_t rawTemp = (data[1] << 8) | data[0];
  float celsius = rawTemp * 0.25;  // Each LSB represents 0.25°C

  Serial.print("Temperature: ");
  Serial.print(celsius);
  Serial.println(" °C");
  delay(1000);  // Wait before the next reading
}
Troubleshooting and FAQs
Common Issues and Solutions
No Response from the MAX31850K
- Ensure the
DQpin is connected to the correct pin on the microcontroller. - Verify the pull-up resistor (4.7kΩ) is properly connected to the
DQline. - Check the power supply voltage (3.0V to 3.6V).
- Ensure the
Incorrect Temperature Readings
- Confirm the thermocouple is properly connected to the
DQandT-pins. - Ensure the thermocouple is not damaged or exposed to temperatures outside its range.
- Verify the microcontroller's code is correctly interpreting the data from the MAX31850K.
- Confirm the thermocouple is properly connected to the
Intermittent Communication Failures
- Use shielded cables for the thermocouple and 1-Wire data line in noisy environments.
- Add a decoupling capacitor (0.1µF) between
VDDandGNDto stabilize the power supply.
FAQs
Q: Can I use the MAX31850K with thermocouples other than K-type?
A: No, the MAX31850K is specifically designed for K-type thermocouples. Using other types may result in inaccurate readings.
Q: What is the maximum cable length for the 1-Wire communication?
A: The maximum cable length depends on the environment and pull-up resistor value. Typically, lengths up to 30 meters are achievable with proper shielding and a 4.7kΩ pull-up resistor.
Q: Does the MAX31850K require calibration?
A: No, the MAX31850K is factory-calibrated and includes built-in cold-junction compensation for accurate readings.