How to Use CN3065 Mini Solar Charger Module: Examples, Pinouts, and Specs
Introduction
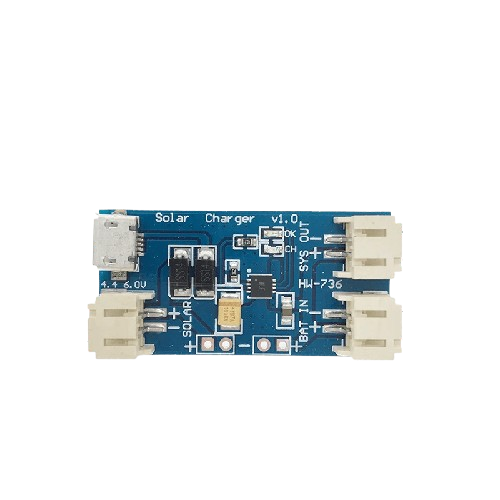
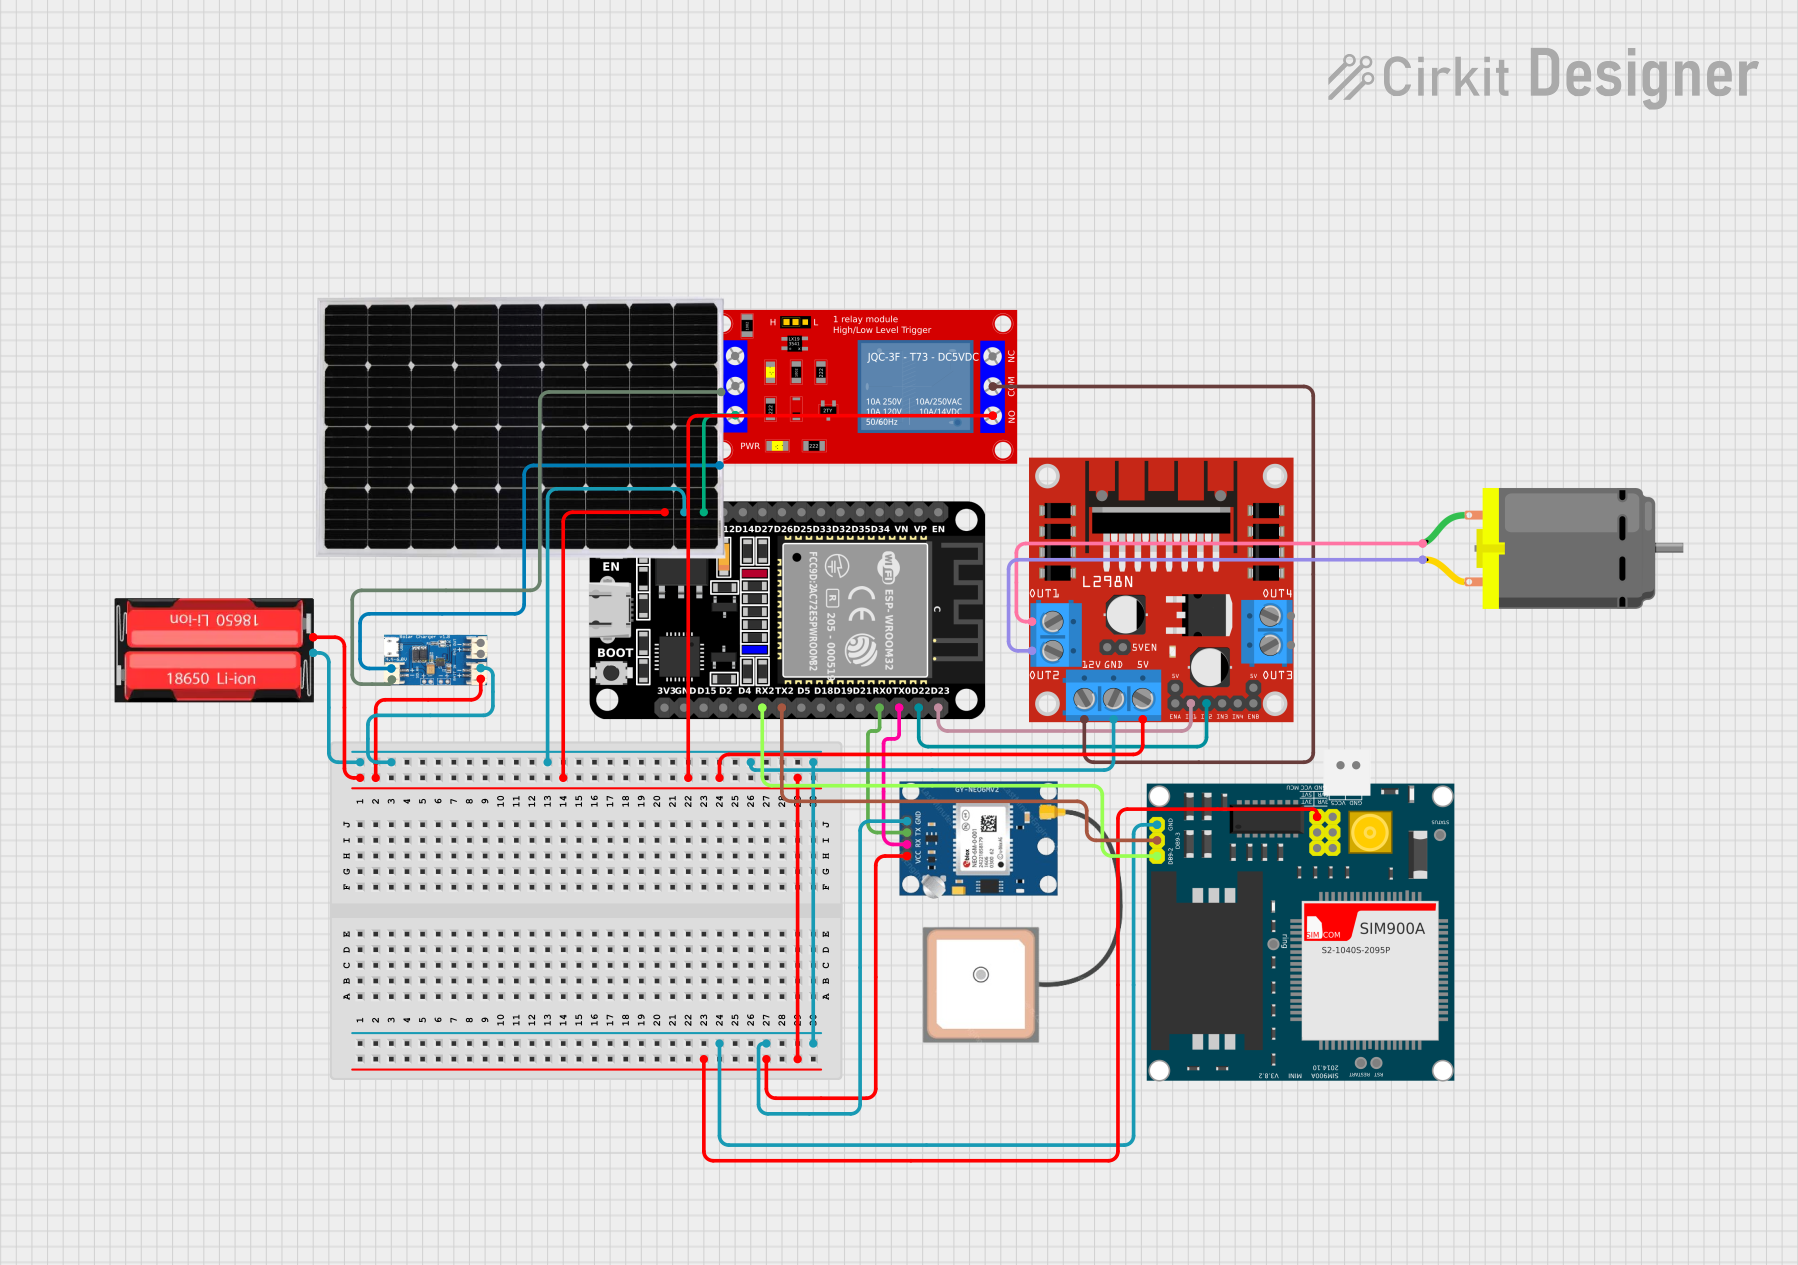
The CN3065 Mini Solar Charger Module is a compact and efficient solution for charging lithium-ion batteries using solar energy. It is specifically designed to optimize solar panel output and ensure safe and reliable charging. The module features built-in protection mechanisms, including overcharge and short-circuit protection, making it ideal for portable and renewable energy projects.
Explore Projects Built with CN3065 Mini Solar Charger Module

Explore Projects Built with CN3065 Mini Solar Charger Module
Common Applications and Use Cases
- Solar-powered IoT devices
- Portable battery charging systems
- DIY renewable energy projects
- Low-power outdoor electronics
- Backup power systems for small devices
Technical Specifications
The CN3065 Mini Solar Charger Module is designed to work seamlessly with small solar panels and lithium-ion batteries. Below are its key technical details:
General Specifications
| Parameter | Value |
|---|---|
| Input Voltage Range | 4.4V to 6V |
| Charging Current | Up to 500mA |
| Battery Type Supported | Single-cell Li-ion (3.7V) |
| Charging Cut-off Voltage | 4.2V ± 1% |
| Operating Temperature | -40°C to +85°C |
| Efficiency | Up to 92% |
Pin Configuration and Descriptions
| Pin Name | Description |
|---|---|
| IN+ | Positive input terminal for the solar panel (4.4V to 6V input range). |
| IN- | Negative input terminal for the solar panel (ground). |
| BAT+ | Positive terminal for the lithium-ion battery. |
| BAT- | Negative terminal for the lithium-ion battery (ground). |
| STAT | Status indicator pin (low when charging, high when fully charged). |
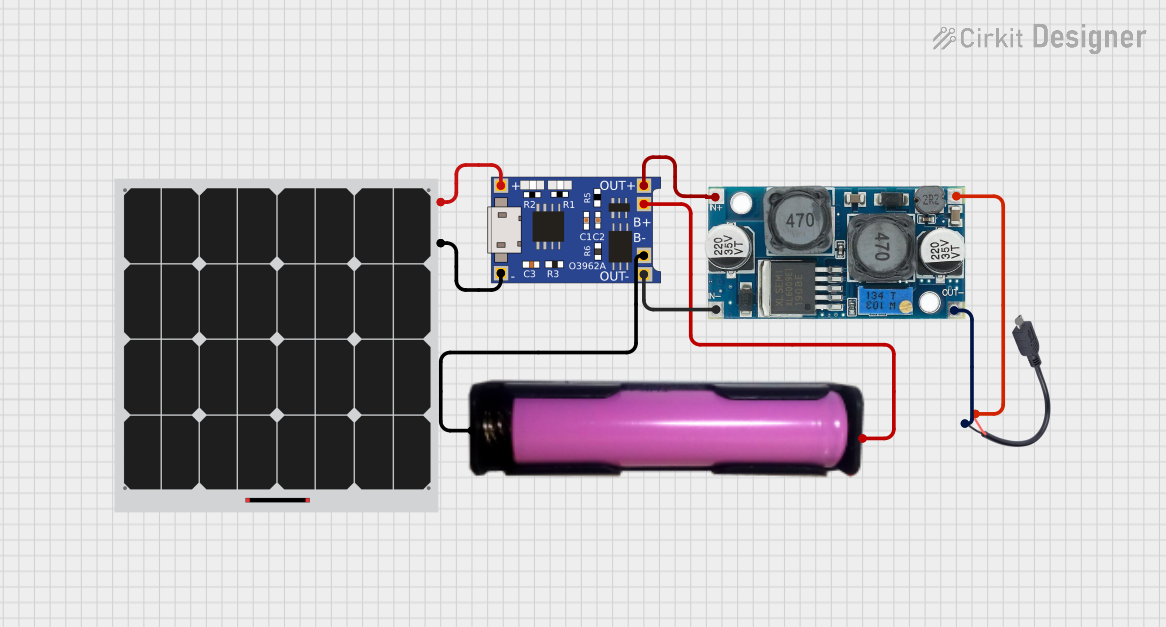
Usage Instructions
How to Use the CN3065 Mini Solar Charger Module in a Circuit
Connect the Solar Panel:
- Attach the positive terminal of the solar panel to the
IN+pin. - Attach the negative terminal of the solar panel to the
IN-pin. - Ensure the solar panel's output voltage is within the range of 4.4V to 6V.
- Attach the positive terminal of the solar panel to the
Connect the Lithium-ion Battery:
- Connect the positive terminal of the battery to the
BAT+pin. - Connect the negative terminal of the battery to the
BAT-pin.
- Connect the positive terminal of the battery to the
Monitor Charging Status:
- Use the
STATpin to monitor the charging status.- When the battery is charging, the
STATpin will output a low signal. - When the battery is fully charged, the
STATpin will output a high signal.
- When the battery is charging, the
- Use the
Power Considerations:
- Use a solar panel with an output current of at least 500mA for optimal performance.
- Avoid connecting loads directly to the battery while charging to prevent overloading the module.
Important Considerations and Best Practices
- Battery Compatibility: Only use single-cell lithium-ion batteries with a nominal voltage of 3.7V.
- Heat Dissipation: Ensure proper ventilation around the module to prevent overheating during operation.
- Reverse Polarity Protection: Double-check all connections to avoid damaging the module due to reverse polarity.
- Solar Panel Selection: Use a solar panel with an open-circuit voltage (Voc) of 5V to 6V for best results.
Example: Using the CN3065 with an Arduino UNO
The CN3065 can be used to power an Arduino UNO by charging a lithium-ion battery, which then supplies power to the Arduino. Below is an example of how to monitor the charging status using the STAT pin:
// Example code to monitor CN3065 charging status with Arduino UNO

const int statPin = 2; // Connect the STAT pin of CN3065 to digital pin 2

void setup() {
  pinMode(statPin, INPUT); // Set STAT pin as input
  Serial.begin(9600);      // Initialize serial communication
}

void loop() {
  int chargingStatus = digitalRead(statPin); // Read the STAT pin state

  if (chargingStatus == LOW) {
    // STAT pin is LOW when the battery is charging
    Serial.println("Battery is charging...");
  } else {
    // STAT pin is HIGH when the battery is fully charged
    Serial.println("Battery is fully charged!");
  }

  delay(1000); // Wait for 1 second before checking again
}
Troubleshooting and FAQs
Common Issues and Solutions
Module Not Charging the Battery:
- Cause: Input voltage is too low or too high.
- Solution: Ensure the solar panel's output voltage is within the 4.4V to 6V range.
Battery Overheating:
- Cause: Faulty battery or excessive charging current.
- Solution: Verify the battery's health and ensure it is compatible with the module.
STAT Pin Not Responding:
- Cause: Incorrect wiring or damaged module.
- Solution: Check all connections and ensure the
STATpin is properly connected to the monitoring device.
Low Charging Efficiency:
- Cause: Insufficient sunlight or mismatched solar panel.
- Solution: Use a solar panel with higher efficiency and ensure it is exposed to direct sunlight.
FAQs
Q1: Can I use this module with a 6V lead-acid battery?
A1: No, the CN3065 is designed specifically for single-cell lithium-ion batteries with a nominal voltage of 3.7V.
Q2: What happens if the input voltage exceeds 6V?
A2: Input voltages above 6V can damage the module. Always use a solar panel within the specified voltage range.
Q3: Can I connect a load directly to the battery while charging?
A3: It is not recommended, as it may overload the module and reduce charging efficiency.
Q4: How do I know if the module is working correctly?
A4: Monitor the STAT pin or check the battery voltage to ensure it is charging properly.
By following this documentation, you can effectively integrate the CN3065 Mini Solar Charger Module into your projects and ensure safe and efficient operation.