
How to Use Basic Force Sensing Resistor (FSR): Examples, Pinouts, and Specs
 Design with Basic Force Sensing Resistor (FSR) in Cirkit Designer
Introduction
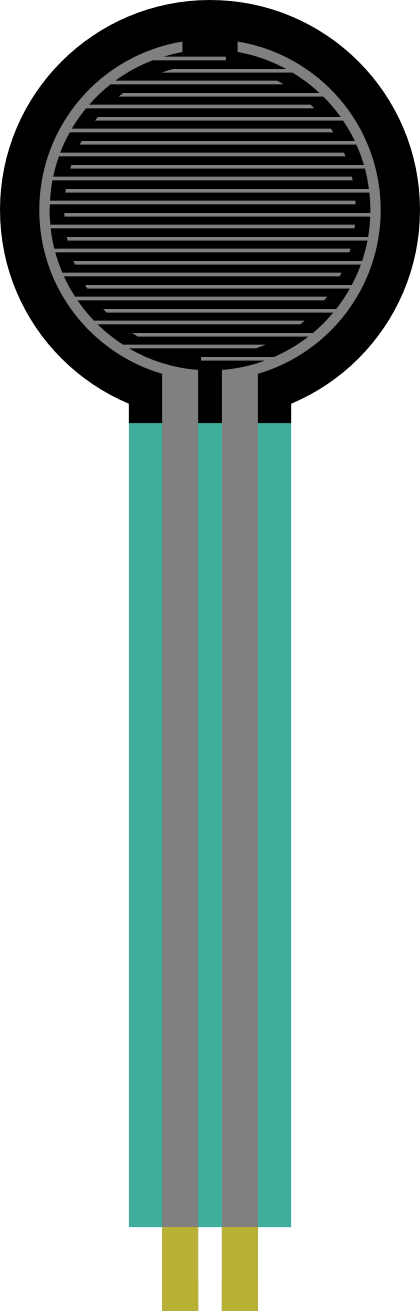
A Force Sensing Resistor (FSR) is a type of variable resistor that changes its resistance based on the amount of force or pressure applied to its surface. When no force is applied, the FSR exhibits a very high resistance, but as pressure increases, its resistance decreases. This makes it an ideal component for detecting and measuring force or pressure in a variety of applications.
Explore Projects Built with Basic Force Sensing Resistor (FSR)
 Open Project in Cirkit Designer
 Open Project in Cirkit Designer
 Open Project in Cirkit Designer
 Open Project in Cirkit Designer
Explore Projects Built with Basic Force Sensing Resistor (FSR)
Open Project in Cirkit DesignerOpen Project in Cirkit DesignerOpen Project in Cirkit DesignerOpen Project in Cirkit DesignerCommon Applications and Use Cases
- Touch-sensitive devices: Used in touchpads, musical instruments, and interactive displays.
- Pressure detection: Common in medical devices, such as pressure-sensitive mats or gloves.
- Robotics: Enables robots to sense and respond to physical interactions.
- Gaming peripherals: Used in pressure-sensitive buttons or controls.
- Wearable technology: Integrated into smart clothing for activity tracking.
Technical Specifications
Below are the key technical details for a typical Basic Force Sensing Resistor (FSR):
| Parameter | Value |
|---|---|
| Resistance (no force) | > 1 MΩ |
| Resistance (maximum force) | ~200 Ω |
| Force sensitivity range | ~0.2 N to ~20 N |
| Operating voltage range | 0 V to 5 V |
| Operating temperature | -30°C to +70°C |
| Response time | < 1 ms |
| Dimensions | Varies (e.g., 0.5-inch or 1-inch diameter) |
Pin Configuration and Descriptions
The FSR typically has two pins, which are used to connect it to a circuit. Below is a description of the pins:
| Pin | Description |
|---|---|
| Pin 1 | Connects to the positive voltage source or signal input. |
| Pin 2 | Connects to ground or the signal output (via a pull-down resistor). |
Usage Instructions
How to Use the FSR in a Circuit
Basic Circuit Setup:
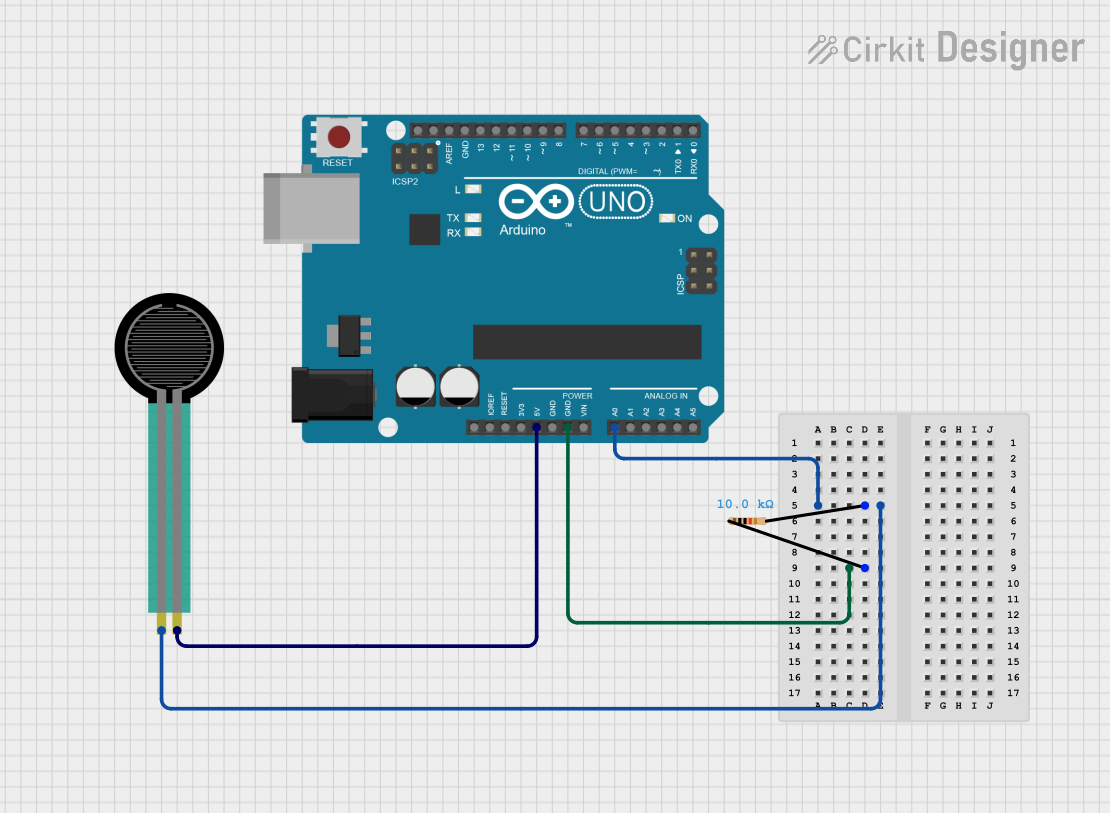
- Connect one pin of the FSR to a voltage source (e.g., 5V).
- Connect the other pin to ground through a pull-down resistor (typically 10 kΩ).
- The voltage at the junction between the FSR and the resistor can be read as an analog signal, which varies with the applied force.
Reading the Signal:
- The voltage across the pull-down resistor increases as the resistance of the FSR decreases (with more force applied).
- This voltage can be read using an analog-to-digital converter (ADC) on a microcontroller, such as an Arduino.
Important Considerations and Best Practices
- Calibration: FSRs are not highly precise, so calibration is necessary for accurate force measurements.
- Force Range: Avoid applying forces beyond the specified range to prevent damage.
- Mechanical Stress: Ensure the FSR is mounted securely but not under constant stress when idle.
- Temperature Effects: Be aware that temperature changes can slightly affect the FSR's resistance.
Example: Using an FSR with Arduino UNO
Below is an example of how to connect and read data from an FSR using an Arduino UNO:
// Define the analog pin connected to the FSR
const int fsrPin = A0; // FSR connected to analog pin A0
int fsrValue = 0;      // Variable to store the analog reading

void setup() {
  Serial.begin(9600); // Initialize serial communication at 9600 baud
}

void loop() {
  fsrValue = analogRead(fsrPin); // Read the analog value from the FSR
  Serial.print("FSR Value: ");
  Serial.println(fsrValue); // Print the FSR value to the Serial Monitor

  // Add a small delay to make the output more readable
  delay(100);
}
Circuit Diagram
- Connect one pin of the FSR to 5V.
- Connect the other pin to both:
- Analog pin A0 on the Arduino.
- A 10 kΩ resistor, which is connected to ground.
Troubleshooting and FAQs
Common Issues and Solutions
No Response from the FSR:
- Cause: Loose connections or incorrect wiring.
- Solution: Double-check all connections and ensure the FSR is properly connected to the circuit.
Inconsistent Readings:
- Cause: Poor contact with the FSR or environmental factors (e.g., temperature).
- Solution: Ensure the FSR is securely mounted and calibrate the sensor for your specific application.
FSR Output Stuck at Maximum or Minimum:
- Cause: The pull-down resistor value may be incorrect.
- Solution: Use a resistor value between 4.7 kΩ and 10 kΩ for most applications.
FAQs
Q: Can the FSR measure exact force values?
A: FSRs are not designed for precise force measurements. They are best used for detecting relative changes in force or pressure.
Q: How do I extend the lifespan of an FSR?
A: Avoid applying excessive force, and ensure the FSR is not exposed to extreme temperatures or humidity.
Q: Can I use an FSR with a 3.3V system?
A: Yes, FSRs are compatible with 3.3V systems, but ensure the pull-down resistor value is appropriate for the lower voltage.
Q: What is the response time of an FSR?
A: The response time is typically less than 1 millisecond, making it suitable for real-time applications.