Cirkit Designer Logo
Cirkit Designer
Your all-in-one circuit design IDE
Home / 
Component Documentation

How to Use Voice Playback Module: Examples, Pinouts, and Specs

Image of Voice Playback Module
Cirkit Designer LogoDesign with Voice Playback Module in Cirkit Designer

Introduction

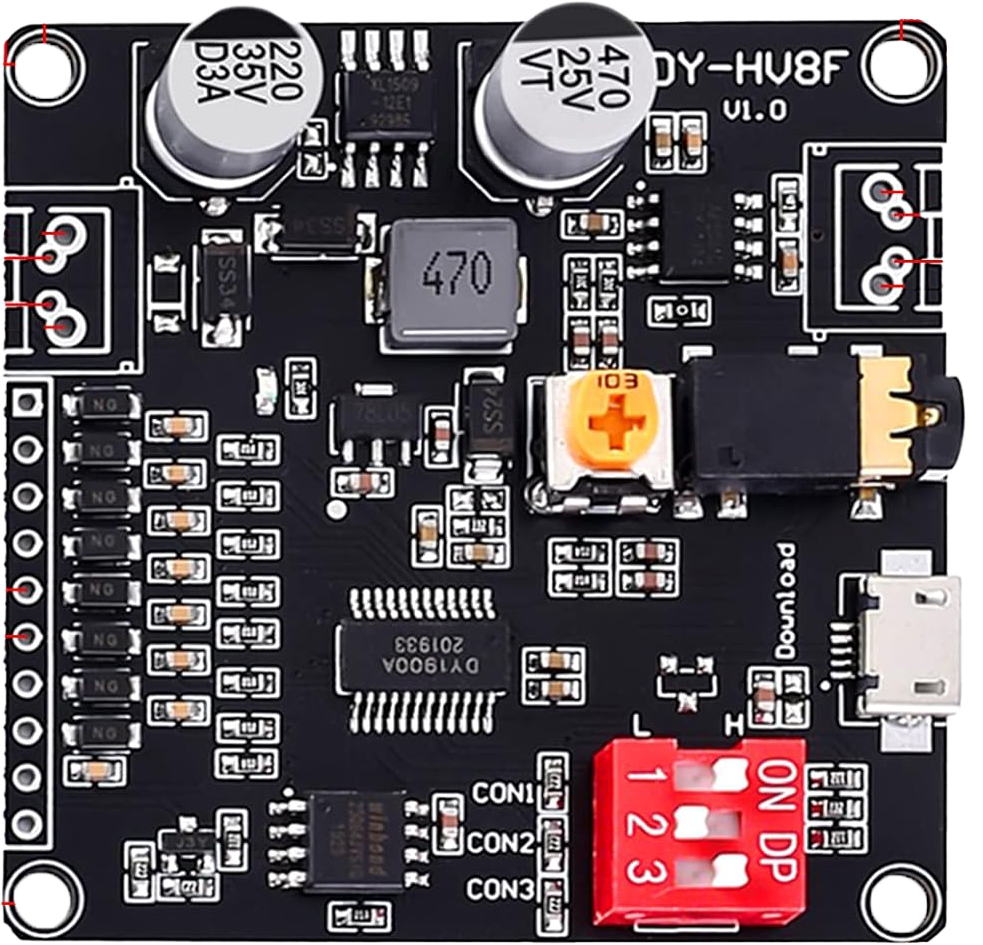
The PEMENOL Voice Playback Module (Part ID: 11) is a versatile device designed to store and play back audio recordings. It is commonly used in applications such as toys, alarms, interactive devices, and other systems requiring pre-recorded audio playback. This module is compact, easy to integrate, and supports high-quality audio output, making it ideal for both hobbyist and professional projects.

Explore Projects Built with Voice Playback Module

Use Cirkit Designer to design, explore, and prototype these projects online. Some projects support real-time simulation. Click "Open Project" to start designing instantly!
Voice-Controlled Buzzer System with VC-02 Module
Image of vc: A project utilizing Voice Playback Module in a practical application
This circuit features a VC-02 voice recognition module connected to a buzzer and powered by a 5V battery. The VC-02 module is programmed to listen for specific voice commands and, upon recognizing the command 'can you make a sound', it activates the buzzer for one second. The circuit is designed for voice-activated sound generation, with the VC-02 module handling voice recognition and serial communication, and the buzzer providing audible feedback.
Cirkit Designer LogoOpen Project in Cirkit Designer
ESP32-Based Voice-Controlled Speaker
Image of Main Design: A project utilizing Voice Playback Module in a practical application
This circuit is a digital voice playback and recording system powered by a 3.7V battery. It features an ESP32 microcontroller for processing, an Adafruit MAX98357A amplifier to drive a loudspeaker for audio output, and an Adafruit MAX9814 microphone amplifier for audio input. A pushbutton provides user interaction, and a 3.3V regulator ensures stable power supply to the components.
Cirkit Designer LogoOpen Project in Cirkit Designer
ESP32-Based Voice Assistant with Battery-Powered Microphone and Speaker
Image of Minor: A project utilizing Voice Playback Module in a practical application
This circuit is a voice-controlled system that uses an ESP32 microcontroller to process audio input from a microphone, send the data to a Gemini API for speech-to-text conversion, and output responses through a speaker. It includes an IR sensor for additional input, an LED for status indication, and a battery with a charging module for power management.
Cirkit Designer LogoOpen Project in Cirkit Designer
Arduino UNO Based Voice-Controlled Bluetooth Interface with OLED Display
Image of skripsi: A project utilizing Voice Playback Module in a practical application
This circuit features an Arduino UNO microcontroller interfaced with a voice recognition module for audio input commands, an HC-05 Bluetooth module for wireless communication, and a 0.96" OLED display for visual output. The Arduino is programmed to handle inputs and outputs, with the voice recognition module connected to digital pins for serial communication, and the OLED display connected via I2C to the analog pins A4 (SDA) and A5 (SCL). The Bluetooth module is also connected to the Arduino's serial pins for remote data exchange.
Cirkit Designer LogoOpen Project in Cirkit Designer

Explore Projects Built with Voice Playback Module

Use Cirkit Designer to design, explore, and prototype these projects online. Some projects support real-time simulation. Click "Open Project" to start designing instantly!
Image of vc: A project utilizing Voice Playback Module in a practical application
Voice-Controlled Buzzer System with VC-02 Module
This circuit features a VC-02 voice recognition module connected to a buzzer and powered by a 5V battery. The VC-02 module is programmed to listen for specific voice commands and, upon recognizing the command 'can you make a sound', it activates the buzzer for one second. The circuit is designed for voice-activated sound generation, with the VC-02 module handling voice recognition and serial communication, and the buzzer providing audible feedback.
Cirkit Designer LogoOpen Project in Cirkit Designer
Image of Main Design: A project utilizing Voice Playback Module in a practical application
ESP32-Based Voice-Controlled Speaker
This circuit is a digital voice playback and recording system powered by a 3.7V battery. It features an ESP32 microcontroller for processing, an Adafruit MAX98357A amplifier to drive a loudspeaker for audio output, and an Adafruit MAX9814 microphone amplifier for audio input. A pushbutton provides user interaction, and a 3.3V regulator ensures stable power supply to the components.
Cirkit Designer LogoOpen Project in Cirkit Designer
Image of Minor: A project utilizing Voice Playback Module in a practical application
ESP32-Based Voice Assistant with Battery-Powered Microphone and Speaker
This circuit is a voice-controlled system that uses an ESP32 microcontroller to process audio input from a microphone, send the data to a Gemini API for speech-to-text conversion, and output responses through a speaker. It includes an IR sensor for additional input, an LED for status indication, and a battery with a charging module for power management.
Cirkit Designer LogoOpen Project in Cirkit Designer
Image of skripsi: A project utilizing Voice Playback Module in a practical application
Arduino UNO Based Voice-Controlled Bluetooth Interface with OLED Display
This circuit features an Arduino UNO microcontroller interfaced with a voice recognition module for audio input commands, an HC-05 Bluetooth module for wireless communication, and a 0.96" OLED display for visual output. The Arduino is programmed to handle inputs and outputs, with the voice recognition module connected to digital pins for serial communication, and the OLED display connected via I2C to the analog pins A4 (SDA) and A5 (SCL). The Bluetooth module is also connected to the Arduino's serial pins for remote data exchange.
Cirkit Designer LogoOpen Project in Cirkit Designer

Technical Specifications

The following table outlines the key technical details of the PEMENOL Voice Playback Module:

Parameter Specification
Manufacturer PEMENOL
Part ID 11
Operating Voltage 3.3V to 5V DC
Operating Current ≤ 30mA
Audio Format WAV, MP3
Storage Capacity Up to 8MB (internal flash memory)
Playback Modes Single playback, loop playback
Control Interface GPIO pins, serial communication (UART)
Output Type Speaker output (direct drive) or AUX out
Dimensions 30mm x 20mm x 5mm

Pin Configuration and Descriptions

The PEMENOL Voice Playback Module has the following pin configuration:

Pin Name Description
1 VCC Power supply input (3.3V to 5V DC).
2 GND Ground connection.
3 PLAY Trigger pin for playback. A HIGH signal initiates audio playback.
4 NEXT Skips to the next audio file when triggered.
5 PREV Skips to the previous audio file when triggered.
6 LOOP Enables loop playback mode when set HIGH.
7 TX UART transmit pin for serial communication.
8 RX UART receive pin for serial communication.
9 SPK+ Positive terminal for speaker connection.
10 SPK- Negative terminal for speaker connection.

Usage Instructions

How to Use the Component in a Circuit

  1. Power the Module: Connect the VCC pin to a 3.3V or 5V DC power source and the GND pin to ground.
  2. Connect a Speaker: Attach a speaker to the SPK+ and SPK- pins for audio output. Alternatively, use the AUX output for external audio devices.
  3. Control Playback:
    • Use the PLAY pin to trigger audio playback. A HIGH signal starts playback.
    • Use the NEXT and PREV pins to navigate through audio files.
    • Set the LOOP pin HIGH to enable continuous playback of the current audio file.
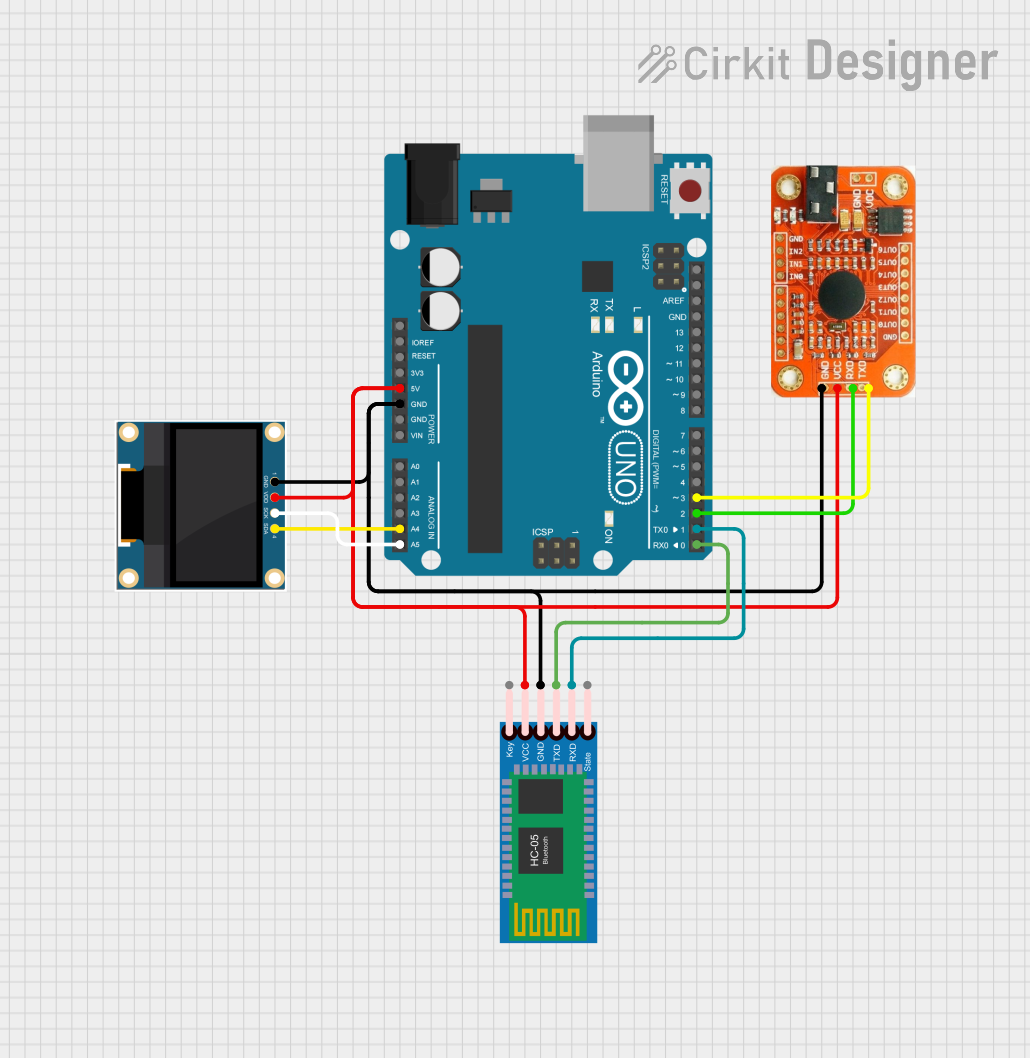
  4. Serial Communication: For advanced control, connect the TX and RX pins to a microcontroller (e.g., Arduino UNO) to send commands via UART.

Important Considerations and Best Practices

  • Ensure the power supply voltage is within the specified range (3.3V to 5V) to avoid damaging the module.
  • Use a decoupling capacitor (e.g., 10µF) across the VCC and GND pins to stabilize the power supply.
  • If using UART communication, configure the baud rate to 9600 bps (default setting).
  • Avoid connecting a speaker with an impedance lower than 8 ohms to prevent overloading the module.

Example: Connecting to an Arduino UNO

Below is an example of how to control the PEMENOL Voice Playback Module using an Arduino UNO:

// Example code to control PEMENOL Voice Playback Module with Arduino UNO
// Connect the module's TX pin to Arduino pin 10 and RX pin to pin 11
// Use SoftwareSerial for UART communication

#include <SoftwareSerial.h>

// Define RX and TX pins for SoftwareSerial
SoftwareSerial voiceModule(10, 11); // RX, TX

void setup() {
  // Initialize serial communication with the module
  voiceModule.begin(9600);
  Serial.begin(9600); // For debugging

  // Send a command to play the first audio file
  Serial.println("Sending play command...");
  voiceModule.write(0x01); // Command to play the first audio file
}

void loop() {
  // Example: Send a command to play the next audio file every 10 seconds
  delay(10000);
  Serial.println("Sending next command...");
  voiceModule.write(0x02); // Command to play the next audio file
}

Troubleshooting and FAQs

Common Issues and Solutions

  1. No Audio Output:

    • Ensure the speaker is properly connected to the SPK+ and SPK- pins.
    • Verify that the power supply voltage is within the specified range.
    • Check if the audio files are correctly formatted (WAV or MP3) and stored in the module.
  2. Playback Does Not Start:

    • Confirm that the PLAY pin is receiving a HIGH signal.
    • If using UART, ensure the baud rate is set to 9600 bps and the TX/RX connections are correct.
  3. Distorted Audio:

    • Use a speaker with an impedance of at least 8 ohms.
    • Check for noise or instability in the power supply and add a decoupling capacitor if necessary.
  4. Module Not Responding to UART Commands:

    • Verify the TX and RX connections between the module and the microcontroller.
    • Ensure the correct command format is being sent.

FAQs

Q: Can I use this module with a 3.3V microcontroller?
A: Yes, the module supports an operating voltage range of 3.3V to 5V, making it compatible with 3.3V microcontrollers.

Q: How many audio files can the module store?
A: The module has an internal storage capacity of up to 8MB, which can store multiple audio files depending on their size and format.

Q: Can I control the volume of the audio output?
A: Volume control is not directly supported via GPIO pins. However, you can adjust the volume of the audio files before uploading them to the module.

Q: Is it possible to use an external amplifier with this module?
A: Yes, you can connect the AUX output to an external amplifier for higher audio output power.