How to Use YF ROBOT 语音合成: Examples, Pinouts, and Specs

Introduction
The YF ROBOT 语音合成 is a voice synthesis module designed to convert text into spoken words. This module is widely used in robotics, IoT devices, and interactive systems to provide auditory feedback or enable voice-based communication. Its compact design and ease of integration make it a popular choice for projects requiring text-to-speech functionality.
Explore Projects Built with YF ROBOT 语音合成
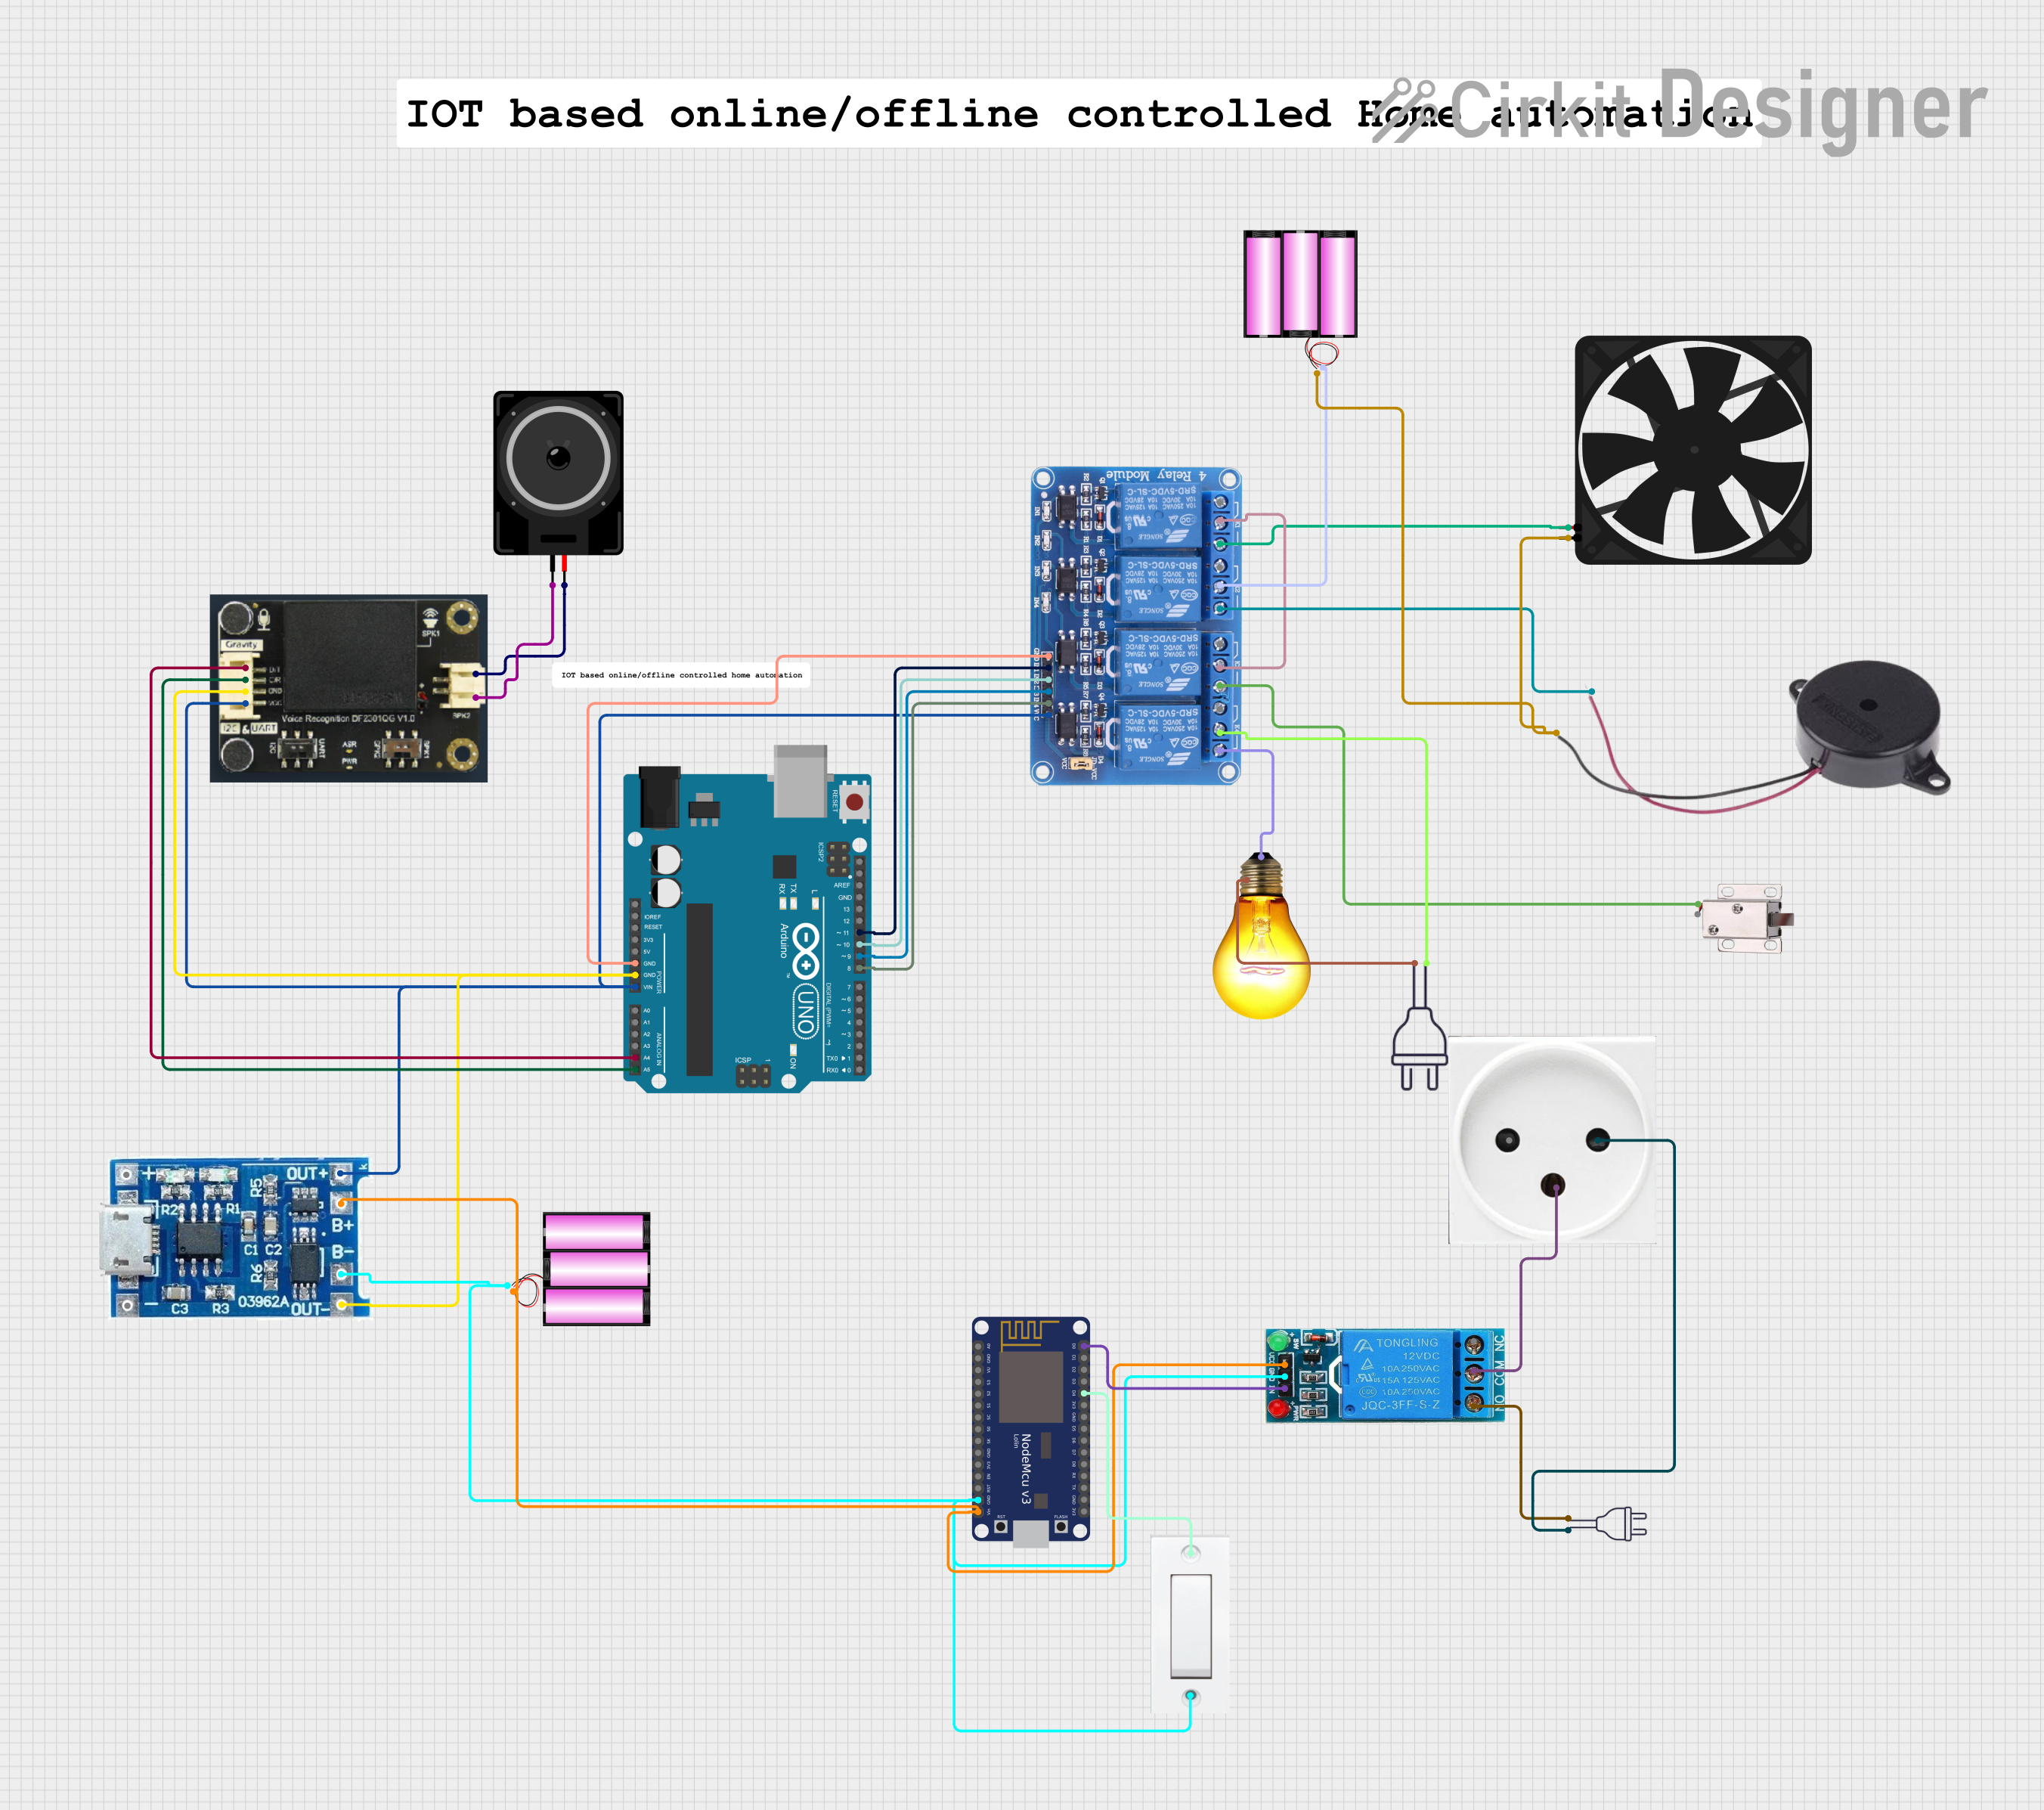

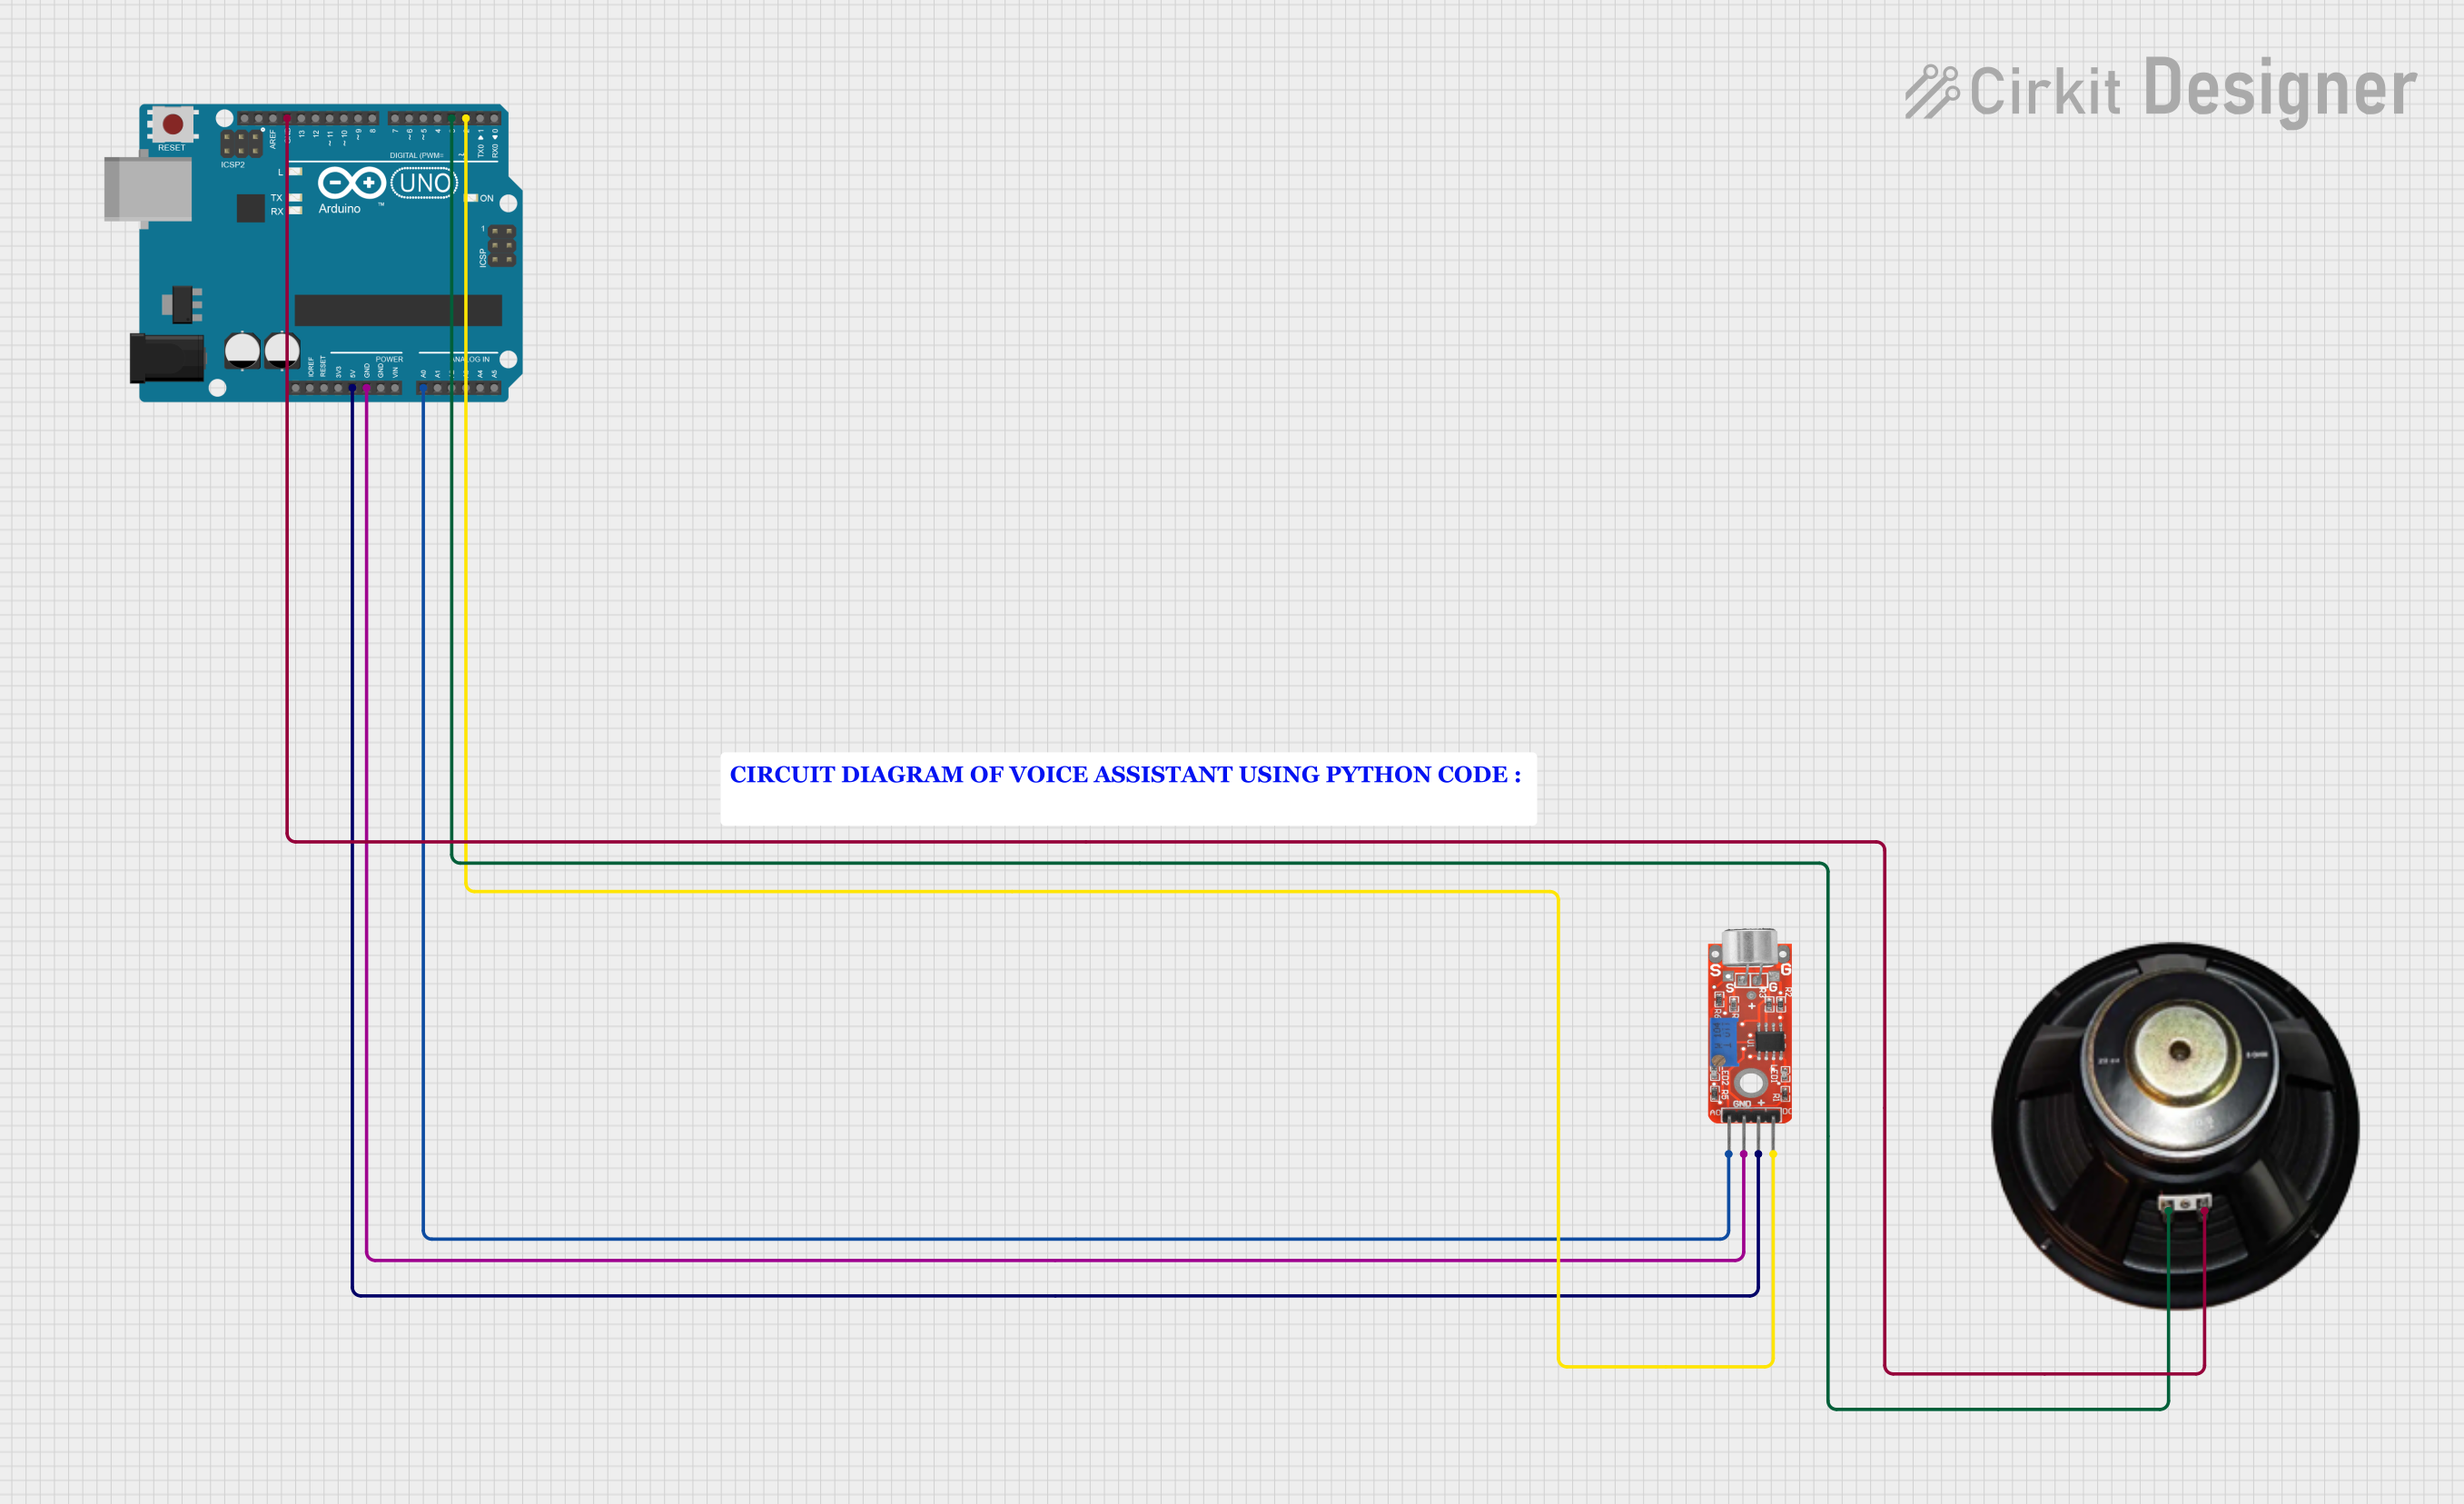

Explore Projects Built with YF ROBOT 语音合成
Common Applications
- Robotics: Providing voice feedback or instructions.
- Smart home devices: Enabling voice alerts or notifications.
- Interactive kiosks: Delivering spoken information to users.
- Educational tools: Assisting visually impaired individuals with auditory outputs.
Technical Specifications
The YF ROBOT 语音合成 module is designed for simplicity and versatility. Below are its key technical details:
General Specifications
| Parameter | Value |
|---|---|
| Operating Voltage | 3.3V to 5V |
| Communication Method | UART (Serial Communication) |
| Baud Rate | 9600 bps (default) |
| Audio Output | PWM signal or external speaker |
| Supported Languages | Chinese, English |
| Dimensions | 30mm x 20mm x 5mm |
Pin Configuration
The module has a straightforward pin layout for easy integration. Below is the pin description:
| Pin Name | Description |
|---|---|
| VCC | Power supply input (3.3V to 5V) |
| GND | Ground |
| TX | UART Transmit pin (connect to RX of MCU) |
| RX | UART Receive pin (connect to TX of MCU) |
| SPK+ | Positive terminal for external speaker |
| SPK- | Negative terminal for external speaker |
Usage Instructions
Connecting the Module
- Power Supply: Connect the
VCCpin to a 3.3V or 5V power source and theGNDpin to ground. - UART Communication:
- Connect the
TXpin of the module to theRXpin of your microcontroller (e.g., Arduino UNO). - Connect the
RXpin of the module to theTXpin of your microcontroller.
- Connect the
- Audio Output:
- For direct audio output, connect a small speaker to the
SPK+andSPK-pins. - Alternatively, use the PWM signal for further audio processing.
- For direct audio output, connect a small speaker to the
Example Code for Arduino UNO
Below is an example of how to use the YF ROBOT 语音合成 module with an Arduino UNO to produce speech:
#include <SoftwareSerial.h>

// Define the RX and TX pins for the module
SoftwareSerial voiceModule(10, 11); // RX = Pin 10, TX = Pin 11

void setup() {
  Serial.begin(9600); // Initialize Serial Monitor
  voiceModule.begin(9600); // Initialize communication with the module

  // Send a test message to the module
  sendTextToSpeech("Hello, welcome to the YF ROBOT voice module!");
}

void loop() {
  // Add your main code here
}

// Function to send text to the voice module
void sendTextToSpeech(String text) {
  voiceModule.print(text); // Send the text to the module
  delay(100); // Small delay to ensure proper transmission
}
Best Practices
- Power Supply: Ensure a stable power source to avoid noise or interruptions in audio output.
- Speaker Selection: Use a speaker with appropriate impedance (e.g., 8Ω) for optimal sound quality.
- Baud Rate: Confirm the module's baud rate (default is 9600 bps) and match it with your microcontroller's settings.
- Text Encoding: Ensure the text sent to the module is in the correct encoding (e.g., UTF-8) for accurate speech synthesis.
Troubleshooting and FAQs
Common Issues and Solutions
No Sound Output:
- Check the speaker connections (
SPK+andSPK-). - Ensure the module is powered correctly (3.3V to 5V).
- Verify that the text is being sent to the module via UART.
- Check the speaker connections (
Garbled or Incorrect Speech:
- Confirm the baud rate is set to 9600 bps on both the module and the microcontroller.
- Ensure the text encoding matches the module's requirements.
Module Not Responding:
- Double-check the
TXandRXconnections between the module and the microcontroller. - Test the module with a different microcontroller or UART interface.
- Double-check the
FAQs
Q: Can the module output audio in languages other than Chinese and English?
A: The module primarily supports Chinese and English. For other languages, check the manufacturer's documentation for firmware updates or additional support.
Q: What is the maximum length of text the module can process?
A: The module can typically handle up to 100 characters per transmission. For longer text, split it into smaller chunks.
Q: Can I adjust the speech speed or tone?
A: Yes, some versions of the module allow adjustments to speech speed and tone via specific UART commands. Refer to the module's command set for details.
By following this documentation, you can effectively integrate and utilize the YF ROBOT 语音合成 module in your projects.