How to Use ASR PRO 2.0: Examples, Pinouts, and Specs
Introduction
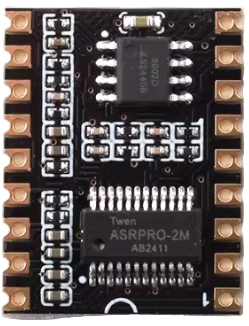
The ASR PRO 2.0 is an advanced automatic speech recognition (ASR) system designed to deliver high accuracy in transcribing spoken language into text. Leveraging cutting-edge machine learning algorithms, the ASR PRO 2.0 adapts to various accents, speech patterns, and environmental conditions, making it a versatile solution for speech-to-text applications.
Explore Projects Built with ASR PRO 2.0
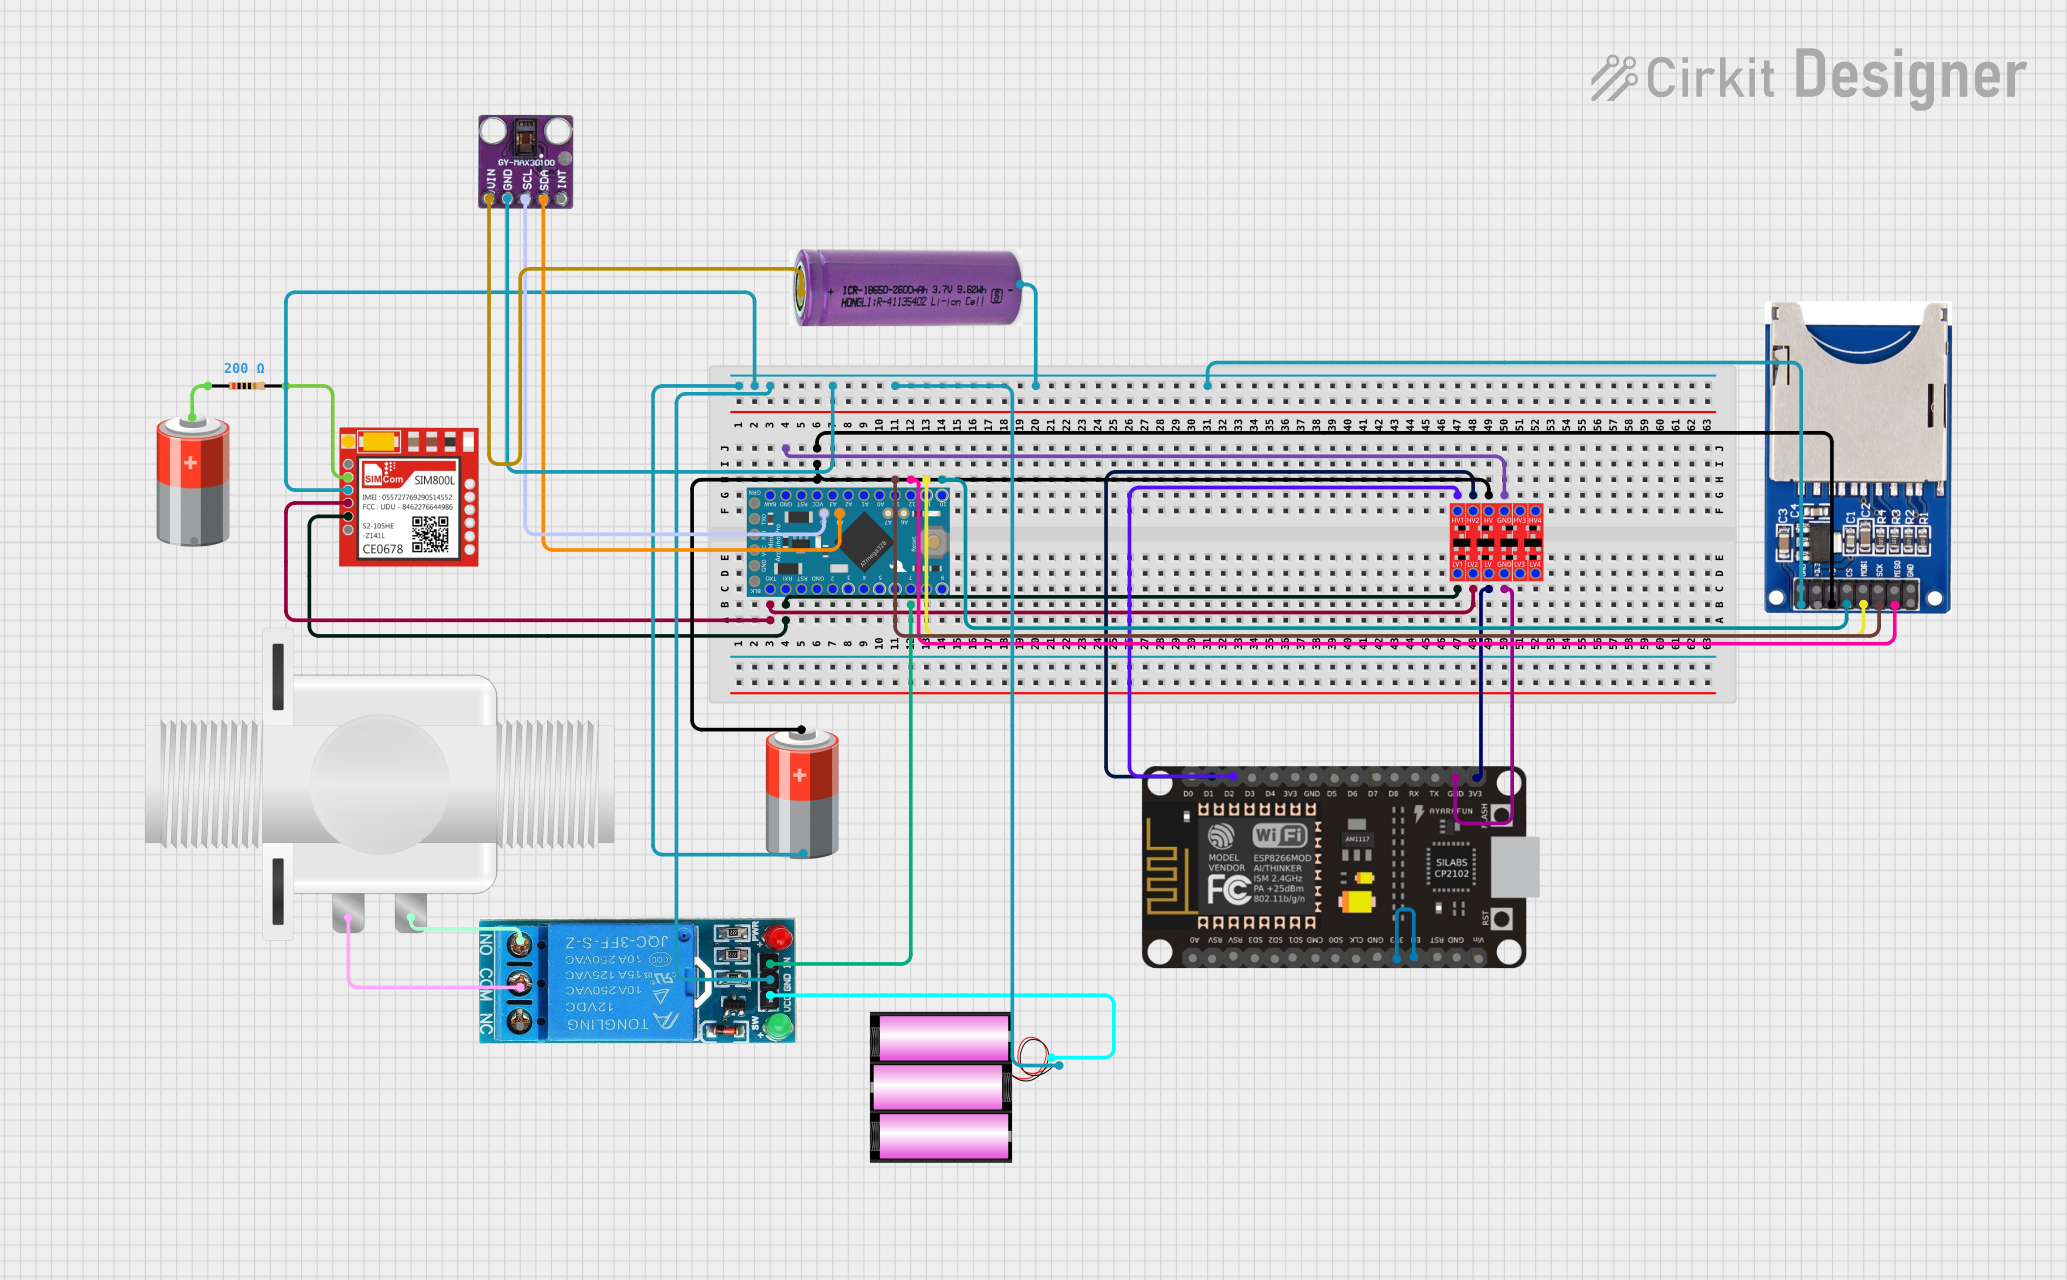

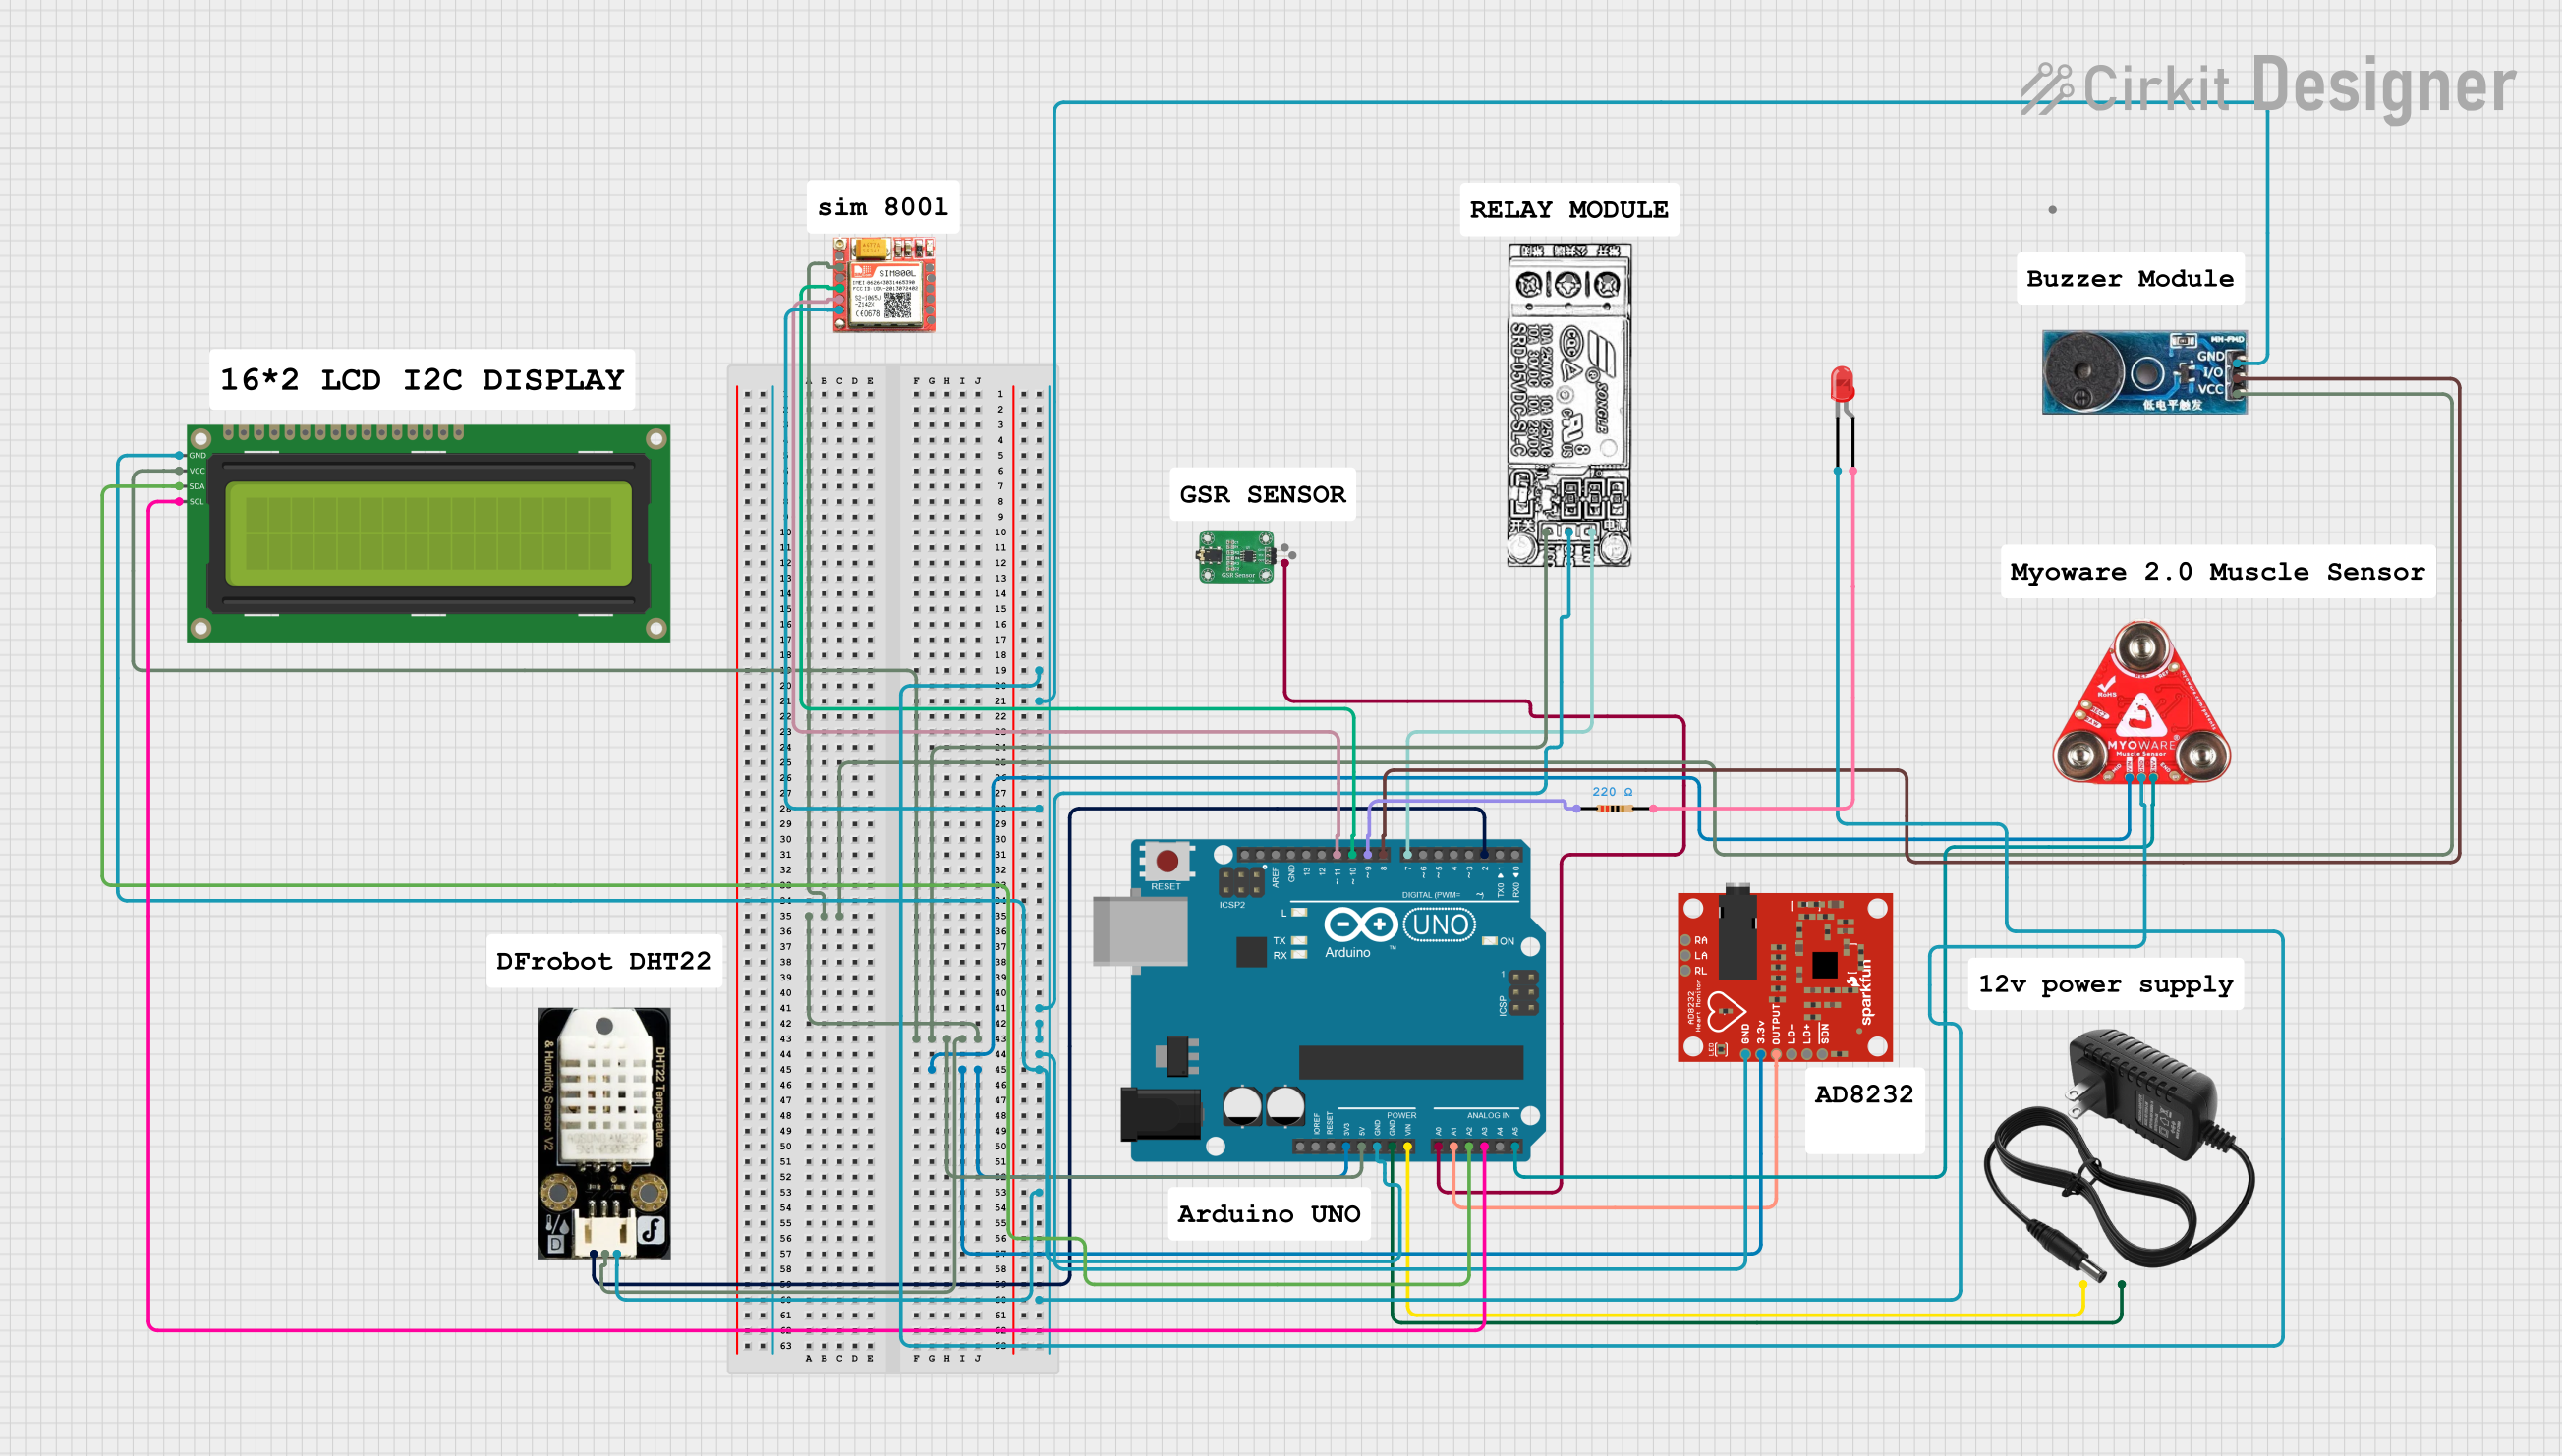
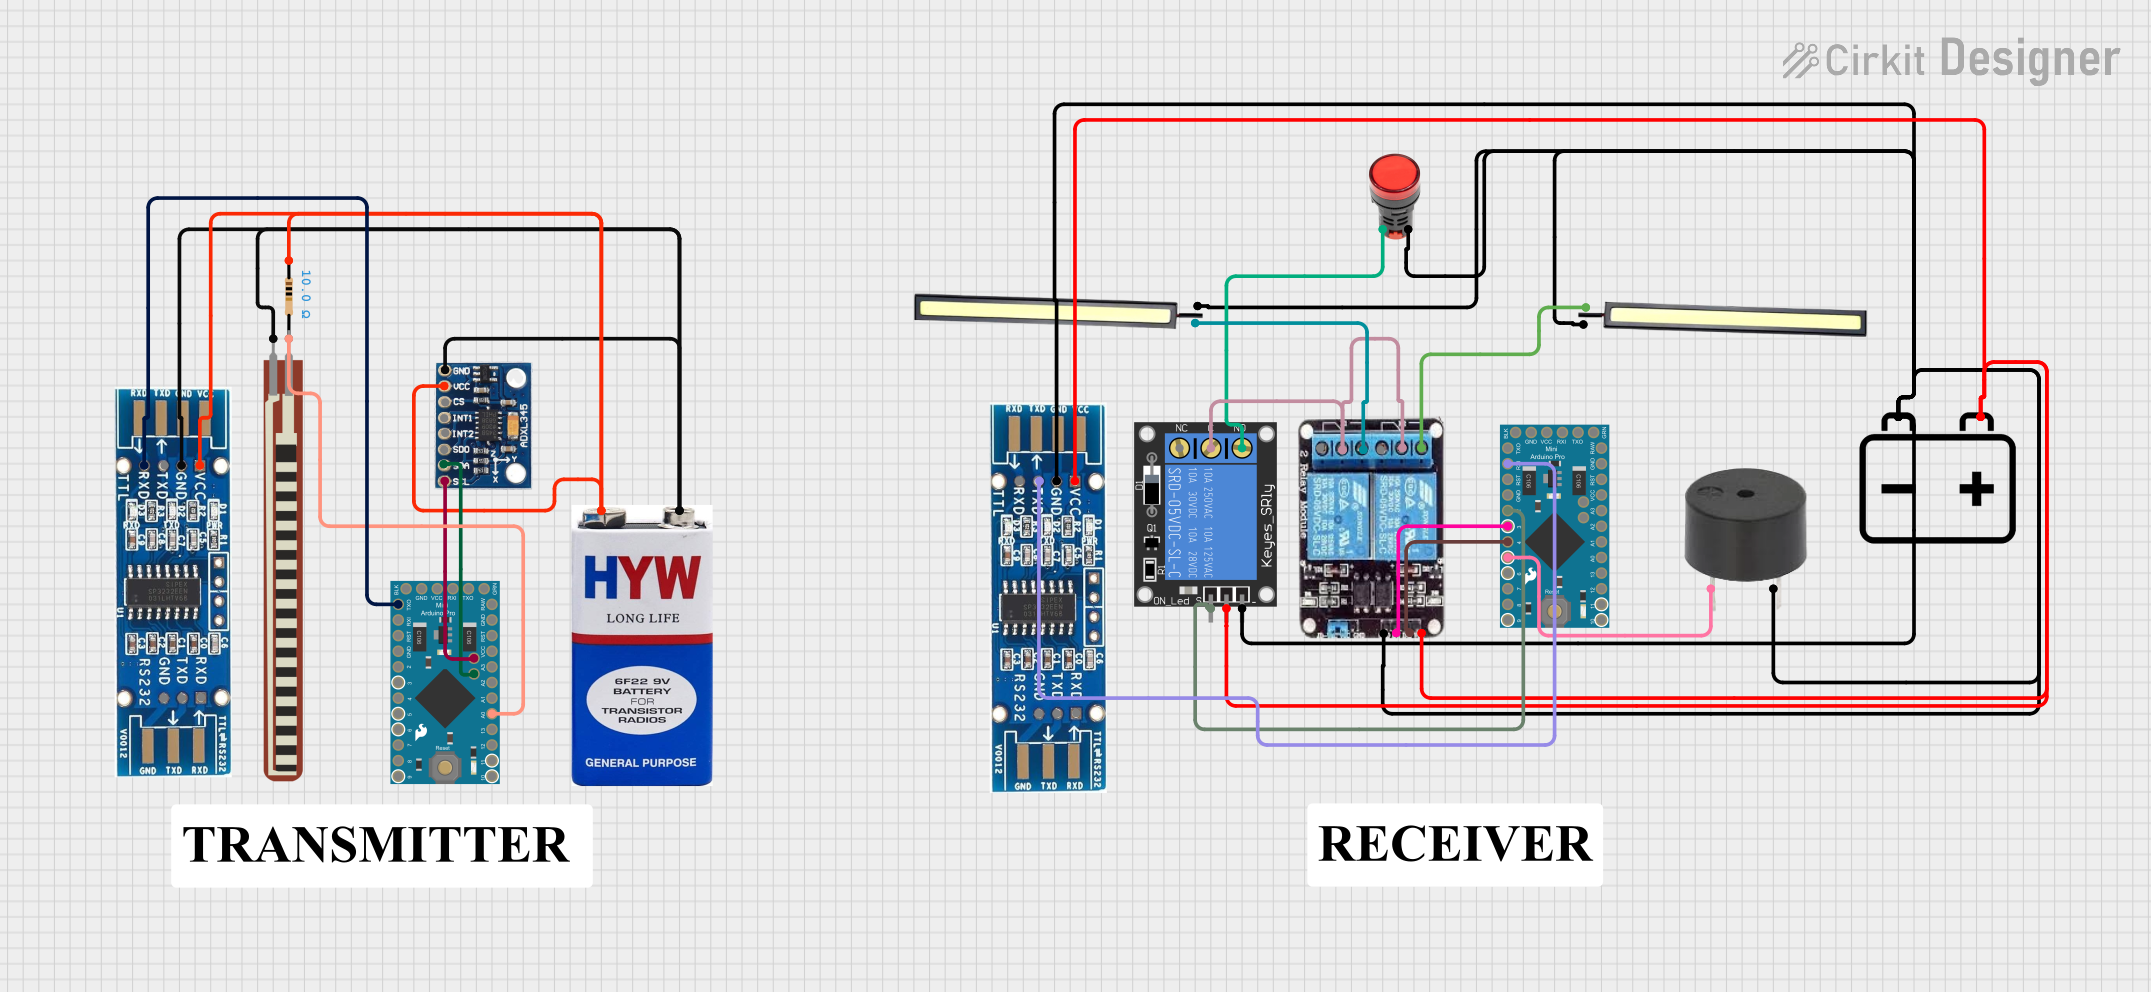
Explore Projects Built with ASR PRO 2.0
Common Applications and Use Cases
- Voice-controlled devices and smart assistants
- Real-time transcription for meetings and conferences
- Call center automation and customer service
- Accessibility tools for individuals with hearing impairments
- Language learning and pronunciation analysis
Technical Specifications
The ASR PRO 2.0 is a compact module that integrates seamlessly into various systems. Below are its key technical details:
Key Technical Details
| Parameter | Specification |
|---|---|
| Input Voltage | 3.3V to 5V DC |
| Power Consumption | 150 mW (typical) |
| Audio Input | Mono, 16-bit PCM, 8 kHz to 48 kHz |
| Output Format | Text (UTF-8 encoding) |
| Communication Protocol | UART, I2C, or SPI |
| Recognition Accuracy | Up to 95% (depending on environment) |
| Supported Languages | 20+ (including English, Spanish, etc.) |
| Operating Temperature | -10°C to 60°C |
| Dimensions | 25mm x 20mm x 5mm |
Pin Configuration and Descriptions
| Pin Number | Pin Name | Description |
|---|---|---|
| 1 | VCC | Power supply input (3.3V to 5V DC) |
| 2 | GND | Ground connection |
| 3 | RX | UART Receive pin for data communication |
| 4 | TX | UART Transmit pin for data communication |
| 5 | SCL | I2C Clock Line (optional, for I2C communication) |
| 6 | SDA | I2C Data Line (optional, for I2C communication) |
| 7 | CS | Chip Select for SPI communication (optional) |
| 8 | MISO | Master In Slave Out for SPI communication (optional) |
| 9 | MOSI | Master Out Slave In for SPI communication (optional) |
| 10 | CLK | Clock Line for SPI communication (optional) |
| 11 | AUDIO_IN | Audio input pin for connecting a microphone or audio source |
| 12 | RESET | Reset pin to restart the module |
Usage Instructions
How to Use the ASR PRO 2.0 in a Circuit
- Power the Module: Connect the VCC pin to a 3.3V or 5V DC power source and the GND pin to ground.
- Connect Audio Input: Attach a microphone or audio source to the AUDIO_IN pin. Ensure the audio signal is mono and within the supported sampling rate (8 kHz to 48 kHz).
- Establish Communication:
- For UART: Connect the RX and TX pins to the corresponding UART pins on your microcontroller.
- For I2C: Connect the SCL and SDA pins to the I2C bus.
- For SPI: Use the CS, MISO, MOSI, and CLK pins for SPI communication.
- Initialize the Module: Send initialization commands via the selected communication protocol to configure the module for your application.
- Start Recognition: Stream audio data to the module and retrieve the transcribed text via the communication interface.
Important Considerations and Best Practices
- Noise Reduction: Use a high-quality microphone and minimize background noise for better recognition accuracy.
- Power Supply: Ensure a stable power supply to avoid performance issues.
- Language Selection: Configure the module to the desired language before starting recognition.
- Data Rate: Match the baud rate of the UART interface with your microcontroller for seamless communication.
- Reset: Use the RESET pin to restart the module if it becomes unresponsive.
Example: Connecting ASR PRO 2.0 to an Arduino UNO
Below is an example of how to connect and use the ASR PRO 2.0 with an Arduino UNO via UART:
Circuit Connections
- Connect the VCC pin of the ASR PRO 2.0 to the 5V pin on the Arduino.
- Connect the GND pin of the ASR PRO 2.0 to the GND pin on the Arduino.
- Connect the RX pin of the ASR PRO 2.0 to pin 10 on the Arduino (software serial TX).
- Connect the TX pin of the ASR PRO 2.0 to pin 11 on the Arduino (software serial RX).
Arduino Code
#include <SoftwareSerial.h>

// Define software serial pins for ASR PRO 2.0
SoftwareSerial asrSerial(10, 11); // RX, TX

void setup() {
  // Initialize serial communication
  Serial.begin(9600); // For debugging
  asrSerial.begin(9600); // Communication with ASR PRO 2.0

  Serial.println("Initializing ASR PRO 2.0...");
  delay(1000);

  // Example command to configure the module (adjust as needed)
  asrSerial.println("SET_LANGUAGE EN"); // Set language to English
  delay(500);
}

void loop() {
  // Check if data is available from ASR PRO 2.0
  if (asrSerial.available()) {
    String transcription = asrSerial.readStringUntil('\n'); // Read transcribed text
    Serial.println("Transcription: " + transcription); // Print to serial monitor
  }

  // Add a small delay to avoid overwhelming the module
  delay(100);
}
Troubleshooting and FAQs
Common Issues and Solutions
No Output from the Module
- Ensure the module is powered correctly (check VCC and GND connections).
- Verify that the communication protocol (UART, I2C, or SPI) is configured properly.
- Check the baud rate settings on both the module and the microcontroller.
Low Recognition Accuracy
- Use a high-quality microphone and ensure the audio input is clear.
- Minimize background noise and echo in the environment.
- Verify that the correct language is selected for recognition.
Module Becomes Unresponsive
- Use the RESET pin to restart the module.
- Check for power supply fluctuations and ensure a stable voltage.
Incorrect Transcriptions
- Ensure the audio input matches the supported sampling rate and format.
- Train the module (if supported) to adapt to specific accents or speech patterns.
FAQs
Q: Can the ASR PRO 2.0 recognize multiple languages simultaneously?
A: No, the module can only recognize one language at a time. You must configure the desired language before starting recognition.
Q: What is the maximum distance for the microphone?
A: The recommended distance is 1-2 meters for optimal accuracy. Beyond this range, recognition accuracy may decrease.
Q: Can the module process audio in real-time?
A: Yes, the ASR PRO 2.0 is designed for real-time speech-to-text processing, provided the audio input and communication interface are configured correctly.