How to Use Driver LED 3W: Examples, Pinouts, and Specs
Introduction
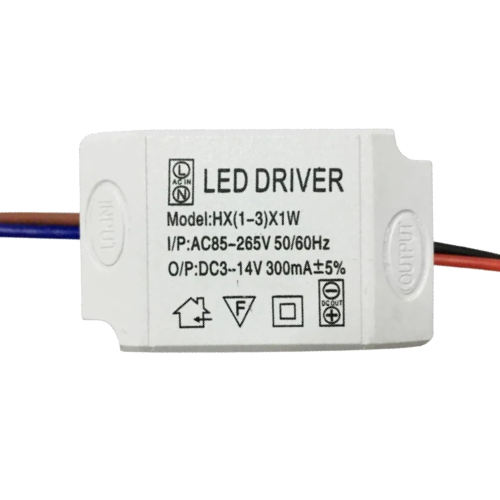
The Driver LED 3W is a compact and efficient power supply unit designed to provide the precise voltage and current required to drive a 3-watt LED. It ensures optimal performance, energy efficiency, and longevity of the LED by regulating the power supply and protecting against overcurrent, overvoltage, and thermal issues. This driver is ideal for applications requiring reliable and stable LED operation.
Explore Projects Built with Driver LED 3W

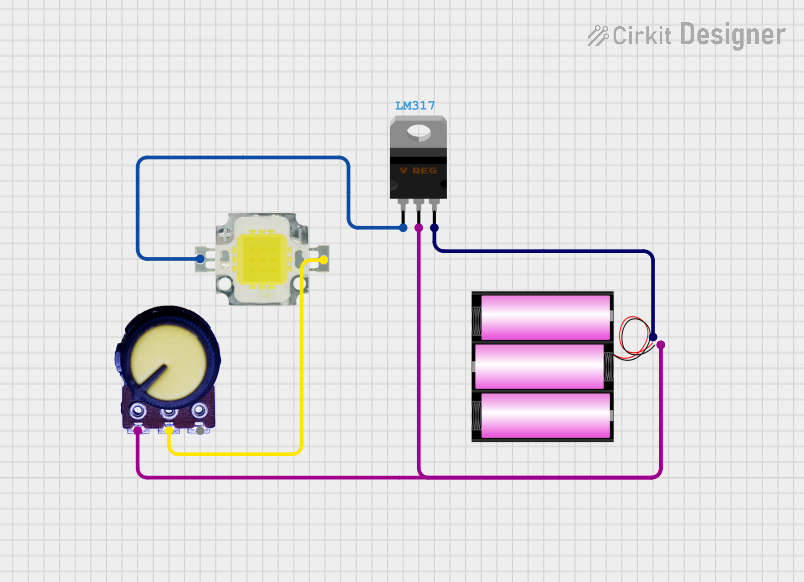
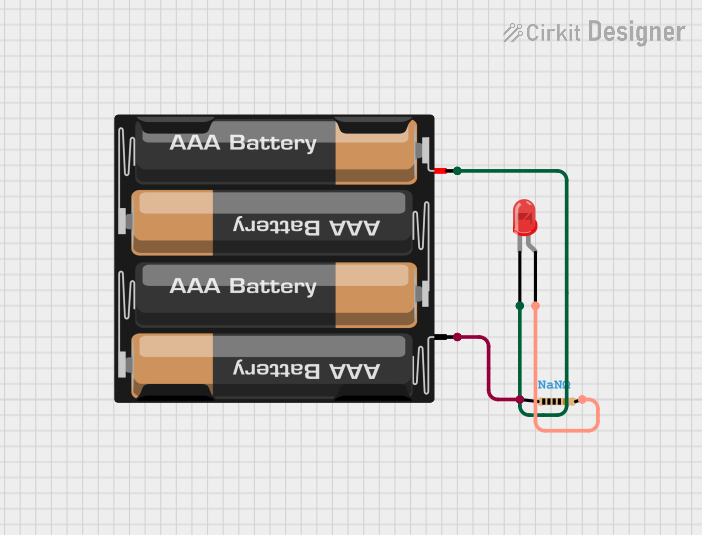
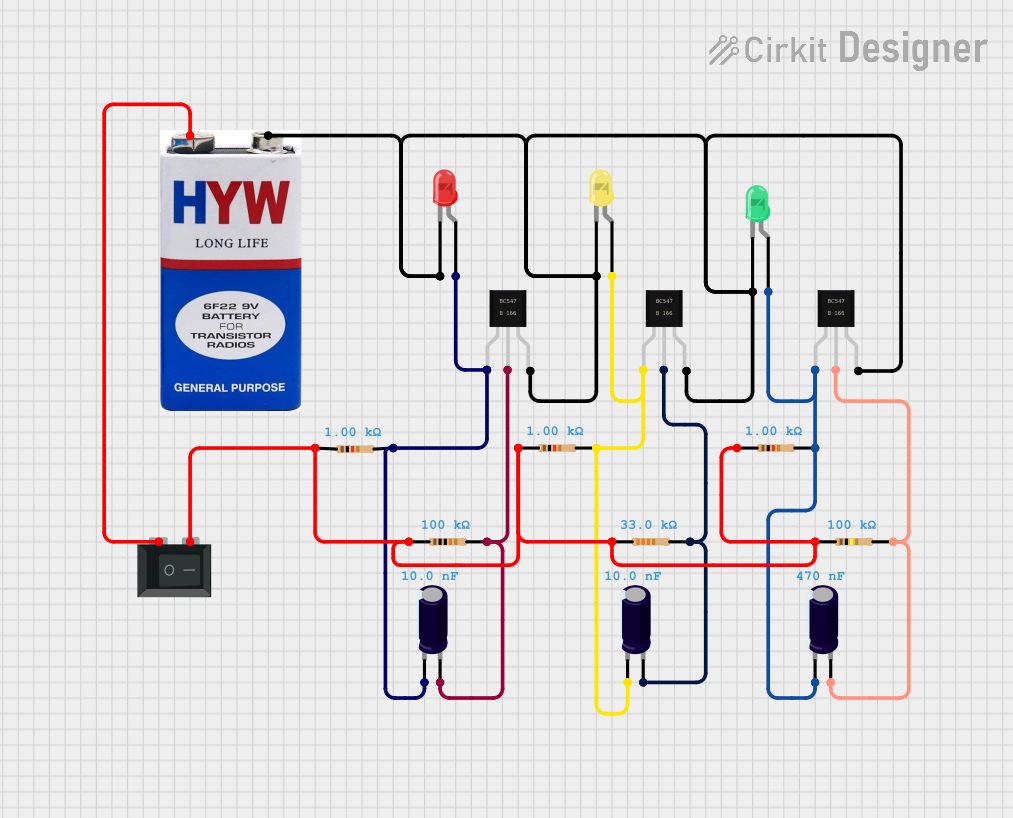
Explore Projects Built with Driver LED 3W
Common Applications and Use Cases
- LED lighting systems (e.g., residential, commercial, and industrial)
- Flashlights and portable lighting devices
- Automotive LED lighting
- Decorative and architectural lighting
- Backlighting for displays and signage
Technical Specifications
The following table outlines the key technical details of the Driver LED 3W:
| Parameter | Value |
|---|---|
| Input Voltage Range | 85V - 265V AC |
| Output Voltage Range | 3V - 12V DC |
| Output Current | 300mA (constant current) |
| Power Rating | 3W |
| Efficiency | ≥85% |
| Operating Temperature | -20°C to +50°C |
| Protection Features | Overcurrent, Overvoltage, Thermal |
| Dimensions | 30mm x 20mm x 15mm |
Pin Configuration and Descriptions
The Driver LED 3W typically has four connection points, as described below:
| Pin Name | Description |
|---|---|
| AC IN (L) | Live input for AC power (85V - 265V AC) |
| AC IN (N) | Neutral input for AC power |
| LED+ | Positive output terminal for the LED |
| LED- | Negative output terminal for the LED |
Usage Instructions
How to Use the Driver LED 3W in a Circuit
Connect the Input Terminals:
- Connect the AC IN (L) terminal to the live wire of the AC power source.
- Connect the AC IN (N) terminal to the neutral wire of the AC power source.
- Ensure the input voltage is within the specified range (85V - 265V AC).
Connect the Output Terminals:
- Connect the LED+ terminal to the positive terminal of the 3W LED.
- Connect the LED- terminal to the negative terminal of the 3W LED.
- Ensure the LED is rated for 3W and is compatible with the driver's output voltage and current.
Power On:
- After verifying all connections, power on the AC source. The driver will regulate the output to provide a constant current to the LED.
Important Considerations and Best Practices
- Heat Dissipation: Ensure proper ventilation or heat sinking for the LED to prevent overheating.
- Polarity: Double-check the polarity of the LED connections (LED+ and LED-) to avoid damage.
- Input Voltage: Do not exceed the specified input voltage range to prevent damage to the driver.
- Load Compatibility: Use only with LEDs rated for 3W to ensure proper operation and avoid overloading the driver.
Example: Connecting to an Arduino UNO
While the Driver LED 3W is not directly controlled by an Arduino, you can use the Arduino to switch the driver on and off via a relay module. Below is an example code snippet for controlling the driver using an Arduino UNO and a relay module:
// Define the relay pin connected to the Arduino
const int relayPin = 7;

void setup() {
  pinMode(relayPin, OUTPUT); // Set the relay pin as an output
  digitalWrite(relayPin, LOW); // Ensure the relay is off initially
}

void loop() {
  // Turn on the LED driver
  digitalWrite(relayPin, HIGH);
  delay(5000); // Keep the LED on for 5 seconds

  // Turn off the LED driver
  digitalWrite(relayPin, LOW);
  delay(5000); // Keep the LED off for 5 seconds
}
Note: Ensure the relay module is rated for the AC voltage and current used by the driver.
Troubleshooting and FAQs
Common Issues and Solutions
LED Does Not Light Up:
- Cause: Incorrect wiring or loose connections.
- Solution: Verify all connections, ensuring proper polarity and secure wiring.
LED Flickers:
- Cause: Input voltage fluctuations or incompatible LED.
- Solution: Ensure the input voltage is stable and within the specified range. Use a compatible 3W LED.
Driver Overheats:
- Cause: Insufficient ventilation or overloading.
- Solution: Provide adequate ventilation and ensure the LED is rated for 3W.
Driver Does Not Power On:
- Cause: Faulty driver or incorrect input voltage.
- Solution: Check the input voltage and replace the driver if necessary.
FAQs
Q1: Can I use this driver with LEDs rated higher than 3W?
A1: No, this driver is specifically designed for 3W LEDs. Using it with higher-rated LEDs may cause overheating or malfunction.
Q2: Is the driver waterproof?
A2: No, the driver is not waterproof. Use it in a dry environment or within a waterproof enclosure.
Q3: Can I dim the LED using this driver?
A3: This driver does not support dimming. Use a compatible dimmable driver if dimming is required.
Q4: What happens if I reverse the LED polarity?
A4: Reversing the polarity may damage the LED. Always ensure correct polarity during installation.