How to Use CH358D Voice Board: Examples, Pinouts, and Specs
Introduction
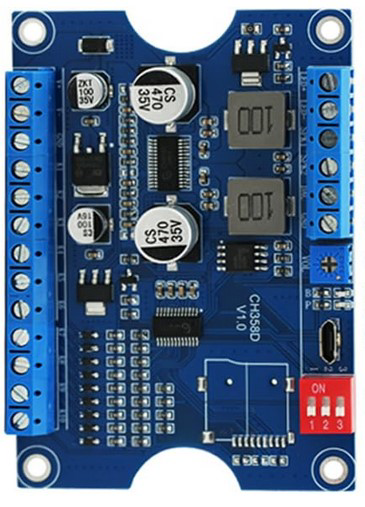
The CH358D Voice Board is a compact and versatile audio processing module designed for voice playback and recording. It features built-in memory for storing audio files and supports multiple audio formats, including WAV and MP3. This module is widely used in applications such as toys, alarms, interactive devices, and other audio-enabled systems. Its small size and ease of integration make it an excellent choice for projects requiring high-quality audio output and simple control mechanisms.
Explore Projects Built with CH358D Voice Board


Explore Projects Built with CH358D Voice Board
Technical Specifications
Below are the key technical details of the CH358D Voice Board:
General Specifications
- Power Supply Voltage: 3.3V to 5V DC
- Audio Formats Supported: WAV, MP3
- Storage: Built-in flash memory (varies by model, typically 4MB to 16MB)
- Playback Modes: Single playback, loop playback
- Control Interface: GPIO, UART, or SPI
- Output: Mono audio output (can be connected to a speaker or amplifier)
- Dimensions: Compact form factor (approximately 25mm x 20mm)
Pin Configuration and Descriptions
The CH358D Voice Board has a simple pinout for easy integration into circuits. Below is the pin configuration:
| Pin Name | Description |
|---|---|
| VCC | Power supply input (3.3V to 5V DC). |
| GND | Ground connection. |
| TX | UART transmit pin for communication with a microcontroller or host device. |
| RX | UART receive pin for communication with a microcontroller or host device. |
| SPK+ | Positive terminal for speaker connection. |
| SPK- | Negative terminal for speaker connection. |
| KEY1 | Trigger pin for playback of the first audio file. |
| KEY2 | Trigger pin for playback of the second audio file. |
| KEY3 | Trigger pin for playback of the third audio file. |
| BUSY | Output pin that indicates whether the module is currently playing audio. |
Usage Instructions
How to Use the CH358D Voice Board in a Circuit
- Power Supply: Connect the VCC pin to a 3.3V or 5V DC power source and the GND pin to ground.
- Speaker Connection: Attach a small speaker to the SPK+ and SPK- pins. For higher volume, you can connect the output to an external amplifier.
- Control Interface:
- For simple playback, connect the KEY1, KEY2, or KEY3 pins to momentary push buttons. Pressing a button will trigger the corresponding audio file.
- For advanced control, use the UART interface (TX and RX pins) to communicate with a microcontroller like an Arduino UNO.
- Audio File Upload: Use the provided software or a compatible programmer to upload audio files to the module's built-in memory. Ensure the files are in a supported format (e.g., WAV or MP3).
Important Considerations and Best Practices
- Power Stability: Ensure a stable power supply to avoid noise or interruptions during playback.
- Speaker Impedance: Use a speaker with an impedance of 8 ohms for optimal performance.
- File Naming: When uploading audio files, follow the naming conventions specified in the module's datasheet (e.g.,
001.mp3,002.wav). - Debouncing: If using push buttons for playback, consider adding a debounce circuit or software debounce to avoid multiple triggers.
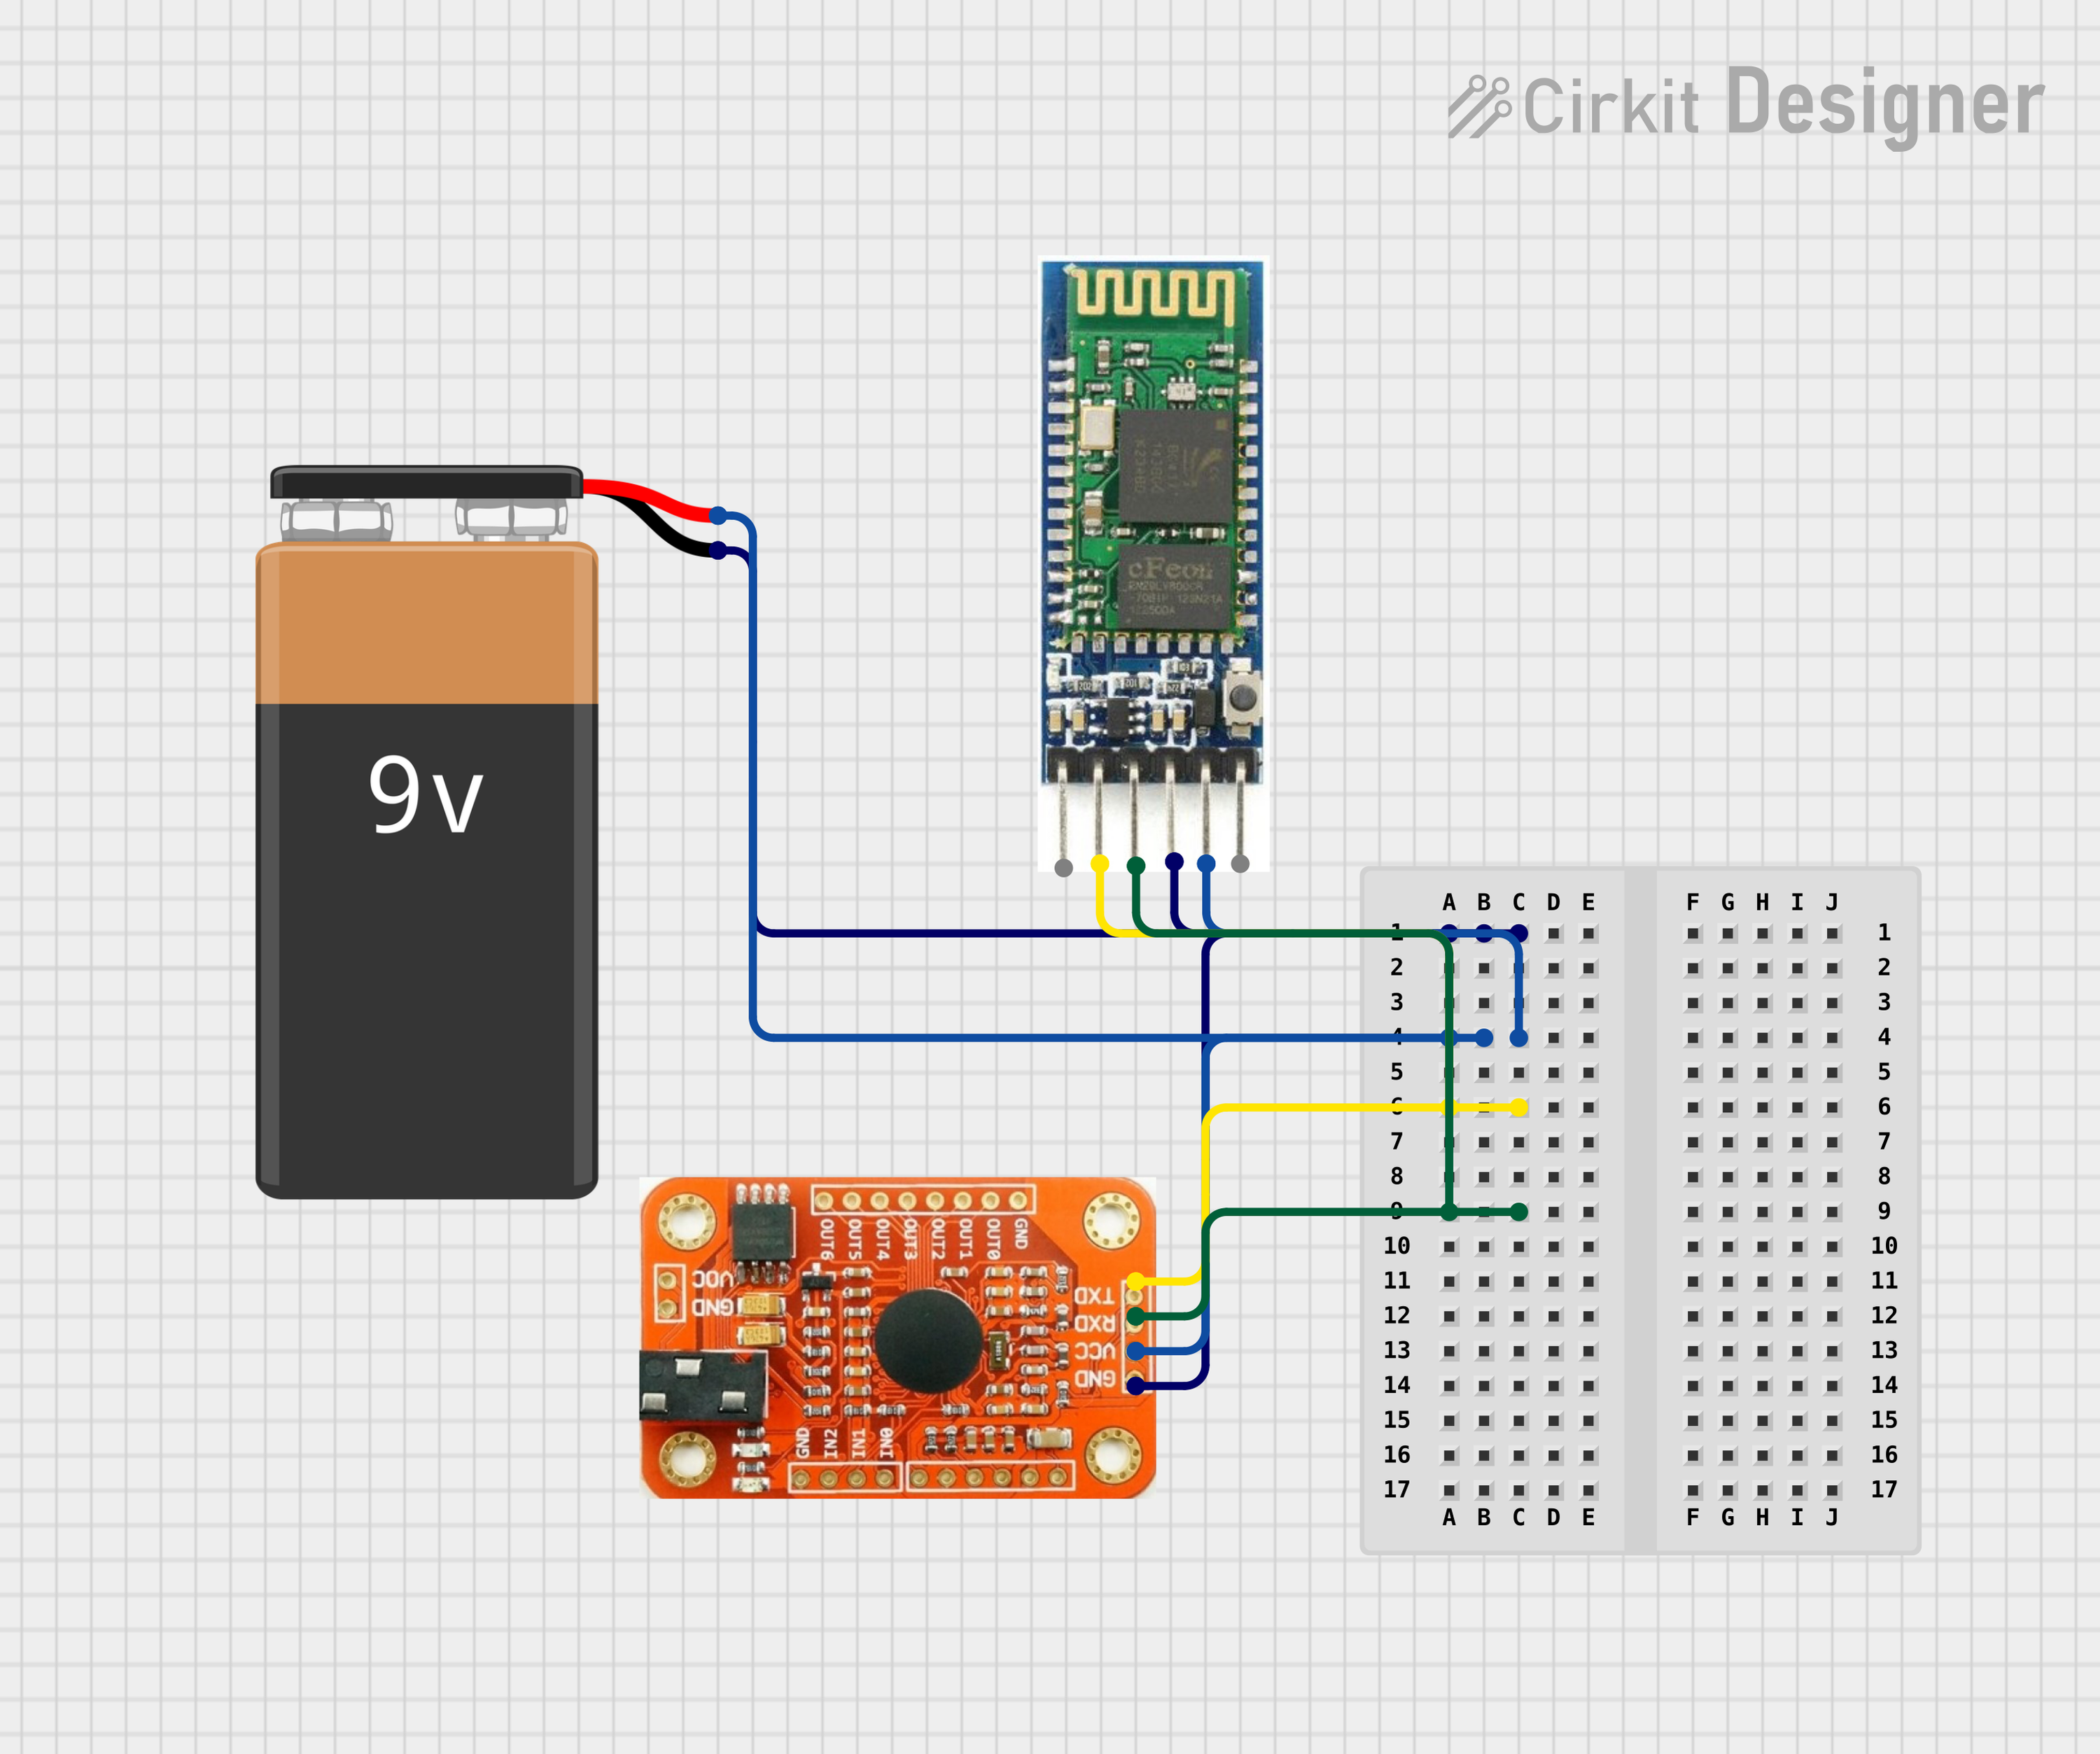
Example: Connecting to an Arduino UNO
Below is an example of how to control the CH358D Voice Board using an Arduino UNO via UART:
#include <SoftwareSerial.h>

// Define RX and TX pins for communication with the CH358D module
SoftwareSerial voiceBoard(10, 11); // RX = Pin 10, TX = Pin 11

void setup() {
  // Initialize serial communication with the CH358D module
  voiceBoard.begin(9600); // Baud rate for the CH358D module
  Serial.begin(9600);     // For debugging via Serial Monitor

  Serial.println("CH358D Voice Board Initialized");
}

void loop() {
  // Example: Send a command to play the first audio file
  Serial.println("Sending play command for file 001.mp3");
  voiceBoard.write(0x01); // Command to play the first audio file
  delay(5000);            // Wait for the audio to finish playing

  // Example: Send a command to stop playback
  Serial.println("Sending stop command");
  voiceBoard.write(0x02); // Command to stop playback
  delay(2000);            // Wait before sending the next command
}
Note: Refer to the CH358D datasheet for the exact UART command set. The above example assumes 0x01 is the command to play the first file and 0x02 is the stop command.
Troubleshooting and FAQs
Common Issues and Solutions
No Audio Output:
- Cause: Incorrect speaker connection or incompatible speaker impedance.
- Solution: Verify the speaker is connected to the SPK+ and SPK- pins and has an impedance of 8 ohms.
Playback Does Not Start:
- Cause: Audio files are not uploaded correctly or are in an unsupported format.
- Solution: Ensure the audio files are in WAV or MP3 format and follow the naming conventions.
Module Not Responding to UART Commands:
- Cause: Incorrect baud rate or wiring.
- Solution: Confirm the baud rate is set to 9600 and check the TX/RX connections.
Noise or Distortion During Playback:
- Cause: Unstable power supply or poor-quality audio files.
- Solution: Use a regulated power supply and ensure the audio files are of good quality.
FAQs
Q: Can I use the CH358D Voice Board with a 3.7V Li-ion battery?
A: Yes, the module supports a power supply range of 3.3V to 5V, so a 3.7V Li-ion battery is compatible.Q: How many audio files can the module store?
A: The number of files depends on the module's built-in memory size and the size of the audio files. For example, a 4MB module can store approximately 4 minutes of audio at 128kbps.Q: Can I control the playback volume?
A: Volume control is not directly available on the module. You can adjust the volume using an external amplifier or by editing the audio files.Q: Is it possible to loop playback?
A: Yes, the module supports loop playback. Refer to the datasheet for the specific command or pin configuration required.
This concludes the documentation for the CH358D Voice Board. For further details, consult the module's datasheet or contact the manufacturer.