How to Use Altitude/Pressure Sensor - MPL3115A2 Breakout: Examples, Pinouts, and Specs
Introduction
The MPL3115A2 is a compact, piezoresistive, absolute pressure sensor with an I2C interface. It offers high-precision readings of both altitude and atmospheric pressure, making it an ideal choice for a variety of applications such as weather stations, smartphones, GPS devices, and UAVs. The breakout board format simplifies integration into hobbyist and prototype projects, particularly those utilizing microcontrollers like the Arduino UNO.
Explore Projects Built with Altitude/Pressure Sensor - MPL3115A2 Breakout
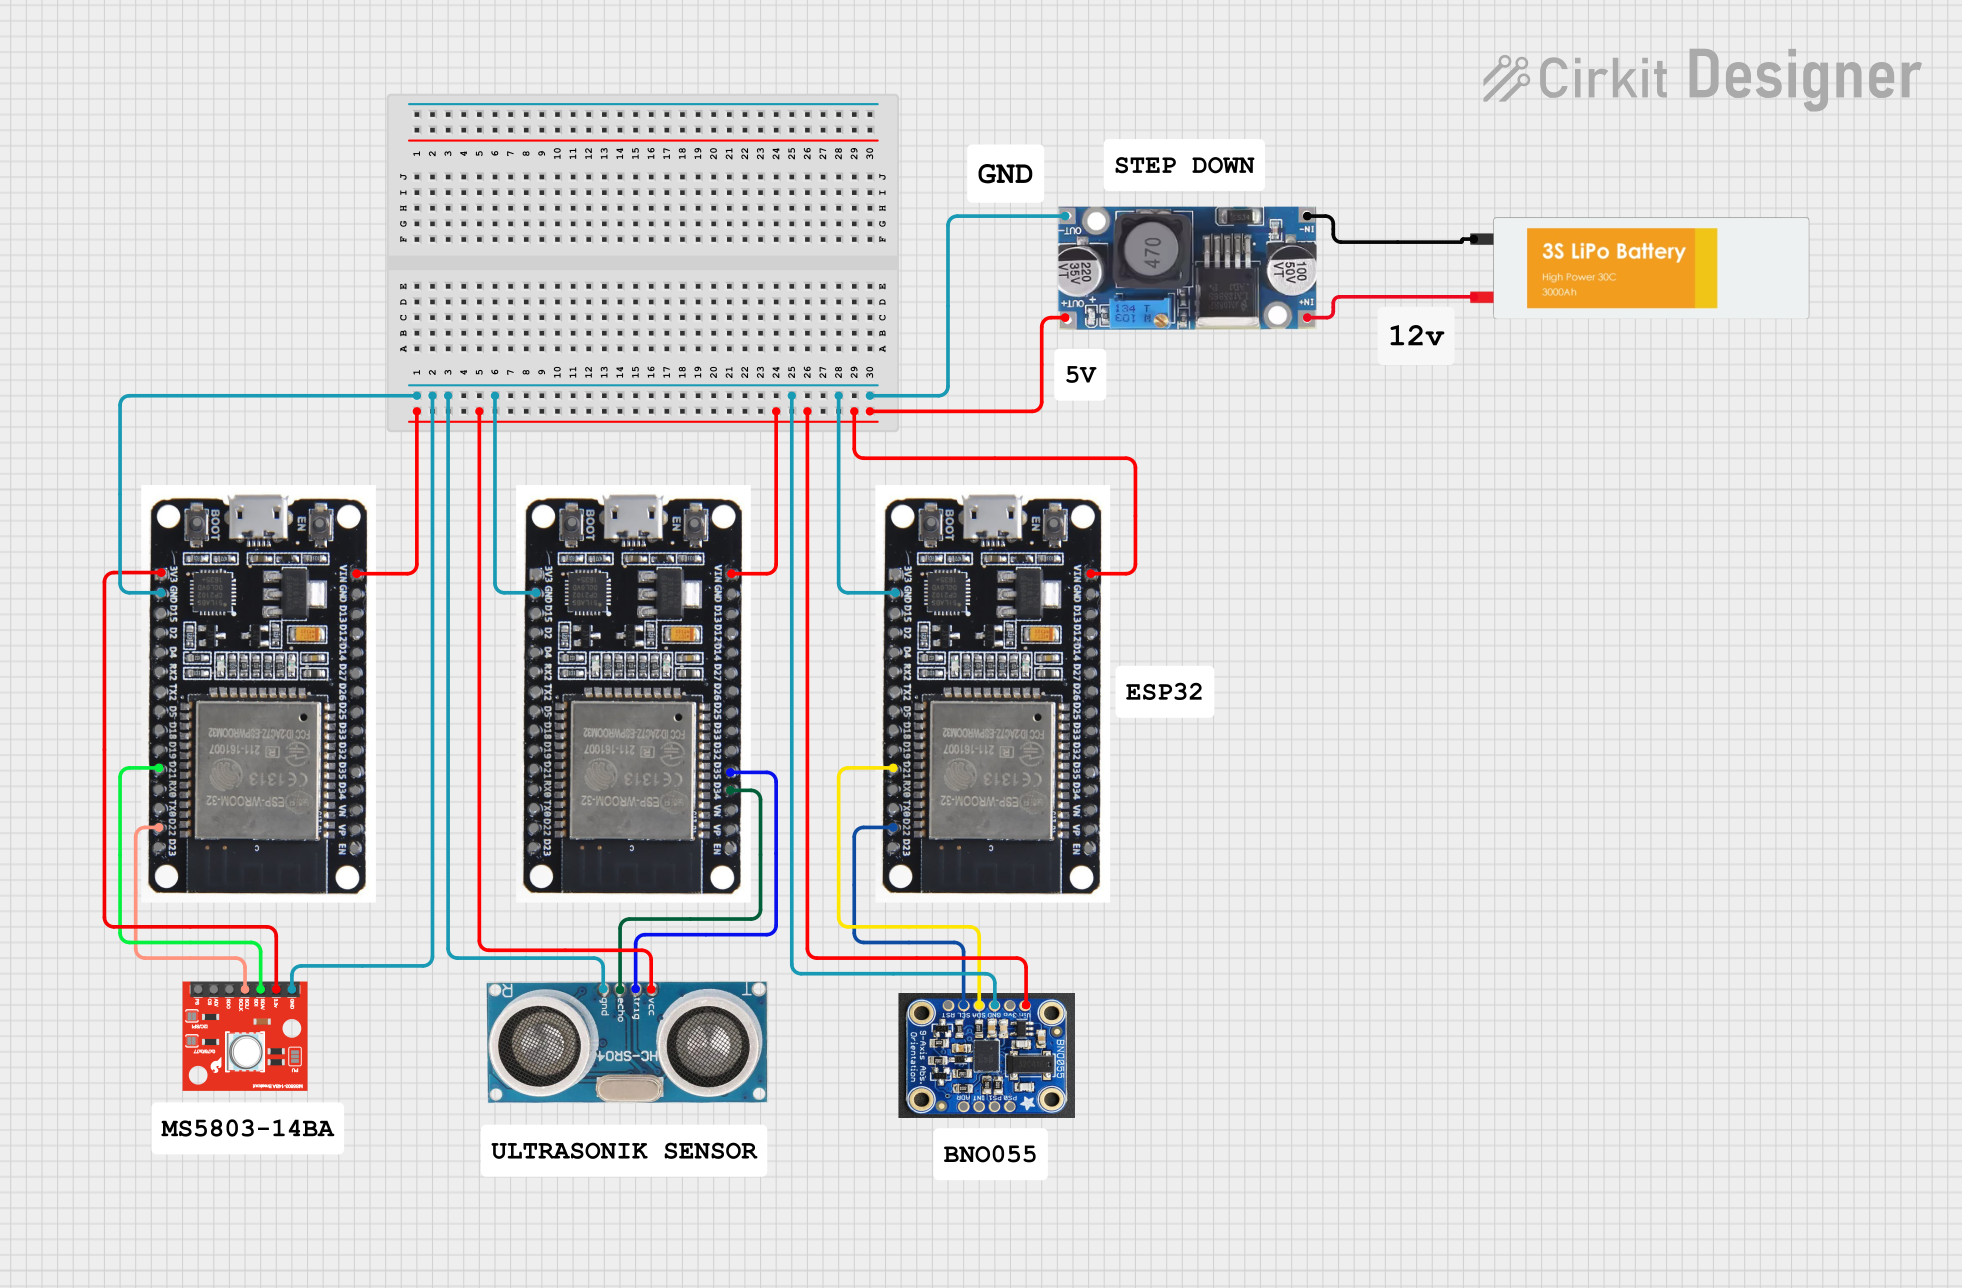
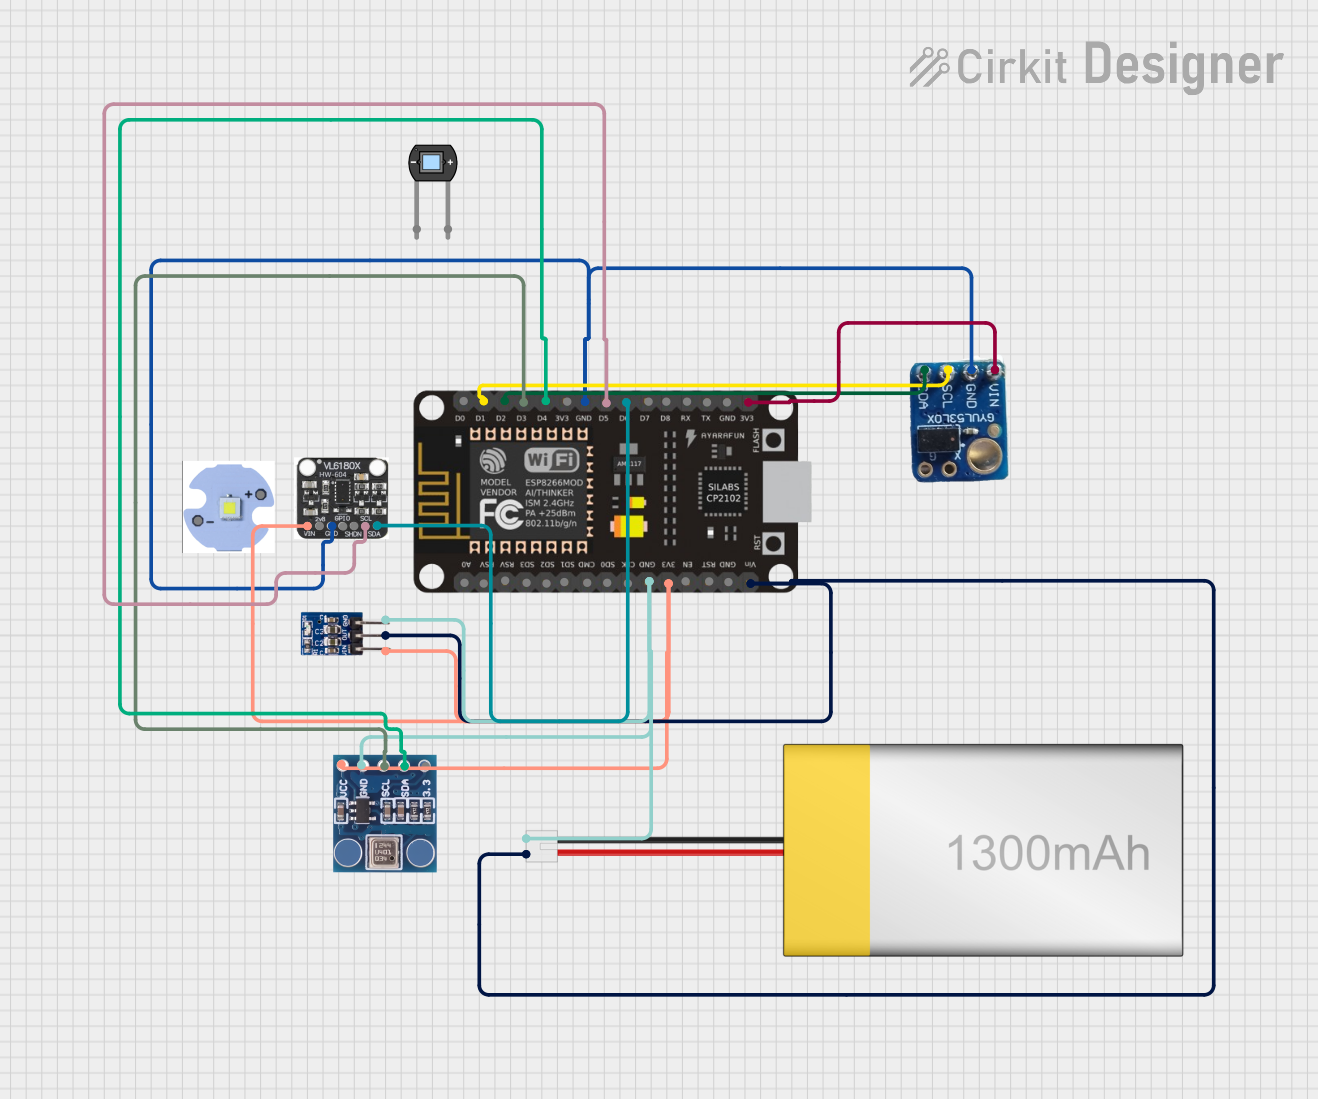
Explore Projects Built with Altitude/Pressure Sensor - MPL3115A2 Breakout
Technical Specifications
Key Features
- Pressure Range: 20 to 110 kPa
- Altitude Range: -300 to +11000 m
- Resolution: 0.1 m for altitude, 0.1 Pa for pressure
- Operating Voltage: 2.5V to 5.5V
- Interface: I2C (up to 400 kHz)
- Integrated temperature sensor
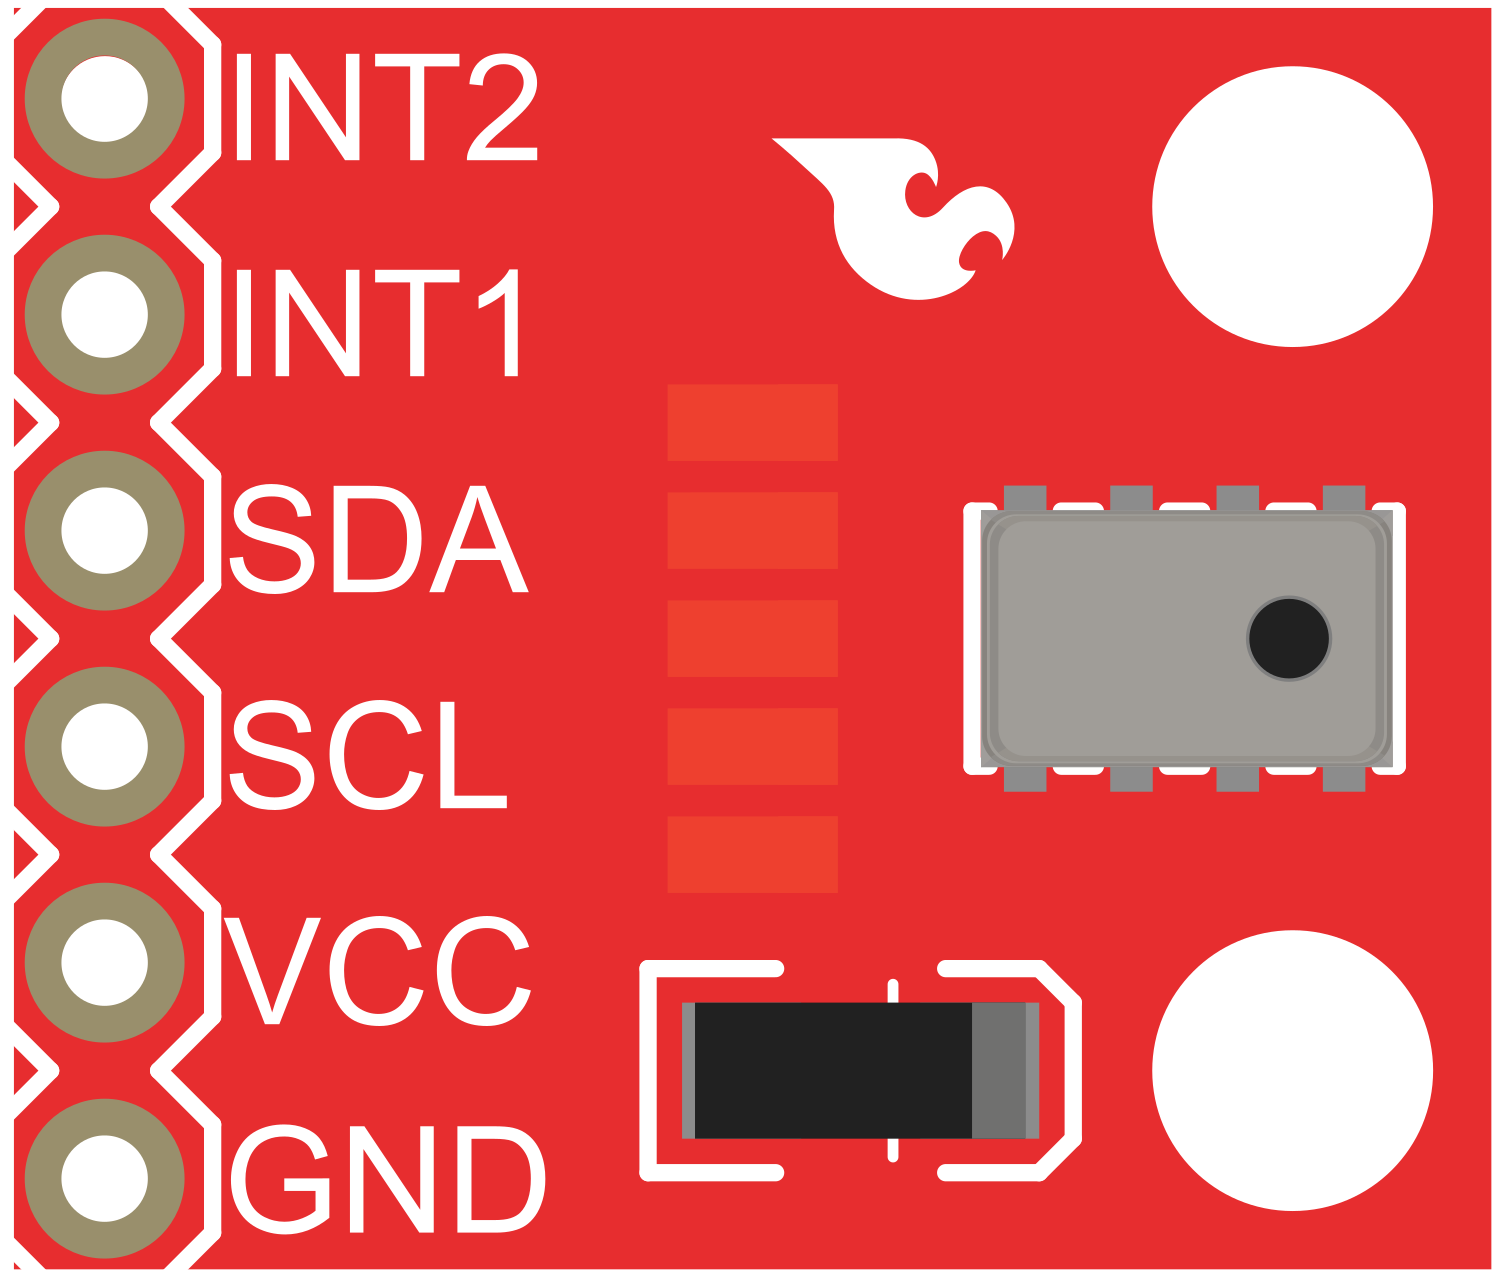
Pin Configuration
| Pin Number | Name | Description |
|---|---|---|
| 1 | VDD | Power supply (2.5V to 5.5V) |
| 2 | GND | Ground connection |
| 3 | SCL | I2C clock line |
| 4 | SDA | I2C data line |
| 5 | INT1 | Interrupt 1 (optional use) |
| 6 | INT2 | Interrupt 2 (optional use) |
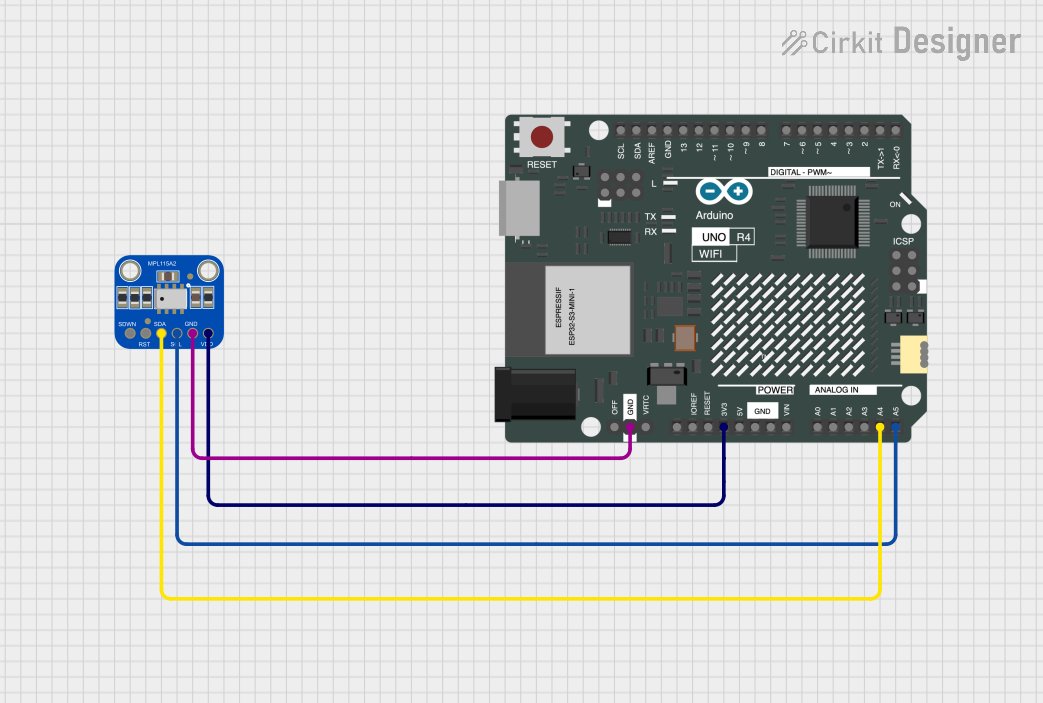
Usage Instructions
Interfacing with Arduino
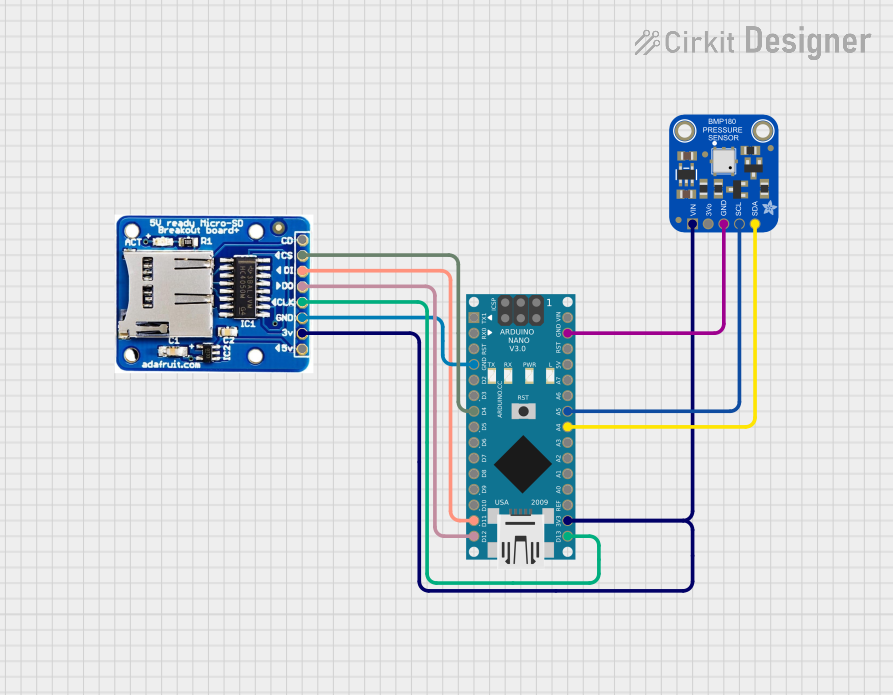
- Power Connections: Connect VDD to the 3.3V output on the Arduino and GND to one of the Arduino's ground pins.
- I2C Connections: Connect SCL to the Arduino's SCL pin and SDA to the Arduino's SDA pin.
- Library Installation: Install a compatible MPL3115A2 library from the Arduino Library Manager.
- Initialization: Initialize the sensor in your code using the library's functions.
Best Practices
- Use pull-up resistors on the I2C lines if they are not included on the breakout board.
- Avoid physical stress and contamination on the sensor to maintain accuracy.
- Ensure that the sensor is not exposed to condensing moisture or corrosive gases.
Example Arduino Code
#include <Wire.h>
#include <MPL3115A2.h> // Include the MPL3115A2 library

MPL3115A2 myPressure; // Create an instance of the MPL3115A2 class

void setup() {
  Serial.begin(9600); // Start serial communication at 9600 baud
  Wire.begin();       // Initialize I2C communication
  myPressure.begin(); // Initialize the sensor

  // Configure the sensor to measure altitude
  myPressure.setModeAltimeter();
  // Enable data flags so that data is ready after measurement
  myPressure.setEventFlags();
}

void loop() {
  // Read altitude from the sensor
  float altitude = myPressure.readAltitude();
  Serial.print("Altitude: ");
  Serial.print(altitude, 1); // Print the altitude with 1 decimal place
  Serial.println(" m");

  // Read pressure from the sensor
  float pressure = myPressure.readPressure();
  Serial.print("Pressure: ");
  Serial.print(pressure, 1); // Print the pressure with 1 decimal place
  Serial.println(" Pa");

  // Read temperature from the sensor
  float temperature = myPressure.readTemp();
  Serial.print("Temperature: ");
  Serial.print(temperature, 1); // Print the temperature with 1 decimal place
  Serial.println(" C");

  delay(1000); // Wait for 1 second before taking the next reading
}
Troubleshooting and FAQs
Common Issues
- Inaccurate Readings: Ensure that the sensor has not been physically damaged and that it is not being affected by environmental factors like moisture or corrosive gases.
- No Data on I2C: Check the wiring, ensure pull-up resistors are in place, and verify that the correct I2C address is being used in your code.
- Intermittent Connection: Inspect solder joints on the breakout board for cold solder or breaks.
FAQs
Q: Can the MPL3115A2 be used with a 5V system? A: Yes, the MPL3115A2 can operate with a supply voltage from 2.5V to 5.5V, but ensure that the I2C logic levels are compatible.
Q: How can I calibrate the sensor? A: Calibration can be done through software using known reference values for altitude and pressure. Consult the sensor's datasheet for detailed procedures.
Q: What is the operating temperature range of the sensor? A: The MPL3115A2 operates within a temperature range of -40°C to +85°C.
Q: How do I use the interrupt pins? A: The INT1 and INT2 pins can be configured to trigger on certain events like data ready or threshold exceedance. Refer to the library documentation and the sensor datasheet for more information on setting up interrupts.
For further assistance, consult the MPL3115A2 datasheet and the library documentation for in-depth technical information and advanced configurations.