How to Use cell: Examples, Pinouts, and Specs
Introduction
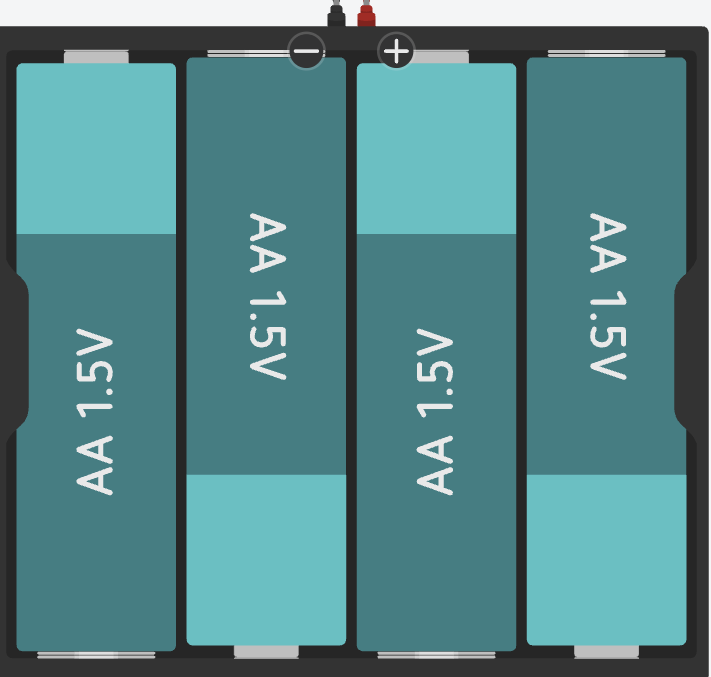
A cell is a basic electrochemical unit that converts chemical energy into electrical energy. The Duracell AA cell is a widely used power source in various electronic devices due to its compact size, reliability, and long-lasting performance. It is commonly found in household electronics, toys, remote controls, flashlights, and portable devices.
Explore Projects Built with cell
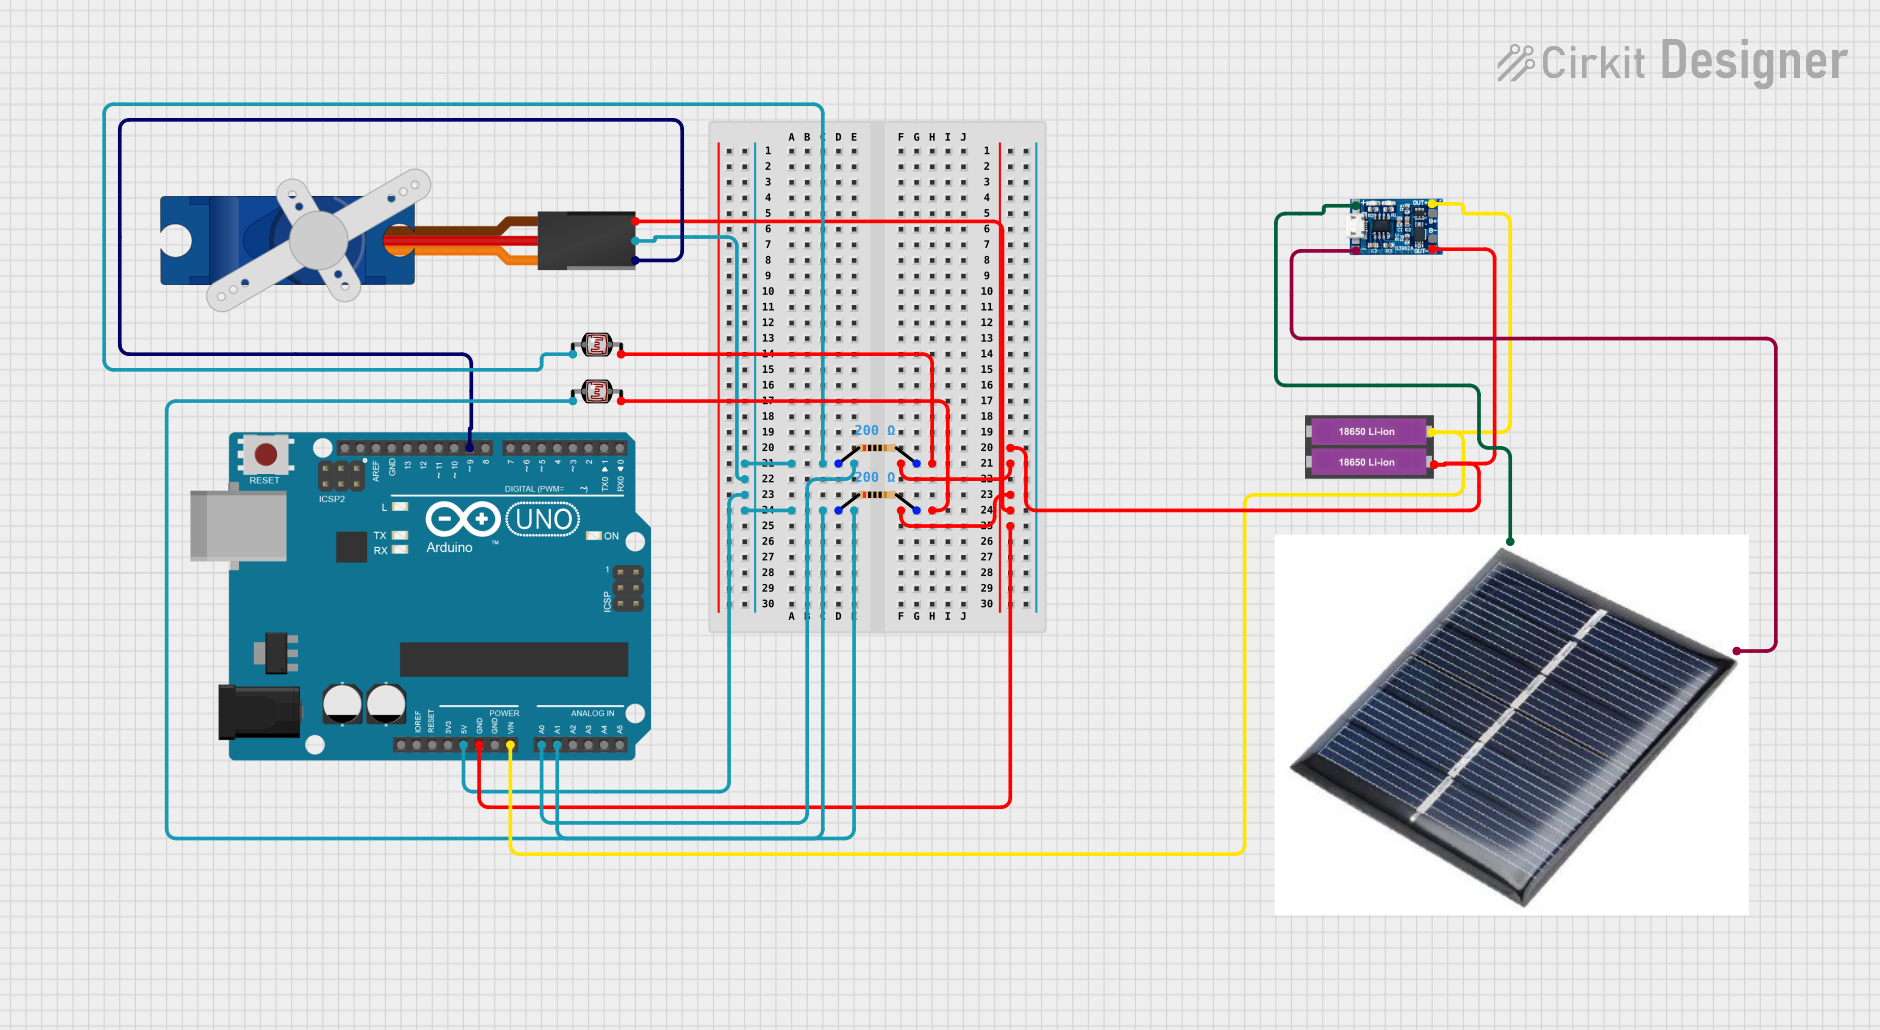
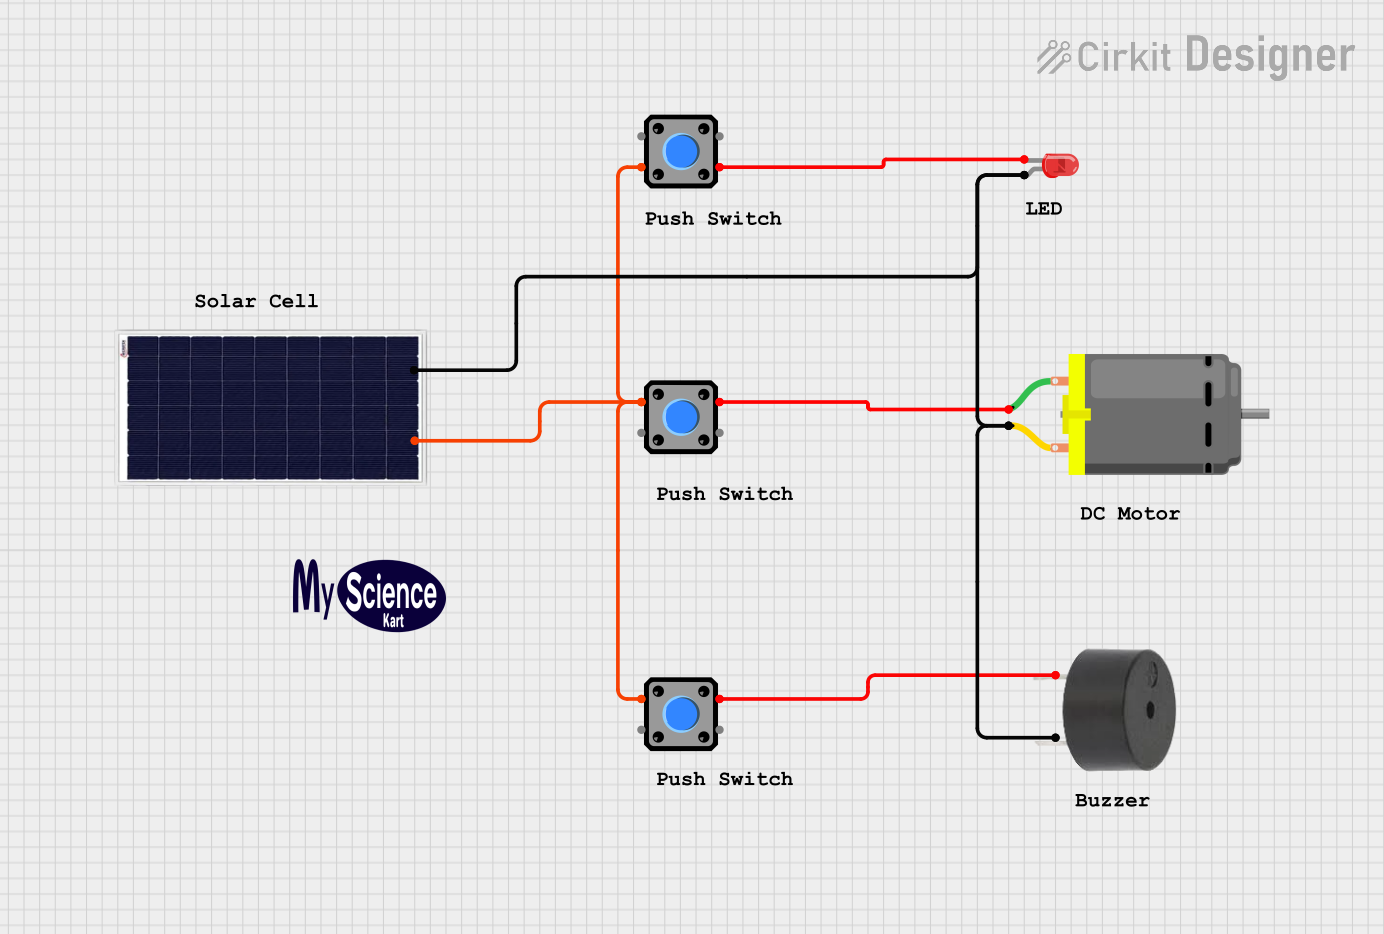
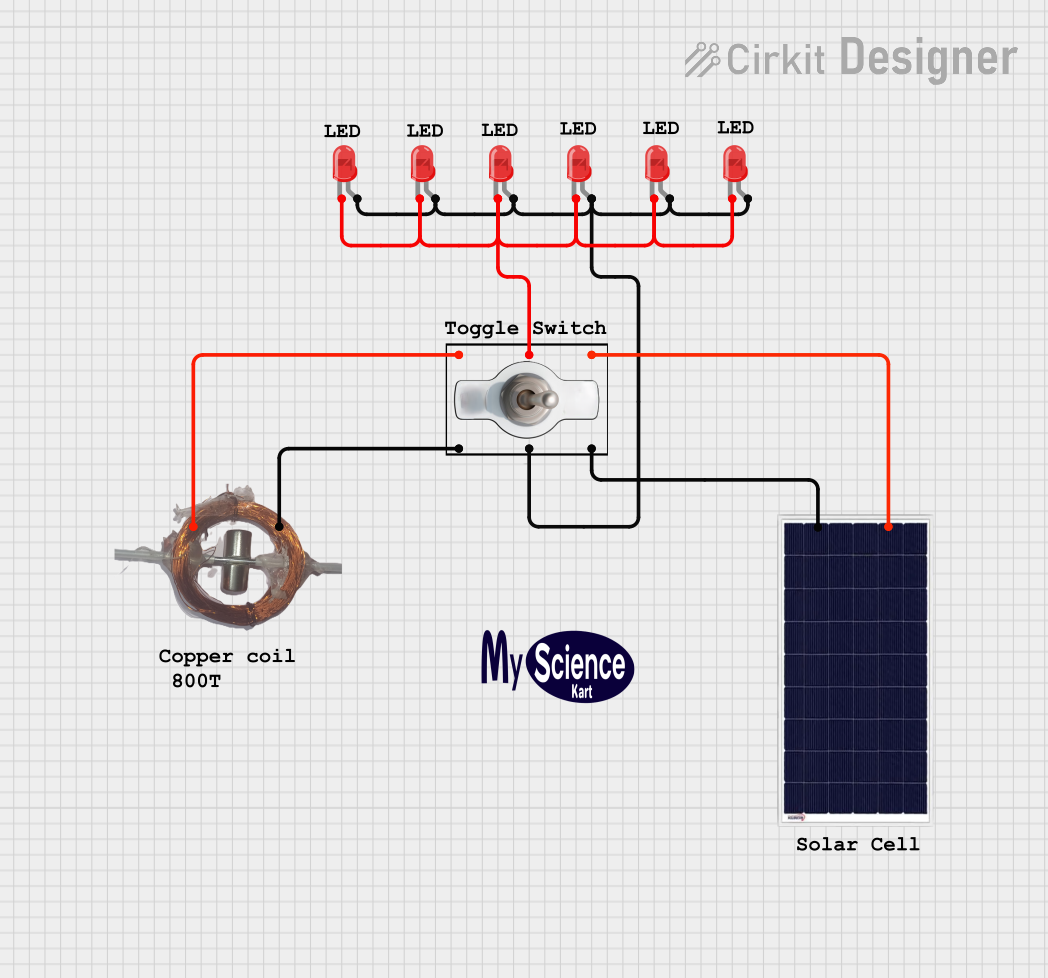
Explore Projects Built with cell
Common Applications
- Remote controls
- Flashlights
- Portable audio devices
- Wireless mice and keyboards
- Toys and handheld gadgets
Technical Specifications
The Duracell AA cell is designed to provide consistent and reliable power for a wide range of devices. Below are its key technical specifications:
| Parameter | Specification |
|---|---|
| Manufacturer | Duracell |
| Part ID | AA |
| Cell Type | Alkaline |
| Nominal Voltage | 1.5V |
| Capacity | ~2850 mAh (varies by usage) |
| Dimensions | 50.5 mm (length) x 14.5 mm (diameter) |
| Weight | ~23 g |
| Operating Temperature | -20°C to 54°C |
| Shelf Life | Up to 10 years |
Pin Configuration and Descriptions
The AA cell has two terminals:
| Terminal | Description |
|---|---|
| Positive (+) | The positive terminal (anode) |
| Negative (-) | The negative terminal (cathode) |
Usage Instructions
How to Use the Component in a Circuit
- Identify the Terminals: The positive terminal is marked with a "+" symbol, and the negative terminal is flat.
- Insert Properly: Ensure the cell is inserted into the device or circuit with the correct polarity. Reversing the polarity may damage the device or prevent it from functioning.
- Connect to a Battery Holder: For circuits, use a battery holder designed for AA cells to secure the cell and provide easy connections to the circuit.
- Voltage Considerations: The nominal voltage of the AA cell is 1.5V. If your circuit requires higher voltage, connect multiple cells in series. For increased capacity, connect cells in parallel.
Important Considerations and Best Practices
- Avoid Short Circuits: Never connect the positive and negative terminals directly, as this can cause overheating or leakage.
- Do Not Recharge: Standard Duracell AA alkaline cells are not rechargeable. Attempting to recharge them may result in leakage or rupture.
- Storage: Store cells in a cool, dry place to maximize shelf life. Avoid exposing them to extreme temperatures.
- Dispose Properly: Follow local regulations for battery disposal or recycling to minimize environmental impact.
Example: Using an AA Cell with an Arduino UNO
To power an Arduino UNO using AA cells, you can use a battery pack with 4 AA cells (providing ~6V). Connect the battery pack to the Arduino's VIN pin and GND pin.
// Example code to blink an LED using an Arduino UNO powered by AA cells

int ledPin = 13; // Pin connected to the onboard LED

void setup() {
  pinMode(ledPin, OUTPUT); // Set the LED pin as an output
}

void loop() {
  digitalWrite(ledPin, HIGH); // Turn the LED on
  delay(1000);               // Wait for 1 second
  digitalWrite(ledPin, LOW);  // Turn the LED off
  delay(1000);               // Wait for 1 second
}
Note: Ensure the total voltage from the AA cells does not exceed the Arduino's input voltage range (7-12V recommended for VIN).
Troubleshooting and FAQs
Common Issues
Device Not Powering On
- Cause: Incorrect polarity or depleted cell.
- Solution: Check the polarity and replace the cell if necessary.
Leakage
- Cause: Over-discharge or exposure to high temperatures.
- Solution: Replace the cell and clean the affected area. Avoid using damaged cells.
Short Battery Life
- Cause: High current draw or using the cell in extreme temperatures.
- Solution: Use a device with lower power consumption or operate within the recommended temperature range.
Corrosion on Terminals
- Cause: Prolonged storage or leakage.
- Solution: Clean the terminals with a dry cloth or mild abrasive. Replace the cell if necessary.
FAQs
Q: Can I use Duracell AA cells in high-drain devices?
A: Yes, Duracell AA cells are suitable for high-drain devices, but for optimal performance, consider using Duracell Quantum or rechargeable NiMH cells.
Q: How can I extend the life of my AA cells?
A: Store them in a cool, dry place, avoid mixing old and new cells, and remove them from devices when not in use for extended periods.
Q: Are Duracell AA cells safe for children’s toys?
A: Yes, they are safe when used as directed. Ensure the battery compartment is secure to prevent accidental ingestion.
Q: Can I mix different brands of AA cells?
A: It is not recommended to mix brands or types of cells, as this can lead to uneven discharge and leakage.
By following these guidelines, you can maximize the performance and lifespan of your Duracell AA cells.