How to Use LilyPad Arduino USB: Examples, Pinouts, and Specs
Introduction
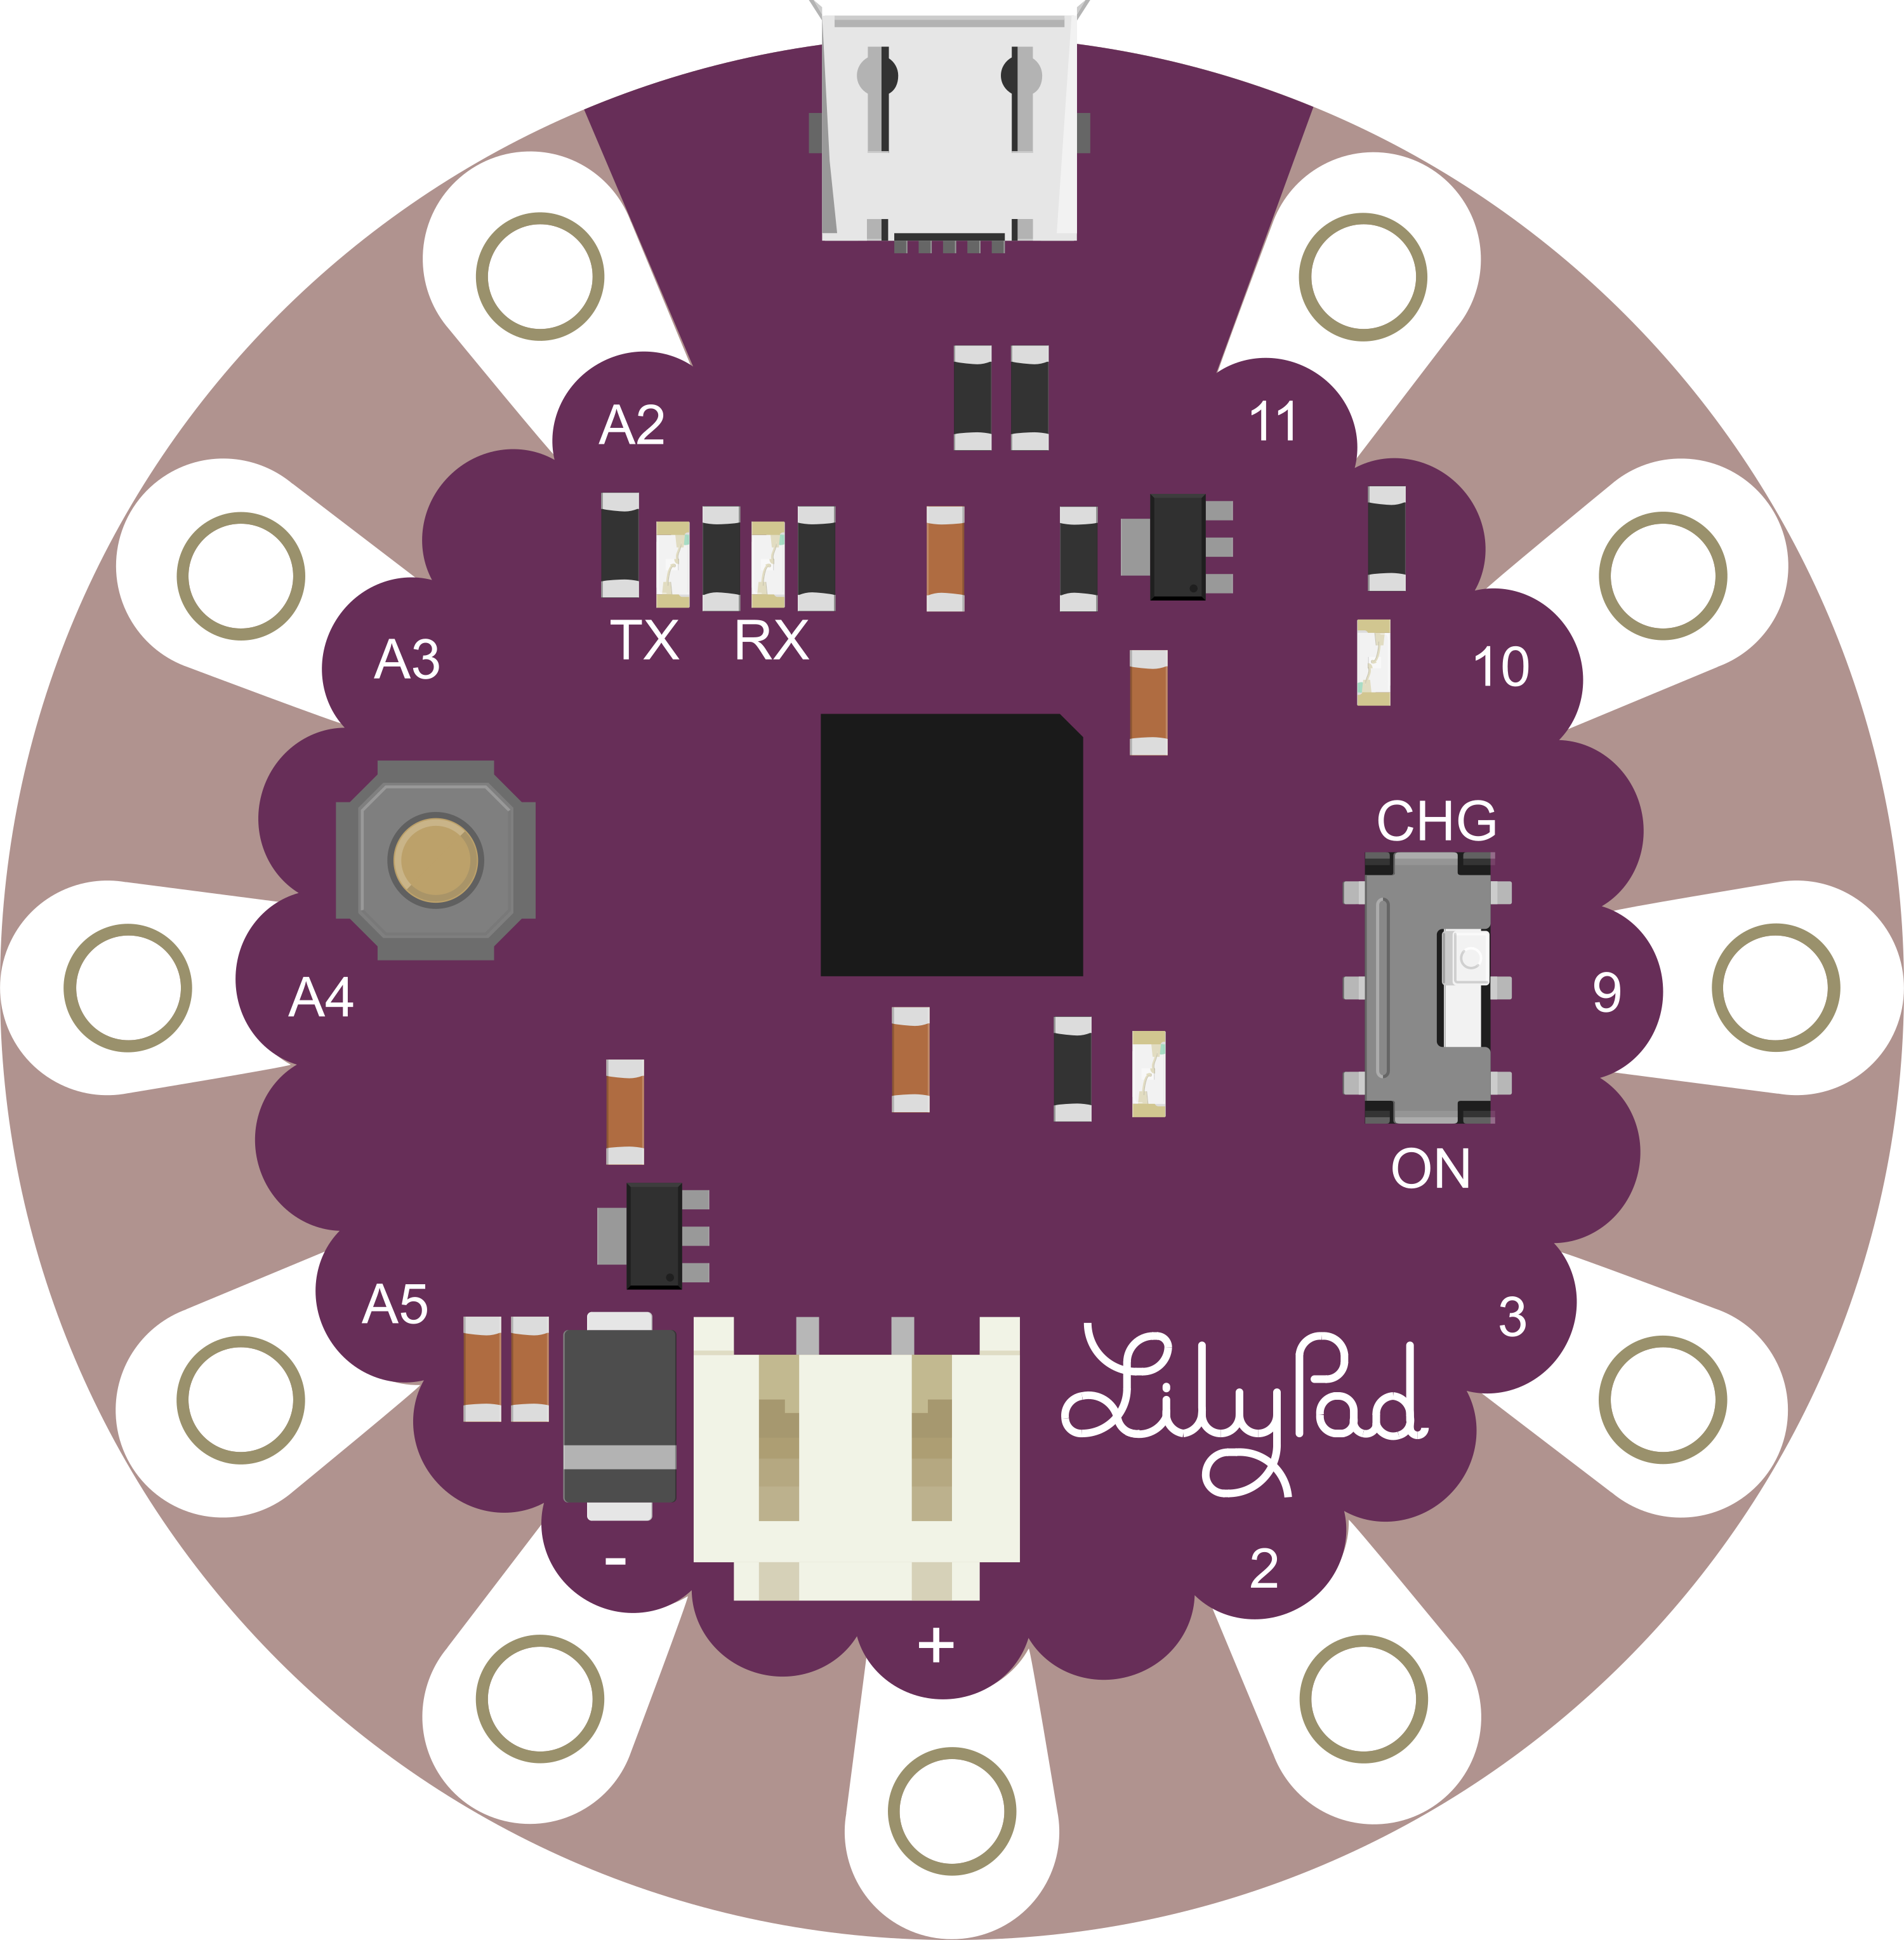
The LilyPad Arduino USB is a microcontroller board designed for integration into textiles and wearable projects. It offers a compact form factor and unique design that allows it to be sewn into clothing and other fabrics with conductive thread. The board is based on the ATmega32U4 microcontroller and features built-in USB communication, eliminating the need for a secondary processor. This makes it ideal for projects that require onboard USB connectivity for programming and communication purposes.
Common applications for the LilyPad Arduino USB include interactive garments, smart accessories, sensor-laden fabrics, and educational projects that introduce electronics and programming through the lens of fashion and design.
Explore Projects Built with LilyPad Arduino USB

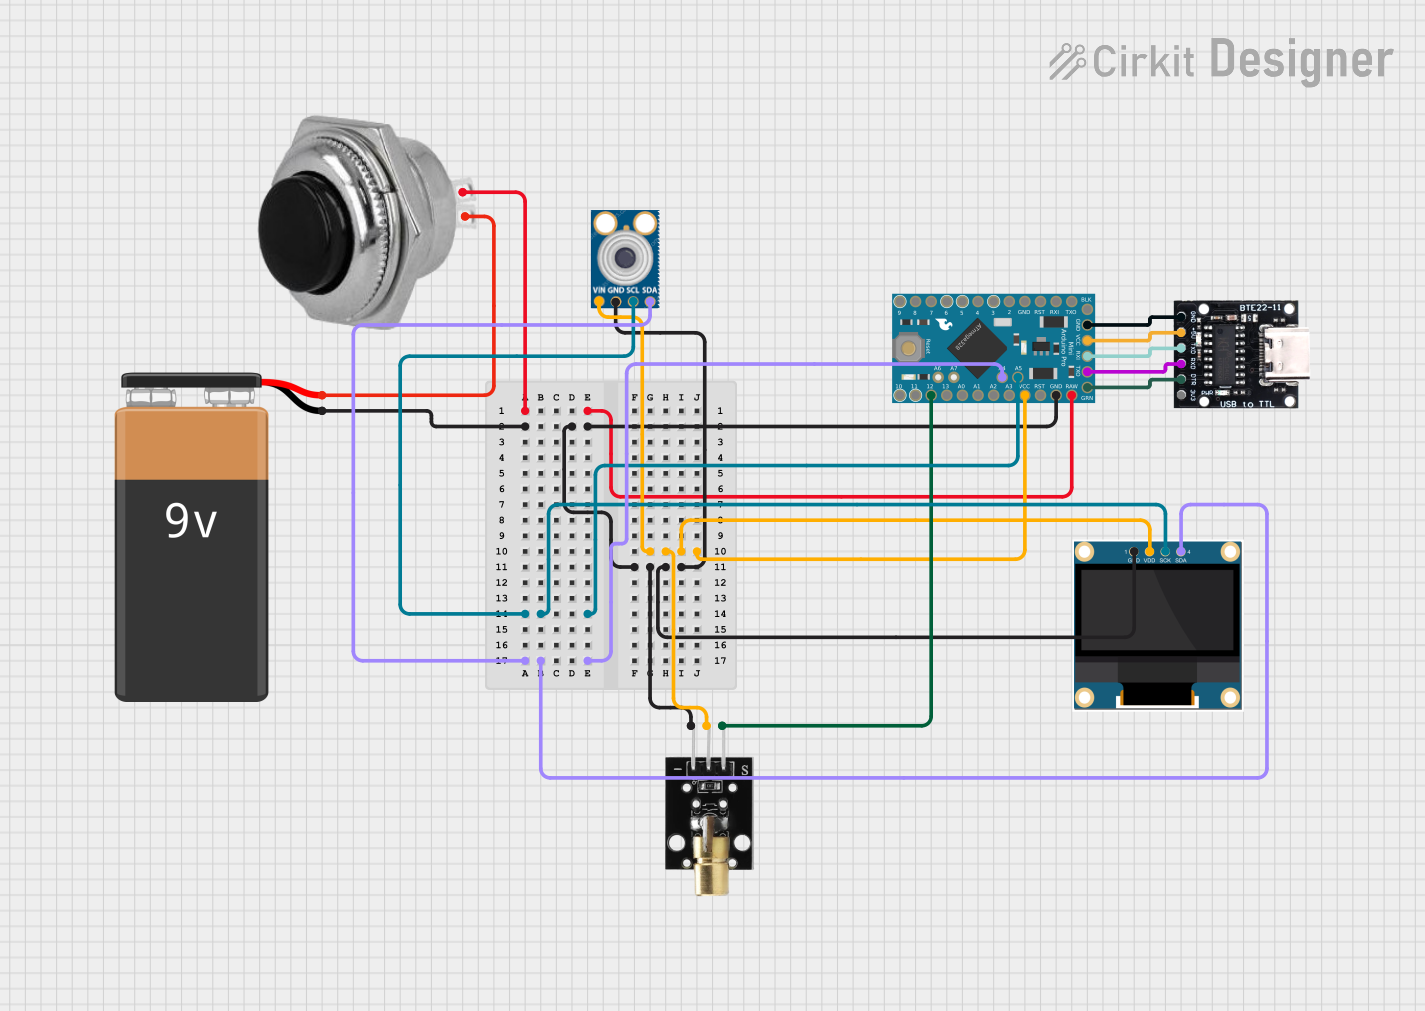
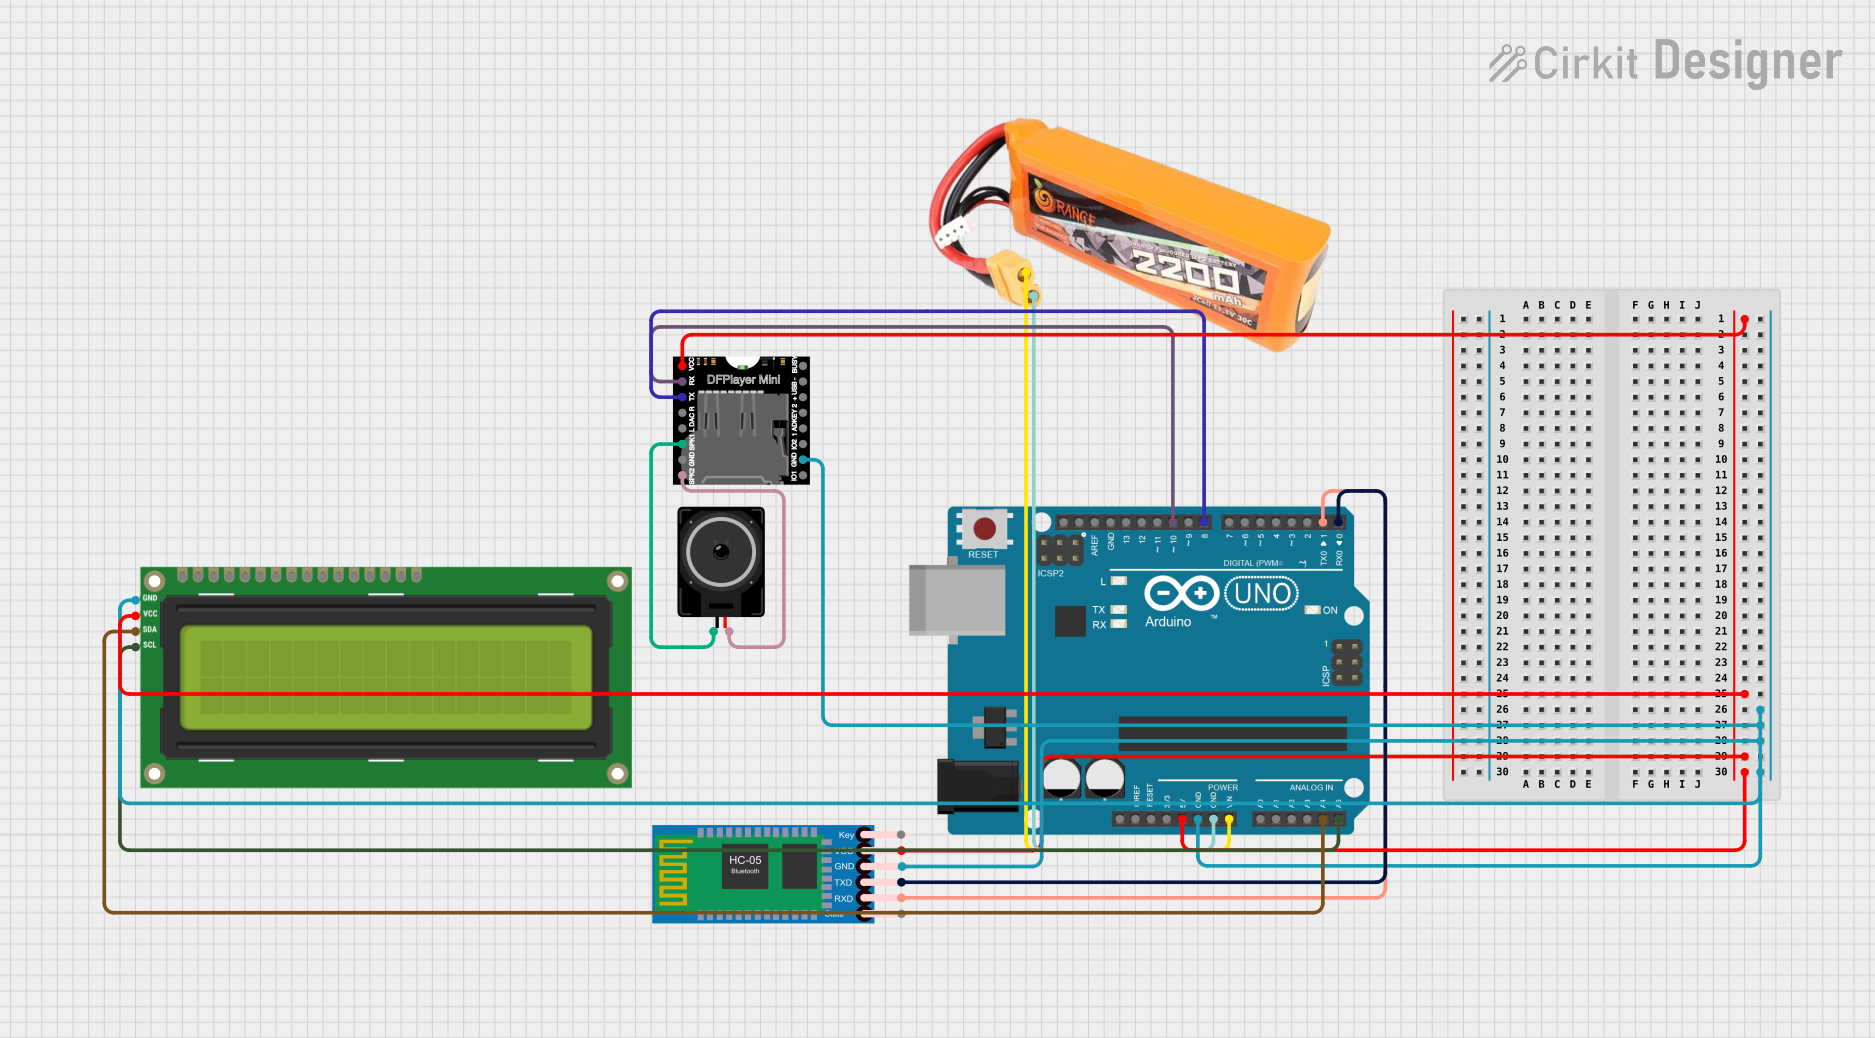
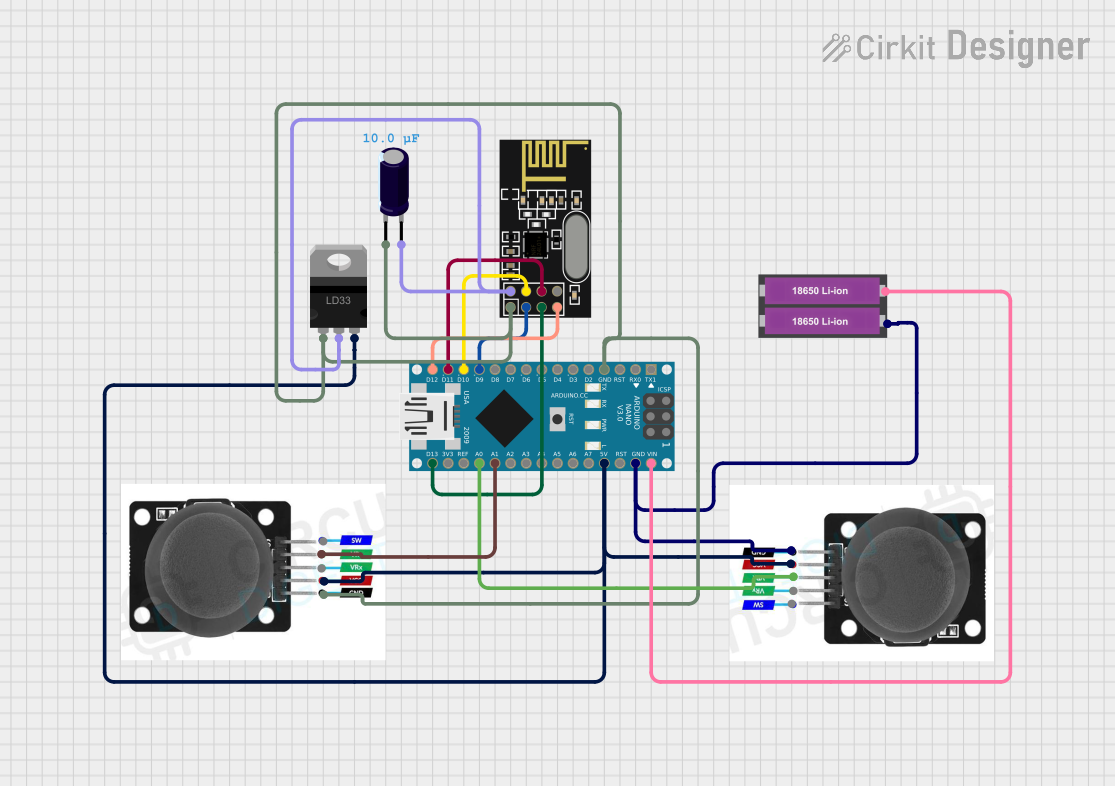
Explore Projects Built with LilyPad Arduino USB
Technical Specifications
Key Technical Details
- Microcontroller: ATmega32U4
- Operating Voltage: 3.3V
- Input Voltage: 3.8V to 5V
- Digital I/O Pins: 9 (of which 4 provide PWM output)
- Analog Input Pins: 4
- DC Current per I/O Pin: 40 mA
- Flash Memory: 32 KB (ATmega32U4) of which 4 KB used by bootloader
- SRAM: 2.5 KB (ATmega32U4)
- EEPROM: 1 KB (ATmega32U4)
- Clock Speed: 8 MHz
- Connectivity: Built-in micro-USB for programming
Pin Configuration and Descriptions
| Pin Number | Function | Description |
|---|---|---|
| 1 | RX/I2C | Serial receive pin, I2C data line |
| 2 | TX/I2C | Serial transmit pin, I2C clock line |
| 3 | Digital I/O | Digital input/output, PWM capable |
| 4 | Digital I/O | Digital input/output, PWM capable |
| 5 | Digital I/O | Digital input/output |
| 6 | Digital I/O | Digital input/output, PWM capable |
| 7 | Digital I/O | Digital input/output, PWM capable |
| 8 | + | Positive power supply (3.3V - 5V) |
| 9 | - | Ground |
| 10 | A0 | Analog input |
| 11 | A1 | Analog input |
| 12 | A2 | Analog input |
| 13 | A3 | Analog input |
| 14 | + | Positive power supply for additional modules |
| 15 | - | Ground for additional modules |
Usage Instructions
Integrating the LilyPad Arduino USB into a Circuit
Powering the LilyPad: Connect a power supply of 3.8V to 5V to the '+' and '-' pins. Ensure the power supply is stable and within the specified voltage range to prevent damage.
Connecting I/O Pins: Use conductive thread or thin wires to connect the digital and analog pins to sensors, actuators, or other components. Be mindful of the current limitations of each pin.
Programming: Connect the board to a computer using a micro-USB cable. Select 'LilyPad Arduino USB' from the Arduino IDE's Board menu. Write and upload your sketches as you would with any other Arduino board.
Best Practices
- Insulation: When sewing with conductive thread, ensure that connections do not touch each other to prevent short circuits.
- Securing Connections: Make sure all connections are secure and well-insulated, especially if the project will undergo movement or flexing.
- Testing: Always test your circuit with a multimeter before powering it up to check for shorts or open circuits.
Example Code for Blinking an LED
// Pin number for the built-in LED
const int ledPin = 13;

void setup() {
  // Set the LED pin as an output
  pinMode(ledPin, OUTPUT);
}

void loop() {
  // Turn the LED on
  digitalWrite(ledPin, HIGH);
  // Wait for one second
  delay(1000);
  // Turn the LED off
  digitalWrite(ledPin, LOW);
  // Wait for one second
  delay(1000);
}
Troubleshooting and FAQs
Common Issues
- Board Not Recognized: Ensure the micro-USB cable is properly connected and the computer's USB port is functioning. Try a different cable or port if necessary.
- Sketch Not Uploading: Check that the correct board and port are selected in the Arduino IDE. Press the reset button on the LilyPad and try uploading again.
- Short Circuits: If the board is not functioning, inspect your circuit for shorts. Use a multimeter to check connectivity.
FAQs
Q: Can I wash my LilyPad Arduino USB project? A: Yes, but you must remove the power supply and ensure the board is completely dry before repowering. Hand washing is recommended, and care should be taken to avoid harsh chemicals and excessive force.
Q: How do I connect multiple components to the LilyPad Arduino USB? A: You can sew or solder connections from the I/O pins to your components. Ensure that you do not exceed the current limits of the pins.
Q: What programming language is used for the LilyPad Arduino USB? A: The LilyPad Arduino USB is programmed using the Arduino IDE, which uses a variant of C/C++.
For further assistance, consult the Arduino forums and the extensive community resources available online.