How to Use 801350 LiPo 500mAh Battery: Examples, Pinouts, and Specs
Introduction
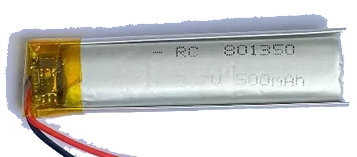
The 801350 LiPo 500mAh Battery is a compact lithium polymer battery designed for applications requiring lightweight and high energy density power sources. With a capacity of 500mAh, it is ideal for powering small electronic devices, drones, wearable technology, and portable gadgets. Its slim form factor and reliable performance make it a popular choice for projects where space and weight are critical considerations.
Explore Projects Built with 801350 LiPo 500mAh Battery


Explore Projects Built with 801350 LiPo 500mAh Battery
Common Applications:
- Drones and quadcopters
- Wearable devices (e.g., fitness trackers, smartwatches)
- Portable electronic gadgets
- IoT devices and sensors
- RC toys and small robotics
Technical Specifications
The following table outlines the key technical details of the 801350 LiPo 500mAh Battery:
| Parameter | Specification |
|---|---|
| Nominal Voltage | 3.7V |
| Capacity | 500mAh |
| Maximum Discharge Rate | 1C (500mA) |
| Charging Voltage | 4.2V ± 0.05V |
| Charging Current | Standard: 0.2C (100mA), Max: 0.5C (250mA) |
| Dimensions | 8mm (thickness) x 13mm (width) x 50mm (length) |
| Weight | ~12g |
| Connector Type | JST-PH 2.0 (commonly used) |
| Protection Circuit | Built-in overcharge and over-discharge protection |
Pin Configuration
The 801350 LiPo battery typically comes with a JST-PH 2.0 connector. The pinout is as follows:
| Pin | Description |
|---|---|
| Red | Positive terminal (+) |
| Black | Negative terminal (-) |
Usage Instructions
How to Use the 801350 LiPo Battery in a Circuit
- Connection: Connect the battery to your circuit using the JST-PH 2.0 connector. Ensure the polarity matches the circuit's power input (red to positive, black to negative).
- Charging: Use a LiPo-compatible charger to charge the battery. Ensure the charger outputs a constant voltage of 4.2V and does not exceed the maximum charging current of 250mA.
- Discharge: Avoid discharging the battery below 3.0V to prevent damage. Most devices with LiPo batteries include a low-voltage cutoff to protect the battery.
- Mounting: Secure the battery in your device using double-sided tape or a battery holder. Avoid puncturing or bending the battery.
Important Considerations and Best Practices
- Safety: Never short-circuit the battery terminals, as this can cause overheating or damage.
- Storage: Store the battery at room temperature and at a charge level of around 50% for long-term storage.
- Handling: Avoid exposing the battery to water, fire, or extreme temperatures.
- Charging: Always use a charger specifically designed for LiPo batteries to prevent overcharging or overheating.
Example: Using the Battery with an Arduino UNO
To power an Arduino UNO with the 801350 LiPo battery, you can use a DC-DC boost converter to step up the 3.7V to 5V. Below is an example circuit and code to read the battery voltage using the Arduino's analog input:
Circuit:
- Connect the battery to the input of the DC-DC boost converter.
- Connect the output of the boost converter to the Arduino's 5V and GND pins.
- Use a voltage divider circuit to measure the battery voltage and connect it to an analog pin (e.g., A0).
Code:
// Define the analog pin connected to the voltage divider
const int batteryPin = A0;

// Voltage divider resistor values (in ohms)
const float R1 = 10000.0; // Resistor connected to battery positive
const float R2 = 10000.0; // Resistor connected to ground

void setup() {
  Serial.begin(9600); // Initialize serial communication
}

void loop() {
  int rawValue = analogRead(batteryPin); // Read the analog value
  float voltage = (rawValue / 1023.0) * 5.0; // Convert to voltage (Arduino 5V ADC)

  // Calculate the actual battery voltage using the voltage divider formula
  float batteryVoltage = voltage * (R1 + R2) / R2;

  // Print the battery voltage to the Serial Monitor
  Serial.print("Battery Voltage: ");
  Serial.print(batteryVoltage);
  Serial.println(" V");

  delay(1000); // Wait for 1 second before the next reading
}
Troubleshooting and FAQs
Common Issues
Battery Not Charging:
- Cause: Charger not compatible or faulty.
- Solution: Ensure the charger is designed for LiPo batteries and outputs 4.2V.
Battery Drains Quickly:
- Cause: Excessive current draw or aging battery.
- Solution: Check the current draw of your circuit and ensure it does not exceed 500mA. Replace the battery if it is old or damaged.
Battery Swells or Overheats:
- Cause: Overcharging, over-discharging, or physical damage.
- Solution: Stop using the battery immediately and dispose of it safely.
Arduino Not Powering On:
- Cause: Insufficient voltage from the battery.
- Solution: Use a DC-DC boost converter to step up the voltage to 5V.
FAQs
Can I use this battery for high-current applications?
- No, the maximum discharge rate is 1C (500mA). For higher currents, consider a battery with a higher capacity or discharge rating.
How long does it take to charge the battery?
- At the standard charging current of 100mA, it takes approximately 5 hours to fully charge. At the maximum charging current of 250mA, it takes about 2 hours.
Is the battery safe to use in outdoor environments?
- The battery is not waterproof or weatherproof. Use it in a protective enclosure if exposed to outdoor conditions.
Can I connect multiple batteries in series or parallel?
- Yes, but ensure proper balancing and protection circuits are used to avoid overcharging or over-discharging.
By following this documentation, you can safely and effectively use the 801350 LiPo 500mAh Battery in your projects.