How to Use uv: Examples, Pinouts, and Specs

Introduction
A UV (ultraviolet) light source is an electronic component that emits ultraviolet radiation, typically in the wavelength range of 100 nm to 400 nm. UV light sources are widely used in various applications, including sterilization of surfaces, water, and air, curing of adhesives and coatings, and phototherapy for medical treatments. These components are available in different forms, such as UV LEDs, mercury vapor lamps, and excimer lamps, depending on the specific application requirements.
Common applications and use cases:
- Sterilization and disinfection: Kills bacteria, viruses, and other pathogens.
- Curing of materials: Used in industrial processes to harden adhesives, inks, and coatings.
- Phototherapy: Treats skin conditions like psoriasis and vitiligo.
- Forensics and counterfeit detection: Identifies substances or markings visible only under UV light.
- Scientific research: Used in spectroscopy and fluorescence studies.
Explore Projects Built with uv

Explore Projects Built with uv
Technical Specifications
The following specifications are for a typical UV LED light source. Specifications may vary depending on the manufacturer and model.
Key Technical Details
- Wavelength Range: 280 nm to 400 nm (UVA and UVB spectrum)
- Forward Voltage: 3.0 V to 4.0 V
- Forward Current: 20 mA to 350 mA (depending on power rating)
- Power Output: 1 mW to 10 W
- Viewing Angle: 120° (typical for LEDs)
- Operating Temperature: -30°C to 85°C
- Lifespan: Up to 10,000 hours (for UV LEDs)
Pin Configuration and Descriptions
For a standard UV LED, the pin configuration is as follows:
| Pin | Name | Description |
|---|---|---|
| 1 | Anode (+) | Connect to the positive terminal of the power supply. |
| 2 | Cathode (-) | Connect to the negative terminal or ground. |
For other types of UV light sources, such as mercury vapor lamps, refer to the manufacturer's datasheet for pinout details.
Usage Instructions
How to Use the Component in a Circuit
- Power Supply: Ensure the power supply matches the forward voltage and current requirements of the UV light source. For UV LEDs, use a constant current driver to prevent overdriving the LED.
- Current Limiting Resistor: If using a UV LED, include a resistor in series to limit the current. Calculate the resistor value using Ohm's Law: [ R = \frac{V_{supply} - V_{forward}}{I_{forward}} ] where ( V_{supply} ) is the supply voltage, ( V_{forward} ) is the forward voltage of the LED, and ( I_{forward} ) is the desired forward current.
- Heat Management: UV light sources can generate significant heat. Use a heatsink or active cooling to maintain safe operating temperatures.
- Safety Precautions: UV light can be harmful to skin and eyes. Always use protective gear, such as UV-blocking goggles and gloves, when handling or operating the component.
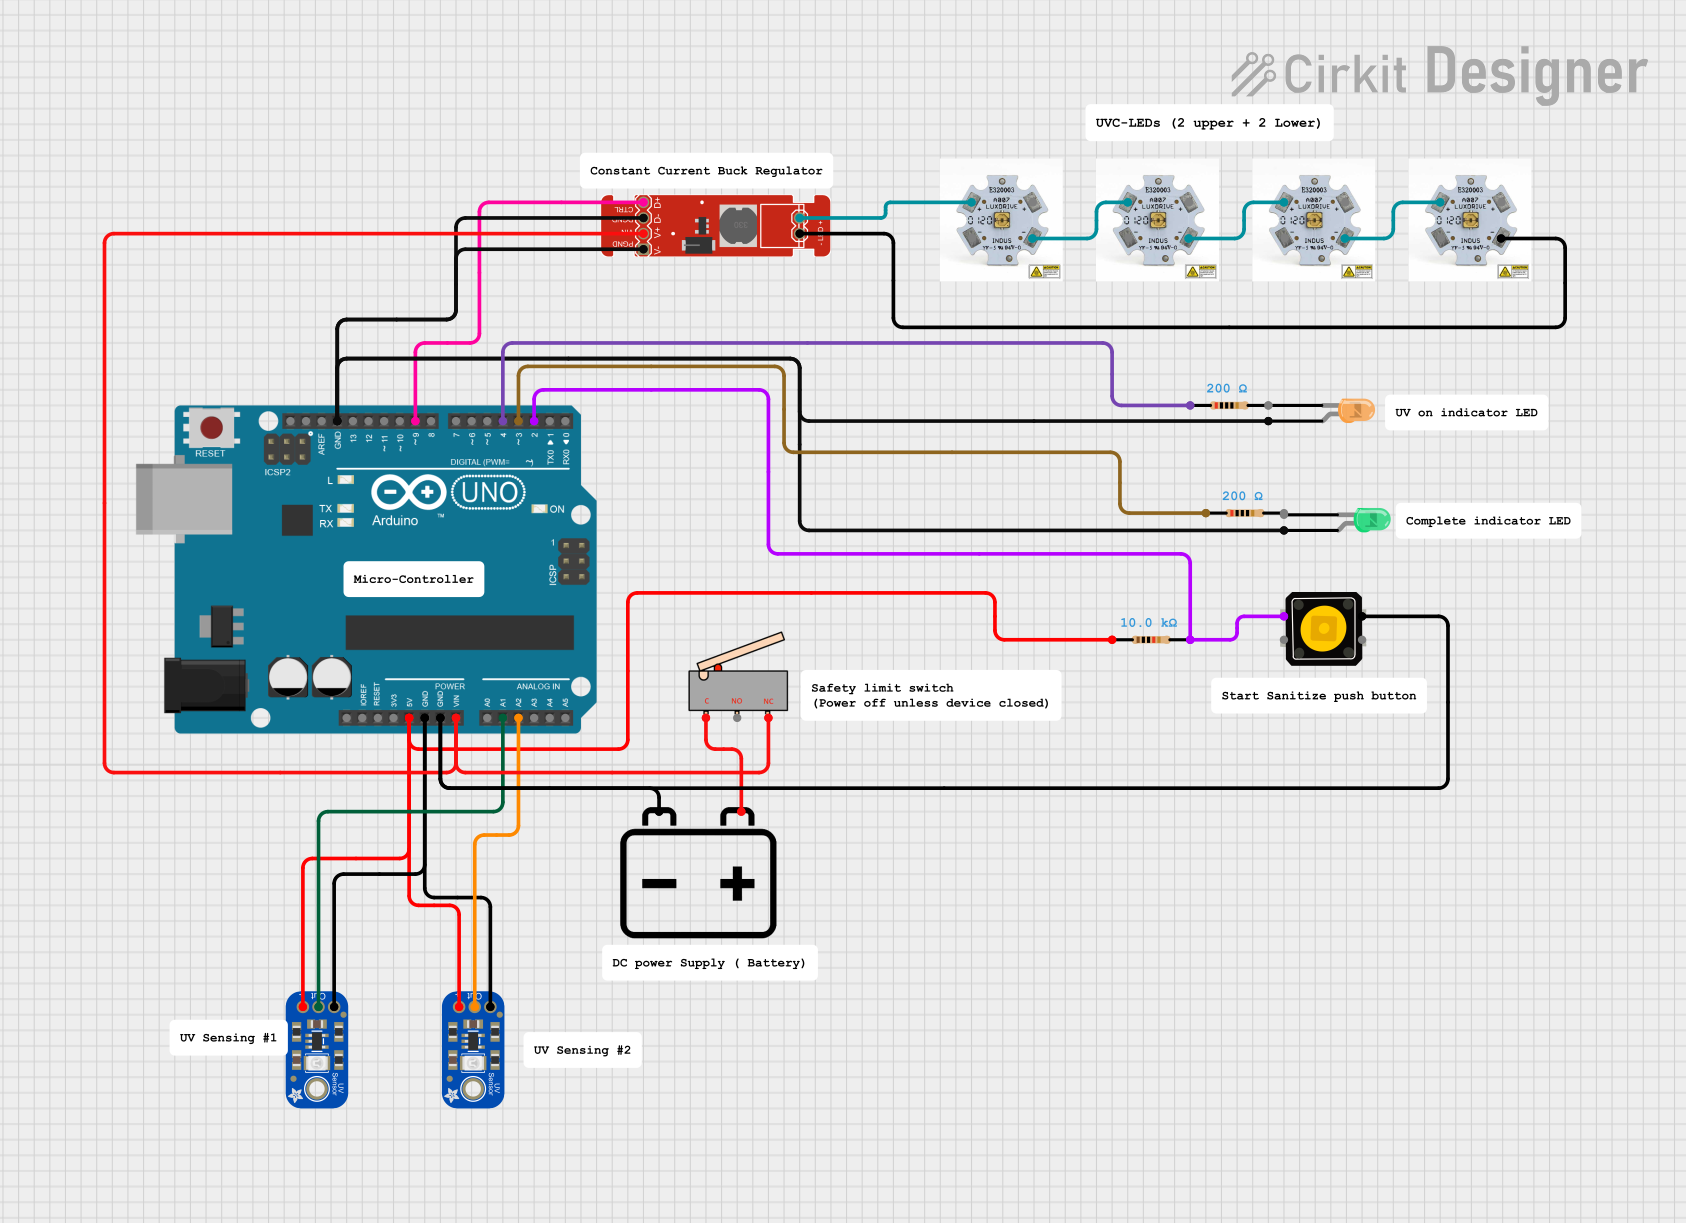
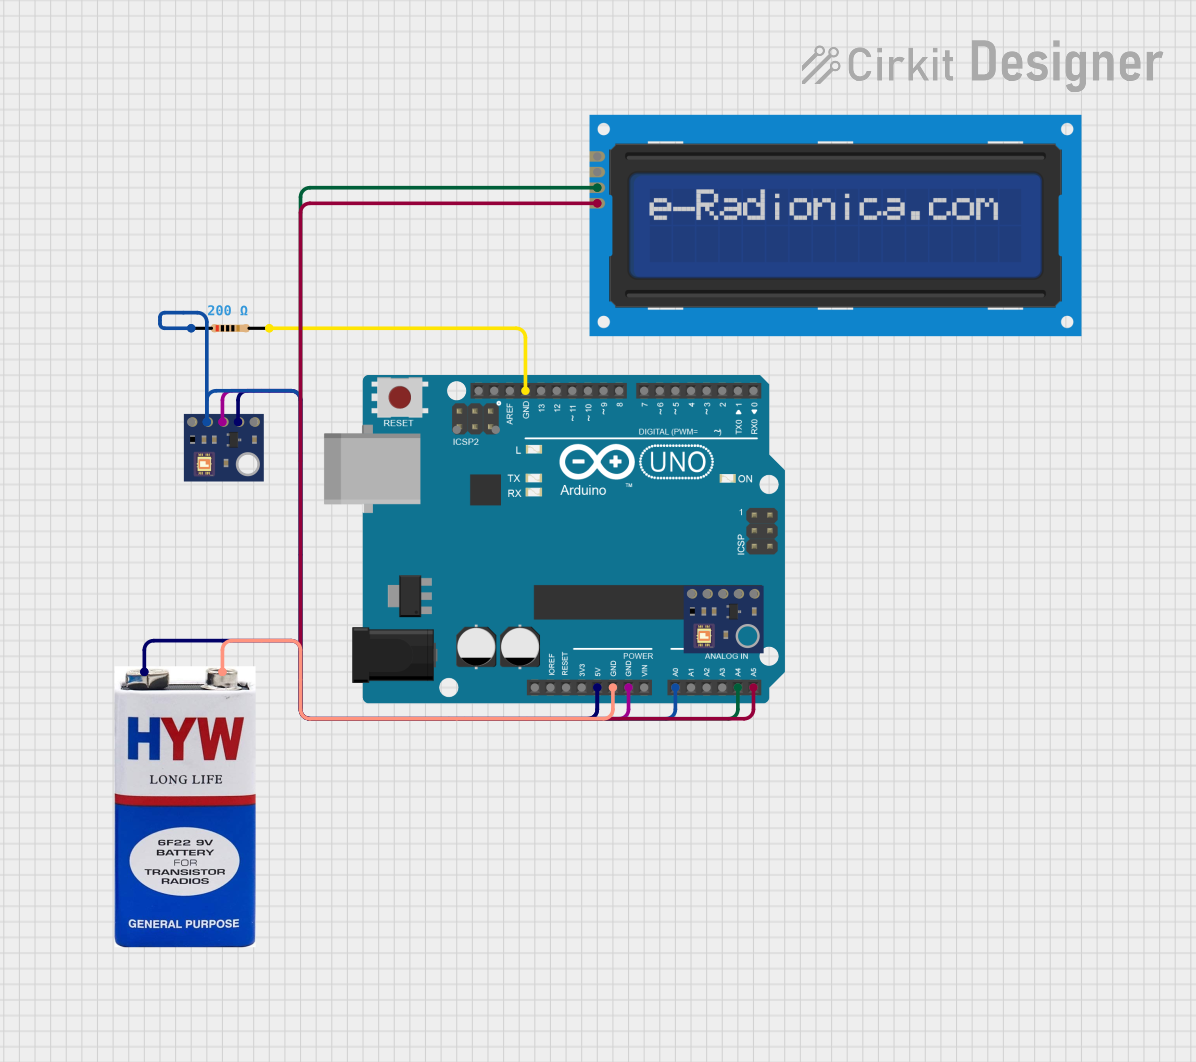
Example: Connecting a UV LED to an Arduino UNO
Below is an example of how to control a UV LED using an Arduino UNO. The LED is connected to a digital pin via a current-limiting resistor.
Circuit Diagram
- Connect the anode of the UV LED to a 220-ohm resistor.
- Connect the other end of the resistor to digital pin 9 on the Arduino.
- Connect the cathode of the UV LED to the Arduino's GND pin.
Code Example
// UV LED Control with Arduino UNO
// This code turns the UV LED on for 1 second and off for 1 second in a loop.

const int uvLedPin = 9; // Pin connected to the UV LED

void setup() {
  pinMode(uvLedPin, OUTPUT); // Set the UV LED pin as an output
}

void loop() {
  digitalWrite(uvLedPin, HIGH); // Turn on the UV LED
  delay(1000); // Wait for 1 second
  digitalWrite(uvLedPin, LOW); // Turn off the UV LED
  delay(1000); // Wait for 1 second
}
Important Considerations and Best Practices
- Avoid Overdriving: Exceeding the rated current can damage the UV light source.
- UV Exposure: Minimize direct exposure to UV light to prevent harm to skin and eyes.
- Ventilation: Ensure proper ventilation when using UV light sources in enclosed spaces to avoid heat buildup.
- Power Supply Stability: Use a stable power supply to prevent voltage fluctuations that could damage the component.
Troubleshooting and FAQs
Common Issues and Solutions
UV Light Does Not Turn On
- Cause: Incorrect wiring or insufficient power supply.
- Solution: Double-check the wiring and ensure the power supply meets the voltage and current requirements.
UV LED Flickering
- Cause: Unstable power supply or loose connections.
- Solution: Use a regulated power supply and secure all connections.
Excessive Heat
- Cause: Prolonged operation without proper cooling.
- Solution: Add a heatsink or active cooling to dissipate heat effectively.
Reduced UV Intensity Over Time
- Cause: Degradation of the UV light source due to prolonged use.
- Solution: Replace the UV light source if the intensity drops below acceptable levels.
FAQs
Q: Can I use a UV LED with a battery?
- A: Yes, but ensure the battery voltage and current output match the LED's requirements. Use a resistor or driver circuit to limit current.
Q: How do I measure the UV intensity?
- A: Use a UV light meter or a photodiode calibrated for UV wavelengths.
Q: Is UV light harmful?
- A: Yes, prolonged exposure can damage skin and eyes. Always use protective equipment when working with UV light sources.
Q: Can I dim a UV LED?
- A: Yes, you can use pulse-width modulation (PWM) to control the brightness of a UV LED.
This documentation provides a comprehensive guide to understanding, using, and troubleshooting UV light sources. Always refer to the manufacturer's datasheet for specific details about your component.