How to Use 1 gang metal clad socket: Examples, Pinouts, and Specs
Introduction
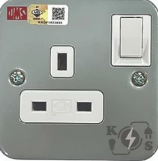
A 1 gang metal clad socket is a robust electrical outlet designed to accommodate a single plug. Constructed from durable metal, it offers enhanced protection against physical damage, wear, and environmental factors. This makes it ideal for industrial, commercial, and outdoor applications where durability and safety are paramount. Its sturdy design ensures reliable performance in demanding environments, such as workshops, factories, and garages.
Explore Projects Built with 1 gang metal clad socket


Explore Projects Built with 1 gang metal clad socket
Common Applications and Use Cases
- Industrial environments requiring durable electrical outlets
- Outdoor installations where weather resistance is essential
- Workshops and garages with heavy-duty electrical equipment
- Commercial spaces with high foot traffic or potential for physical impact
Technical Specifications
Key Technical Details
| Parameter | Specification |
|---|---|
| Material | Metal (typically steel or aluminum) |
| Number of Gangs | 1 |
| Voltage Rating | 220-250V AC (varies by region) |
| Current Rating | 13A (standard for most regions) |
| Socket Type | BS 1363 (UK) or other regional types |
| Mounting Type | Surface-mounted |
| IP Rating (Ingress Protection) | IP20 to IP66 (varies by model) |
| Dimensions | Typically 86mm x 86mm x 45mm |
| Earth Terminal | Yes (for safety grounding) |
Pin Configuration and Descriptions
The 1 gang metal clad socket typically follows the BS 1363 standard (UK) or other regional standards. Below is the pin configuration for a BS 1363 socket:
| Pin Name | Description |
|---|---|
| Live (L) | Supplies the active phase of the AC voltage. |
| Neutral (N) | Completes the circuit for current flow. |
| Earth (E) | Provides safety grounding to prevent shocks. |
Usage Instructions
How to Use the Component in a Circuit
Preparation:
- Ensure the power supply is turned off before installation.
- Verify that the socket's voltage and current ratings match the intended application.
Wiring:
- Connect the Live (L) wire to the terminal marked "L."
- Connect the Neutral (N) wire to the terminal marked "N."
- Connect the Earth (E) wire to the terminal marked "E" or the grounding terminal.
- Use appropriate cable sizes (e.g., 2.5mm² for 13A circuits) to ensure safe operation.
Mounting:
- Secure the metal clad socket to a surface using screws and ensure it is firmly fixed.
- Use a back box if required, ensuring it is compatible with the socket dimensions.
Testing:
- After installation, test the socket using a plug-in socket tester to verify correct wiring.
- Turn on the power supply and check for proper operation.
Important Considerations and Best Practices
- Always follow local electrical codes and regulations during installation.
- Use a Residual Current Device (RCD) for additional safety in outdoor or wet environments.
- Ensure the metal casing is properly grounded to prevent electrical shocks.
- Avoid overloading the socket by connecting devices that exceed the rated current (13A).
- For outdoor use, select a model with a high IP rating (e.g., IP66) to protect against water and dust.
Arduino UNO Compatibility
While a 1 gang metal clad socket is not directly connected to an Arduino UNO, it can be used in projects where the Arduino controls devices powered through the socket. For example, you can use a relay module to control the socket's power supply. Below is an example code snippet for controlling a relay connected to an Arduino:
// Example: Controlling a relay to switch a 1 gang metal clad socket
const int relayPin = 7; // Pin connected to the relay module

void setup() {
  pinMode(relayPin, OUTPUT); // Set relay pin as output
  digitalWrite(relayPin, LOW); // Ensure relay is off at startup
}

void loop() {
  // Turn the socket ON
  digitalWrite(relayPin, HIGH); // Activate relay
  delay(5000); // Keep socket ON for 5 seconds

  // Turn the socket OFF
  digitalWrite(relayPin, LOW); // Deactivate relay
  delay(5000); // Keep socket OFF for 5 seconds
}
Note: Ensure the relay module is rated for the voltage and current of the socket. Use proper isolation techniques to separate the low-voltage Arduino circuit from the high-voltage socket.
Troubleshooting and FAQs
Common Issues Users Might Face
Socket Not Working After Installation:
- Cause: Incorrect wiring or loose connections.
- Solution: Double-check the wiring and ensure all terminals are securely connected.
Tripped Circuit Breaker:
- Cause: Overloading the socket or a short circuit.
- Solution: Reduce the load on the socket and inspect for wiring faults.
Electric Shocks from the Socket:
- Cause: Improper grounding or damaged insulation.
- Solution: Verify that the Earth terminal is properly connected and inspect the wiring.
Water or Dust Ingress:
- Cause: Using a socket with a low IP rating in outdoor environments.
- Solution: Replace the socket with a model that has a higher IP rating (e.g., IP66).
Solutions and Tips for Troubleshooting
- Use a multimeter to check for continuity and proper voltage levels.
- Inspect the socket for visible damage, such as cracks or corrosion.
- If unsure about installation or troubleshooting, consult a licensed electrician.
- Regularly test the socket with a plug-in tester to ensure safe operation.
By following this documentation, users can safely and effectively install and use a 1 gang metal clad socket in various applications.