How to Use 12A UBEC: Examples, Pinouts, and Specs
Introduction
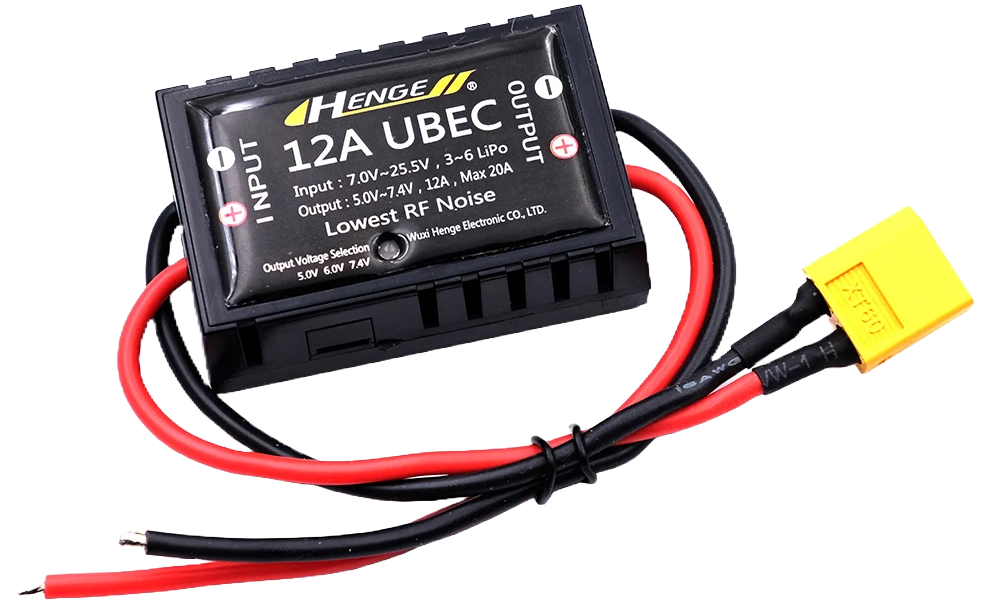
The HENGE 12A UBEC is a high-efficiency Universal Battery Elimination Circuit designed to convert high-voltage battery power into a stable 12V output. This component is essential in radio-controlled (RC) applications, such as drones, airplanes, and cars, where it powers receivers, servos, and other electronics from high-voltage batteries. The UBEC ensures that sensitive electronics receive a consistent voltage, which is crucial for performance and reliability.
Explore Projects Built with 12A UBEC
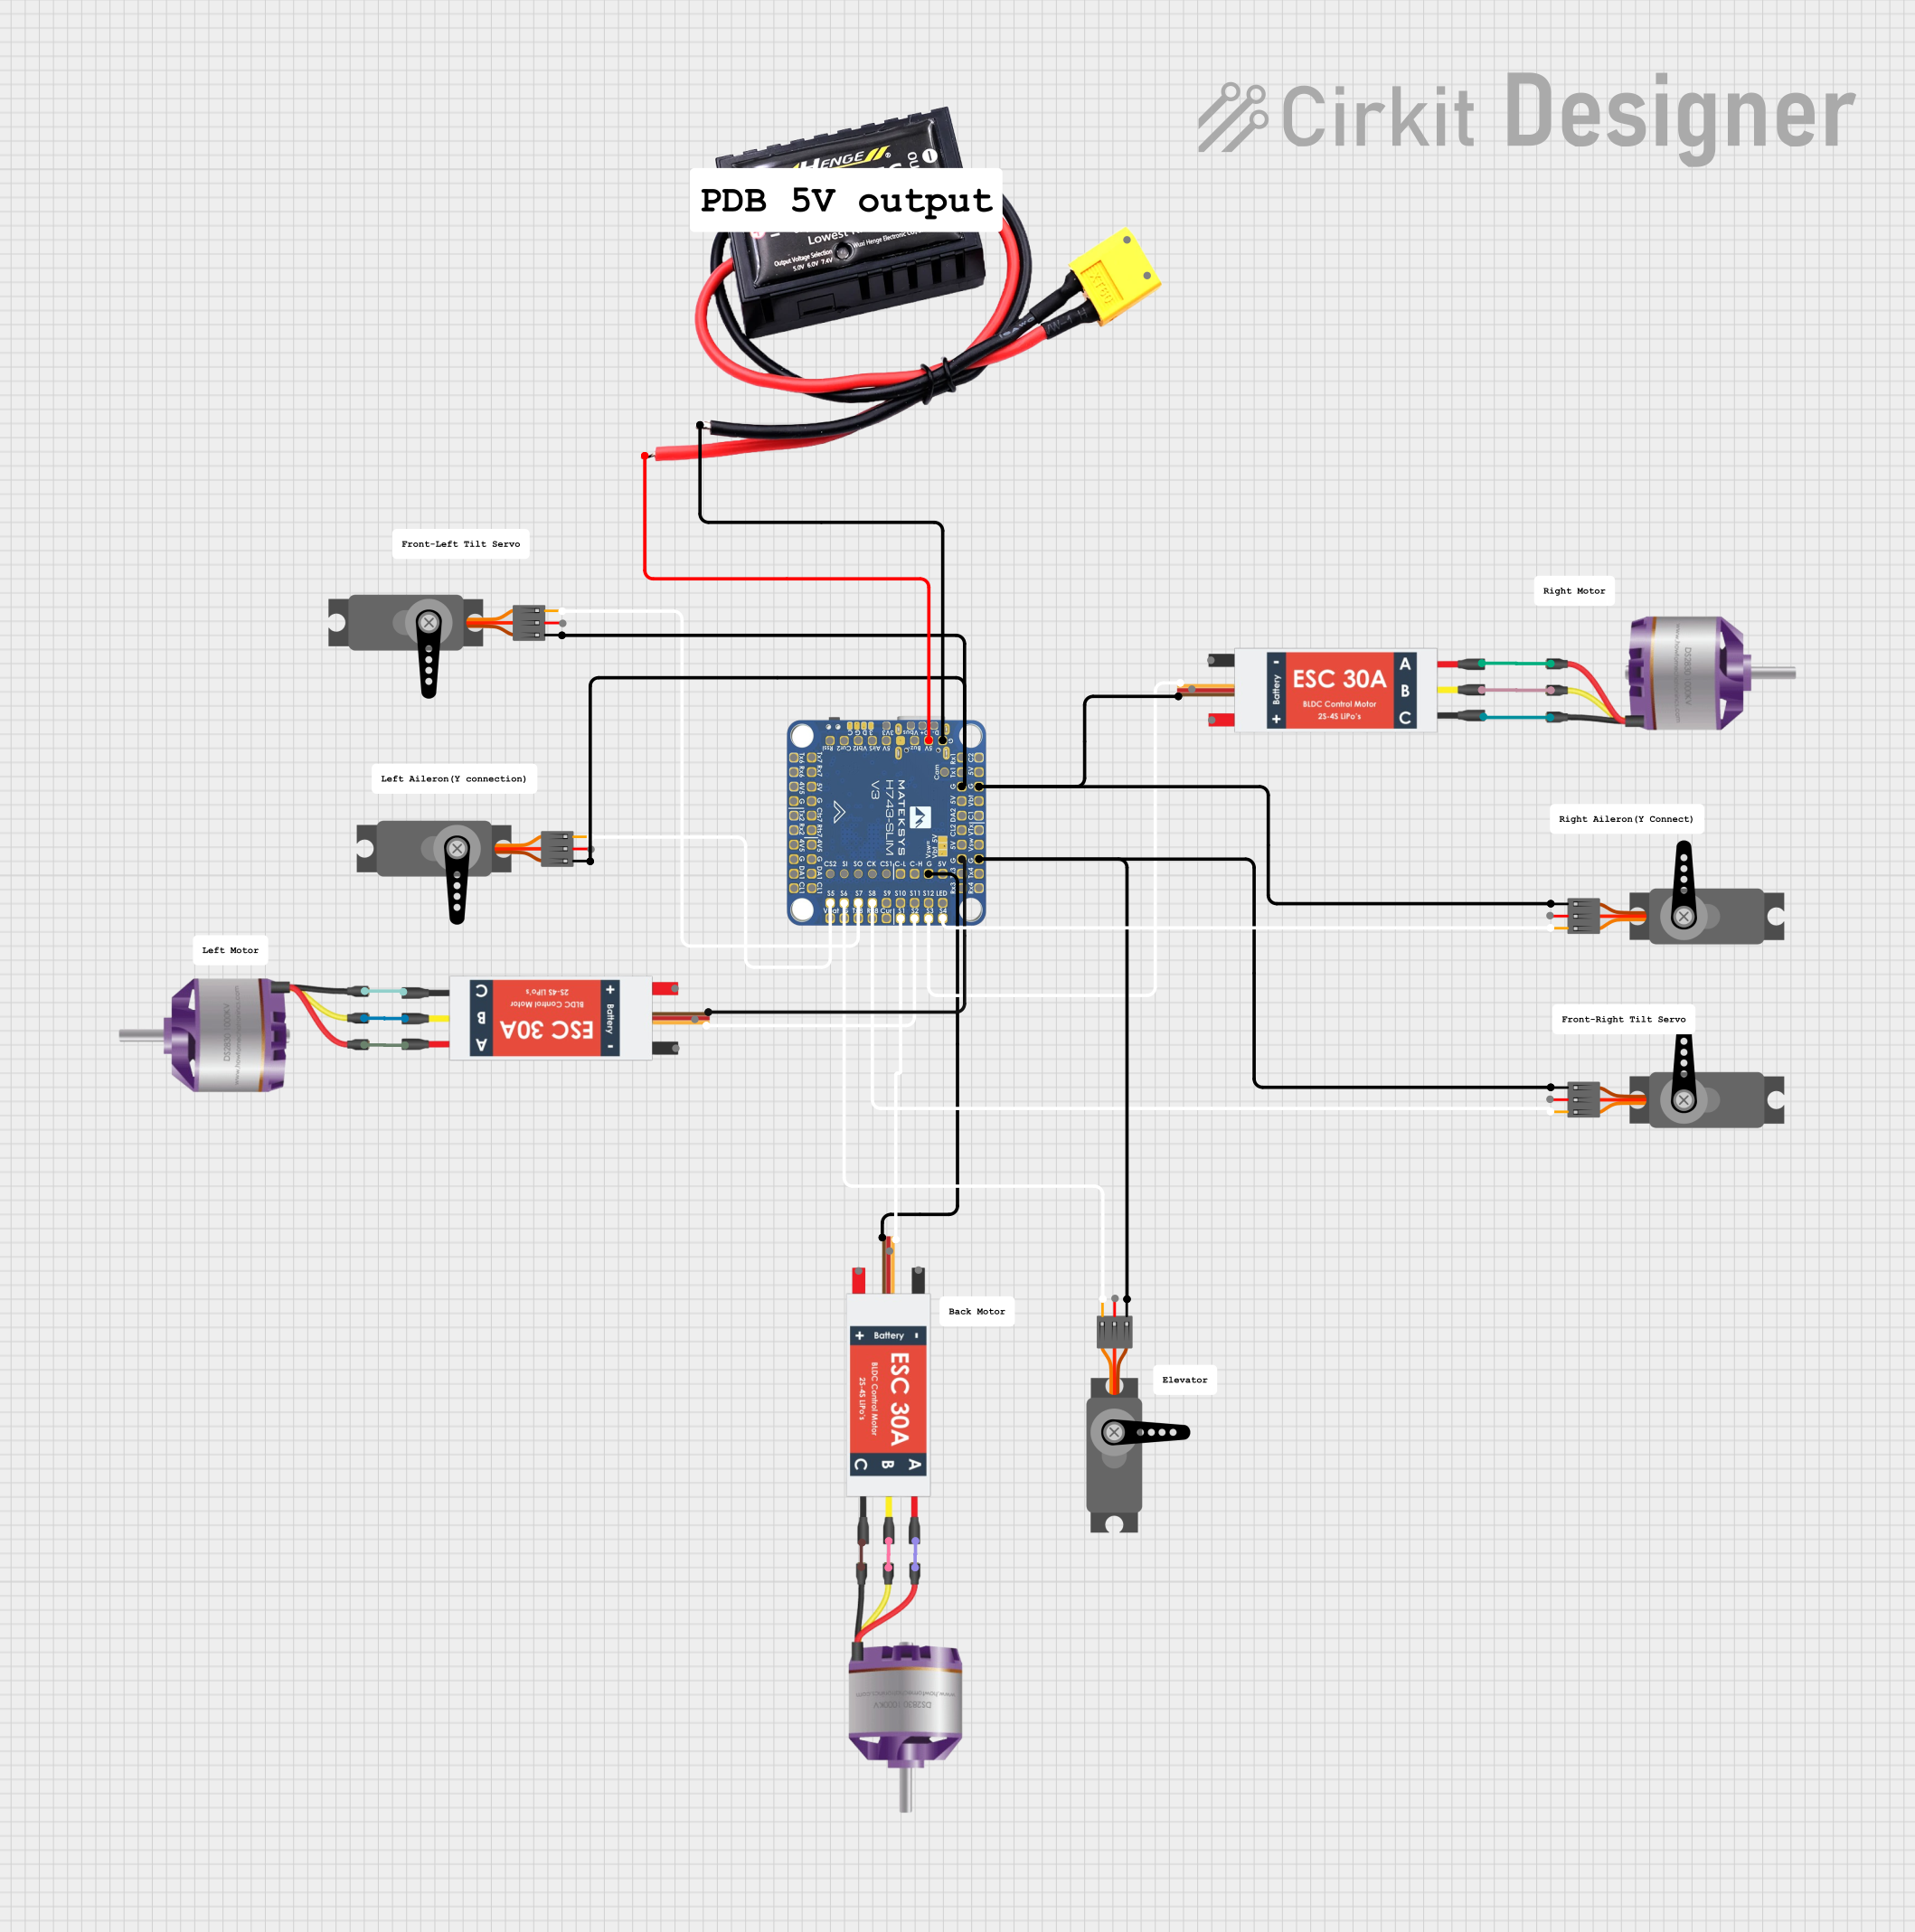
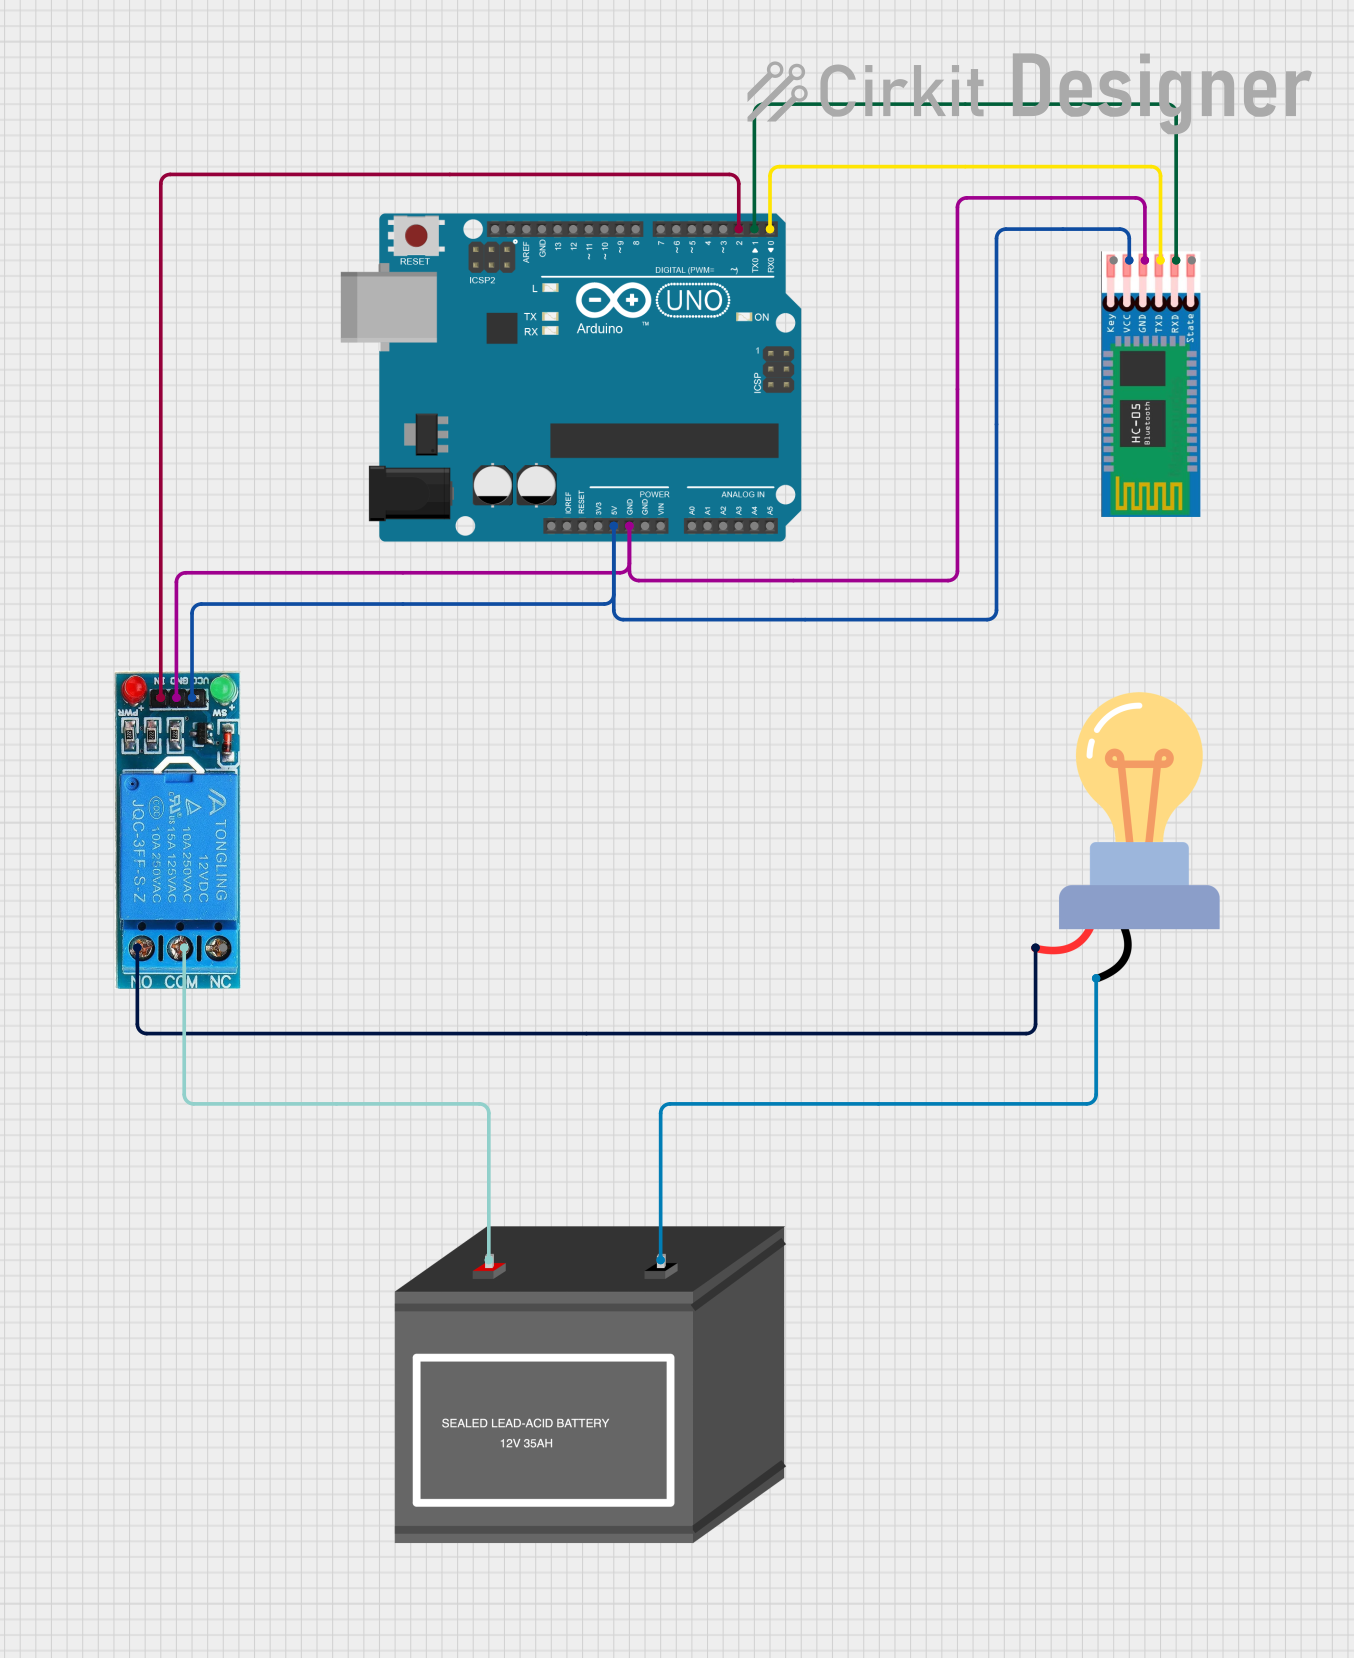
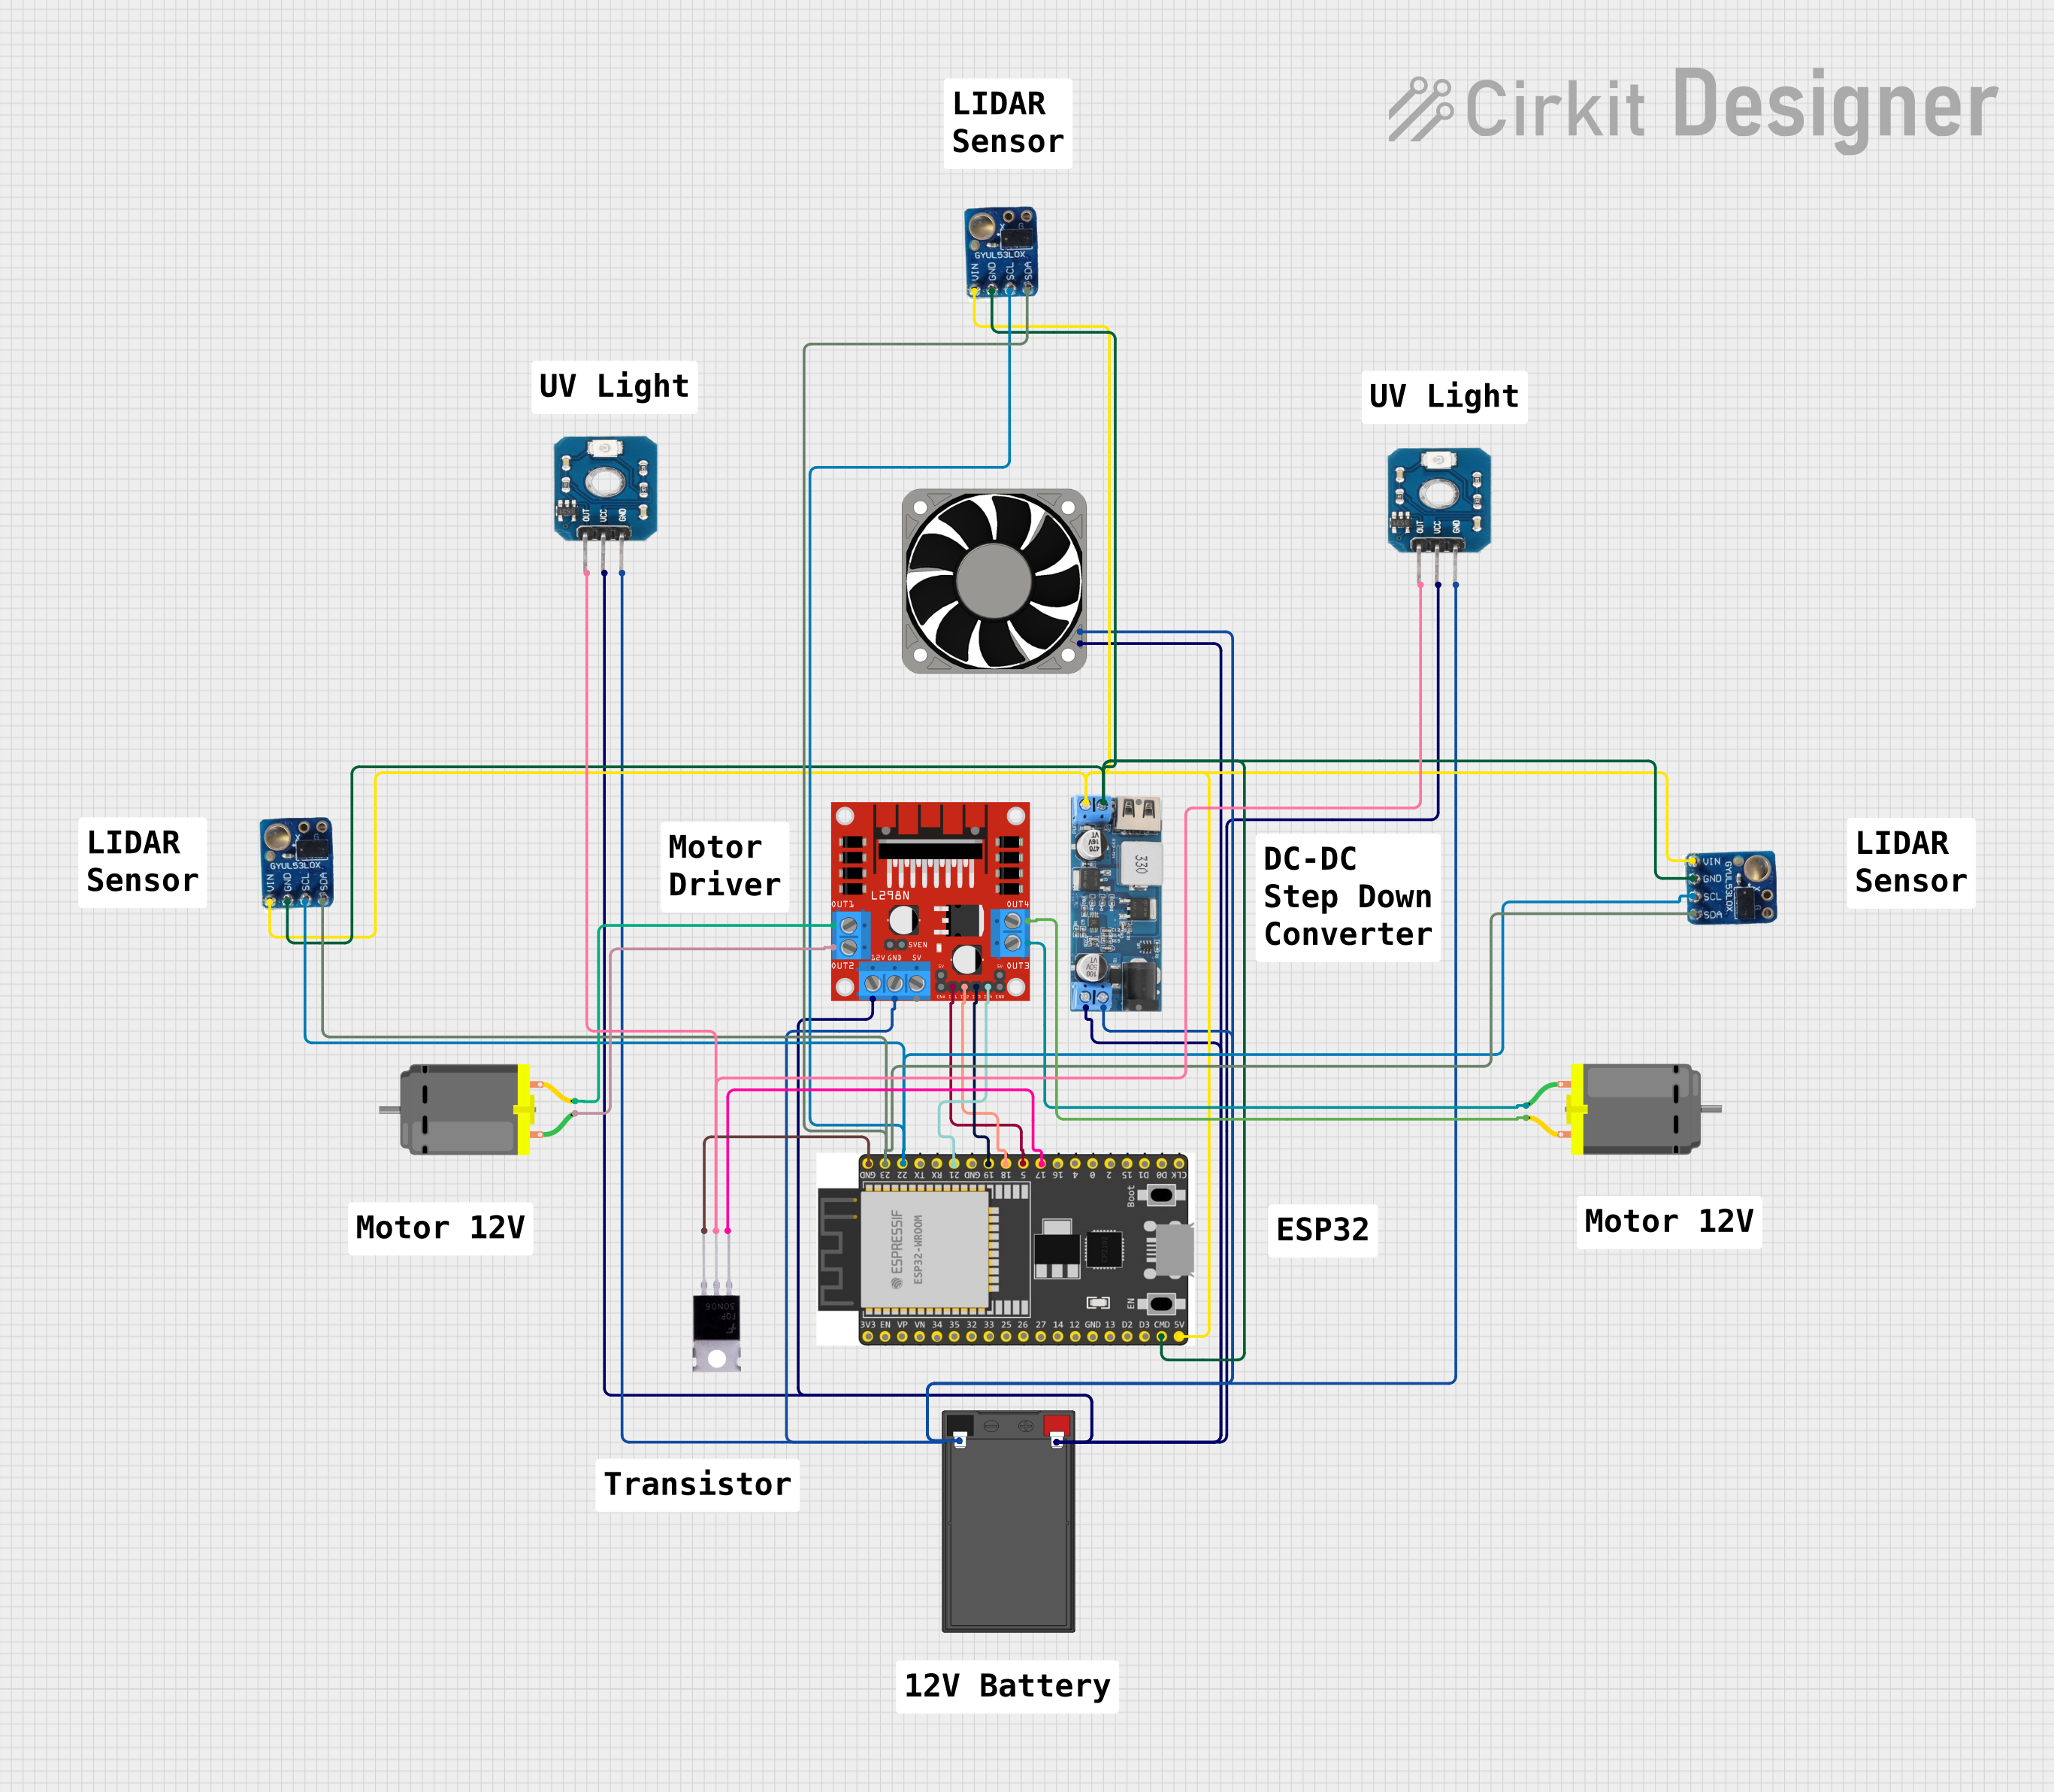

Explore Projects Built with 12A UBEC
Technical Specifications
Key Features
- Input Voltage: 6V-25.2V (2-6S LiPo)
- Output Voltage: 12V DC
- Continuous Output Current: 12A
- Peak Output Current: 15A (for a few seconds)
- Efficiency: >90%
- Size: 53mm x 17mm x 7mm
- Weight: 34g
Pin Configuration and Descriptions
| Pin Number | Description | Notes |
|---|---|---|
| 1 | Voltage Input (VIN) | Connect to positive battery terminal |
| 2 | Ground (GND) | Connect to battery ground |
| 3 | Voltage Output (VOUT) | 12V regulated output |
| 4 | Ground (GND) | Ground for the output |
Usage Instructions
Connecting the UBEC
- Connect the battery's positive terminal to the VIN pin of the UBEC.
- Connect the battery's negative terminal to the GND pin next to the VIN pin.
- Connect the VOUT pin to the positive terminal of the device you wish to power.
- Connect the GND pin next to the VOUT pin to the ground of the device.
Best Practices
- Ensure that the input voltage does not exceed the maximum rating of 25.2V.
- Do not exceed the continuous output current of 12A to prevent overheating and potential damage.
- Use appropriate gauge wires to handle the current without excessive voltage drop.
- Place the UBEC in a location with good airflow to aid in cooling.
- If using with sensitive electronics, consider adding additional filtering on the output to reduce noise.
Troubleshooting and FAQs
Common Issues
- Voltage Output is Too Low or Unstable: Check the input voltage and connections. Ensure that the input voltage is within the specified range and that all connections are secure.
- UBEC Overheating: Ensure that the current draw is within the specified limits and that the UBEC is adequately ventilated.
FAQs
Q: Can I use the 12A UBEC with a 24V battery? A: Yes, the UBEC can handle input voltages up to 25.2V, so a 24V battery is suitable.
Q: Is it possible to adjust the output voltage of the UBEC? A: No, this model provides a fixed 12V output.
Q: How do I know if the UBEC is functioning correctly? A: Measure the output voltage with a multimeter. It should be a stable 12V.
Example Code for Arduino UNO
The following example demonstrates how to use the 12A UBEC with an Arduino UNO to power an external device.
// There is no specific code required for the UBEC itself, as it is a power supply component.
// However, below is an example of how to set up a simple LED circuit powered by the UBEC.

void setup() {
  pinMode(13, OUTPUT); // Set the LED pin as an output
}

void loop() {
  digitalWrite(13, HIGH); // Turn on the LED
  delay(1000);           // Wait for 1 second
  digitalWrite(13, LOW);  // Turn off the LED
  delay(1000);           // Wait for 1 second
}

// Note: The LED in this example is powered by the Arduino, which in turn
// can be powered by the UBEC if the input voltage exceeds the Arduino's limits.
Remember to connect the Arduino's VIN pin to the UBEC's VOUT pin and the Arduino's GND to the UBEC's GND. This will allow the Arduino to be powered by the UBEC when using a high-voltage battery source.