The Phoenix QUINT4-PS/1AC/5DC/5/PT (Manufacturer Part ID: 2904595) is a compact and highly efficient industrial power supply unit designed to convert AC input to a stable DC output. With its robust design, wide input voltage range, and advanced protection features, this power supply is ideal for demanding industrial environments. It ensures reliable operation of connected devices and systems, even under challenging conditions.
Explore Projects Built with Phoenix QUINT4-PS/1AC/5DC/5/PT
Use Cirkit Designer to design, explore, and prototype these projects online. Some projects support real-time simulation. Click "Open Project" to start designing instantly!
This circuit describes a networked system where an Optiplex Micro computer is powered by a PC Power Supply and connected to a PC Screen via HDMI for display output. The computer is networked through an Ethernet Switch, which also connects to two PoE Cameras and a Toyopuc PLC. The Ethernet Switch is powered by a PoE PSU 48V DC, and all AC-powered devices are connected to a common 220V AC source.
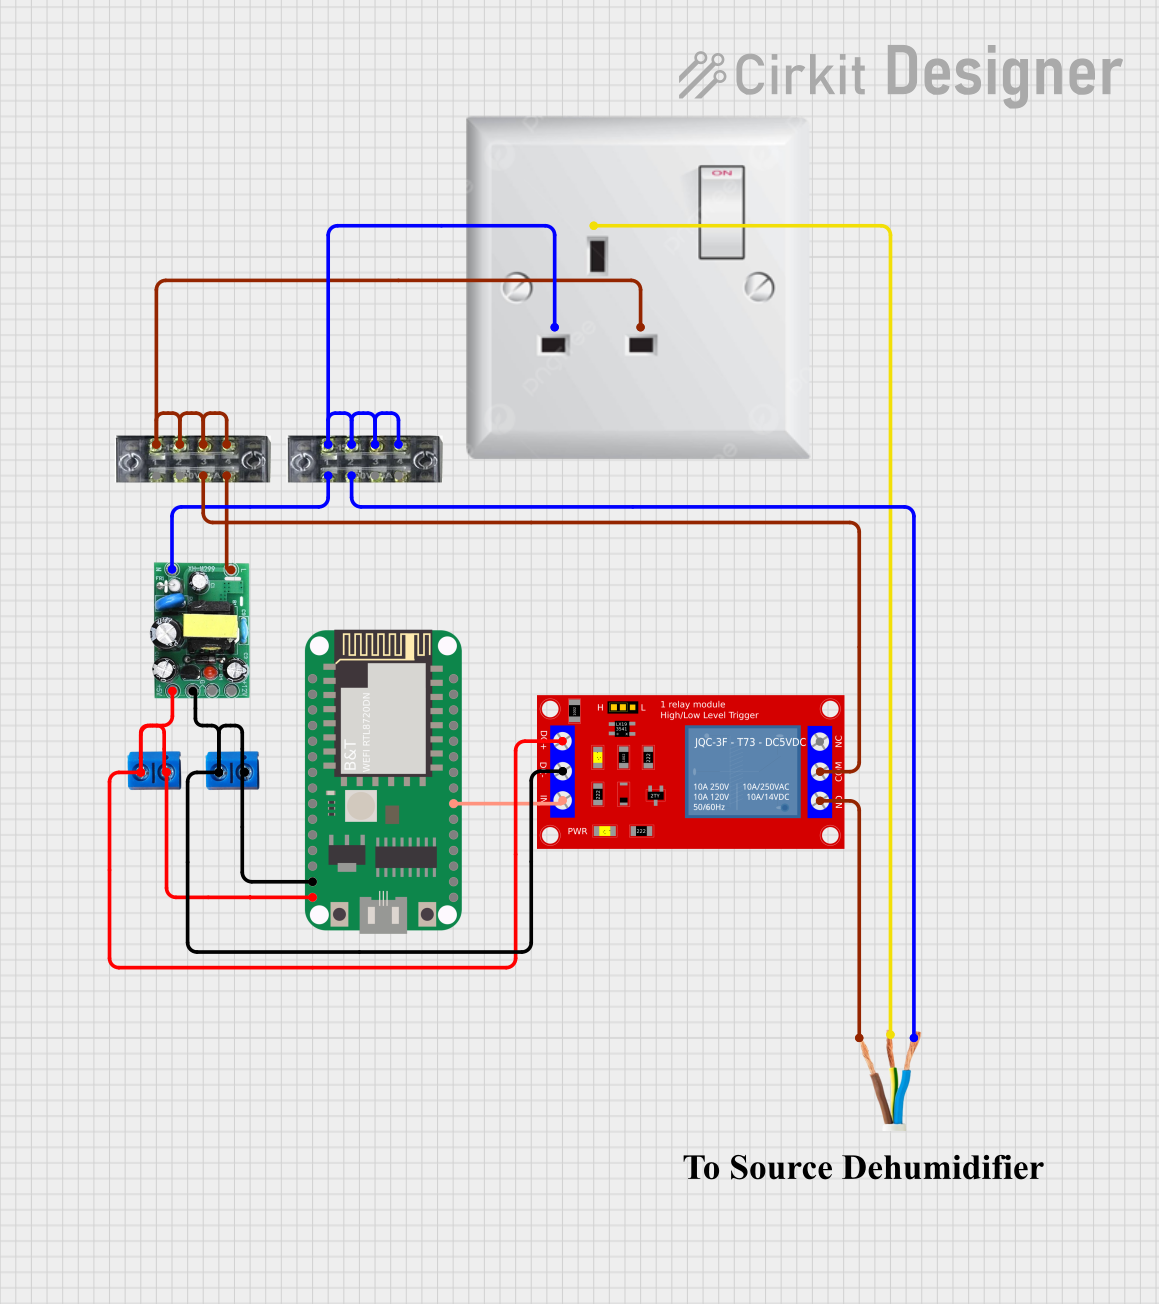
This circuit is designed to control an AC load using a 5V relay module, which is driven by a RTL8720DN microcontroller. The AC-DC PSU board converts 220V AC to 5V DC to power the microcontroller and the relay module. The microcontroller can switch the relay to turn the connected AC load on or off.
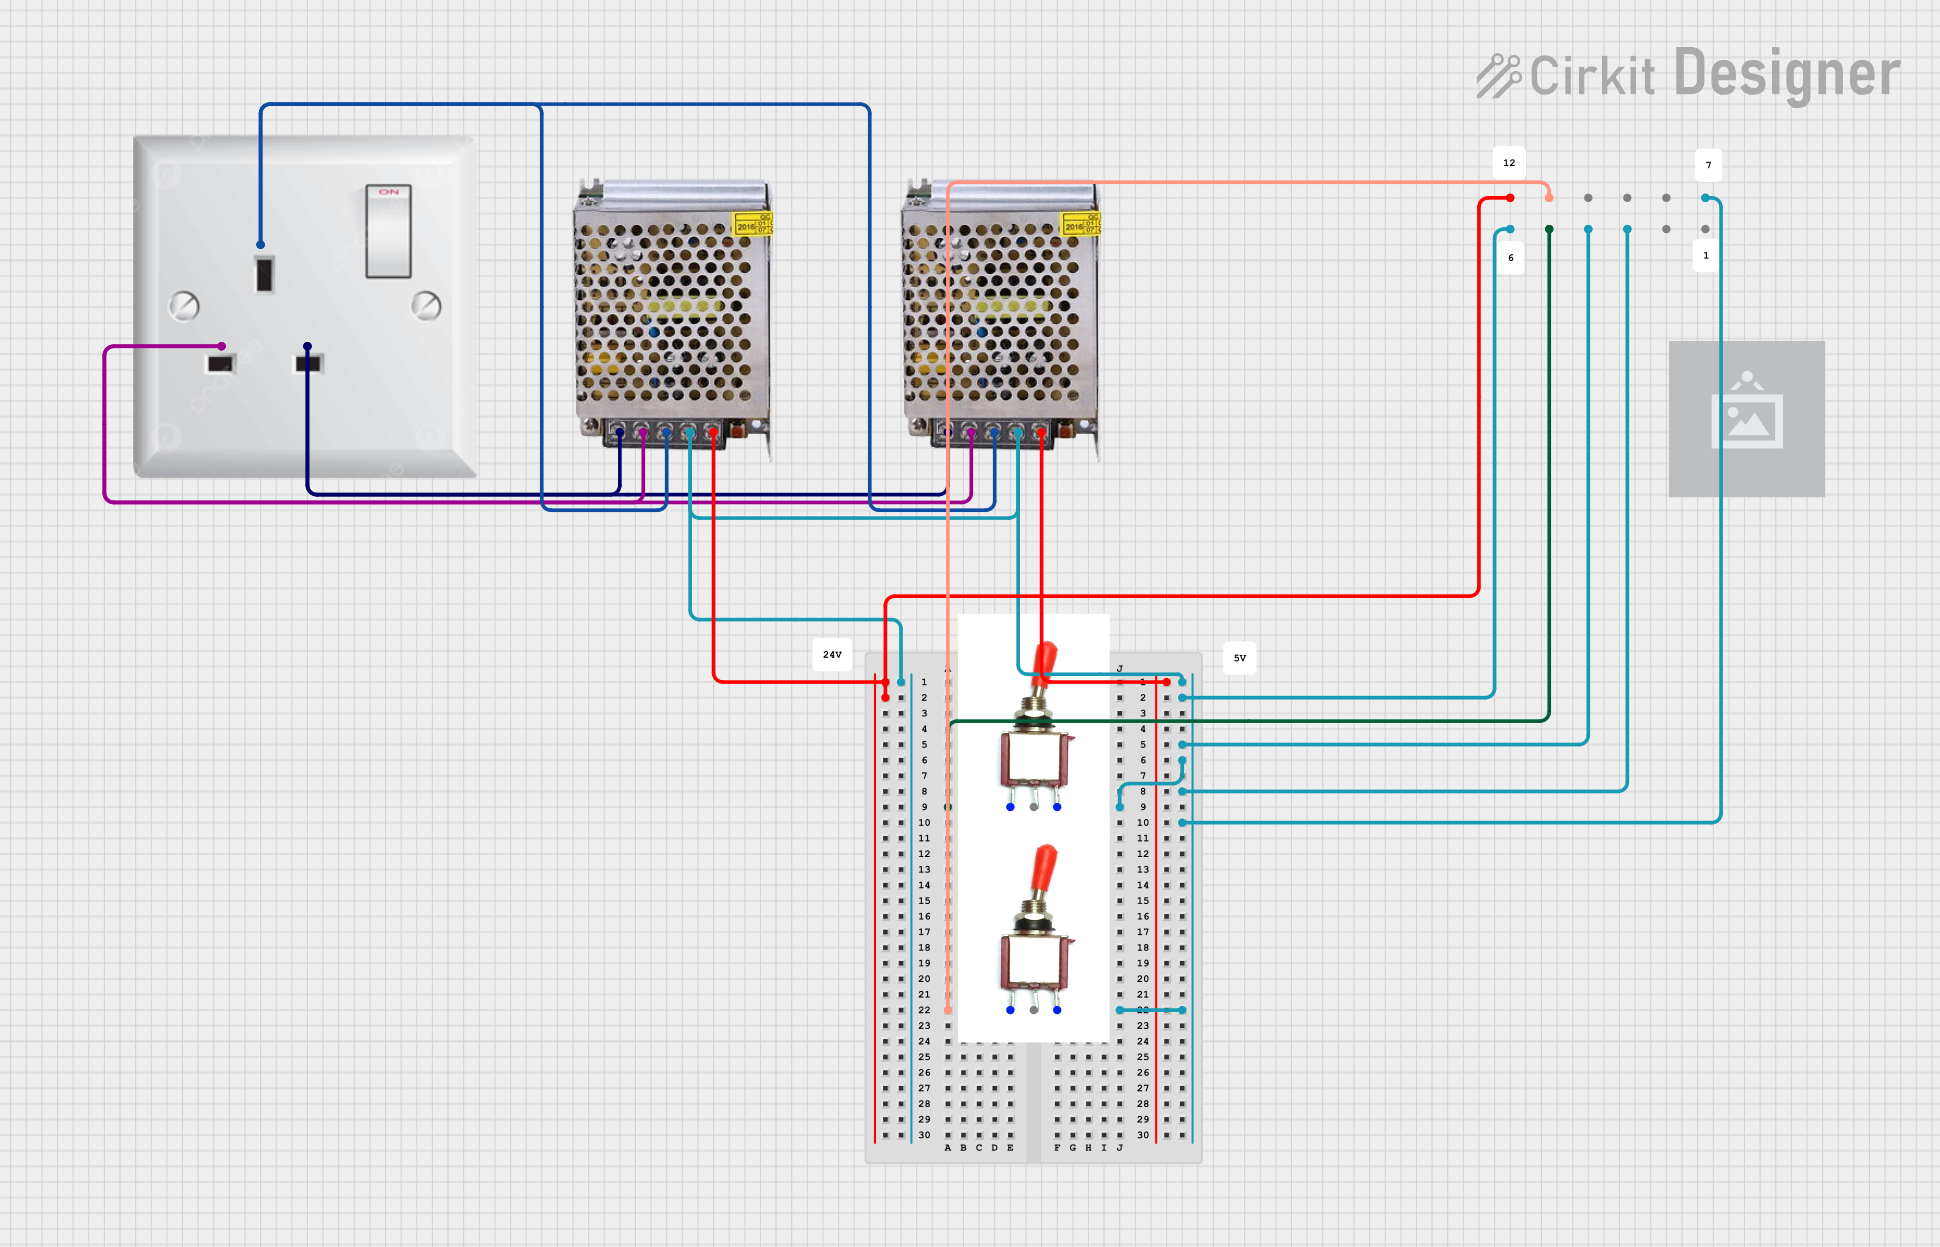
This circuit consists of two 5V 5A power supplies connected to an AC wall plug point, providing DC output through a 12-way connector. The ground connections from both power supplies are interconnected and also connected to the ground pins of two toggle switches. The DC outputs from the power supplies are separately connected to different pins on the 12-way connector, with each power supply output being switchable via one of the toggle switches.
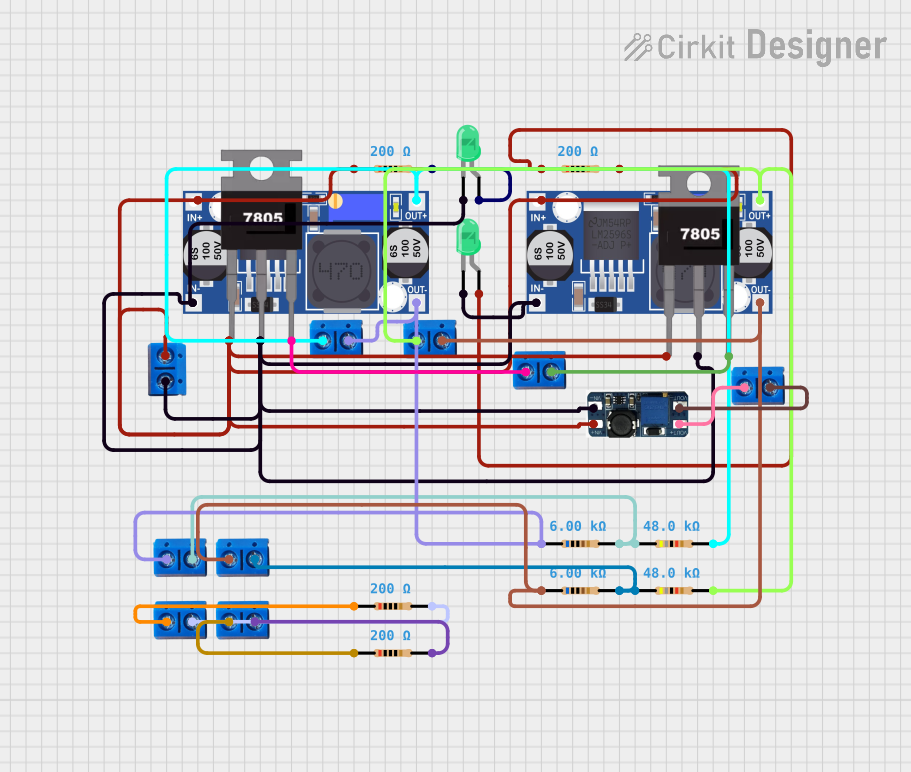
This circuit is designed for power management, featuring buck and boost converters for voltage adjustment, and linear regulators for stable voltage output. It includes LEDs for status indication, and terminal blocks for external connections.
PLCs (Programmable Logic Controllers) and control panels
Sensors and actuators in factory environments
Communication and networking equipment
LED lighting systems
Any application requiring a stable 5V DC power source
Technical Specifications
Key Technical Details
Parameter
Value
Input Voltage Range
100–240 V AC (85–264 V AC operational)
Input Frequency
50–60 Hz
Output Voltage
5 V DC
Output Current
5 A
Output Power
25 W
Efficiency
Up to 92%
Overload Protection
Yes (electronic shutdown and restart)
Operating Temperature Range
-25°C to +70°C
Dimensions (W x H x D)
35 mm x 130 mm x 125 mm
Weight
Approx. 0.6 kg
Status Indicators
LED indicators for "DC OK" and "Overload"
Pin Configuration and Descriptions
The Phoenix QUINT4-PS/1AC/5DC/5/PT features screw terminal connections for input and output. Below is the pin configuration:
Input Terminals
Pin Label
Description
L
Live AC input
N
Neutral AC input
PE
Protective Earth (Ground)
Output Terminals
Pin Label
Description
+
Positive DC output (5 V DC)
-
Negative DC output (Ground)
Usage Instructions
How to Use the Component in a Circuit
Mounting: Secure the power supply unit onto a DIN rail or a flat surface using the provided mounting clips.
Input Connection:
Connect the AC input wires to the L (Live) and N (Neutral) terminals.
Ensure the PE (Protective Earth) terminal is properly grounded for safety.
Output Connection:
Connect the + terminal to the positive input of your load.
Connect the - terminal to the ground or negative input of your load.
Power On:
After verifying all connections, switch on the AC power supply.
Check the LED indicators: the "DC OK" LED should light up, indicating proper operation.
Important Considerations and Best Practices
Input Voltage: Ensure the input voltage is within the specified range (100–240 V AC). Operating outside this range may damage the unit.
Load Capacity: Do not exceed the maximum output current of 5 A. Overloading may trigger the protection mechanism.
Ventilation: Install the unit in a well-ventilated area to prevent overheating. Avoid enclosing it in tight spaces without airflow.
Wiring: Use appropriately rated wires for both input and output connections to handle the current safely.
Polarity: Double-check the polarity of the output connections to avoid damaging connected devices.
Example: Connecting to an Arduino UNO
The Phoenix QUINT4-PS/1AC/5DC/5/PT can be used to power an Arduino UNO. Below is an example wiring and code snippet:
Wiring
Connect the + terminal of the power supply to the Arduino's 5V pin.
Connect the - terminal of the power supply to the Arduino's GND pin.
Code Example
// Example code to blink an LED connected to pin 13 on the Arduino UNO
// Ensure the Arduino is powered by the Phoenix QUINT4-PS/1AC/5DC/5/PT

void setup() {
  pinMode(13, OUTPUT); // Set pin 13 as an output
}

void loop() {
  digitalWrite(13, HIGH); // Turn the LED on
  delay(1000);            // Wait for 1 second
  digitalWrite(13, LOW);  // Turn the LED off
  delay(1000);            // Wait for 1 second
}
Troubleshooting and FAQs
Common Issues and Solutions
Issue
Possible Cause
Solution
"DC OK" LED is off
No AC input or incorrect wiring
Verify AC input connections and voltage.
Output voltage is unstable
Overload or short circuit on the output
Check the load and ensure it is within the 5 A limit.
Unit overheats
Poor ventilation or excessive load
Improve airflow or reduce the load.
No output voltage
Protection mechanism triggered
Disconnect the load, power cycle the unit, and reconnect.
FAQs
Can this power supply be used with 12 V DC input?
No, the unit is designed for AC input only. Using DC input may damage the device.
What happens if the load exceeds 5 A?
The power supply will activate its overload protection, shutting down the output. Once the overload is removed, it will automatically restart.
Is the unit suitable for outdoor use?
No, the power supply is not weatherproof. It should be installed in a dry, indoor environment.
Can I use this power supply to charge batteries?
While technically possible, it is not recommended unless the battery charging circuit includes proper current and voltage regulation.
By following this documentation, users can safely and effectively integrate the Phoenix QUINT4-PS/1AC/5DC/5/PT into their industrial or hobbyist projects.



 Open Project in Cirkit Designer