How to Use WS2812B White LED: Examples, Pinouts, and Specs
Introduction
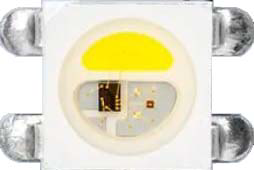
The WS2812B White LED, manufactured by Aliexpress, is a smart RGB LED with an integrated driver. This component allows for individual control of each LED, enabling the creation of dynamic lighting effects and a wide range of colors, including white. Its compact design and ease of use make it a popular choice for decorative lighting, displays, and creative projects.
Explore Projects Built with WS2812B White LED

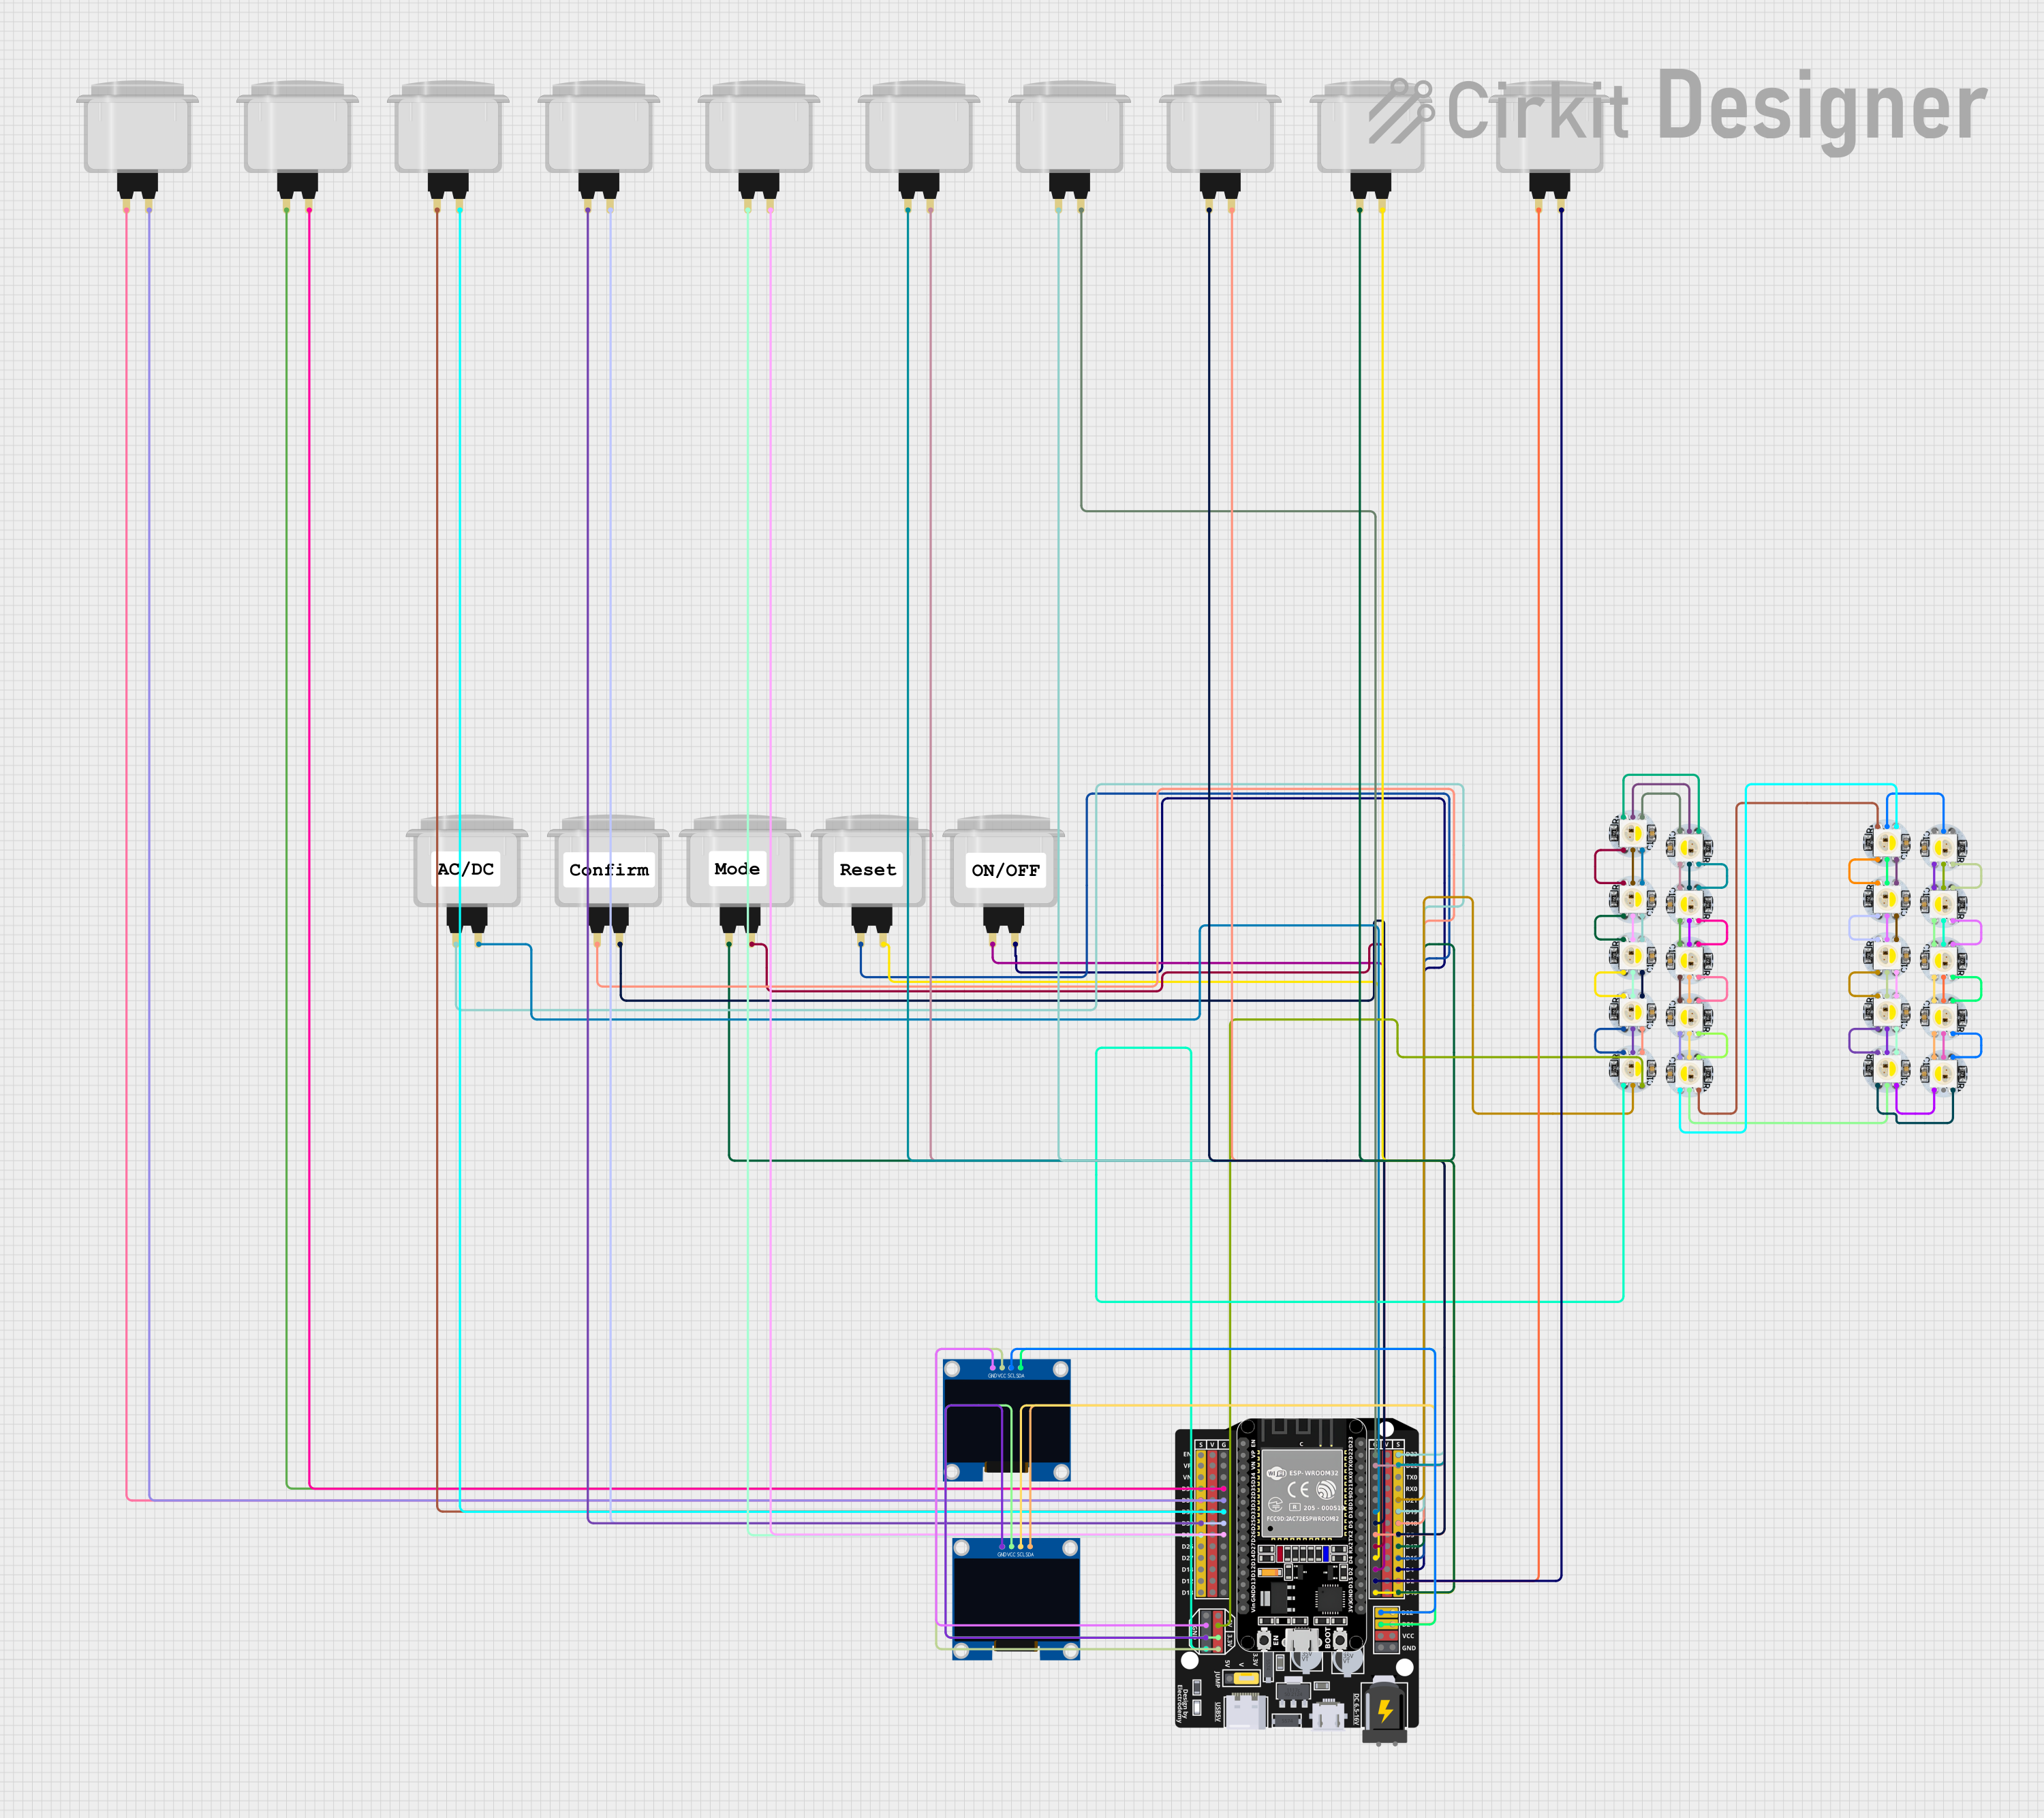

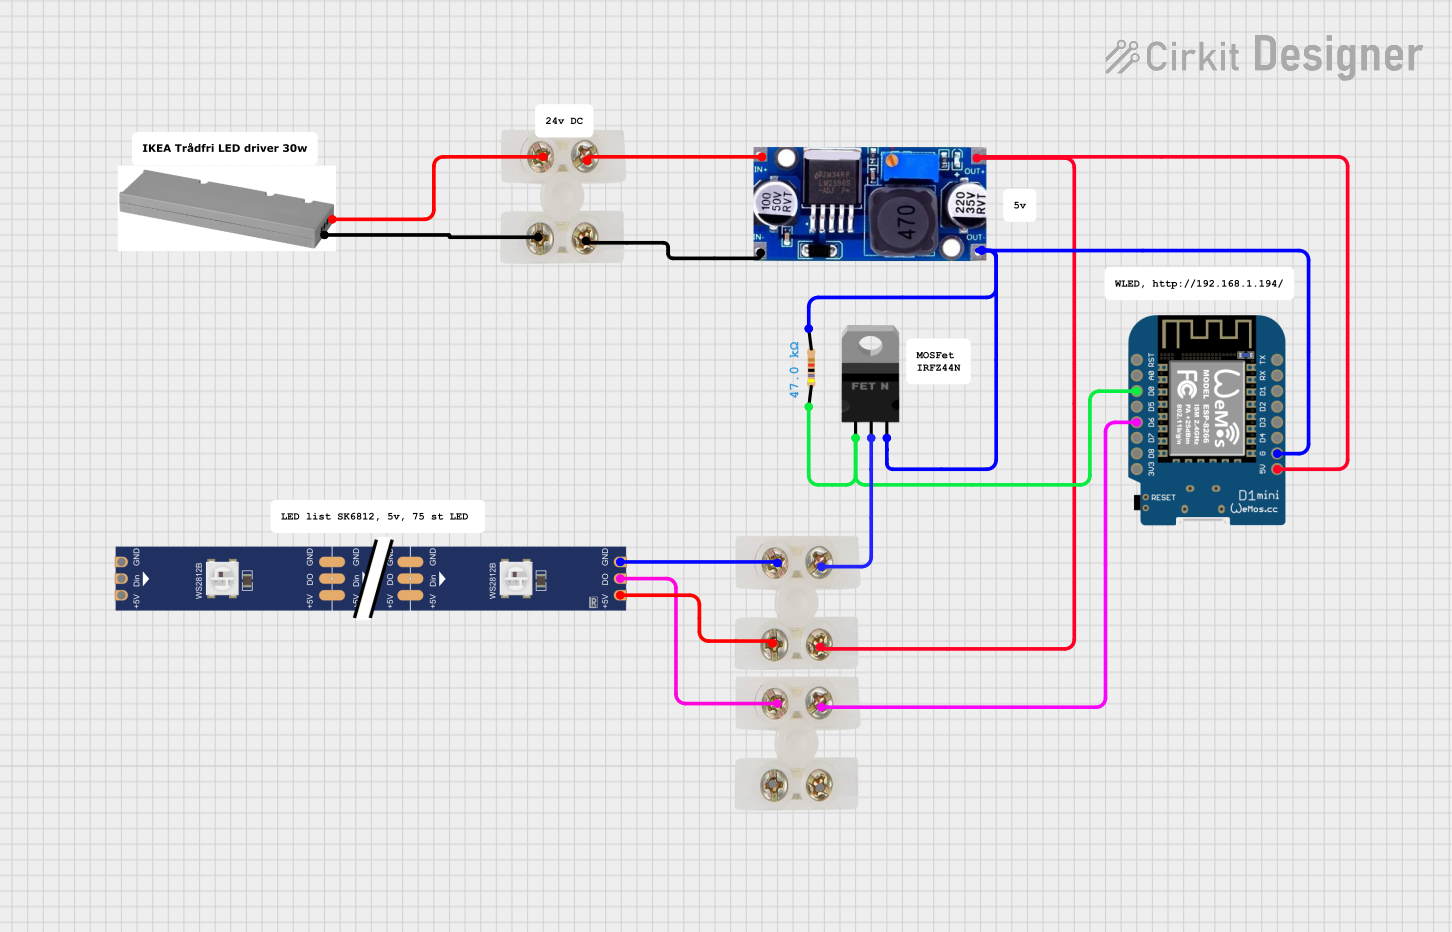
Explore Projects Built with WS2812B White LED
Common Applications
- LED strips for decorative lighting
- Digital displays and signage
- Wearable electronics
- Ambiance lighting for homes and offices
- Art installations and DIY projects
Technical Specifications
The WS2812B White LED combines an RGB LED and a control IC in a single package. Below are its key technical details:
Key Specifications
| Parameter | Value |
|---|---|
| Operating Voltage | 3.5V to 5.3V |
| Operating Current | ~20mA per color channel |
| Maximum Power | ~60mW per LED |
| Communication Protocol | Single-wire (self-clocking) |
| Data Transfer Rate | Up to 800kbps |
| Viewing Angle | 120° |
| Operating Temperature | -25°C to +80°C |
| LED Dimensions | 5mm x 5mm x 1.5mm |
Pin Configuration
The WS2812B White LED has three pins, as described in the table below:
| Pin Name | Pin Number | Description |
|---|---|---|
| VDD | 1 | Power supply pin (3.5V to 5.3V) |
| DOUT | 2 | Data output pin for cascading multiple LEDs |
| DIN | 3 | Data input pin for receiving control signals |
| GND | 4 | Ground pin |
Usage Instructions
How to Use the WS2812B White LED in a Circuit
- Power Supply: Connect the VDD pin to a 5V power source and the GND pin to ground. Ensure the power supply can handle the total current draw of all LEDs in the circuit.
- Data Input: Connect the DIN pin to the microcontroller's data output pin. Use a resistor (330Ω to 470Ω) in series with the data line to reduce noise.
- Capacitor: Place a 100µF capacitor across the VDD and GND pins to stabilize the power supply.
- Cascading LEDs: For multiple LEDs, connect the DOUT pin of one LED to the DIN pin of the next LED.
Important Considerations
- Voltage Levels: Ensure the data signal voltage matches the LED's operating voltage. Use a level shifter if the microcontroller operates at 3.3V.
- Heat Management: Avoid overheating by limiting the brightness or using heat sinks for large arrays.
- Data Timing: Follow the WS2812B timing protocol for accurate color control.
Example Code for Arduino UNO
Below is an example of how to control a WS2812B White LED using an Arduino UNO and the Adafruit NeoPixel library:
#include <Adafruit_NeoPixel.h>

// Define the number of LEDs in the strip
#define NUM_LEDS 1

// Define the pin connected to the DIN pin of the WS2812B
#define DATA_PIN 6

// Create a NeoPixel object
Adafruit_NeoPixel strip = Adafruit_NeoPixel(NUM_LEDS, DATA_PIN, NEO_GRB + NEO_KHZ800);

void setup() {
  strip.begin(); // Initialize the NeoPixel library
  strip.show();  // Turn off all LEDs initially
}

void loop() {
  // Set the LED to white color (maximum brightness for all channels)
  strip.setPixelColor(0, strip.Color(255, 255, 255)); // RGB values for white
  strip.show(); // Update the LED with the new color
  delay(1000);  // Keep the LED on for 1 second

  // Turn off the LED
  strip.setPixelColor(0, strip.Color(0, 0, 0)); // RGB values for off
  strip.show(); // Update the LED to turn it off
  delay(1000);  // Keep the LED off for 1 second
}
Notes:
- Install the Adafruit NeoPixel library via the Arduino Library Manager before uploading the code.
- Adjust
NUM_LEDSandDATA_PINas needed for your setup.
Troubleshooting and FAQs
Common Issues
LEDs Not Lighting Up
- Check the power supply voltage and current capacity.
- Verify the data connection and ensure the DIN pin is receiving signals.
- Ensure the ground of the LED and microcontroller are connected.
Incorrect Colors or Flickering
- Verify the timing of the data signal matches the WS2812B protocol.
- Use a resistor in series with the data line to reduce noise.
- Check for loose connections or insufficient power supply.
Overheating
- Reduce the brightness or limit the number of LEDs powered simultaneously.
- Ensure proper ventilation or use heat sinks for large arrays.
FAQs
Q: Can I control multiple WS2812B LEDs with one microcontroller?
A: Yes, you can daisy-chain multiple LEDs by connecting the DOUT pin of one LED to the DIN pin of the next. Ensure the microcontroller can handle the data timing and the power supply can support the total current draw.
Q: What is the maximum number of LEDs I can control?
A: Theoretically, there is no limit, but practical constraints like memory, processing speed, and power supply capacity will determine the maximum number.
Q: Can I use a 3.3V microcontroller with WS2812B LEDs?
A: Yes, but you may need a level shifter to convert the 3.3V data signal to 5V for reliable operation.
Q: How do I achieve smooth color transitions?
A: Use PWM (Pulse Width Modulation) to gradually change the RGB values over time. Libraries like Adafruit NeoPixel simplify this process.
By following this documentation, you can effectively integrate the WS2812B White LED into your projects and troubleshoot common issues with ease.