How to Use 12V Solenoid Valve: Examples, Pinouts, and Specs
Introduction
The 12V Solenoid Valve is an electromechanical device designed to control the flow of fluids or gases. It operates by using an electromagnetic coil to open or close a valve mechanism, allowing or restricting the passage of the medium. This component is widely used in automation systems, irrigation setups, fluid control systems, and pneumatic or hydraulic applications.
Explore Projects Built with 12V Solenoid Valve

Explore Projects Built with 12V Solenoid Valve
Common Applications and Use Cases
- Irrigation Systems: Automating water flow in agricultural or garden setups.
- Industrial Automation: Controlling the flow of liquids or gases in manufacturing processes.
- Home Appliances: Found in washing machines, dishwashers, and water purifiers.
- Pneumatic and Hydraulic Systems: Regulating air or fluid flow in mechanical systems.
- DIY Projects: Used in hobbyist projects requiring fluid control.
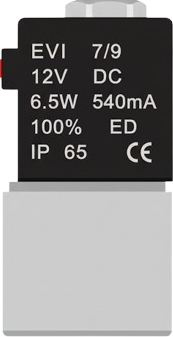
Technical Specifications
The following are the key technical details of the 12V Solenoid Valve:
| Parameter | Value |
|---|---|
| Operating Voltage | 12V DC |
| Current Consumption | 0.2A to 0.5A (depending on model) |
| Power Consumption | 2.4W to 6W |
| Operating Pressure | 0.02 MPa to 0.8 MPa |
| Fluid Type | Water, air, or other compatible fluids |
| Valve Type | Normally Closed (NC) |
| Material | Brass or plastic (varies by model) |
| Port Size | 1/2 inch or other standard sizes |
| Operating Temperature | 0°C to 60°C |
Pin Configuration and Descriptions
The 12V Solenoid Valve typically has two wires for connection:
| Wire Color | Description |
|---|---|
| Red | Positive terminal (+12V DC) |
| Black | Negative terminal (Ground) |
Note: Some models may have different wire colors. Always refer to the manufacturer's datasheet for specific details.
Usage Instructions
How to Use the 12V Solenoid Valve in a Circuit
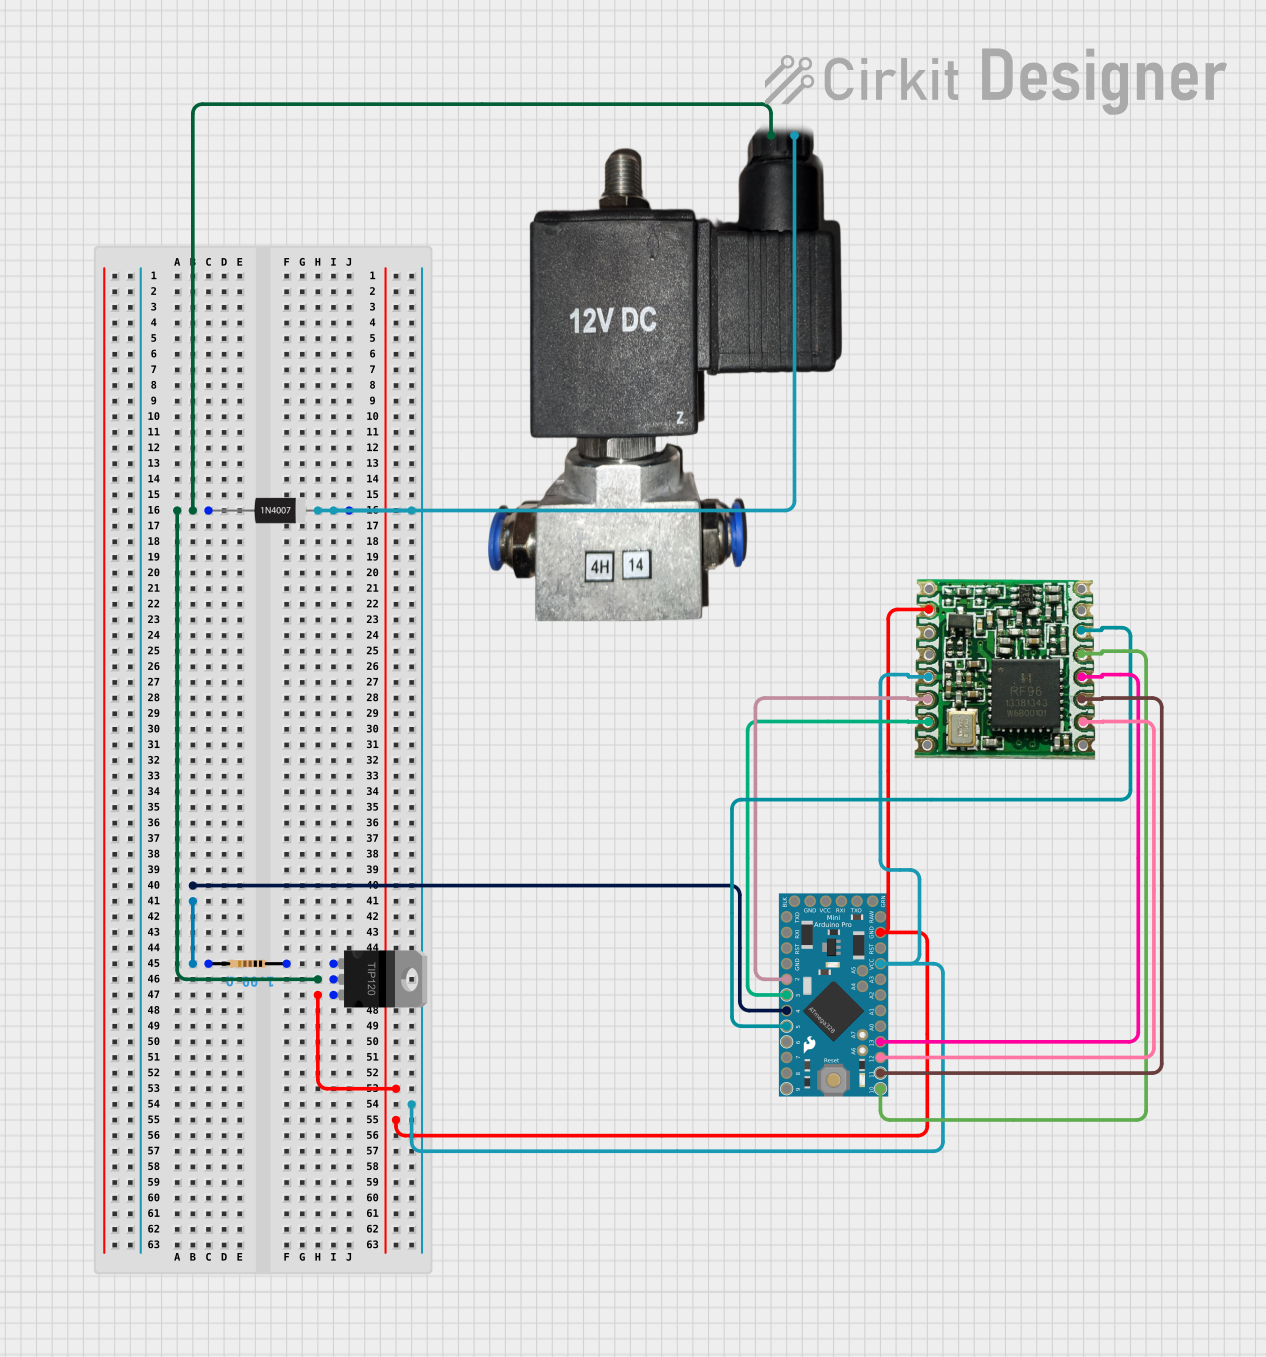
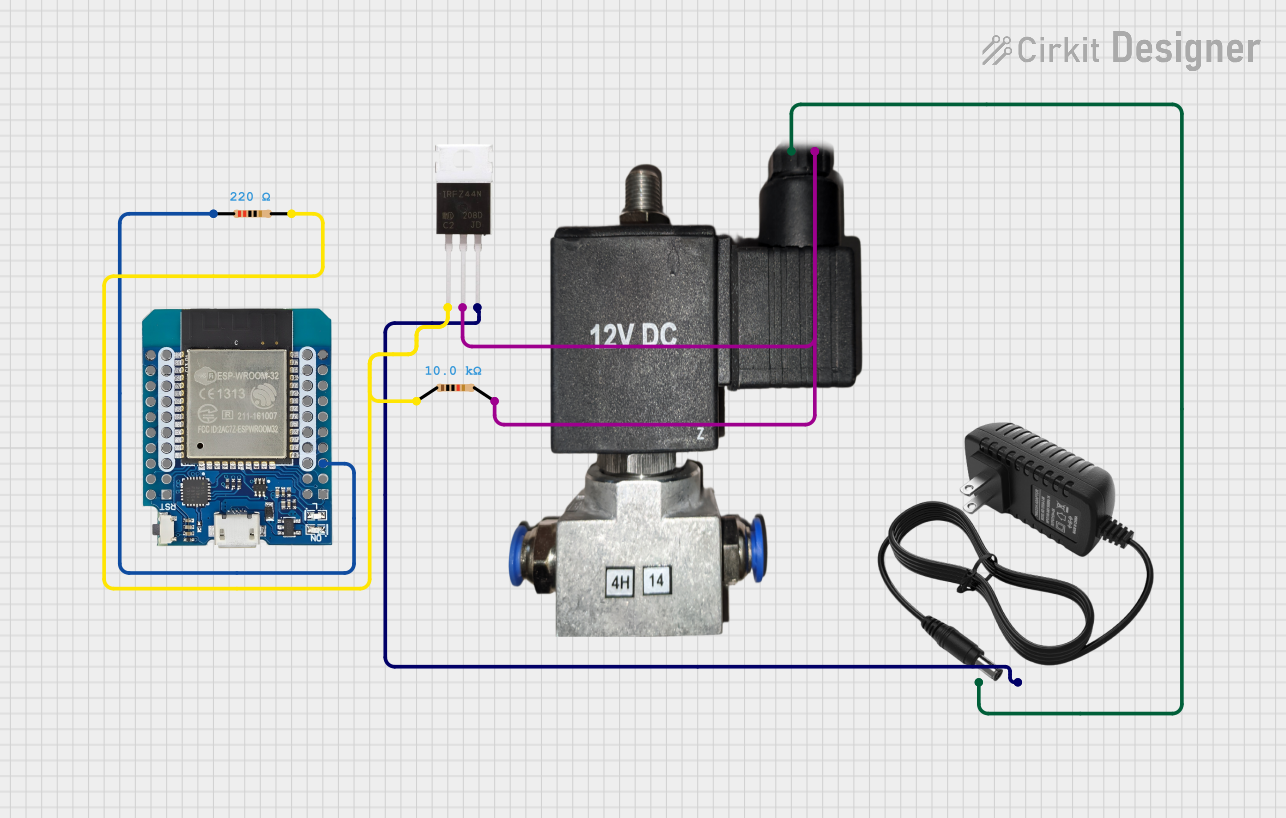
- Power Supply: Connect the red wire to a 12V DC power source and the black wire to ground. Ensure the power supply can provide sufficient current (at least 0.5A).
- Control Mechanism: Use a relay module, transistor, or MOSFET to control the valve from a microcontroller (e.g., Arduino UNO). Directly connecting the valve to a microcontroller is not recommended due to high current requirements.
- Fluid Connection: Attach the inlet and outlet ports to the appropriate fluid lines. Ensure the flow direction matches the arrow on the valve body.
- Testing: Apply 12V to the valve to activate it. The valve should open, allowing fluid to flow. Remove the voltage to close the valve.
Important Considerations and Best Practices
- Diode Protection: Always use a flyback diode across the solenoid terminals to protect the circuit from voltage spikes caused by the collapsing magnetic field when the valve is turned off.
- Power Supply: Use a stable 12V DC power source with sufficient current capacity.
- Mounting: Install the valve in a position that prevents fluid leakage and ensures proper flow direction.
- Fluid Compatibility: Verify that the fluid or gas is compatible with the valve's material to avoid corrosion or damage.
Example: Connecting to an Arduino UNO
Below is an example of how to control a 12V Solenoid Valve using an Arduino UNO and a relay module.
Circuit Diagram
- Connect the solenoid valve to the relay module's Normally Open (NO) terminal and Common (COM) terminal.
- Connect the relay module's VCC, GND, and IN pins to the Arduino's 5V, GND, and a digital pin (e.g., D7), respectively.
Arduino Code
// Define the relay control pin
const int relayPin = 7;

void setup() {
  pinMode(relayPin, OUTPUT); // Set the relay pin as an output
  digitalWrite(relayPin, LOW); // Ensure the relay is off initially
}

void loop() {
  // Turn the solenoid valve ON
  digitalWrite(relayPin, HIGH); // Activate the relay
  delay(5000); // Keep the valve open for 5 seconds

  // Turn the solenoid valve OFF
  digitalWrite(relayPin, LOW); // Deactivate the relay
  delay(5000); // Keep the valve closed for 5 seconds
}
Note: Ensure the relay module is rated for the solenoid valve's current and voltage.
Troubleshooting and FAQs
Common Issues and Solutions
Valve Not Opening or Closing:
- Cause: Insufficient power supply.
- Solution: Verify that the power supply provides 12V DC and sufficient current (at least 0.5A).
Fluid Leakage:
- Cause: Incorrect installation or damaged seals.
- Solution: Check the valve's connections and ensure proper tightening. Replace seals if necessary.
Overheating:
- Cause: Continuous operation for extended periods.
- Solution: Use the valve intermittently or ensure proper cooling.
No Response from Valve:
- Cause: Faulty wiring or damaged coil.
- Solution: Check the wiring and measure the coil's resistance with a multimeter. Replace the valve if the coil is damaged.
FAQs
Q: Can I use the 12V Solenoid Valve with an AC power supply?
A: No, this valve is designed for 12V DC operation. Using AC power may damage the coil.Q: Is the valve waterproof?
A: The valve is water-resistant but not fully waterproof. Avoid submerging it in water.Q: Can I control the valve directly with an Arduino?
A: No, the Arduino cannot supply enough current. Use a relay module or transistor for control.Q: How do I know the flow direction?
A: The valve body typically has an arrow indicating the flow direction.
By following this documentation, you can effectively integrate and troubleshoot the 12V Solenoid Valve in your projects.