How to Use 7 in One NPK Sensor: Examples, Pinouts, and Specs
Introduction
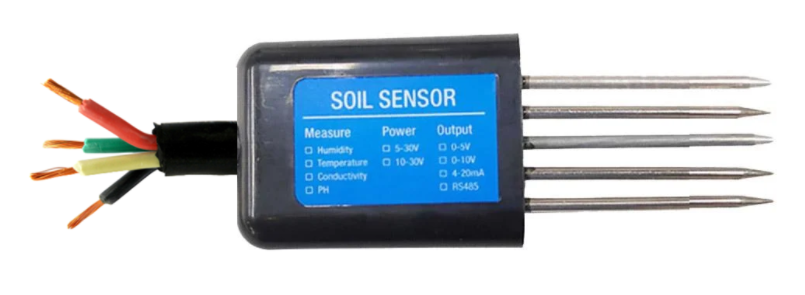
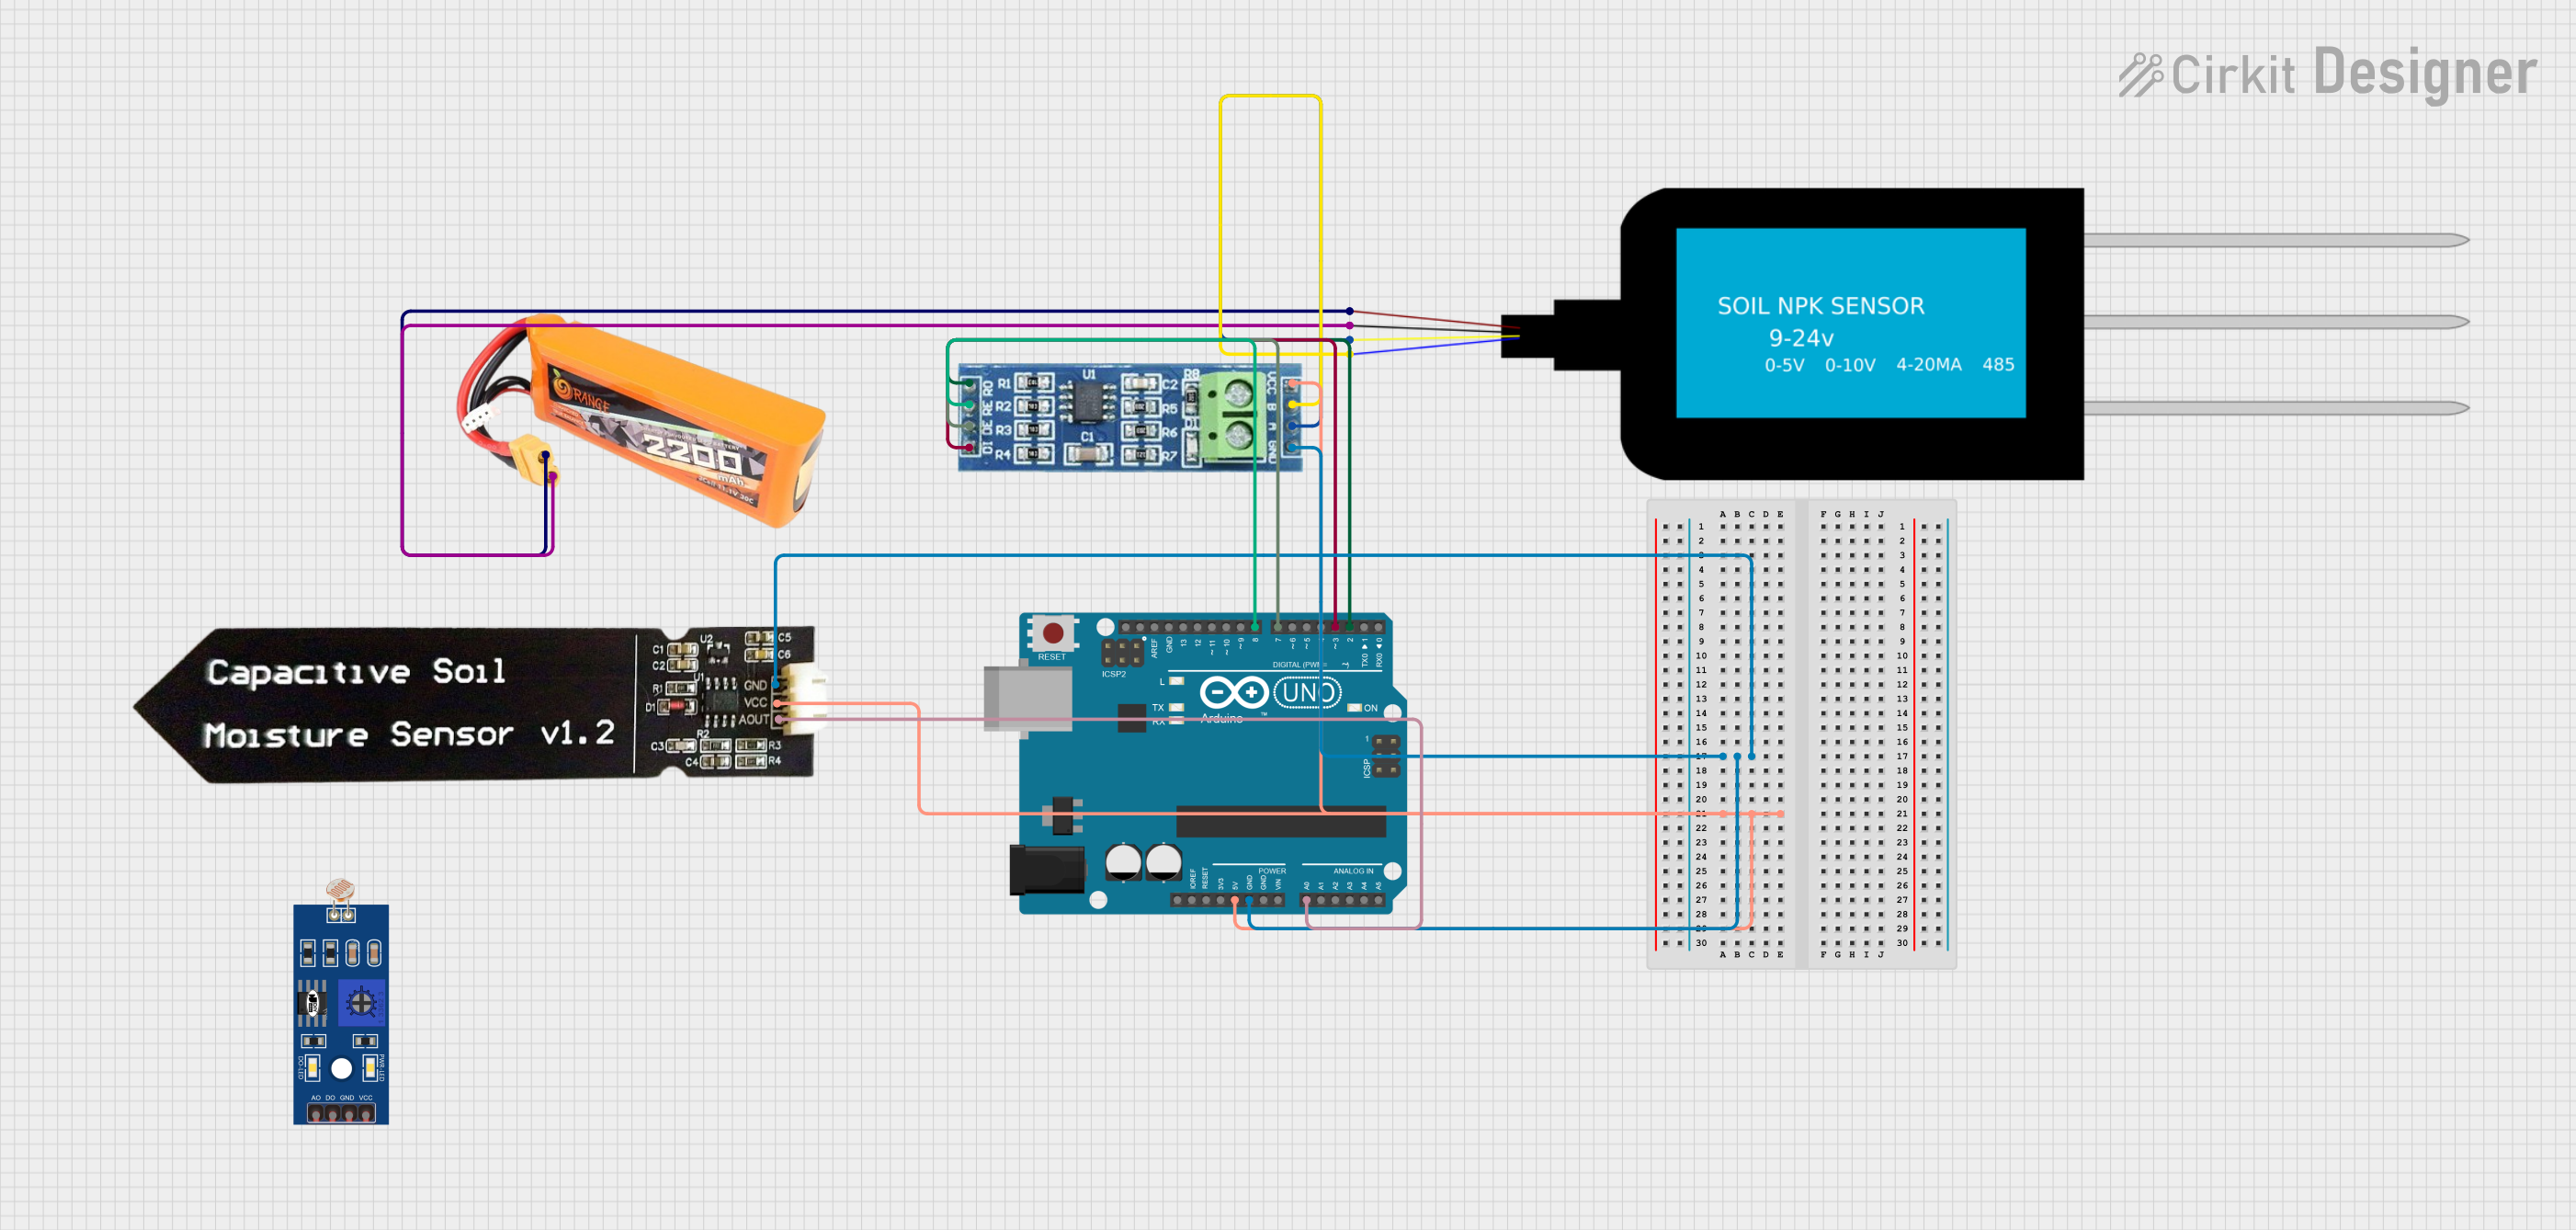
The 7 in One NPK Sensor is a versatile and advanced soil analysis tool designed by Arduino (Part ID: UNO). This sensor measures critical soil parameters, including nitrogen (N), phosphorus (P), potassium (K), moisture, temperature, and pH levels. It provides essential data for optimizing plant growth and maintaining soil health, making it an invaluable tool for agricultural, horticultural, and research applications.
Explore Projects Built with 7 in One NPK Sensor
Explore Projects Built with 7 in One NPK Sensor
Common Applications and Use Cases
- Precision agriculture for optimizing fertilizer use
- Monitoring soil health in gardens and farms
- Research and development in soil science
- Automated irrigation systems
- Smart gardening and IoT-based agricultural solutions
Technical Specifications
The following table outlines the key technical details of the 7 in One NPK Sensor:
| Parameter | Specification |
|---|---|
| Operating Voltage | 5V DC |
| Operating Current | ≤ 50mA |
| Measurement Range (NPK) | 0–1999 mg/kg |
| Soil Moisture Range | 0–100% |
| Soil Temperature Range | -40°C to 80°C |
| pH Measurement Range | 3.5–9.0 |
| Communication Protocol | UART (9600 baud rate) |
| Sensor Dimensions | 150mm x 30mm x 15mm |
| Cable Length | 1 meter |
Pin Configuration and Descriptions
The sensor has a 4-pin interface for communication and power. The pin configuration is as follows:
| Pin | Name | Description |
|---|---|---|
| 1 | VCC | Power supply input (5V DC) |
| 2 | GND | Ground connection |
| 3 | TX | UART Transmit pin (data output from the sensor) |
| 4 | RX | UART Receive pin (data input to the sensor) |
Usage Instructions
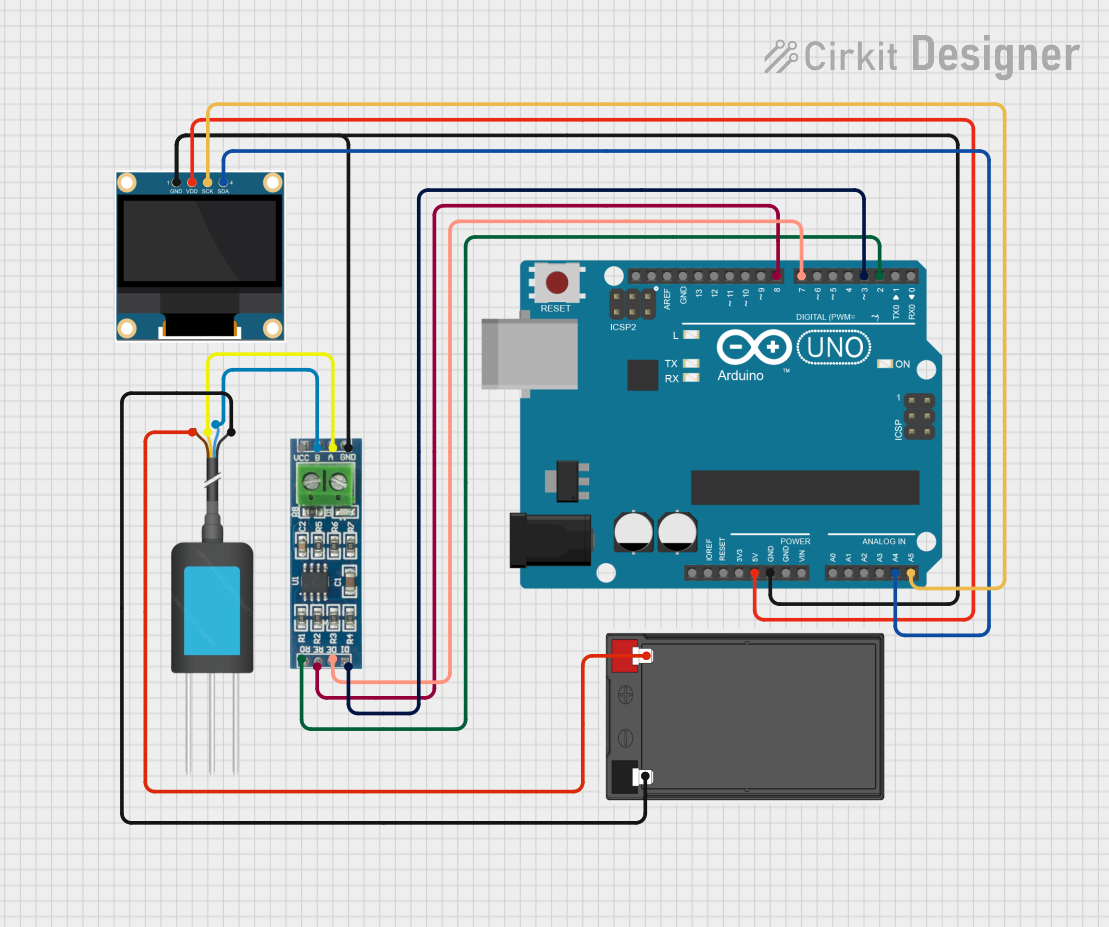
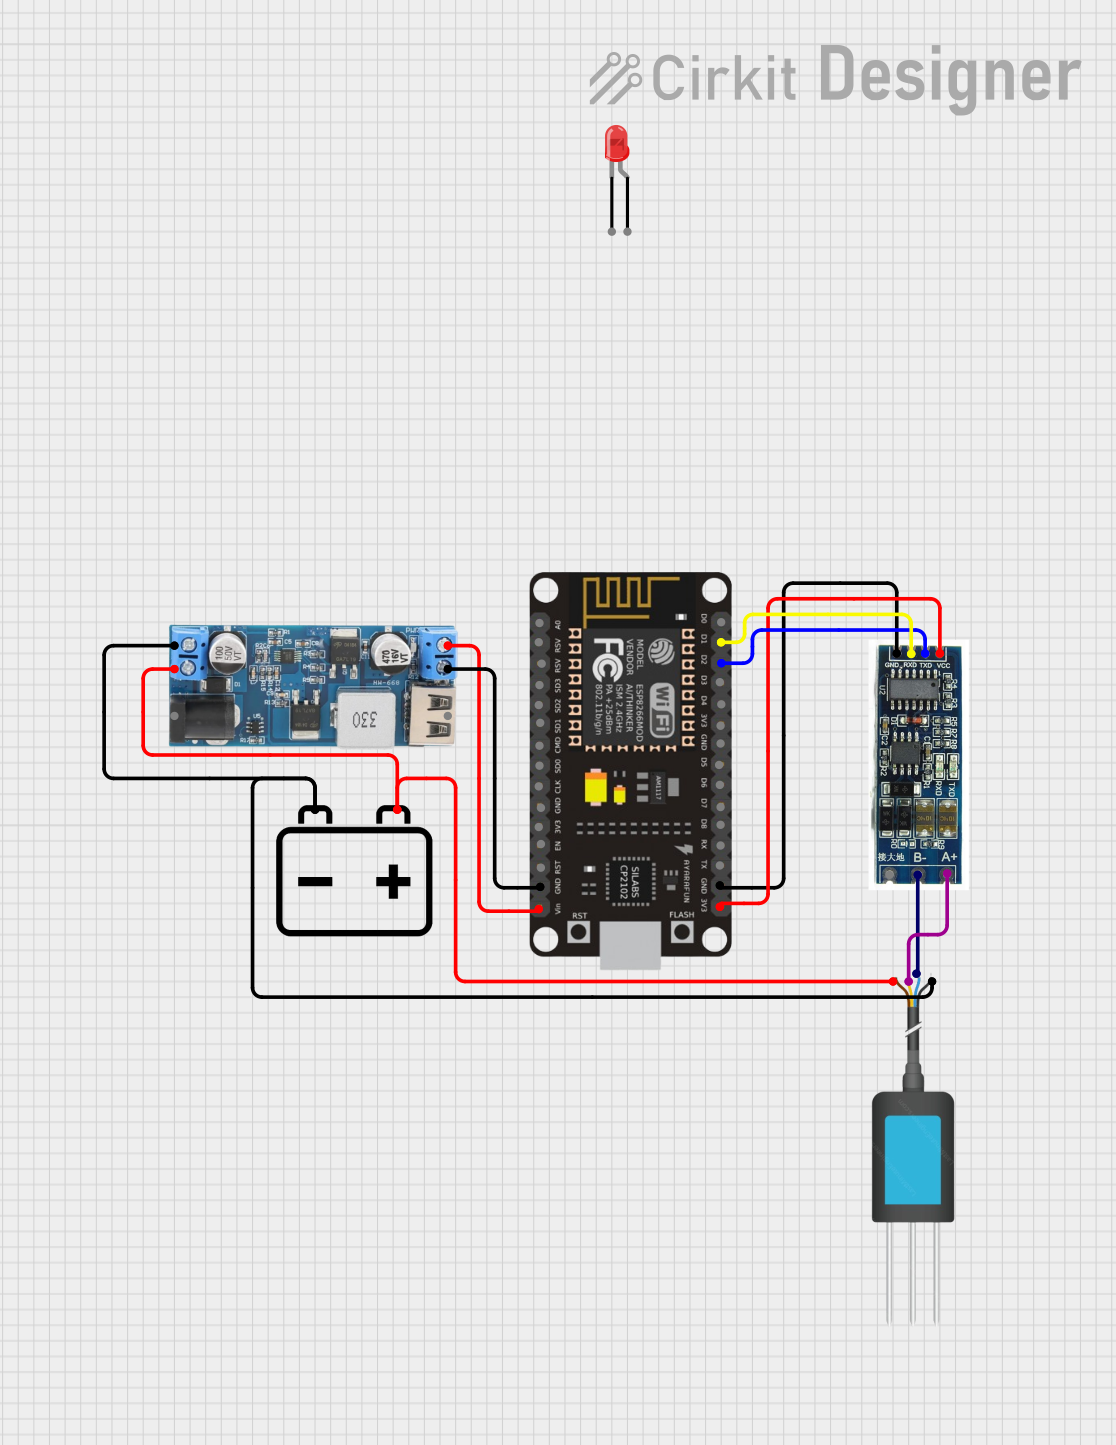
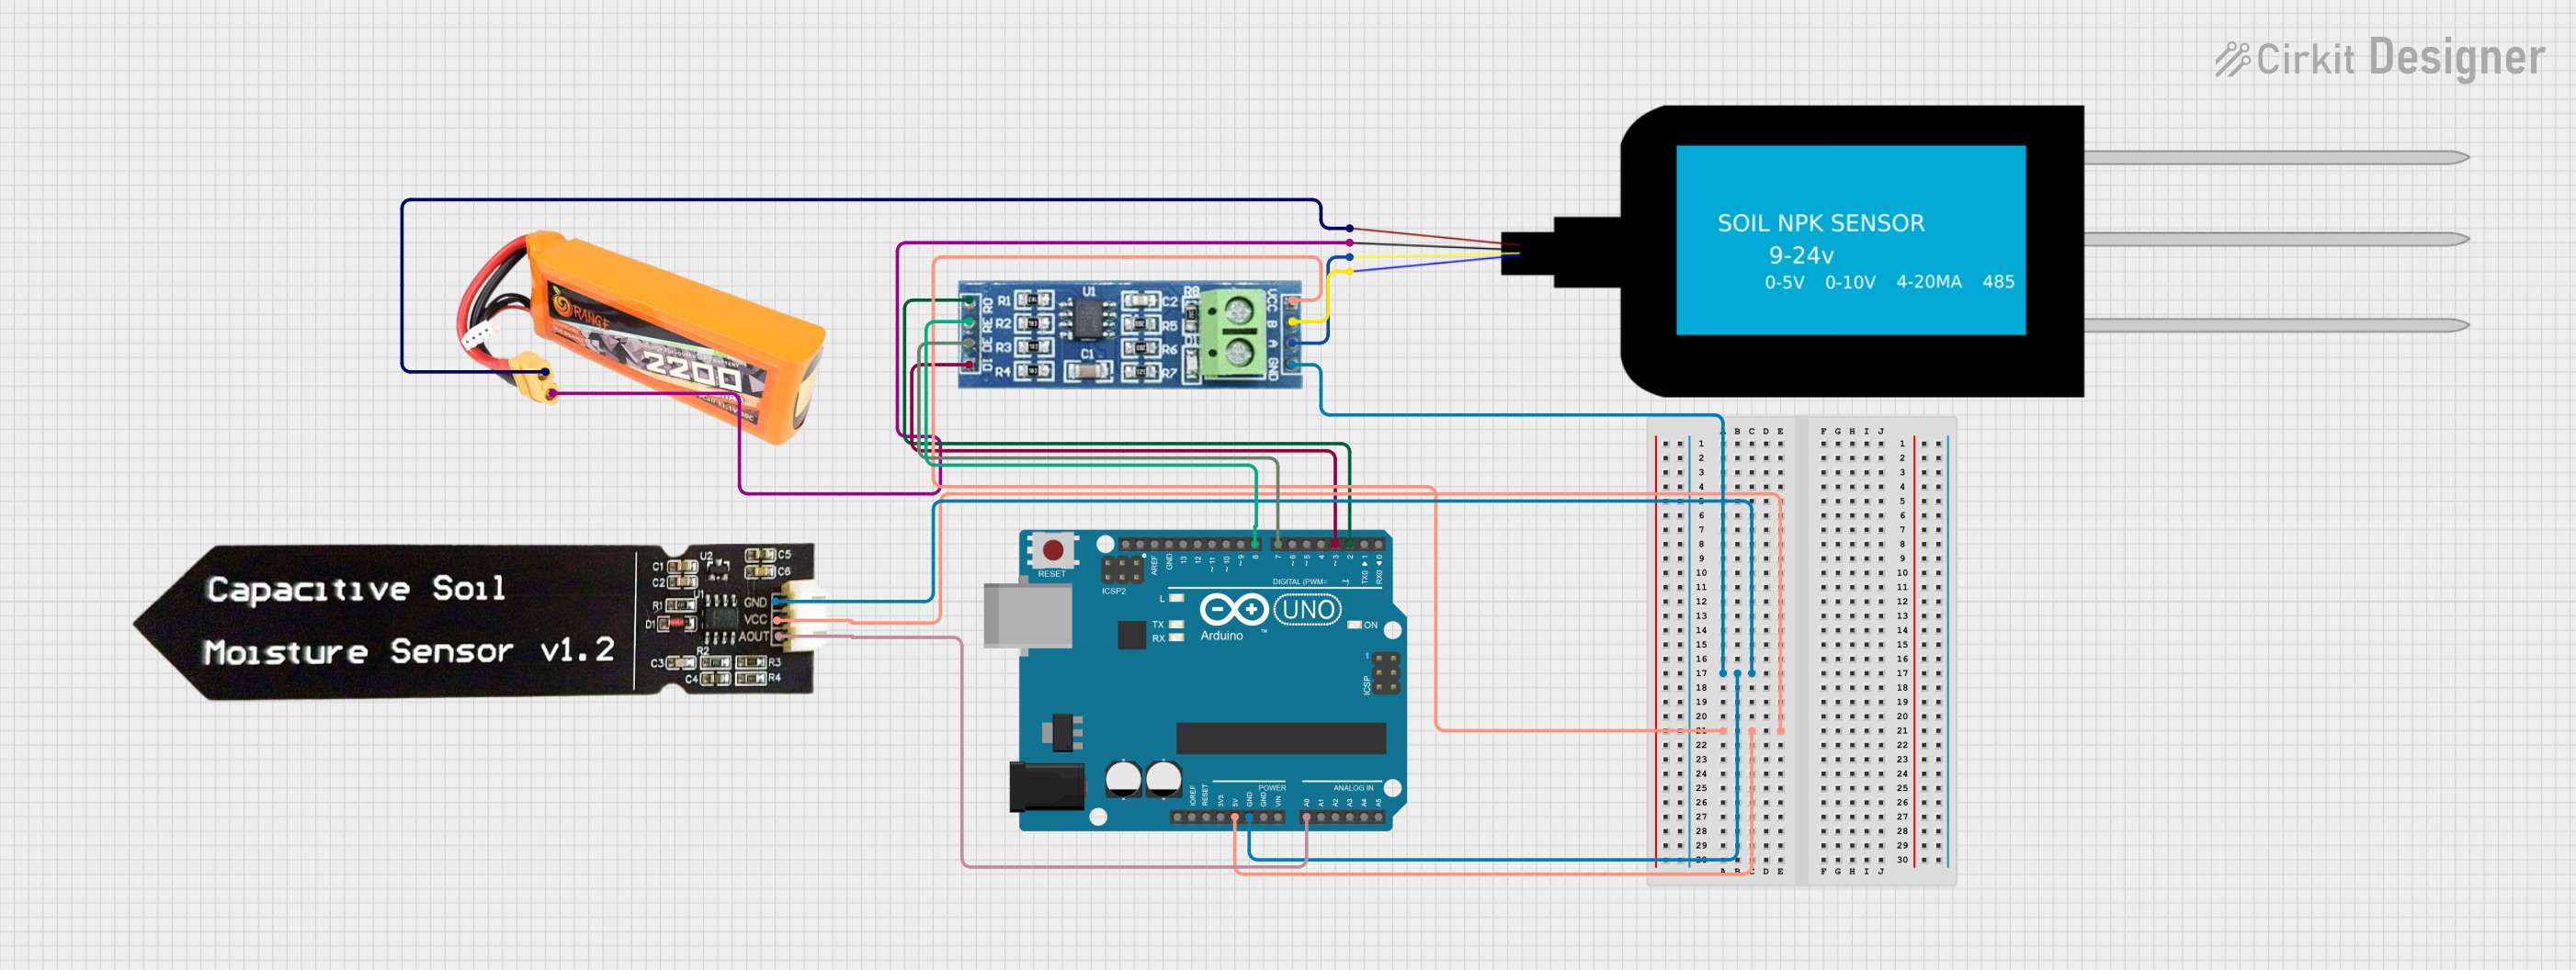
How to Use the Sensor in a Circuit
Wiring the Sensor:
- Connect the VCC pin of the sensor to the 5V pin on the Arduino UNO.
- Connect the GND pin of the sensor to the GND pin on the Arduino UNO.
- Connect the TX pin of the sensor to the RX pin (Pin 0) on the Arduino UNO.
- Connect the RX pin of the sensor to the TX pin (Pin 1) on the Arduino UNO.
Powering the Sensor:
- Ensure the Arduino UNO is powered via USB or an external power source.
Reading Data:
- The sensor communicates via UART. Use the Arduino Serial Monitor or a custom sketch to read and process the data.
Important Considerations and Best Practices
- Calibration: The sensor may require calibration for accurate pH and NPK readings. Follow the manufacturer’s calibration procedure.
- Placement: Insert the sensor probes fully into the soil for accurate measurements. Avoid rocky or extremely dry soil.
- Moisture Sensitivity: Ensure the sensor is not submerged in water, as it is designed for soil use only.
- Data Filtering: Use software filtering techniques to smooth out noisy data, especially for pH and NPK readings.
Sample Arduino Code
Below is an example Arduino sketch to read data from the 7 in One NPK Sensor:
// Include necessary libraries
#include <SoftwareSerial.h>

// Define RX and TX pins for SoftwareSerial
SoftwareSerial mySerial(10, 11); // RX = Pin 10, TX = Pin 11

void setup() {
  Serial.begin(9600); // Initialize Serial Monitor at 9600 baud
  mySerial.begin(9600); // Initialize sensor communication at 9600 baud
  Serial.println("7 in One NPK Sensor Initialized");
}

void loop() {
  if (mySerial.available()) {
    // Read data from the sensor
    String sensorData = mySerial.readStringUntil('\n');
    Serial.println("Sensor Data: " + sensorData); // Print data to Serial Monitor
  }
  delay(1000); // Wait 1 second before the next reading
}
Notes:
- Replace
10and11inSoftwareSerialwith the desired pins if using a different configuration. - Ensure the baud rate matches the sensor's default (9600).
Troubleshooting and FAQs
Common Issues and Solutions
No Data Output:
- Cause: Incorrect wiring or baud rate mismatch.
- Solution: Double-check the wiring and ensure the baud rate is set to 9600 in the code.
Inaccurate Readings:
- Cause: Sensor not calibrated or improperly placed in the soil.
- Solution: Calibrate the sensor and ensure it is fully inserted into the soil.
Sensor Not Responding:
- Cause: Insufficient power supply or damaged sensor.
- Solution: Verify the power supply voltage (5V) and check for physical damage.
Interference with Other UART Devices:
- Cause: Multiple devices using the same UART pins.
- Solution: Use
SoftwareSerialto assign different pins for communication.
FAQs
Q1: Can this sensor be used in hydroponics?
A1: No, this sensor is designed for soil use only and may not provide accurate readings in water-based systems.
Q2: How often should the sensor be calibrated?
A2: Calibration frequency depends on usage. For critical applications, calibrate monthly or after prolonged storage.
Q3: Can the sensor be used with other microcontrollers?
A3: Yes, the sensor can be used with any microcontroller that supports UART communication, such as ESP32 or Raspberry Pi.
Q4: Is the sensor waterproof?
A4: The sensor is water-resistant but not fully waterproof. Avoid submerging it in water.
By following this documentation, users can effectively integrate the 7 in One NPK Sensor into their projects and achieve accurate soil analysis for various applications.