How to Use CO Sensor: Examples, Pinouts, and Specs
Introduction
The DFRobot CO Sensor is a highly sensitive and reliable carbon monoxide sensor designed to detect the presence of carbon monoxide (CO) gas in the environment. This sensor is ideal for applications requiring real-time monitoring of CO levels to ensure safety and prevent poisoning. It is commonly used in air quality monitoring systems, industrial safety equipment, and smart home devices.
Explore Projects Built with CO Sensor
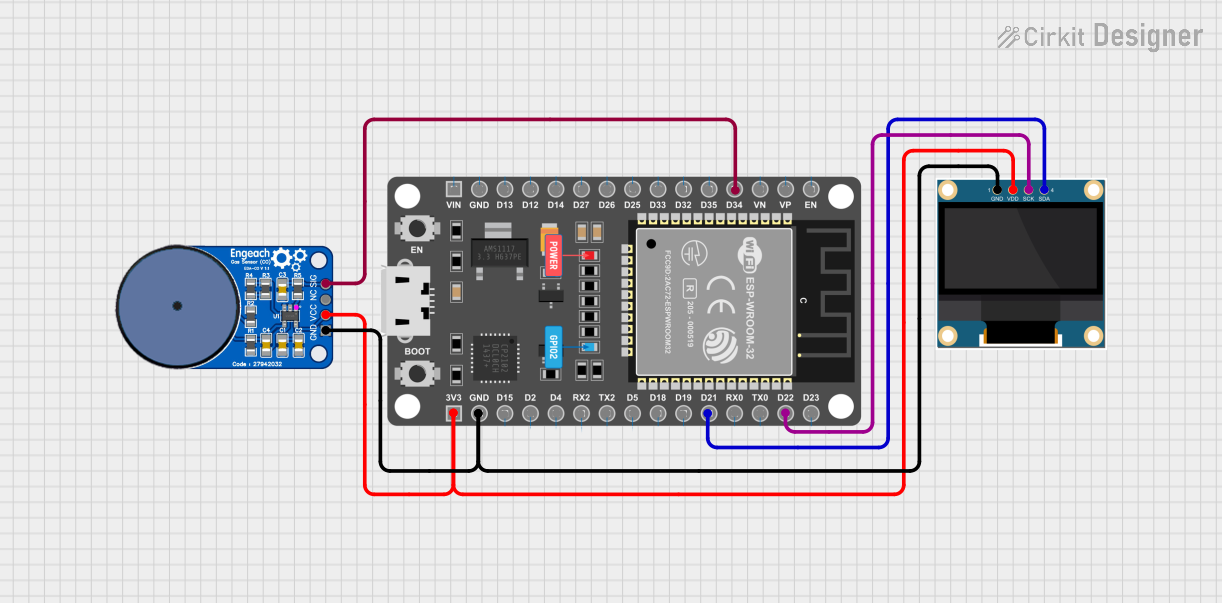
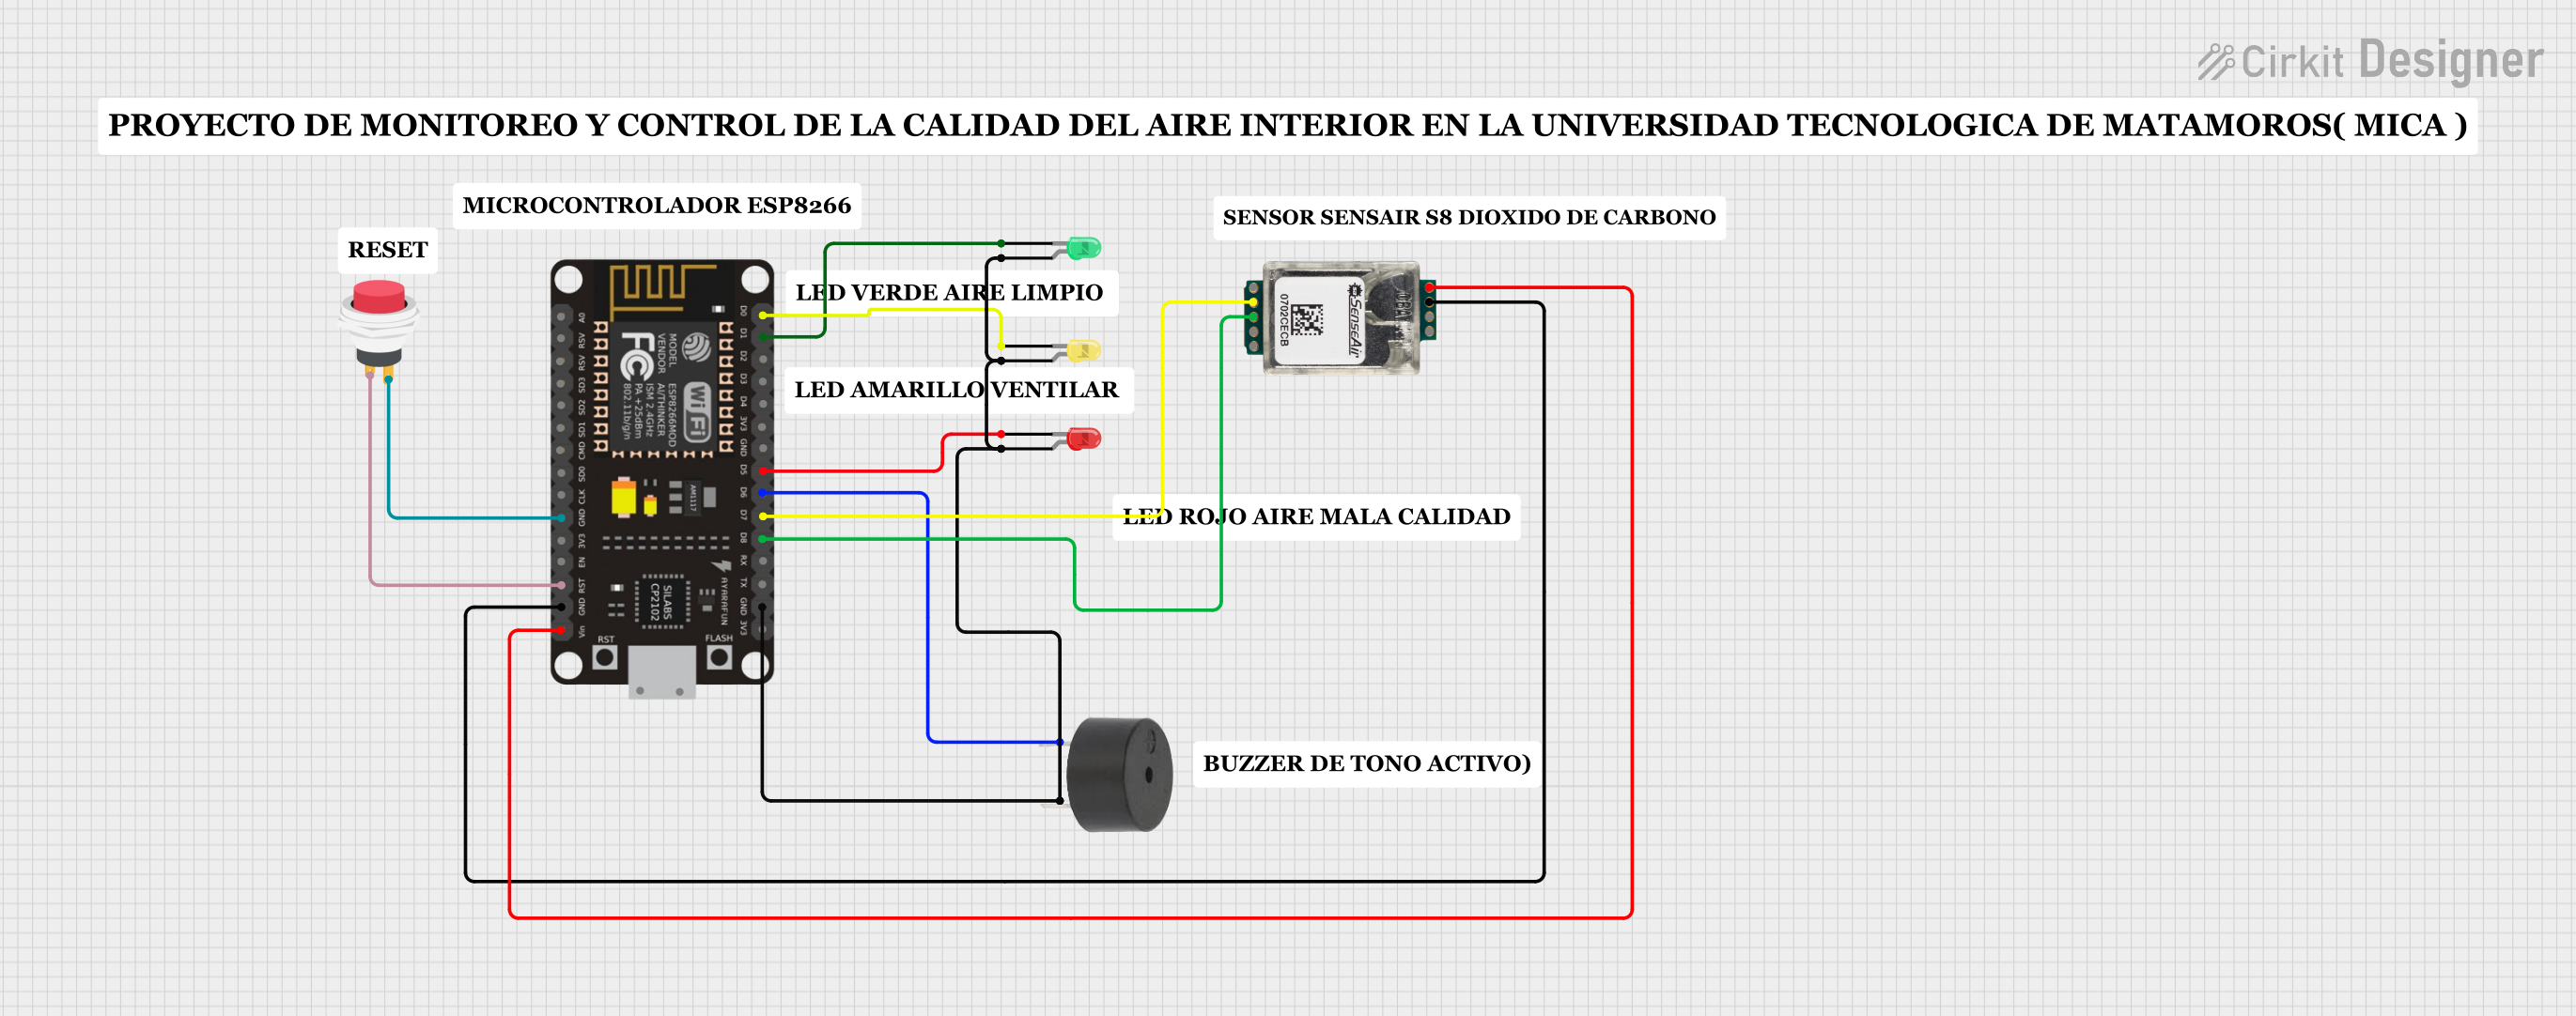
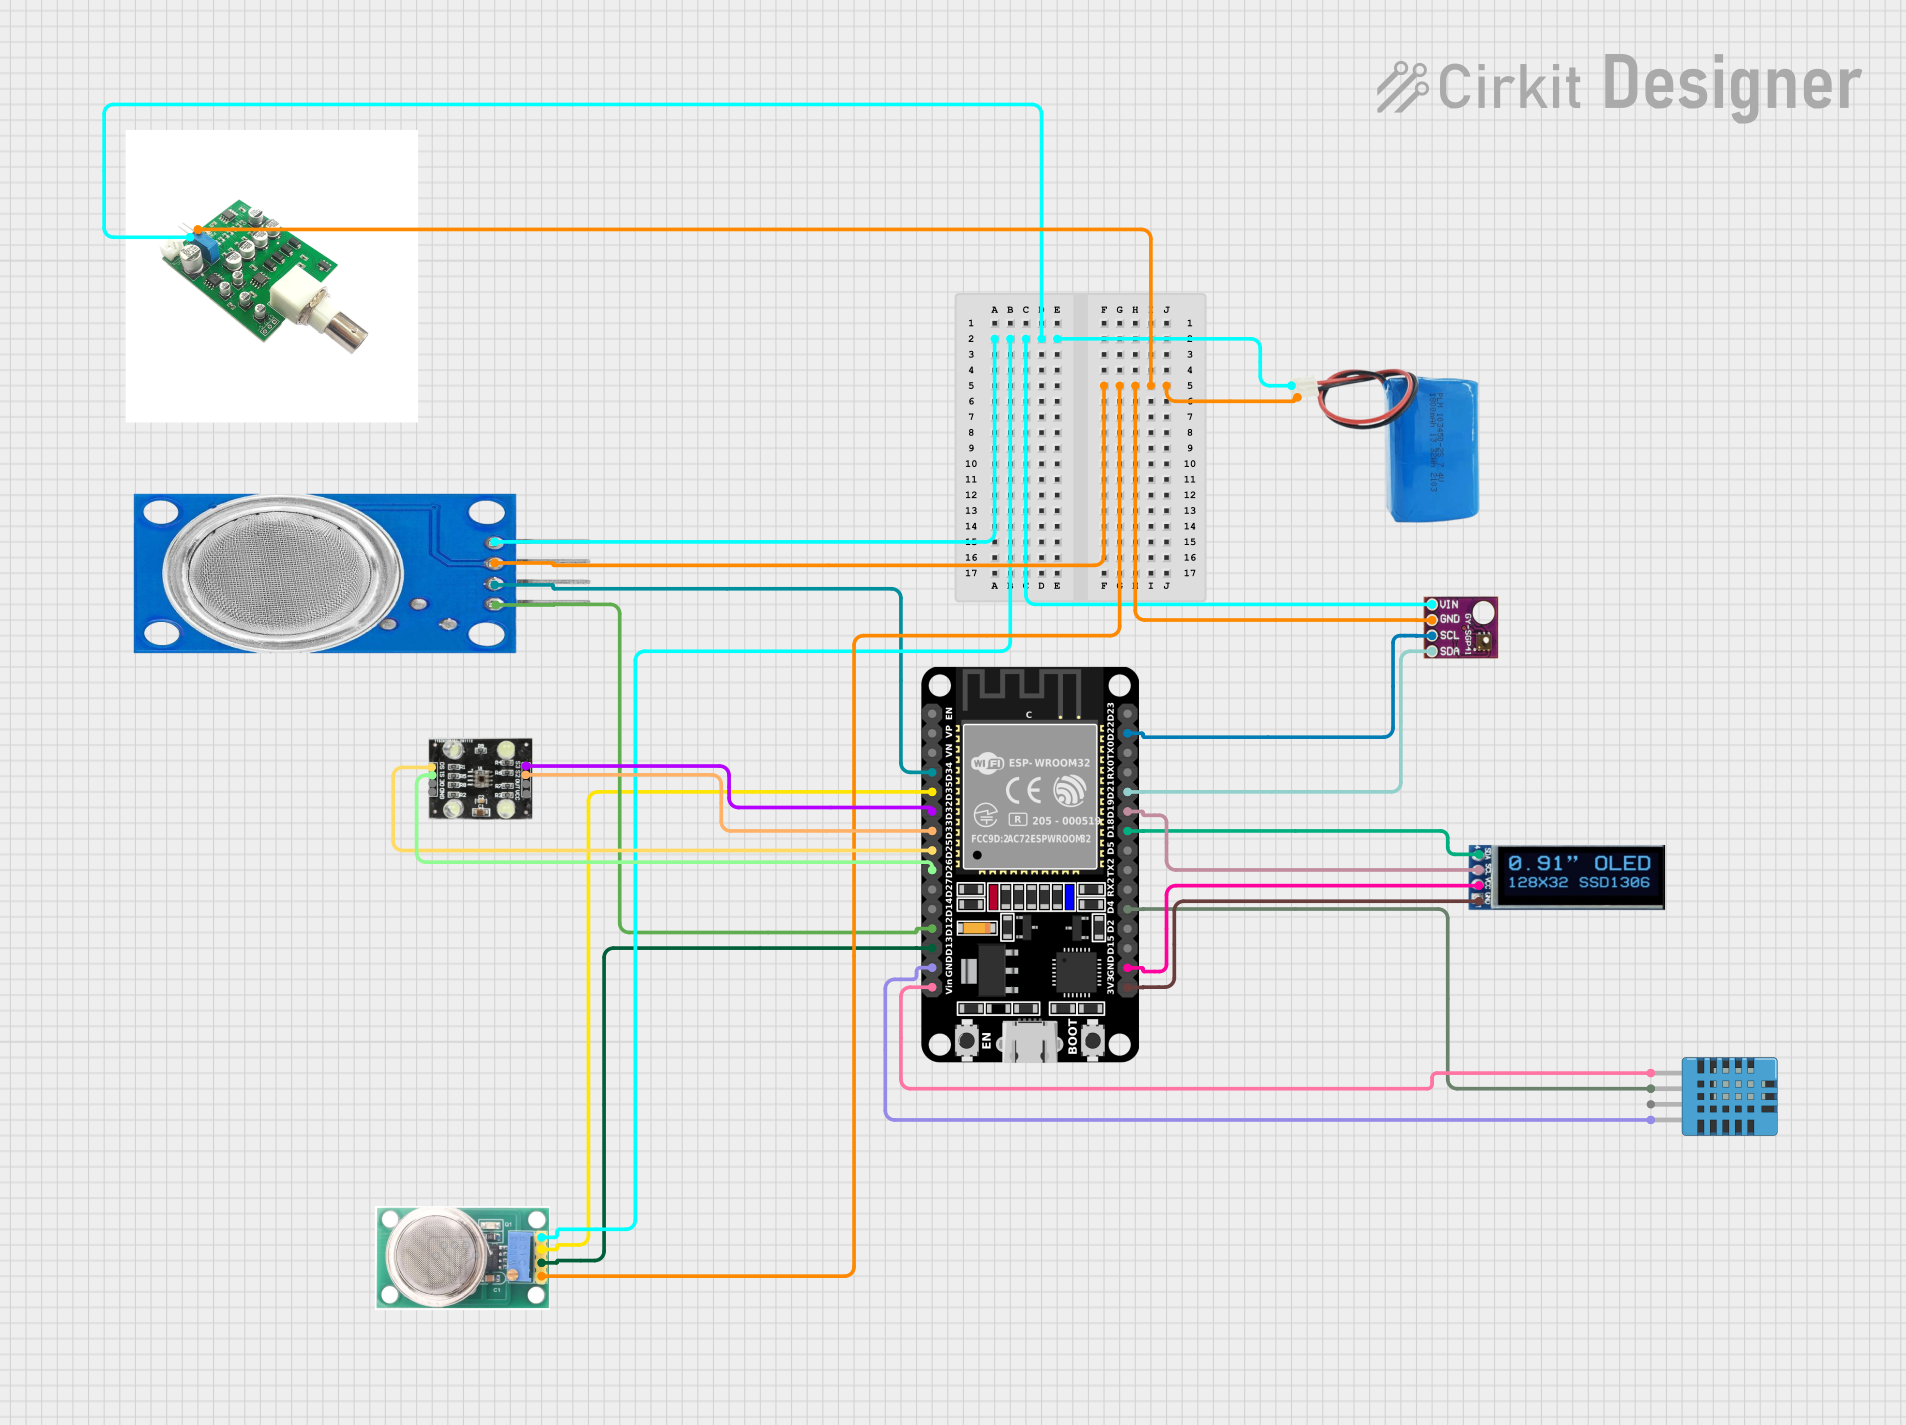
Explore Projects Built with CO Sensor
Common Applications and Use Cases
- Air quality monitoring in homes and offices
- Industrial safety systems to detect CO leaks
- Smart home automation for environmental safety
- Automotive applications for cabin air quality monitoring
- Portable CO detection devices
Technical Specifications
The DFRobot CO Sensor is designed for ease of use and integration into various systems. Below are its key technical details:
Key Technical Details
- Operating Voltage: 3.3V to 5V
- Output Signal: Analog voltage
- Detection Range: 10 ppm to 1000 ppm (parts per million)
- Preheat Time: 2 minutes
- Response Time: < 30 seconds
- Operating Temperature: -20°C to 50°C
- Operating Humidity: 15% to 90% RH (non-condensing)
- Power Consumption: < 150 mW
- Sensor Type: Electrochemical
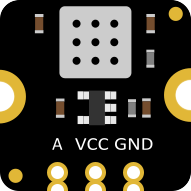
Pin Configuration and Descriptions
The DFRobot CO Sensor typically comes with a 4-pin interface. Below is the pin configuration:
| Pin | Name | Description |
|---|---|---|
| 1 | VCC | Power supply pin. Connect to 3.3V or 5V. |
| 2 | GND | Ground pin. Connect to the ground of the circuit. |
| 3 | AOUT | Analog output pin. Provides a voltage proportional to the CO concentration. |
| 4 | DOUT | Digital output pin. Outputs HIGH or LOW based on a preset CO concentration level. |
Usage Instructions
How to Use the Component in a Circuit
- Power the Sensor: Connect the VCC pin to a 3.3V or 5V power source and the GND pin to the ground.
- Read Analog Output: Connect the AOUT pin to an analog input pin of a microcontroller (e.g., Arduino UNO) to measure the CO concentration.
- Digital Output (Optional): Use the DOUT pin for a simple HIGH/LOW signal if a threshold concentration is set.
- Preheat the Sensor: Allow the sensor to preheat for at least 2 minutes before taking measurements for accurate readings.
Important Considerations and Best Practices
- Preheat Time: Always allow the sensor to preheat for the recommended 2 minutes before use.
- Calibration: For precise measurements, calibrate the sensor in a clean air environment.
- Ventilation: Ensure proper ventilation around the sensor to avoid false readings due to stagnant air.
- Avoid Contaminants: Keep the sensor away from water, oil, and other contaminants that may damage it.
- Power Supply: Use a stable power supply to avoid fluctuations in the sensor's output.
Example Code for Arduino UNO
Below is an example of how to interface the DFRobot CO Sensor with an Arduino UNO to read analog values:
// Define the analog pin connected to the AOUT pin of the CO sensor
const int sensorPin = A0;

void setup() {
  Serial.begin(9600); // Initialize serial communication at 9600 baud
  Serial.println("CO Sensor Initialized. Preheating...");
  delay(120000); // Preheat the sensor for 2 minutes (120,000 ms)
  Serial.println("Preheat complete. Starting measurements...");
}

void loop() {
  int sensorValue = analogRead(sensorPin); // Read the analog value from the sensor
  float voltage = sensorValue * (5.0 / 1023.0); // Convert the analog value to voltage
  Serial.print("Sensor Voltage: ");
  Serial.print(voltage);
  Serial.println(" V");

  // Example: Convert voltage to approximate CO concentration (ppm)
  // Note: Replace the formula below with the sensor's specific calibration data
  float coConcentration = voltage * 200; // Example conversion factor
  Serial.print("CO Concentration: ");
  Serial.print(coConcentration);
  Serial.println(" ppm");

  delay(1000); // Wait 1 second before the next reading
}
Troubleshooting and FAQs
Common Issues and Solutions
No Output or Incorrect Readings:
- Cause: Insufficient preheat time.
- Solution: Ensure the sensor is preheated for at least 2 minutes before use.
Fluctuating Readings:
- Cause: Unstable power supply or environmental interference.
- Solution: Use a stable power source and ensure the sensor is placed in a well-ventilated area.
Sensor Not Responding:
- Cause: Incorrect wiring or damaged sensor.
- Solution: Double-check the wiring and ensure the sensor is not physically damaged.
Digital Output Always HIGH or LOW:
- Cause: Incorrect threshold setting or faulty sensor.
- Solution: Verify the threshold setting and test the sensor in a known CO concentration environment.
FAQs
Q1: Can the sensor detect gases other than CO?
A1: No, the sensor is specifically designed to detect carbon monoxide (CO) and may not respond accurately to other gases.
Q2: How do I calibrate the sensor?
A2: Place the sensor in a clean air environment (0 ppm CO) and adjust the calibration settings in your code or circuit as per the manufacturer's guidelines.
Q3: Can I use the sensor outdoors?
A3: The sensor is designed for indoor use. Outdoor use may expose it to extreme temperatures, humidity, or contaminants, which can affect its performance.
Q4: What is the lifespan of the sensor?
A4: The typical lifespan of the sensor is 2 to 3 years under normal operating conditions.