How to Use NPK 5 in 1: Examples, Pinouts, and Specs
Introduction
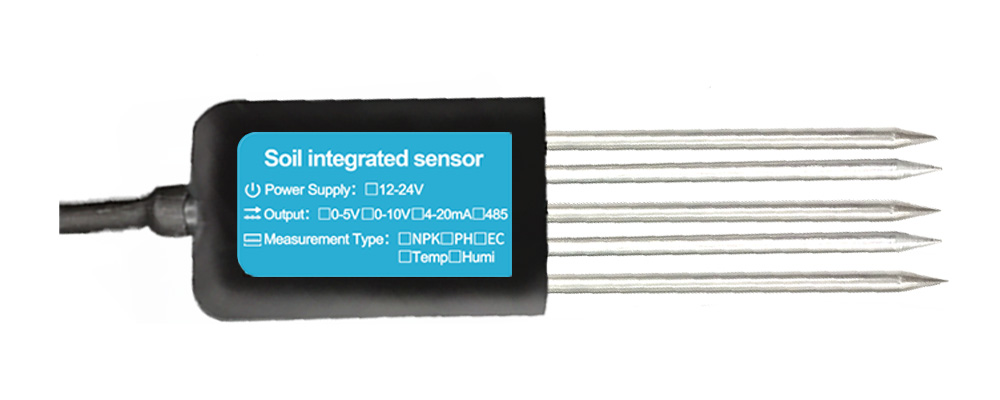
The NPK 5 in 1 sensor, manufactured by ESP32, is a versatile electronic component designed to measure soil nutrient levels, specifically Nitrogen (N), Phosphorus (P), and Potassium (K), along with additional environmental parameters such as soil moisture and temperature. This sensor is essential for precision agriculture, enabling users to monitor and optimize soil conditions for plant growth and development.
Explore Projects Built with NPK 5 in 1
Explore Projects Built with NPK 5 in 1
Common Applications and Use Cases
- Precision agriculture and smart farming
- Greenhouse monitoring systems
- Soil quality analysis for gardening and landscaping
- Research and development in agronomy
- Automated irrigation systems
Technical Specifications
The NPK 5 in 1 sensor is designed to provide accurate and reliable measurements of soil nutrients and environmental conditions. Below are the key technical details:
General Specifications
| Parameter | Value |
|---|---|
| Manufacturer | ESP32 |
| Part ID | NPK |
| Nutrient Ratio | 5:1:1 (N:P:K) |
| Operating Voltage | 3.3V - 5V |
| Operating Current | ≤ 50mA |
| Communication Protocol | UART (Universal Asynchronous Receiver-Transmitter) |
| Measurement Parameters | Nitrogen (N), Phosphorus (P), Potassium (K), Soil Moisture, Temperature |
| Operating Temperature | -20°C to 60°C |
| Measurement Range | NPK: 0-1999 mg/kg, Moisture: 0-100%, Temperature: -40°C to 80°C |
| Accuracy | ±2% for NPK, ±3% for moisture, ±0.5°C for temperature |
Pin Configuration and Descriptions
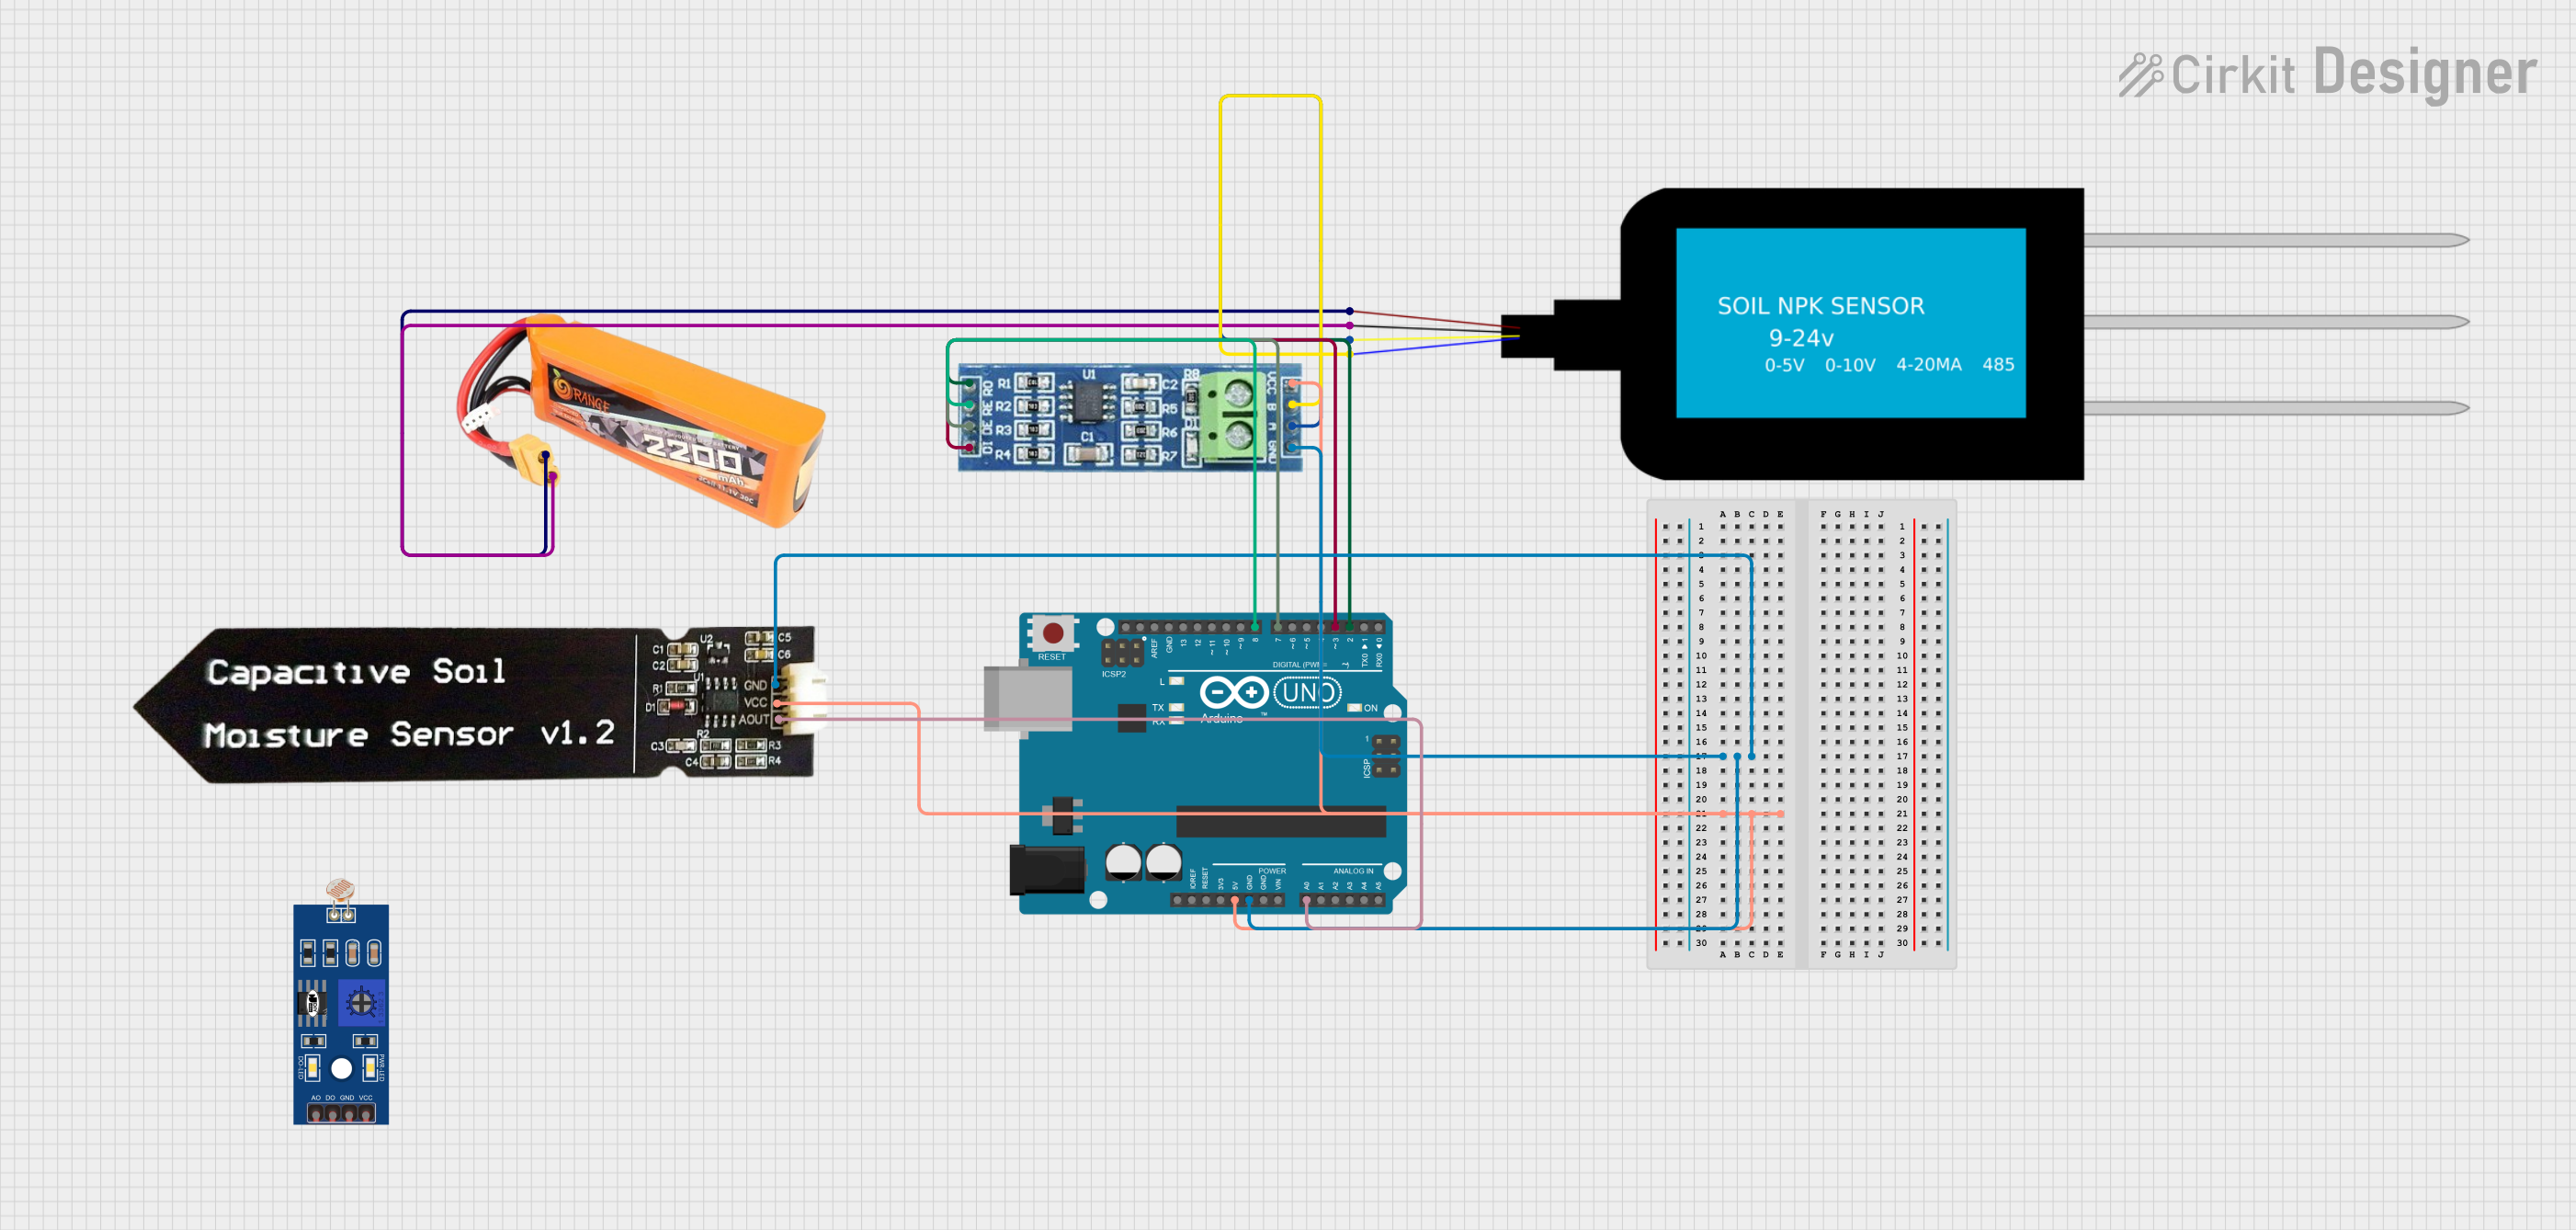
The NPK 5 in 1 sensor has a 4-pin interface for easy integration with microcontrollers such as the ESP32 or Arduino UNO.
| Pin Name | Pin Number | Description |
|---|---|---|
| VCC | 1 | Power supply input (3.3V - 5V) |
| GND | 2 | Ground connection |
| TX | 3 | UART Transmit pin for data output |
| RX | 4 | UART Receive pin for communication with the MCU |
Usage Instructions
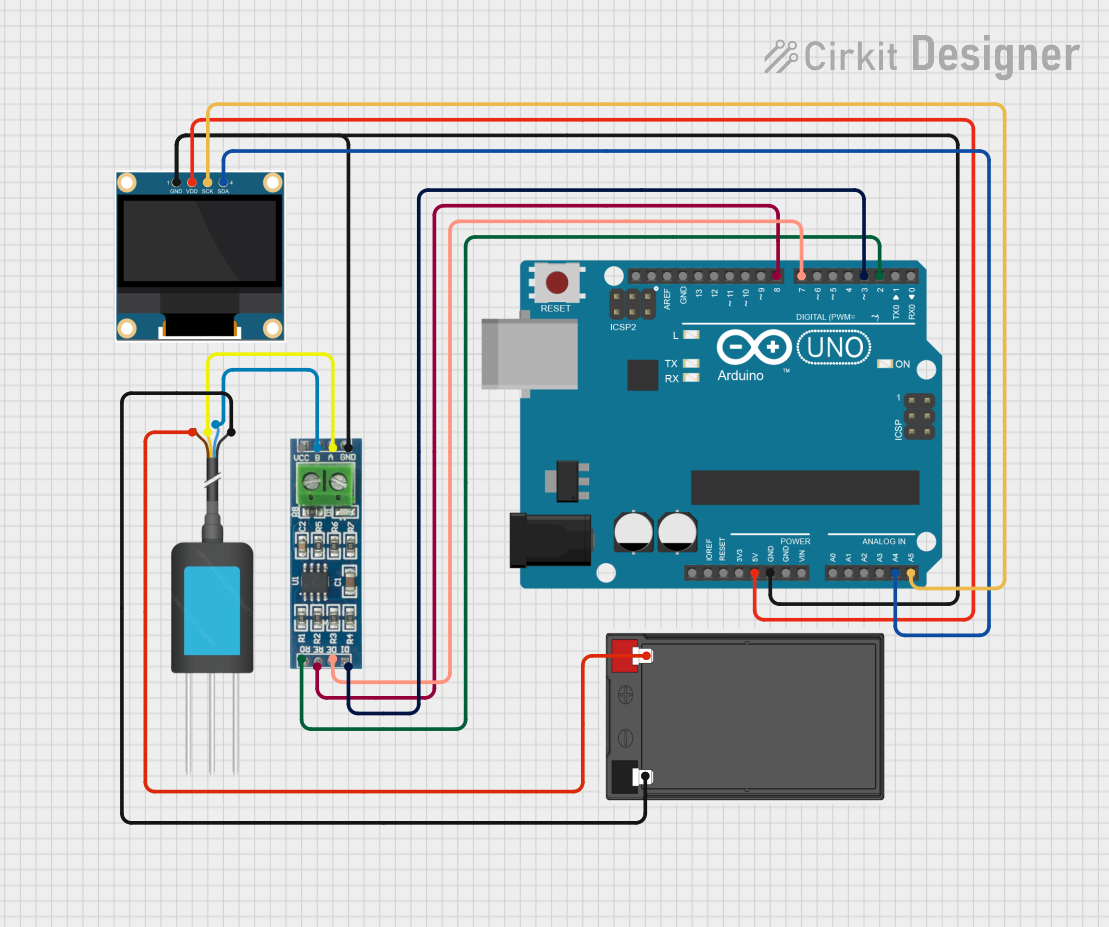
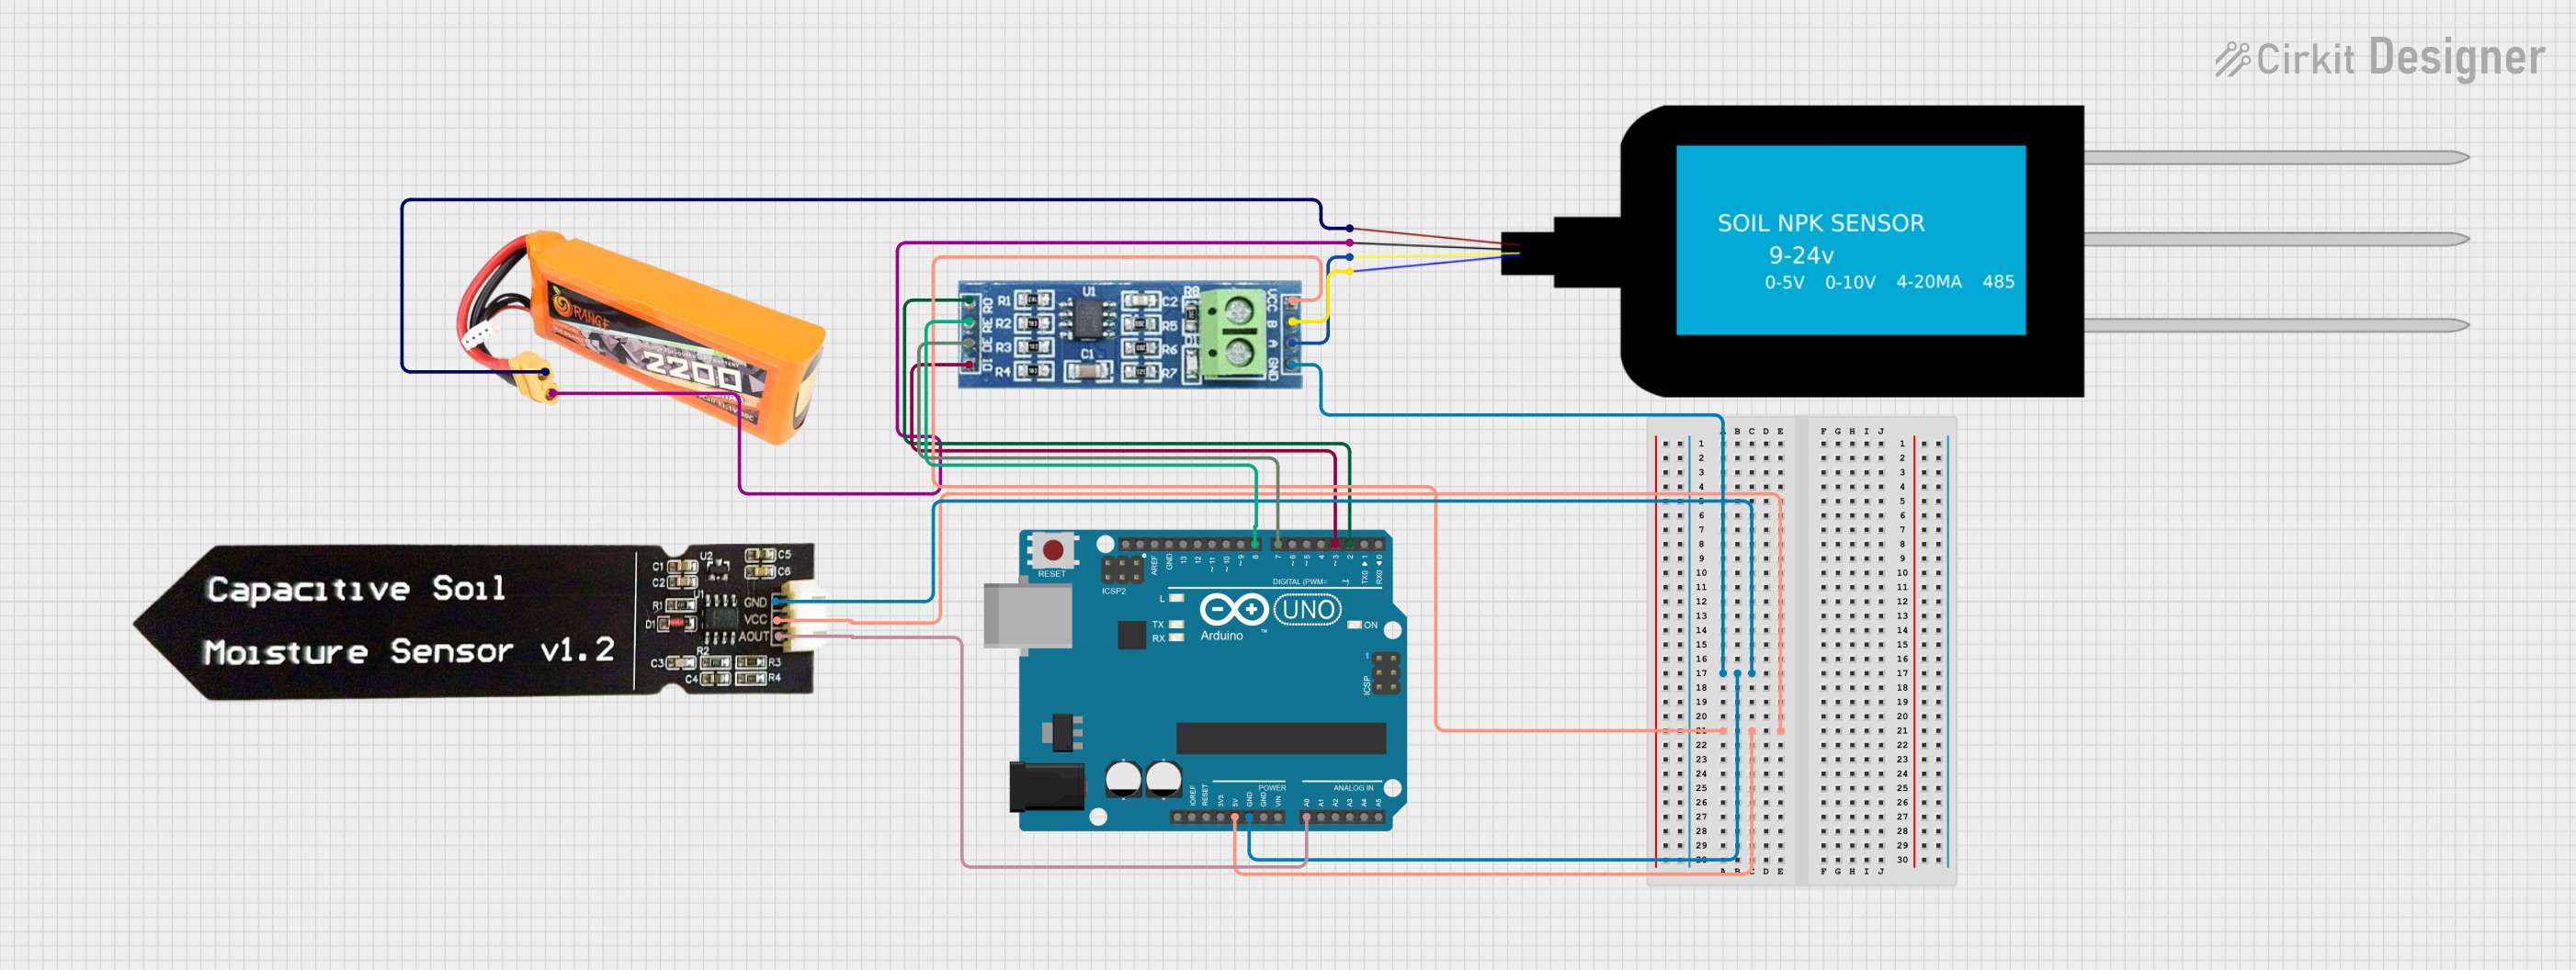
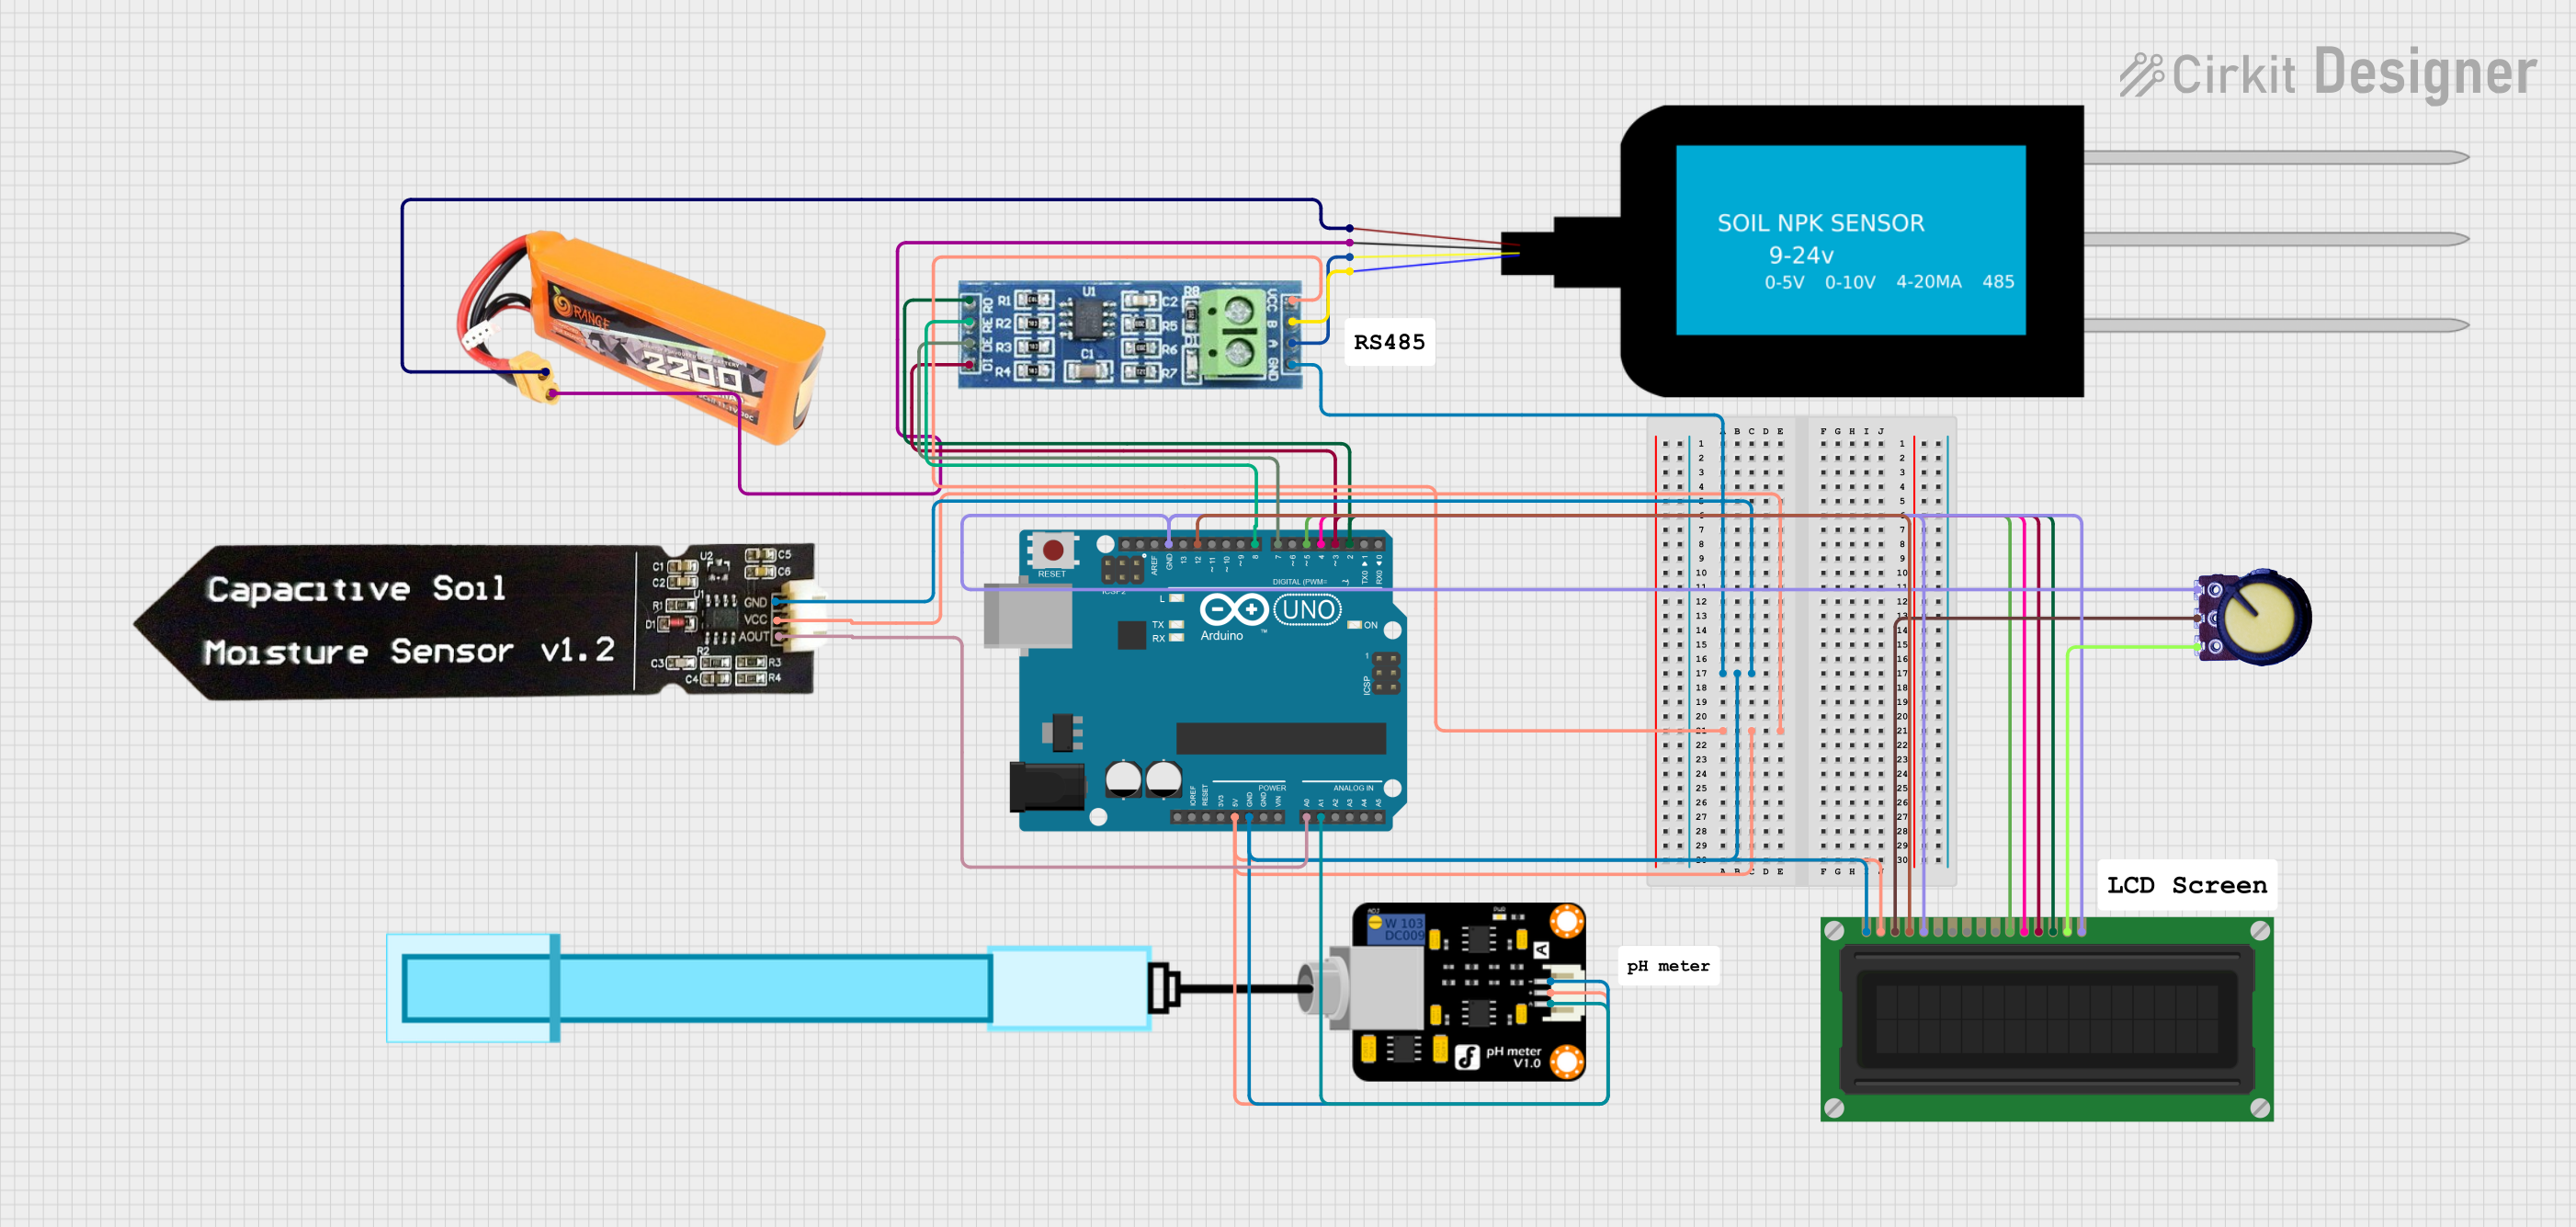
How to Use the Component in a Circuit
- Power the Sensor: Connect the VCC pin to a 3.3V or 5V power source and the GND pin to the ground of your circuit.
- Establish Communication: Connect the TX pin of the sensor to the RX pin of your microcontroller and the RX pin of the sensor to the TX pin of your microcontroller.
- Read Data: Use the UART communication protocol to read the sensor's output data. The sensor will provide real-time measurements of NPK levels, soil moisture, and temperature.
Important Considerations and Best Practices
- Ensure the sensor is properly calibrated before use to achieve accurate measurements.
- Avoid exposing the sensor to extreme environmental conditions beyond its operating range.
- Insert the sensor probes fully into the soil for consistent readings.
- Use a stable power supply to prevent fluctuations in sensor performance.
- Clean the sensor probes after use to prevent corrosion or residue buildup.
Example Code for Arduino UNO
Below is an example code snippet to interface the NPK 5 in 1 sensor with an Arduino UNO:
#include <SoftwareSerial.h>

// Define RX and TX pins for SoftwareSerial
SoftwareSerial mySerial(10, 11); // RX = Pin 10, TX = Pin 11

void setup() {
  Serial.begin(9600); // Initialize Serial Monitor at 9600 baud
  mySerial.begin(9600); // Initialize SoftwareSerial at 9600 baud
  Serial.println("NPK 5 in 1 Sensor Test");
}

void loop() {
  if (mySerial.available()) {
    // Read data from the sensor
    String sensorData = mySerial.readString();
    Serial.println("Sensor Data: " + sensorData); // Print data to Serial Monitor
  }
  delay(1000); // Wait for 1 second before the next reading
}
Note: Replace 10 and 11 with the appropriate pins on your Arduino UNO if different pins are used for RX and TX.
Troubleshooting and FAQs
Common Issues and Solutions
No Data Output:
- Ensure the sensor is powered correctly (check VCC and GND connections).
- Verify the TX and RX connections between the sensor and the microcontroller.
- Confirm that the baud rate in the code matches the sensor's default baud rate (9600).
Inaccurate Readings:
- Check if the sensor probes are fully inserted into the soil.
- Calibrate the sensor if necessary, following the manufacturer's guidelines.
- Clean the sensor probes to remove any dirt or residue.
Sensor Not Responding:
- Ensure the UART communication protocol is correctly implemented in your code.
- Test the sensor with a different microcontroller to rule out hardware issues.
FAQs
Q1: Can the NPK 5 in 1 sensor be used in hydroponic systems?
A1: Yes, the sensor can be used in hydroponic systems, but ensure the probes are submerged in the nutrient solution and not exposed to corrosive chemicals.
Q2: How often should the sensor be calibrated?
A2: Calibration frequency depends on usage and environmental conditions. For optimal performance, calibrate the sensor every 3-6 months.
Q3: Is the sensor waterproof?
A3: The sensor probes are designed for soil insertion and are water-resistant, but the main body of the sensor should not be submerged in water.
Q4: Can the sensor be used with a Raspberry Pi?
A4: Yes, the sensor can be interfaced with a Raspberry Pi using the UART communication protocol. Ensure proper voltage level shifting if required.