How to Use DC power Shield Wemos: Examples, Pinouts, and Specs

Introduction
The DC Power Shield for Wemos D1 Mini is a power management module designed to provide a stable and reliable DC power supply to Wemos D1 Mini boards. This shield simplifies the process of powering your IoT projects by allowing easy connection to various power sources, such as batteries or external DC adapters. It is compact, efficient, and specifically tailored for seamless integration with the Wemos D1 Mini ecosystem.
Explore Projects Built with DC power Shield Wemos

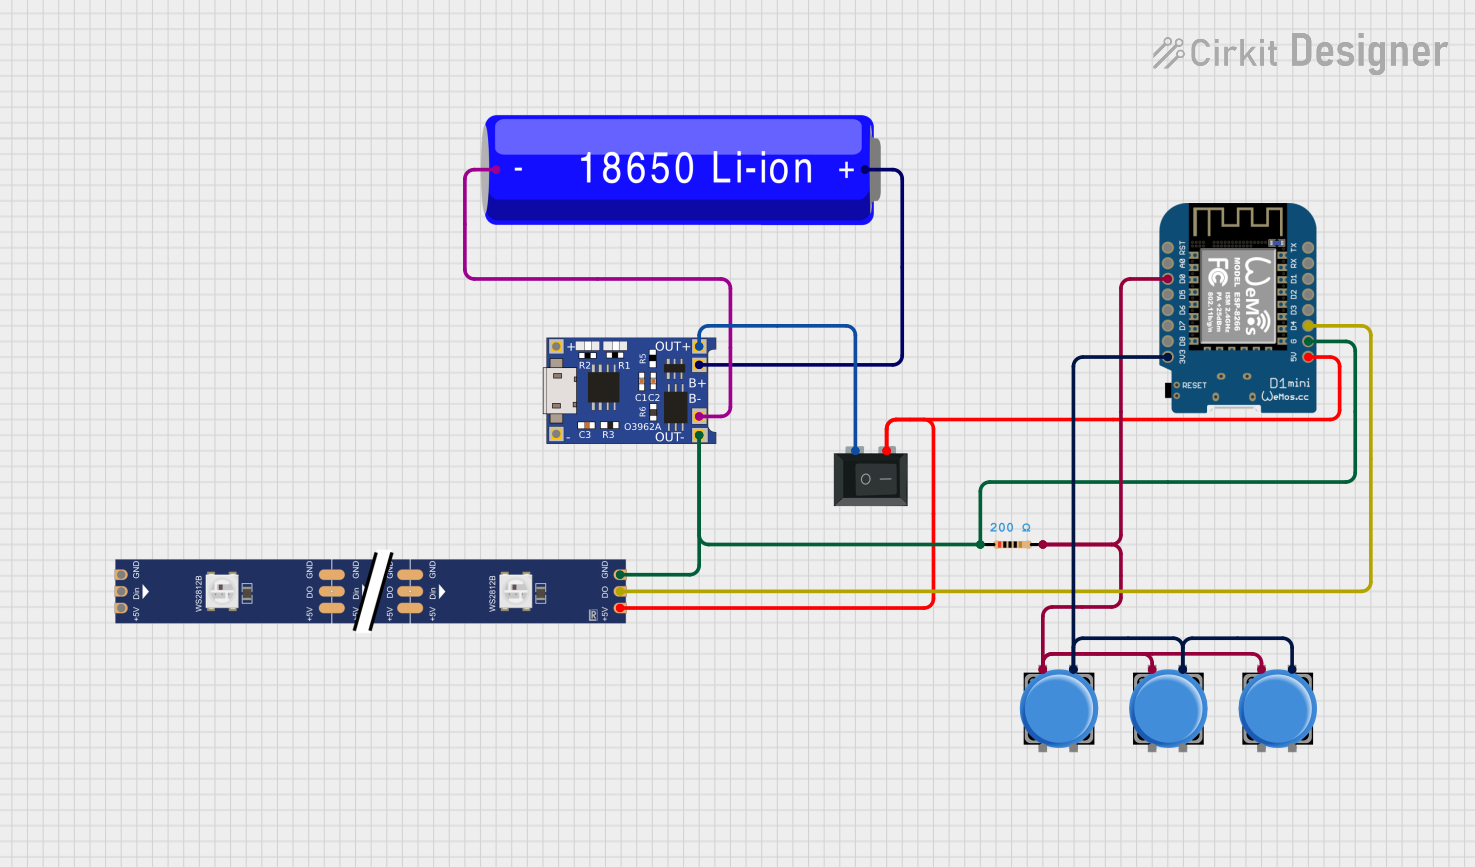
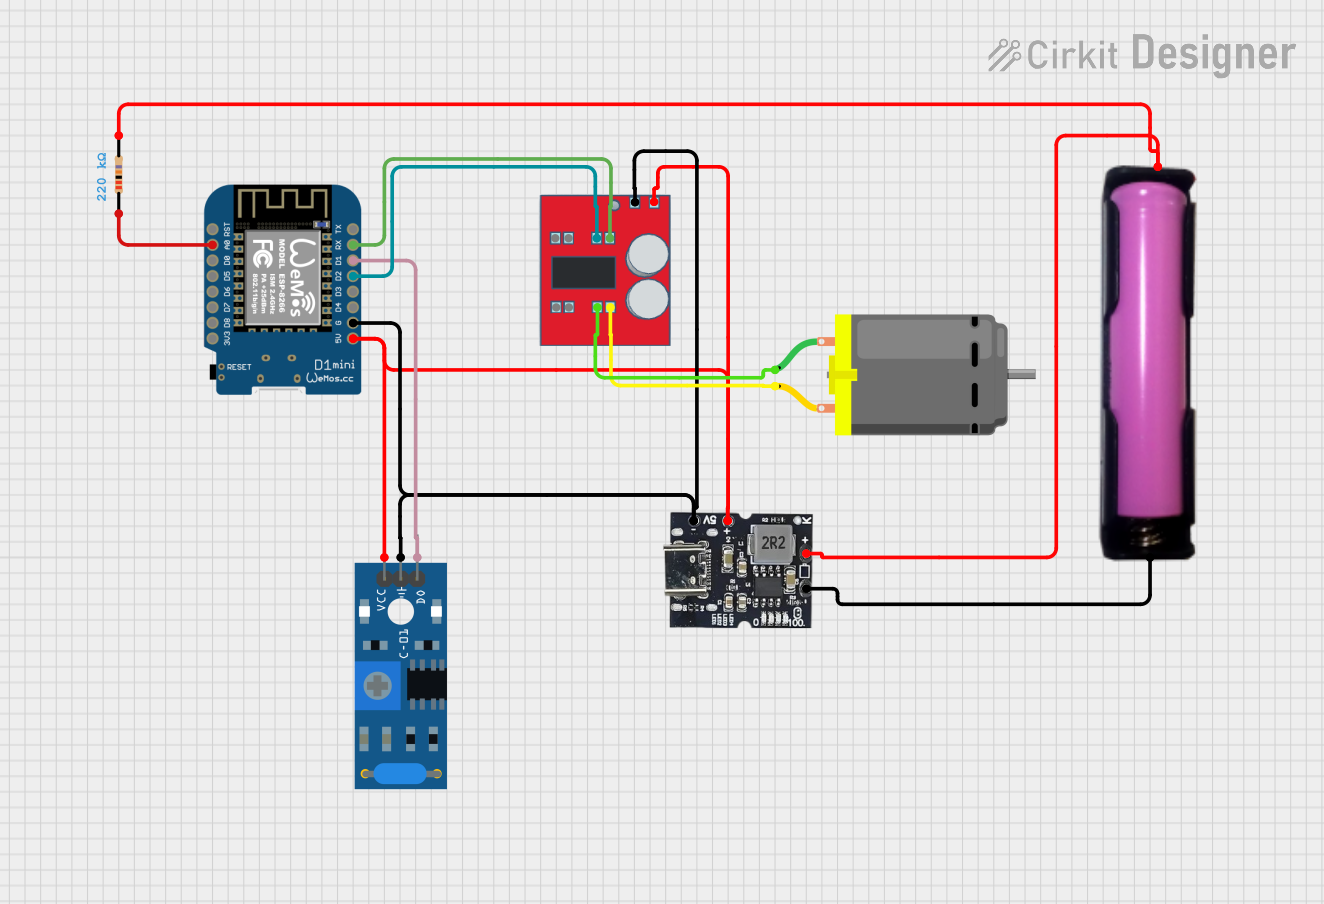
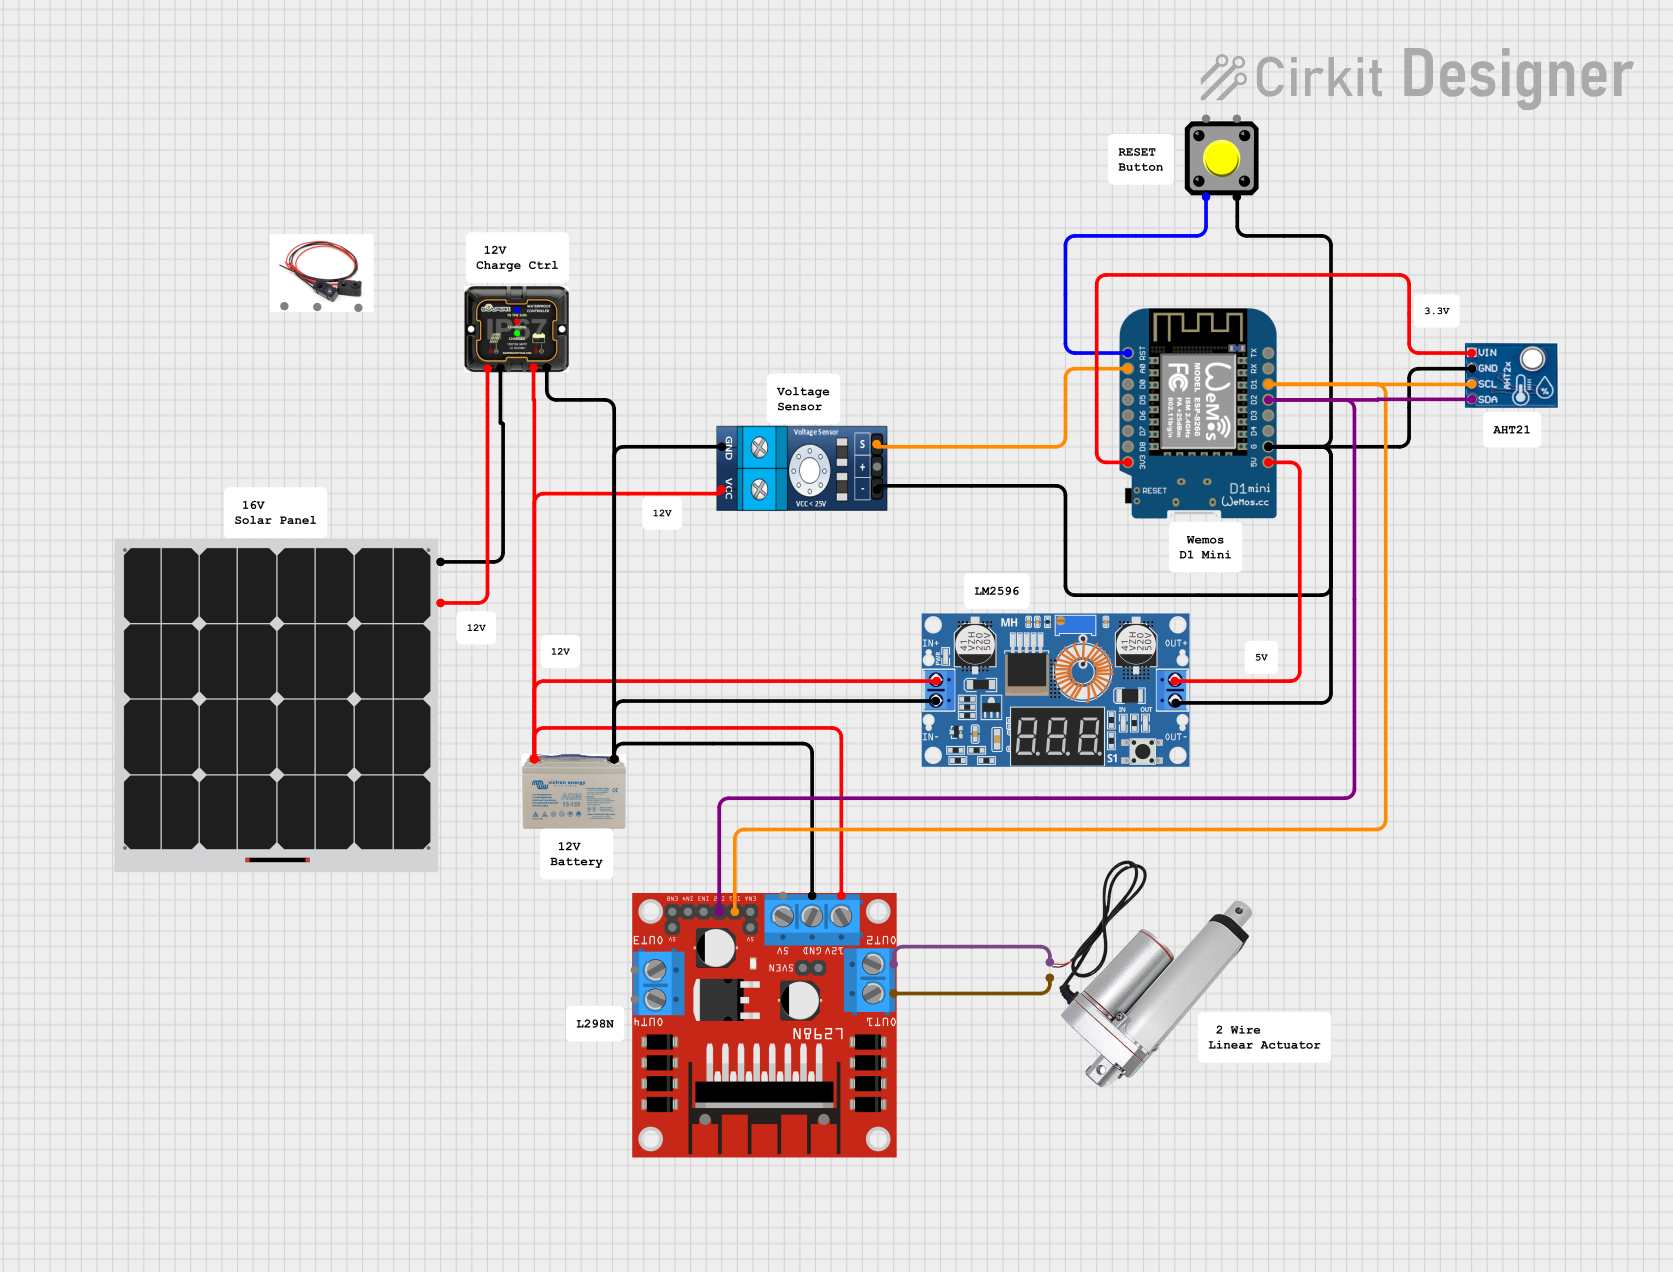
Explore Projects Built with DC power Shield Wemos
Common Applications and Use Cases
- Powering Wemos D1 Mini boards in IoT projects.
- Providing a stable power supply for sensors, actuators, and other peripherals.
- Battery-powered or portable IoT applications.
- Projects requiring a regulated DC voltage input.
Technical Specifications
Key Technical Details
- Input Voltage Range: 6V to 24V DC.
- Output Voltage: 5V DC (regulated).
- Maximum Output Current: 1A.
- Efficiency: Up to 95% (depending on input voltage and load).
- Dimensions: 28.5mm x 28.5mm.
- Connector Type: 2.1mm DC barrel jack and screw terminals.
- Compatibility: Designed for Wemos D1 Mini boards.
Pin Configuration and Descriptions
The DC Power Shield has a simple interface for connecting power sources and delivering regulated power to the Wemos D1 Mini. Below is a description of its key pins and connectors:
| Pin/Connector | Description |
|---|---|
| DC Barrel Jack | Standard 2.1mm DC input for connecting external power adapters (6V-24V). |
| Screw Terminals | Alternative input for connecting wires from a DC power source (6V-24V). |
| 5V Output Pin | Provides regulated 5V DC output to the Wemos D1 Mini board. |
| GND Pin | Ground connection shared between the shield and the Wemos D1 Mini. |
Usage Instructions
How to Use the DC Power Shield in a Circuit
- Attach the Shield to the Wemos D1 Mini: Align the pins of the DC Power Shield with the headers on the Wemos D1 Mini and press them together gently.
- Connect a Power Source:
- Use a DC adapter with a 2.1mm barrel jack to connect to the shield's DC input.
- Alternatively, connect a DC power source (e.g., battery pack) to the screw terminals, ensuring correct polarity.
- Power On: Once connected, the shield will regulate the input voltage and supply 5V to the Wemos D1 Mini.
- Verify Operation: Check the onboard LED indicator (if available) to confirm the shield is powered and functioning.
Important Considerations and Best Practices
- Ensure the input voltage is within the specified range (6V-24V) to avoid damaging the shield or connected components.
- Do not exceed the maximum output current of 1A to prevent overheating or failure.
- Use proper wire gauge and secure connections when using the screw terminals.
- If powering additional peripherals through the Wemos D1 Mini, ensure the total current draw does not exceed the shield's capacity.
Example: Using the Shield with an Arduino Sketch
The DC Power Shield is often used with the Wemos D1 Mini in IoT projects. Below is an example of a simple Arduino sketch to blink an LED connected to the Wemos D1 Mini while powered by the shield:
// Simple LED Blink Example for Wemos D1 Mini
// Ensure the DC Power Shield is properly connected and powered.

#define LED_PIN D4  // Built-in LED on the Wemos D1 Mini

void setup() {
  pinMode(LED_PIN, OUTPUT);  // Set the LED pin as an output
}

void loop() {
  digitalWrite(LED_PIN, HIGH);  // Turn the LED on
  delay(1000);                  // Wait for 1 second
  digitalWrite(LED_PIN, LOW);   // Turn the LED off
  delay(1000);                  // Wait for 1 second
}
Troubleshooting and FAQs
Common Issues and Solutions
Shield Not Powering On:
- Cause: Input voltage is outside the specified range.
- Solution: Verify the input voltage is between 6V and 24V DC.
Wemos D1 Mini Not Receiving Power:
- Cause: Loose connection between the shield and the Wemos D1 Mini.
- Solution: Ensure the shield is securely attached to the Wemos D1 Mini headers.
Overheating of the Shield:
- Cause: Excessive current draw or high input voltage.
- Solution: Reduce the load on the shield or ensure the input voltage is within the recommended range.
No Output Voltage:
- Cause: Incorrect polarity of the input power source.
- Solution: Double-check the polarity of the DC input and correct it if necessary.
FAQs
Can I use the shield with other microcontrollers?
- The shield is specifically designed for the Wemos D1 Mini, but it can be adapted for other 5V devices with proper connections.
What happens if I exceed the maximum current rating?
- Exceeding 1A may cause the shield to overheat or fail. Always ensure the total current draw is within the specified limit.
Is the shield compatible with 3.3V devices?
- No, the shield outputs a regulated 5V supply and is not suitable for 3.3V devices without additional voltage regulation.
By following this documentation, you can effectively integrate the DC Power Shield into your Wemos D1 Mini projects and ensure reliable operation.