How to Use 3.5" LCD touch screen display: Examples, Pinouts, and Specs
Introduction
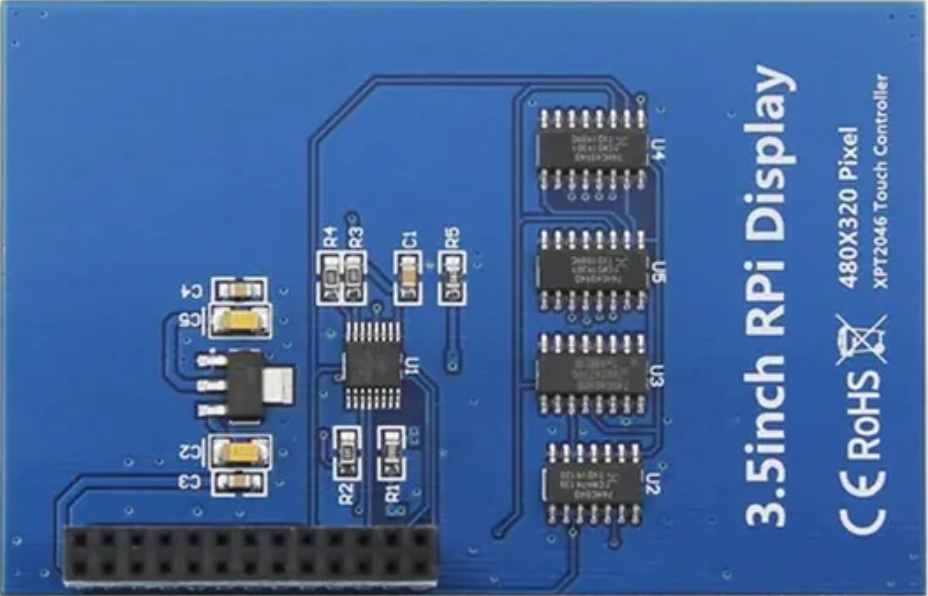
The 3.5-inch LCD touch screen display is a versatile electronic component that combines a high-resolution liquid crystal display with touch screen functionality. This component is widely used in embedded systems, portable devices, and DIY projects to provide both visual output and user interaction through touch input. Its compact size and interactive capabilities make it ideal for applications such as graphical user interfaces (GUIs), control panels, and handheld devices.
Explore Projects Built with 3.5" LCD touch screen display


Explore Projects Built with 3.5" LCD touch screen display
Common Applications
- Embedded systems and microcontroller projects
- Portable devices and handheld gadgets
- Industrial control panels
- DIY projects and prototyping
- Educational tools for learning about touch interfaces
Technical Specifications
Below are the key technical details and pin configuration for the 3.5" LCD touch screen display:
Key Technical Details
| Parameter | Value |
|---|---|
| Display Type | TFT LCD |
| Screen Size | 3.5 inches |
| Resolution | 480 x 320 pixels |
| Touch Type | Resistive or Capacitive (varies by model) |
| Interface | SPI, I2C, or Parallel (varies by model) |
| Operating Voltage | 3.3V or 5V (check model specs) |
| Backlight | LED |
| Viewing Angle | 60°/70°/70°/70° (L/R/U/D) |
| Operating Temperature | -20°C to 70°C |
| Power Consumption | ~150mA (varies with backlight brightness) |
Pin Configuration
The pin configuration may vary depending on the specific model of the display. Below is a general pinout for a 3.5" LCD touch screen with SPI interface:
| Pin Number | Pin Name | Description |
|---|---|---|
| 1 | VCC | Power supply (3.3V or 5V, depending on model) |
| 2 | GND | Ground |
| 3 | CS | Chip Select for SPI |
| 4 | RESET | Reset pin |
| 5 | DC/RS | Data/Command control pin |
| 6 | SDI/MOSI | SPI Data Input / Master Out Slave In |
| 7 | SCK | SPI Clock |
| 8 | LED | Backlight control (connect to VCC or PWM pin) |
| 9 | T_IRQ | Touch interrupt pin (optional, for touch input) |
| 10 | T_CS | Touch Chip Select (optional, for touch input) |
| 11 | T_SCK | Touch SPI Clock (optional, for touch input) |
| 12 | T_MISO | Touch SPI Data Output (optional, for touch input) |
| 13 | T_MOSI | Touch SPI Data Input (optional, for touch input) |
Note: Always refer to the datasheet of your specific model for exact pin configuration.
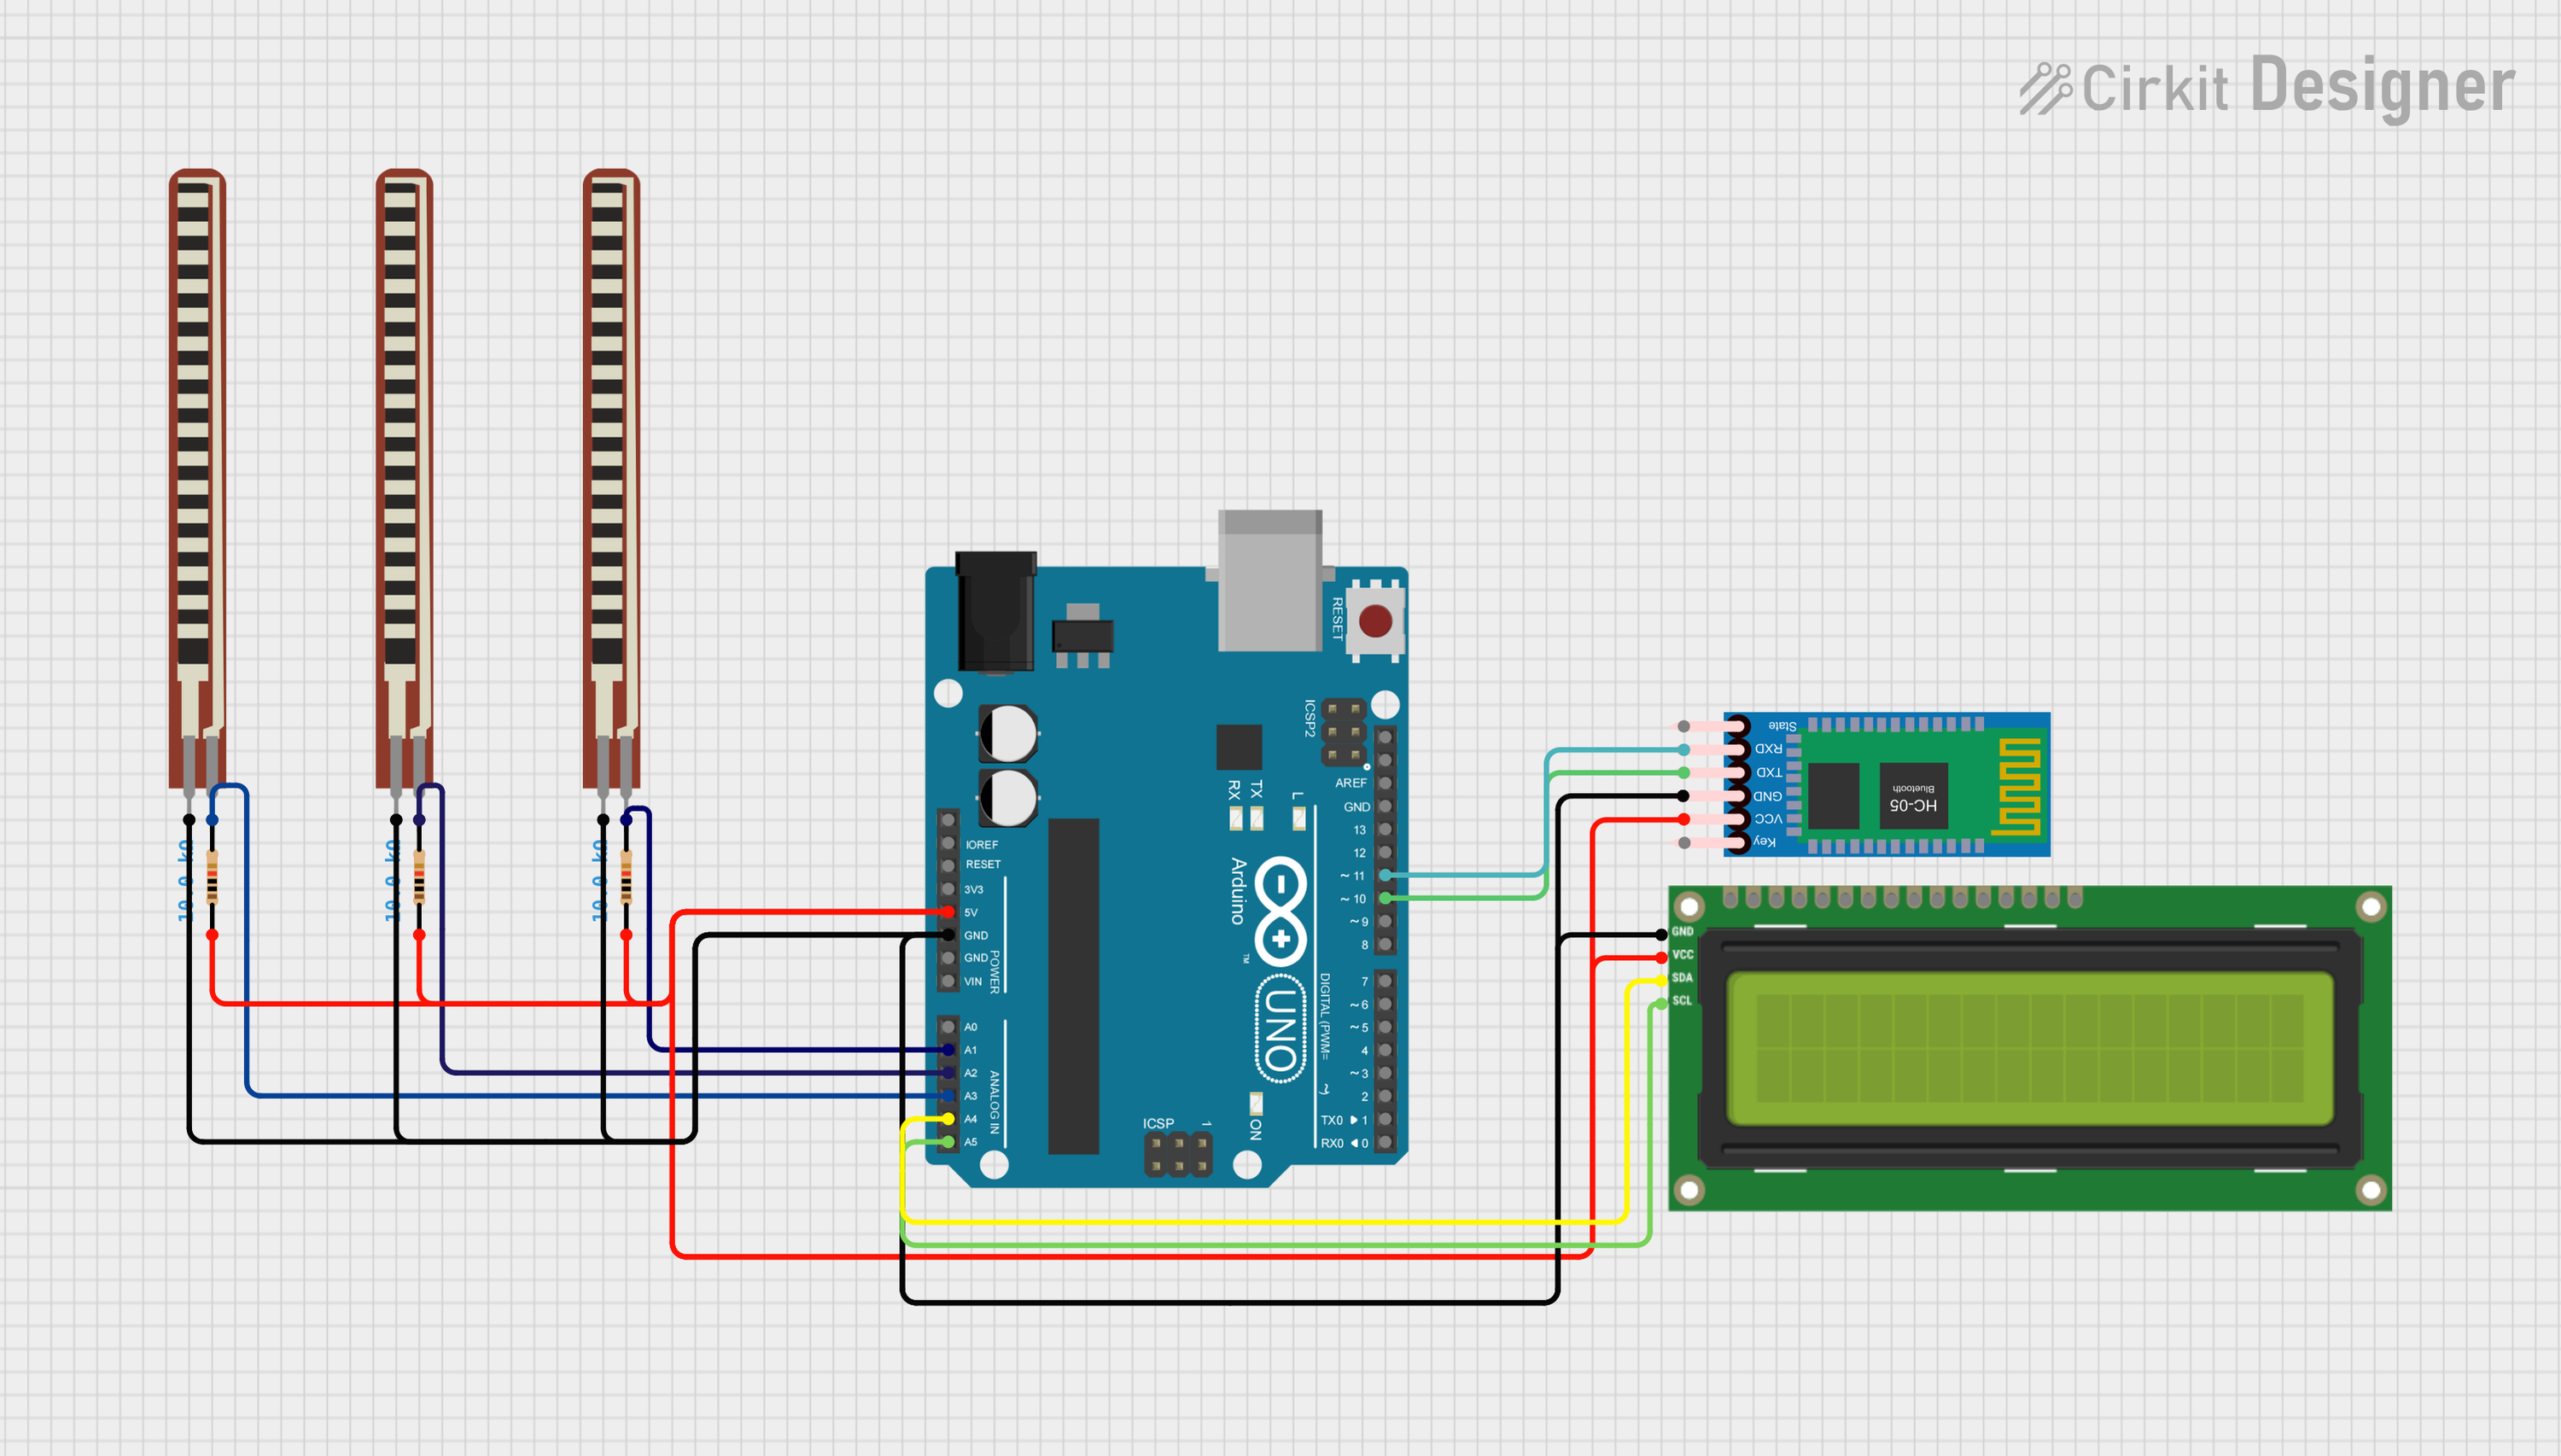
Usage Instructions
Connecting the Display to an Arduino UNO
To use the 3.5" LCD touch screen display with an Arduino UNO, follow these steps:
Wiring the Display:
- Connect the
VCCpin of the display to the 5V pin on the Arduino. - Connect the
GNDpin of the display to the GND pin on the Arduino. - Connect the
CS,RESET,DC/RS,SDI/MOSI, andSCKpins to the corresponding digital pins on the Arduino (e.g., D10, D9, D8, D11, and D13, respectively). - If using the touch functionality, connect the
T_CS,T_IRQ,T_SCK,T_MISO, andT_MOSIpins to additional digital pins on the Arduino.
- Connect the
Install Required Libraries:
- Install the
Adafruit_GFXandAdafruit_TFTLCDlibraries from the Arduino Library Manager. - If using touch functionality, install the
Adafruit_TouchScreenlibrary.
- Install the
Upload Example Code: Use the following example code to test the display:
#include <Adafruit_GFX.h>       // Graphics library for the display
#include <Adafruit_TFTLCD.h>   // LCD driver library
#include <TouchScreen.h>       // Touch screen library (if applicable)

// Define pin connections
#define LCD_CS A3  // Chip Select
#define LCD_CD A2  // Command/Data
#define LCD_WR A1  // LCD Write
#define LCD_RD A0  // LCD Read
#define LCD_RESET A4 // Reset

// Initialize the display
Adafruit_TFTLCD tft(LCD_CS, LCD_CD, LCD_WR, LCD_RD, LCD_RESET);

void setup() {
  tft.begin(0x9341); // Initialize with the display's driver ID
  tft.setRotation(1); // Set display orientation
  tft.fillScreen(0xFFFF); // Fill screen with white
  tft.setTextColor(0x0000); // Set text color to black
  tft.setTextSize(2); // Set text size
  tft.setCursor(50, 100); // Set cursor position
  tft.print("Hello, World!"); // Display text
}

void loop() {
  // Add your code here for interactive functionality
}
Important Considerations
- Voltage Compatibility: Ensure the display is compatible with the voltage levels of your microcontroller (3.3V or 5V).
- Backlight Control: Use a PWM pin to adjust the brightness of the backlight if supported.
- Touch Calibration: If using the touch functionality, you may need to calibrate the touch screen for accurate input detection.
- Driver Compatibility: Verify that the correct driver (e.g., ILI9341) is used in your code.
Troubleshooting and FAQs
Common Issues and Solutions
Display Not Turning On:
- Check the power connections and ensure the
VCCandGNDpins are properly connected. - Verify that the operating voltage matches the display's requirements.
- Check the power connections and ensure the
No Image or Incorrect Display:
- Ensure the correct driver ID is passed to the
tft.begin()function. - Double-check the wiring, especially the
CS,RESET,DC/RS,SDI/MOSI, andSCKpins.
- Ensure the correct driver ID is passed to the
Touch Screen Not Responding:
- Verify that the touch-related pins (
T_CS,T_IRQ, etc.) are correctly connected. - Ensure the
Adafruit_TouchScreenlibrary is installed and properly configured.
- Verify that the touch-related pins (
Flickering or Dim Backlight:
- Check the backlight pin connection and ensure it is receiving sufficient power.
- If using PWM for brightness control, ensure the PWM signal is stable.
FAQs
Q: Can I use this display with a Raspberry Pi?
A: Yes, the display can be used with a Raspberry Pi. You may need to configure the GPIO pins and install the appropriate drivers.
Q: How do I identify the driver IC of my display?
A: The driver IC (e.g., ILI9341) is usually printed on the back of the display module or mentioned in the product documentation.
Q: Can I use this display in outdoor environments?
A: The display is not typically designed for outdoor use. Consider using a display with higher brightness and weatherproofing for outdoor applications.
Q: Is the touch screen resistive or capacitive?
A: This depends on the specific model. Check the product description or datasheet to confirm.